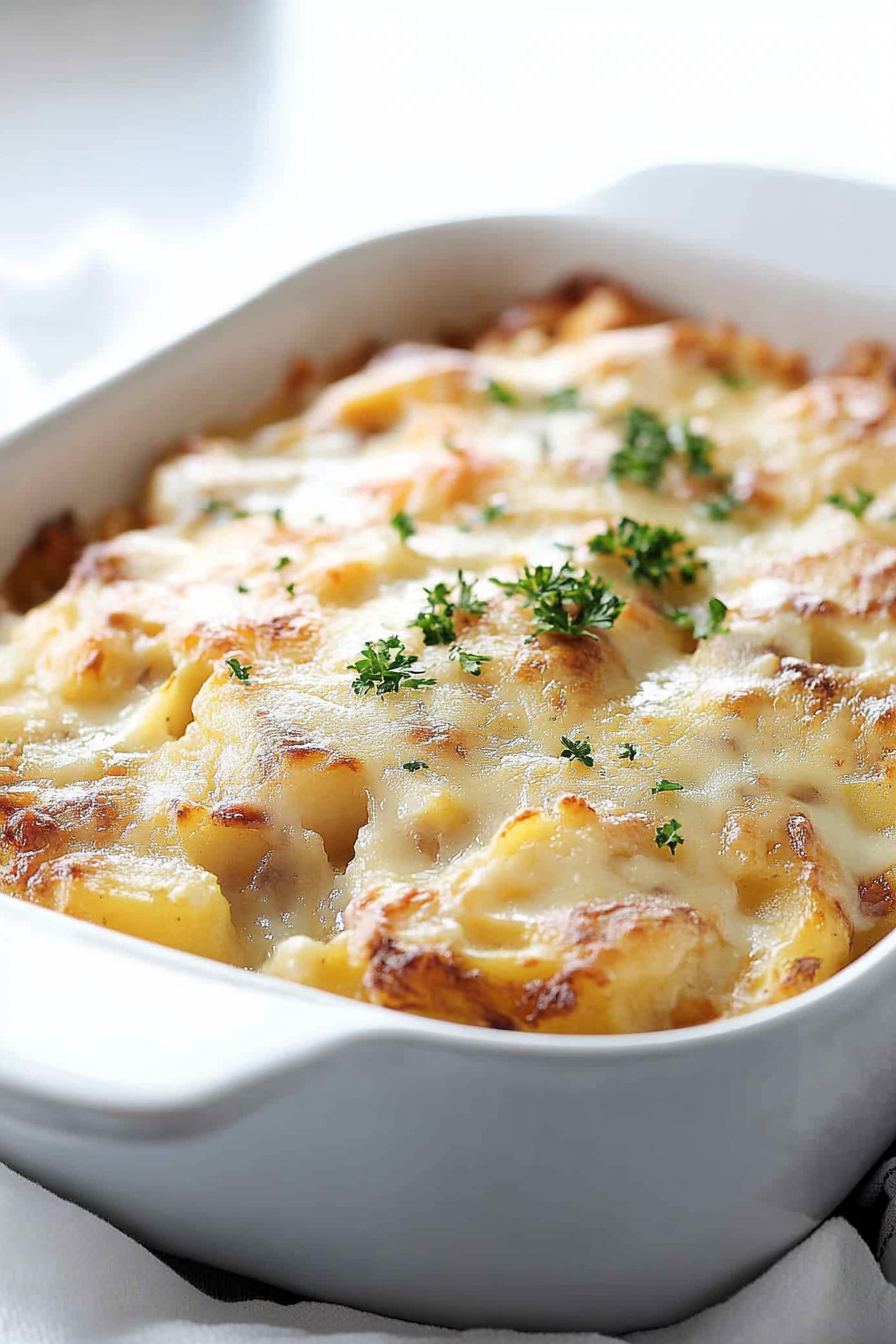
Layered Potatoes Ham Cheese A Simple Comfort
You know that cozy moment when you slice into a cake and the rich, chocolaty aroma hits you right in the face? That’s pretty much my Sunday afternoon every week, especially when I make this zucchini chocolate swirl cake. It’s like a little secret weapon—moist, decadent, and packed with sneaky veggies that make your kids (and you!) feel a little bit better about second helpings. Honestly, I always do this when I’m craving something sweet but don’t want to go all-in on a huge dessert. My kids ask for this all the time—especially when they see the swirl of chocolate peeking out from every slice. It’s simple enough for a weeknight treat but fancy enough to serve on a weekend. Trust me, the smell alone will bring everyone to the kitchen. It’s one of those recipes that’s been handed down in my family, and I’ve played with it so much I could make it in my sleep. Hope you love it as much as we do!
What is Zucchini Chocolate Swirl Cake?
Think of this as a cozy, all-in-one dessert that combines the best of both worlds: a tender, slightly dense cake infused with shredded zucchini and a luscious swirl of melted chocolate. It’s essentially a chocolate zucchini bread turned into a beautiful layered cake—just a little more special, with the chocolate swirl making it feel like a treat. The name might sound fancy, but it’s really just a clever way to jazz up a classic veggie-packed loaf. The zucchini adds moisture and a subtle sweetness, while the chocolate swirl makes every bite irresistible. It’s the perfect way to sneak in some veggies (if you’re into that sort of thing) and indulge at the same time. I love how the flavors meld—sometimes, I even add a sprinkle of sea salt on top before baking for that salty-sweet vibe. It’s a simple bribe to get my kids eating their greens, and honestly, I don’t mind sneaking a bit of veggie goodness into dessert!
Why you’ll love this recipe?
Let me tell you, what I love most about this zucchini chocolate swirl cake is how it makes me feel like I’ve hit the dessert jackpot without all the guilt. The flavor? It’s insanely rich and chocolatey, with just enough earthiness from the zucchini to keep things interesting. And the texture—moist, tender, with little pockets of gooey chocolate goodness—is just perfection. This one’s a lifesaver on busy nights because you don’t need fancy ingredients or hours in the kitchen. Honestly, I usually have everything I need stashed in my pantry or fridge. The best part? It’s super versatile. You can switch out the cocoa for some cinnamon or add in chopped nuts for crunch. Plus, everyone in my family—kids, husband, even the grandma—asks for seconds. What I love most about this is how it feels like a little hug in dessert form. It’s a classic in our house and I’m so glad I finally got around to sharing it here. If you’re into baked goods that are cozy, indulgent, yet secretly good for you—this is your new best friend.
How do I make Zucchini Chocolate Swirl Cake?
Quick Overview
This cake is a breeze to make once you’ve got your ingredients prepped. It’s basically a simple batter of flour, eggs, sugar, and grated zucchini, with a decadent chocolate mixture swirled through before baking. What makes this cake special is how smoothly the zucchini melts into the batter, keeping everything super moist, and how the chocolate swirl creates beautiful patterns every time. I always do this with a big glass of milk or a mug of coffee nearby because the smell alone is irresistible. The process comes together quickly—no need for complicated frosting or fancy pans—and it’s baked until golden. Once cooled, a simple glaze or even just a dusting of powdered sugar takes it over the top. Honestly, you might just find yourself making this every week—because it’s that good and that easy.
Ingredients
For the Main Batter:
– 2 cups all-purpose flour (trust me, I tested with whole wheat and it works, but the texture is slightly denser)
– 1 ½ teaspoons baking powder
– ¼ teaspoon salt
– 1 cup granulated sugar (reduce slightly if you prefer less sweetness)
– ½ cup vegetable oil or melted butter (I’ve actually tested this with applesauce too, for a healthier twist and it works great!)
– 3 large eggs
– 1 teaspoon vanilla extract
– 1 ½ cups grated zucchini (squeeze out excess moisture with a clean towel—trust me on this, soggy batter is no fun)
For the Filling:
– ½ cup chopped high-quality dark chocolate or chocolate chips
– 2 tablespoons unsalted butter (for melting with the chocolate)
– 1 tablespoon milk (to loosen the chocolate for swirling)
– Optional: a sprinkle of sea salt or cinnamon for extra flavor
For the Glaze:
– ½ cup powdered sugar
– 1 tablespoon milk or cream
– A few drops of vanilla extract or a dash of cocoa powder for extra richness
Step-by-Step Instructions
Step 1: Preheat & Prep Pan
Heat your oven to 350°F (175°C). Grease a 9-inch round cake pan with butter or line it with parchment paper. I like to give it a quick spray of non-stick spray; it really prevents sticking and makes for easier cleanup. And don’t forget to set that rack in the middle—baking at the right heat distribution prevents that nasty top burn or sinking middle. I always do this early so everything’s ready to go—no rushing once the batter is mixed.
Step 2: Mix Dry Ingredients
In a large bowl, whisk together the flour, baking powder, and salt. This step is key to avoiding lumps and making sure your cake is evenly aerated. I’ve learned the hard way—overmixing can make the batter dense, so I just mix until everything looks nicely combined. Then, set this aside for a moment.
Step 3: Mix Wet Ingredients
In a separate bowl, beat the eggs with sugar until the mixture turns a bit pale and fluffy—this adds air, making the cake light. Then, stir in the oil (or applesauce), vanilla, and grated zucchini. I tested baking this with different zucchinis, and honestly, the dark green ones work just as well as the yellow ones. Just make sure to squeeze out some moisture after grating. The smell of zucchini and vanilla together is always so comforting!
Step 4: Combine
Pour the wet mixture into the dry ingredients and gently fold until just combined. I always do this with a spatula and do my best not to overmix—the batter should look a little lumpy, but with no dry flour streaks. If you overmix, the cake can turn out a bit rubbery, and that’s a rookie mistake I’ve made more than once. Patience is key here!
Step 5: Prepare Filling
In a small microwave-safe bowl, melt the chocolate with the butter and milk in 20-second bursts, stirring each time until smooth. The mixture should be glossy and pourable but not too runny. If it’s too thick, add a tiny splash more milk. This step is where the magic happens—once you pour it over the batter, the swirling just looks so pretty in the oven. You can add a pinch of sea salt or cinnamon here if you’re feeling fancy.
Step 6: Layer & Swirl
Pour half of the batter into the prepared pan. Drizzle half of the melted chocolate mixture over it, then add the remaining batter on top. Finish with the remaining chocolate and use a butter knife or skewer to swirl gently through the layers—figure eights or big circles. Don’t overdo it—just enough to get a marbled effect and those tempting chocolate streaks peeking through.
Step 7: Bake
Pop it into the oven and bake for about 45-50 minutes. The smell will start to fill your kitchen around minute 30—that’s when you know it’s near done. Test with a toothpick inserted in the center; it should come out clean or with just a few moist crumbs. Every oven is different, so start checking at 45 minutes. If the top is browning too fast, tent it loosely with foil to prevent burning.
Step 8: Cool & Glaze
Let the cake cool in the pan for at least 20 minutes, then transfer to a wire rack. I usually wait until it’s lukewarm because that’s when the glaze is easiest to drizzle. Mix powdered sugar with a splash of milk and vanilla, then pour over the top. If you want a more decadent look, add a dusting of cocoa or even some sprinkles of sea salt.
Step 9: Slice & Serve
Use a serrated knife to cut perfect slices—wiping the blade between cuts helps keep everything neat. Serve it slightly warm with a dollop of whipped cream or a scoop of vanilla ice cream if you’re feeling indulgent. Honestly, this cake is best enjoyed on the day it’s baked, but I’ve stored leftovers for a day or two in an airtight container in the fridge, and it’s still delicious—just a little denser, as expected. Reheat gently in the microwave for that just-baked feel.
What to Serve It With
This cake is pretty versatile, so I love jazzing it up for different occasions. For breakfast or brunch, I slice it and serve with a dollop of Greek yogurt or a drizzle of honey—trust me, it transforms into a delish morning treat. My family always loves it as a dessert after dinner, especially with a side of fresh berries or a splash of cream. On casual afternoons, I’ve sliced it and topped it with a swirl of peanut butter or a dusting of powdered sugar for an easy snack. If you’re feeling fancy, a scoop of vanilla ice cream or a drizzle of warm caramel turns this into a show-stopper. This cake really is a staple, whether for family dinners or quick weekend indulgences. I love it because it’s so adaptable—and the kids think it’s super special, even with the hidden zucchini!
Top Tips for Perfecting Your Zucchini Chocolate Swirl Cake
If you want to make this cake as perfect as possible, here are some things I’ve learned over the years:
- Zucchini Prep: Always squeeze out excess moisture after grating—soggy batter is a no-go, and the zucchini should be about the texture of damp sponge. Also, use fresh zucchini—I tested with slightly older zucchinis, and they can make the batter watery or bland.
- Mixing Advice: Avoid overmixing after adding the flour. Lightly fold until just combined; this keeps the cake light and airy. Overmixing toughens the gluten.
- Swirl Customization: For a more dramatic swirl, add the chocolate mixture in dollops and swirl a little deeper into the batter before baking. You can also switch up the chocolate for peanut butter or caramel—sometimes I do a half-and-half swirl for variety.
- Ingredient Swaps: I’ve played with coconut oil, almond flour, even banana in place of zucchini (though the texture shifts a bit). Expect slight differences in flavor and moisture, but overall, the core method still works.
- Baking Tips: Keep an eye on the cake as it bakes—if the top browns too quickly, tent with foil. Check doneness at 45 minutes with a toothpick—it should come out almost clean. Every oven bakes a little differently, so trust your nose and toothpick.
- Glaze Variations: For dairy-free, skip the powdered sugar glaze and dust with cacao powder or cinnamon. Or layer on a thick layer of Nutella or melted white chocolate for an extra indulgence.
This recipe has been such a comforting staple in my kitchen. The secret to making it amazing is patience with the folding, a good quality chocolate, and a gentle hand when swirling—it’s an art, but totally worth it for that marbled effect. And trust me, every time I make it, I learn a little more—like how a pinch more vanilla or a splash of espresso powder amps up the flavor. The best part? Watching people take that first bite and their eyes light up. It’s just… happiness wrapped in a slice of cake.
Storing and Reheating Tips
This cake keeps pretty well at room temperature for a day—cover it loosely with foil or a clean towel. After that, I suggest storing it in an airtight container in the fridge; it’ll stay moist and delicious for up to 3 days. Just make sure to cover it well—no one wants dried-out edges or fridge odors spoiling the flavor. To keep that fresh-baked goodness, I like to reheat slices in the microwave for about 15-20 seconds—just enough to warm through and revive the chocolate swirl. If you’re freezing leftovers, wrap the cut pieces tightly in plastic wrap and then foil. It keeps in the freezer for up to 2 months. When you’re ready to enjoy, let it thaw at room temperature for about 30 minutes before serving. If you add the glaze afterward, it won’t get soggy or break down in storage, so plan to do that just before serving for maximum wow factor.
Frequently Asked Questions
Final Thoughts
This zucchini chocolate swirl cake has become a go-to in my kitchen—not just for its incredible flavor, but for how it brings people together. It’s one of those recipes that feels like a little celebration every time I bake it. And honestly, I love the sneaky veggie aspect—because it’s a clever way to add some greens into your day without sacrificing flavor. Whether you’re baking for yourself or sharing with loved ones, this cake always disappears faster than I’d like to admit. I encourage you to try a few tweaks—swap the chocolate for peanut butter, sprinkle chopped nuts on top, or add a dash of chili powder for a spicy kick. The beauty of this recipe is its flexibility. Happy baking, and can’t wait to hear how yours turns out!

scalloped potatoes
Ingredients
Method
- Preheat the oven to 375°F and grease a 9x13-inch baking dish.
- Wash and peel the potatoes, then slice them thinly using a mandoline.
- Melt butter in a large skillet over medium heat. Add diced onion and cook until softened, about 3-4 minutes.
- Stir in flour and cook for about 2 minutes until golden.
- Gradually whisk in half-and-half and milk, cooking until mixture thickens, about 3-4 minutes.
- Season the sauce with salt, pepper, garlic powder, Worcestershire sauce, onion powder, and paprika.
- Layer half of the sliced potatoes in the prepared dish. Top with half of the diced ham and half of each cheese.
- Pour half of the sauce over the layered ingredients.
- Repeat the layering with remaining potatoes, ham, cheeses, and sauce.
- Cover with foil and bake for 40 minutes.
- Remove the foil and bake for an additional 20-30 minutes until the top is golden and bubbly.
- Serve warm and enjoy!