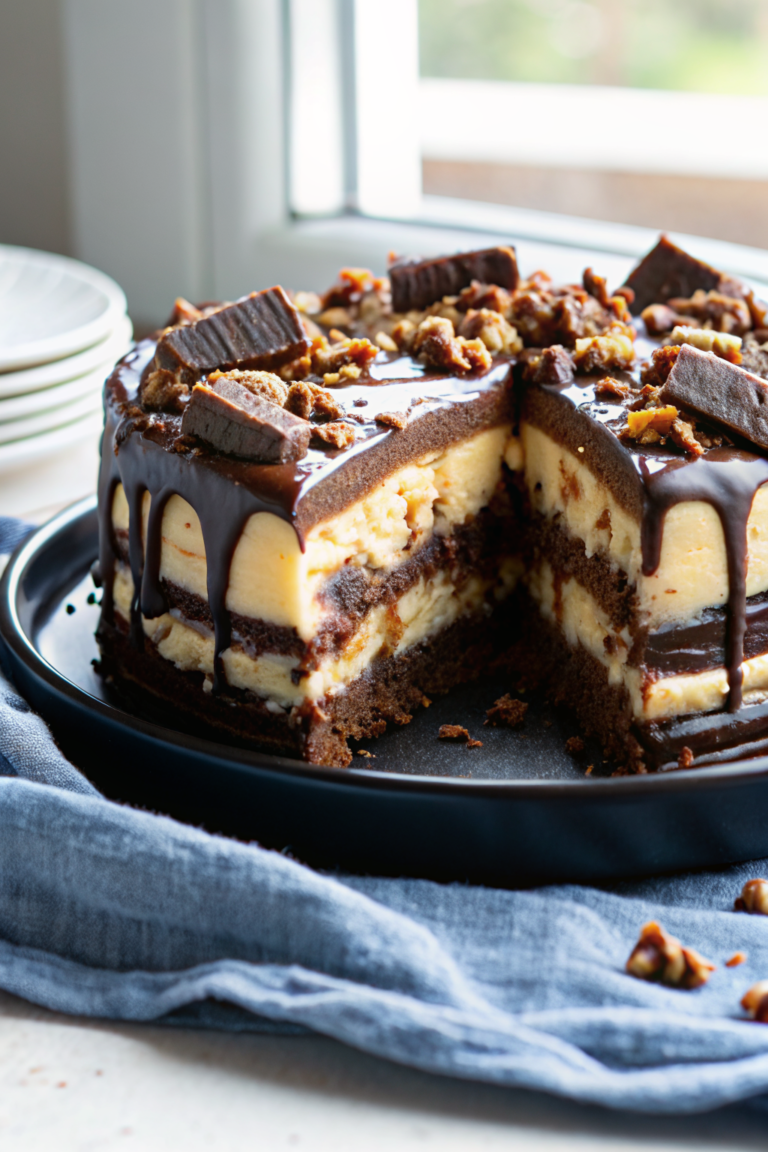
Peanut Butter Cup Pie How to Make It
Ah, the smell of freshly baked coffee cake wafting through the house—that warm, nostalgic scent that immediately transports me back to cozy weekend mornings at my grandma’s place. This zucchini coffee cake has become one of those recipes I always turn to when I want a little slice of comfort, especially on busy mornings or lazy Sunday afternoons. My kids ask for it all the time, and honestly, I don’t blame them—the tender crumb, the slightly tangy cream cheese swirl, and that zing of lemon glaze make it irresistible. Plus, it’s one of those dishes you can whip up pretty quick, and it looks downright impressive on the breakfast table. Trust me, once you get the hang of swirling in that cream cheese mixture, you’ll be craving this more than you realize. The best part? It’s sneaky healthy because of the zucchini—no one will guess! I’ve tested this with almond milk, and it actually made it even creamier—give it a try if you’re dairy-free.
What is Zucchini Coffee Cake?
Think of this as a slightly healthier, more moist twist on classic coffee cake. It’s essentially a tender sponge cake flavored with cinnamon and packed with grated zucchini, which keeps it extra moist and adds a subtle veggie boost. The anticipation of slicing into that beautiful swirl of cream cheese is what makes this recipe so special. Its roots are in those rustic breakfast cakes people have been making for generations—comfort food that’s perfect for sharing with loved ones. The name might make you picture brunch tables and cozy mornings, but honestly, I keep a slice in the fridge just to enjoy with my afternoon coffee. It’s versatile enough to be served as a breakfast treat, a brunch centerpiece, or even a sweet snack when the craving hits. The best part? It’s easy to customize, whether you add a handful of blueberries, swap out the glaze flavors, or make mini muffins instead. No matter how you serve it, I promise it’ll become a staple in your home too.
Why you’ll love this recipe?
What I love most about this zucchini coffee cake is how it hits all the right notes—moist, flavorful, and visually stunning. The cinnamon-spiced cake base is tender without being dense, and the grated zucchini melts into the batter, adding moisture and a touch of freshness that keeps every bite light and fluffy. The cream cheese swirl is a total game-changer; it’s like a silky ribbon of tangy goodness woven right through the cake, making each slice feel extra indulgent. Plus, I’ve found this recipe to be surprisingly simple—most ingredients are pantry staples, and the step-by-step process is foolproof. It’s budget-friendly, too, which is always a win in my book! I also love that it’s versatile—you can dress it up with extra nuts, fresh berries, or even a drizzle of caramel. Honestly, what I love most about this is how it always makes my house smell incredible, and my family ESP loves the leftovers—they ask me to make it all the time. Plus, the lemon glaze adds a lovely brightness that cuts through the richness, making each bite perfectly balanced.
How do I make Zucchini Coffee Cake?
Quick Overview
This zucchini coffee cake is a straightforward baked treat that combines a moist cinnamon batter with a swirl of tangy cream cheese filling. The process involves making the batter, preparing the cream cheese swirl, layering everything in the pan, and then baking. What makes this recipe particularly special is the swirling step—you create a marbled effect that’s as beautiful as it is tasty. It’s a one-bowl, fuss-free process that’s perfect for home bakers of all skill levels. Once baked, a simple lemon glaze ties everything together with a bright, sweet finish. Whether you’re making it for brunch or just because, this cake offers comfort with an elegant touch. Plus, it’s ready in about an hour, making it a perfect weekday treat or weekend indulgence.
Ingredients
For the Main Batter:
– 2 cups all-purpose flour (or try a gluten-free blend if you prefer!)
– 1 teaspoon baking powder
– 1/2 teaspoon baking soda
– 1 teaspoon ground cinnamon
– 1/2 teaspoon salt
– 1/2 cup granulated sugar
– 1/2 cup packed light brown sugar
– 1/2 cup neutral oil like vegetable or light olive oil
– 1 cup unsweetened applesauce (or Greek yogurt for extra richness)
– 2 large eggs
– 1 teaspoon vanilla extract
– 1 cup grated zucchini (squeeze out excess moisture; I do this right after grating for best results)
For the Filling:
– 4 ounces cream cheese, softened
– 1/4 cup powdered sugar
– 1 teaspoon vanilla extract
– Optional: Zest of half a lemon for extra zing
For the Glaze:
– 1 cup powdered sugar
– 2-3 tablespoons fresh lemon juice
– Zest of half a lemon (for extra flavor, optional)
Step-by-Step Instructions
Step 1: Preheat & Prep Pan
Preheat your oven to 350°F (175°C). Grease a 9-inch springform pan or a standard square baking pan with butter or non-stick spray. Lining it with parchment paper makes cleanup even easier, especially for that beautiful swirl—trust me, it’s worth it! Set aside while you prepare the batter.
Step 2: Mix Dry Ingredients
In a large bowl, whisk together flour, baking powder, baking soda, cinnamon, and salt. Mixing the dry ingredients first helps distribute everything evenly, preventing clumps and ensuring a fluffy texture. It’s my little trick to avoid dense pockets of baking soda or cinnamon in the final cake.
Step 3: Mix Wet Ingredients
In a separate bowl, combine the sugars, oil, applesauce, eggs, and vanilla. Mix well until smooth—this mixture should look glossy and slightly thickened. I always do this step by hand with a whisk to keep the batter light and airy. If you’re using almond milk instead of applesauce, it’s fine, but I’ve found that applesauce adds a lovely moisture without diluting the flavors.
Step 4: Combine
Pour the wet mixture into the dry ingredients and stir gently with a spatula or wooden spoon just until combined. Overmixing can lead to a dense cake, so it’s best to mix until no streaks of dry flour remain but avoid aggressive stirring.
Step 5: Prepare Filling
In a small bowl, beat the softened cream cheese with powdered sugar, vanilla, and lemon zest until smooth. I’ve learned that softening the cream cheese beforehand makes mixing much easier—no lumps allowed! This filling is what turns this coffee cake into an irresistible layered treat.
Step 6: Layer & Swirl
Pour half the batter into your prepared pan. Dollop the cream cheese mixture over it, then spread evenly. Top with the remaining batter. Using a knife or skewer, swirl gently through the batter to create a marbled effect. Don’t overdo it; just a few slow zig-zags, and it’ll look pretty and taste even better.
Step 7: Bake
Place the cake in the oven and bake for 40-45 minutes, or until a toothpick inserted into the center comes out clean. I always start checking at 40 minutes, since oven temps can vary. A golden top and a little crack in the middle are good signs it’s ready. Keep the oven door closed as much as possible during the last few minutes—don’t want to cause any sinking!
Step 8: Cool & Glaze
Allow the cake to cool in the pan for about 15 minutes, then transfer to a wire rack. Once completely cooled, drizzle with your lemon glaze. I prefer a slightly thicker glaze—just enough to shimmer without dripping everywhere—that’s why I adjust the powdered sugar and lemon juice until it’s smooth but pourable.
Step 9: Slice & Serve
Use a sharp serrated knife for clean cuts. This cake is best enjoyed slightly warm or at room temperature. The glaze adds a fresh citrus punch that brightens every bite. I love serving it with a cup of hot coffee or tea, especially on lazy weekends when mornings feel extra special. And don’t forget—I always keep a few slices in the fridge for a quick snack later. It reheats beautifully in the microwave for about 20 seconds, and the moist texture stays intact!
What to Serve It With
This zucchini coffee cake is so versatile. For breakfast, I love pairing it with a strong black coffee or a frothy latte—something warm to sit and savor every bite. If you’re hosting a brunch, serve it alongside fresh fruit—berries or sliced peaches complement the lemon and cinnamon beautifully. My family enjoys it as a dessert, especially with a scoop of vanilla ice cream on top or a dollop of mascarpone. When I want a cozy snack, I keep a slice handy with a cup of herbal tea or a glass of cold milk. Once cooled, it keeps well for 2-3 days in a sealed container at room temperature, though you might want to refrigerate it if it’s very warm outside. I’ve also frozen slices for quick mornings—just thaw and enjoy!
Top Tips for Perfecting Your Zucchini Coffee Cake
Making this repeatedly has taught me some helpful tricks:
- Zucchini Prep: Always squeeze out excess moisture after grating to prevent a soggy cake. I keep a clean dish towel handy for this—it’s an easy trick.
- Mixing Advice: Be gentle when combining wet and dry ingredients. Overmixing leads to dense texture, and nobody wants that.
- Swirl Techniques: Don’t over-mix after adding the swirl—light, gentle zig-zags create lovely marbling without mixing everything into a muddy mess.
- Ingredient Swaps: Swap applesauce for Greek yogurt for a richer crumb. Nut butters work, too, if you want a different flavor.
- Baking Tips: Keep an eye on the time—ovens vary, so start checking around 40 minutes. When the top is golden and a toothpick comes out clean, it’s showtime.
- Glaze Variations: Adding a splash of bourbon or vanilla extract to the glaze gives it a fun, grown-up twist. For a more intense lemon flavor, double the lemon juice and zest.
Honestly, I’ve made this countless times, and every batch feels just a little bit better. I learned to use room temperature ingredients for the smoothest batter, and I always top it with extra lemon zest for a pop of brightness.
Storing and Reheating Tips
This cake is wonderfully resilient. Keep it in an airtight container at room temperature for up to 2 days—if it lasts that long! For longer storage, refrigerate for up to 5 days, covered loosely with foil or stored in a sealed container. The cake re-heats very well in the microwave—just 15-20 seconds should do it—keeping the moisture nice and tender. If you want to freeze slices, wrap them tightly in plastic wrap and foil; they’ll stay fresh for up to 3 months. When you’re ready to enjoy again, let it thaw at room temperature for about 30 minutes, then reheat gently if desired. I’d recommend adding the lemon glaze after reheating to keep it fresh and bright.
Frequently Asked Questions
Final Thoughts
I honestly could go on about this zucchini coffee cake—every bite reminds me of slow Sunday mornings and warm family gatherings. It’s one of those recipes I keep in my back pocket because it’s easy, versatile, and everyone adores it. The scent alone makes everyone come rushing into the kitchen, and I’ll admit, I feel pretty proud every time I pull it out of the oven. Whether you’re baking it for your brood or treating yourself to a slice with your favorite cup of coffee, I promise it’ll become a new favorite in your home, just like it is in mine. Play around with the add-ins or toppings—this one’s a canvas for your creativity. Happy baking! And I’d love to hear how yours turns out—drop a comment or share your photos. Now go grab those zucchinis and get baking!
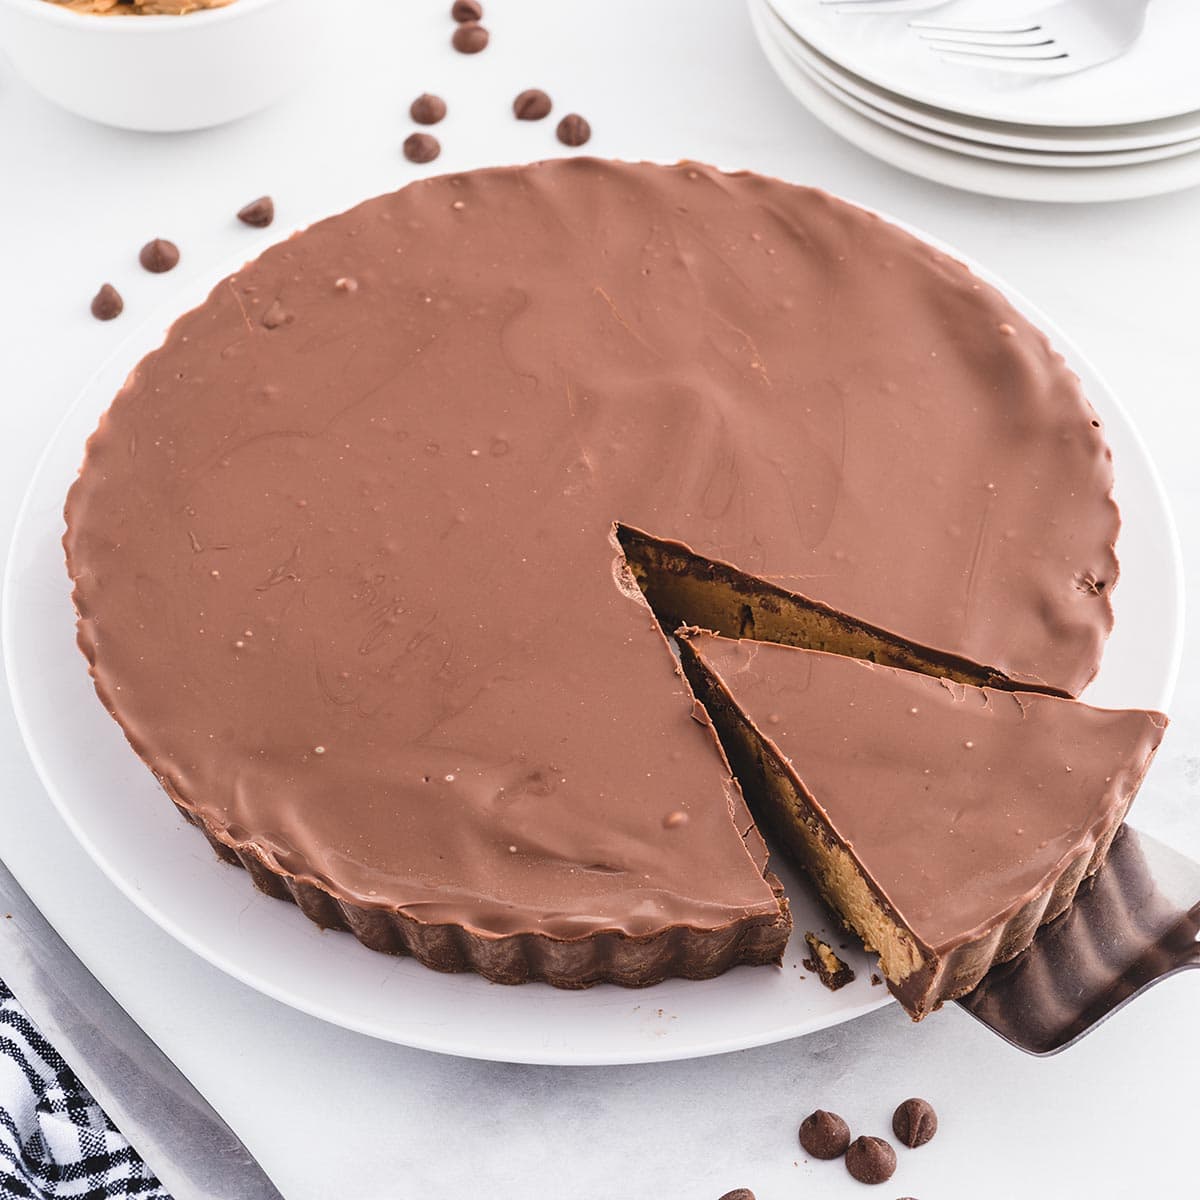
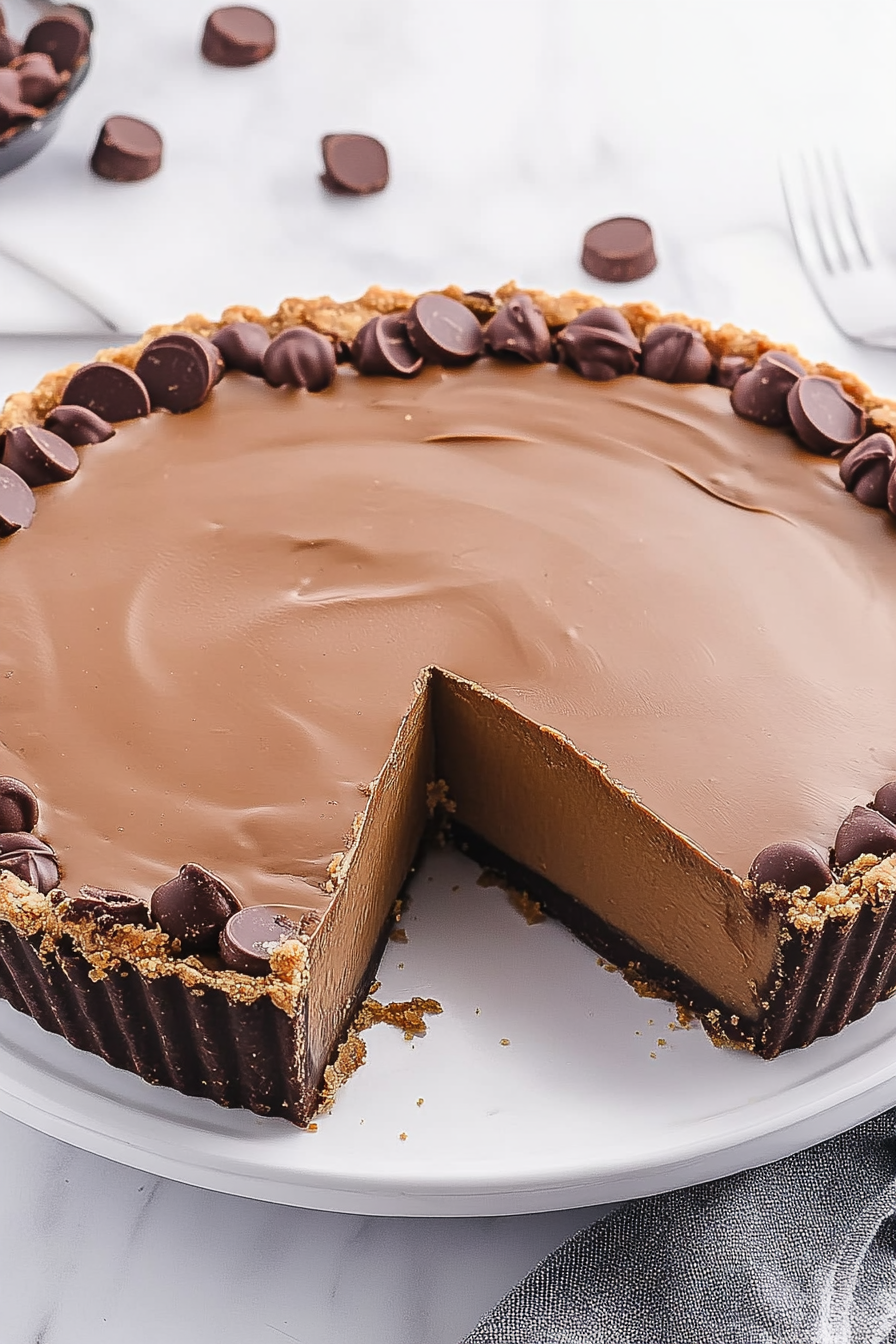
peanut butter cup pie
Ingredients
Method
- Line the bottom of a 9-inch tart pan with parchment paper and lightly spray. Chill aside.
- Combine chocolate chips and vegetable oil in a heat-safe bowl. Microwave for 45-55 seconds, then stir until smooth.
- Spread half of the melted chocolate over the prepared tart pan and chill.
- In a large bowl, whisk together powdered sugar and graham cracker crumbs.
- Microwave peanut butter and butter for 45 seconds, then stir to combine.
- Pour peanut butter mixture over the graham cracker and powdered sugar mixture and combine.
- Spread the peanut butter filling into the chilled chocolate crust, smoothing the top.
- Cover with remaining melted chocolate and smooth to edges.
- Chill the tart for at least 4 hours or until set.
- Gently flip the pie onto a serving plate, peel off parchment, and slice to serve.