Easy Nutty Granola Bars Recipe
There’s something about baking a cake that instantly makes the house feel warmer, somehow connecting us to memories of childhood weekends or grandma’s kitchen. This zucchini swirl cake? It’s become my secret weapon for those evenings when I crave something sweet but don’t want to fuss over complicated recipes. I’ve made this countless times, and I swear, the smell alone brings everyone in my house to the kitchen — it’s like a cozy hug in every bite. And honestly, the best part? It’s so easy to whip up, even on busy weeknights. Plus, my kids ask for this all the time, and I love sneaking in some veggies without them noticing. Trust me on this one—it’s a little indulgence that doesn’t feel heavy, and I think you’ll fall for it just like I did.
What is Zucchini Swirl Cake?
Think of this cake as a happy marriage between a dense, moist crumb and a beautiful swirl of zucchini goodness. It’s essentially a layered cake or loaf that’s packed with grated zucchini, giving it moisture and a subtle veggie sweetness. The swirl mix is usually a cinnamon-spiced cream cheese or vanilla filling that snakes through the batter, creating a marbled effect that’s as pretty as it is delicious. The name ‘zucchini swirl cake’ might sound a little fancy, but honestly, it’s just a smart way to sneak in some extra greens while still indulging in something sweet. Think of it as the grown-up version of a veggie muffin, but so much more decadent. Perfect for breakfast, dessert, or a cozy afternoon snack — it’s a versatile treat that always gets compliments.
Why you’ll love this recipe?
What I love most about this zucchini swirl cake is how it balances flavor and simplicity. The taste? Oh, it’s divine. You get a moist, tender crumb with just enough sweetness, but then that swirl of cinnamon-spiced filling takes it to a whole new level—kind of like a cinnamon roll and cake in one. Plus, the zucchini keeps everything incredibly moist, so it stays fresh for days. Trust me, I’ve tested this with different types of zucchinis, even a mix of yellow summer squash, and it’s always a hit. And let’s not forget how budget-friendly this is! Most ingredients are pantry staples, and it’s perfect for using up the last few zucchinis from the garden or farmers market. The best part? It’s versatile enough to serve at breakfast with a cup of coffee, as a dessert after dinner, or even as a snacking loaf for when you need something quick and satisfying.
How do I make Zucchini Swirl Cake?
Quick Overview
This cake comes together in just a few simple steps. First, you grate the zucchini and squeeze out some moisture—trust me, it makes a huge difference in keeping the cake tender. While your oven preheats, you’ll mix the dry ingredients, then beat the wet ingredients separately—think eggs, oil, vanilla. Then, gently fold everything together, being careful not to overmix, because that’s how you get a fluffy crumb. The filling is a quick mix of cream cheese, cinnamon, and a little sugar—spread it over the batter, swirl with a knife, and pop it into the oven. Bake until golden, then cool, glaze, and voilà — a stunning, super-flavorful cake in no time. The magic is in how everything comes together with minimal fuss but maximum yum factor.
Ingredients
For the Main Batter:
- 2 cups grated zucchini (about 2 medium zucchinis, I use a box grater and press out excess moisture)
- 1 1/2 cups all-purpose flour (I like unbleached for a richer flavor)
- 1 teaspoon baking powder
- 1/2 teaspoon baking soda
- 1/2 teaspoon salt
- 1 teaspoon ground cinnamon (the magic spice)
- 3/4 cup granulated sugar
- 1/2 cup brown sugar
- 1/2 cup vegetable oil or melted coconut oil
- 3 large eggs, at room temperature
- 1 teaspoon vanilla extract
For the Filling:
- 4 oz cream cheese, softened
- 1/4 cup granulated sugar
- 1 teaspoon cinnamon
- Optional: a splash of vanilla or nutmeg for extra warmth
For the Glaze:
- 1/2 cup powdered sugar
- 2-3 teaspoons milk or cream (add more if needed)
- Optional: a sprinkle of cinnamon or lemon zest for flavor
Step-by-Step Instructions
Step 1: Preheat & Prep Pan
Set your oven to 350°F (175°C) and grease a loaf pan or round cake pan well. I always line mine with parchment paper—it makes removing the cake so much easier. While heating, grate your zucchini, then squeeze out as much moisture as possible with a clean kitchen towel or paper towel. Moisture is the enemy here! If you don’t remove enough, the cake might turn out a bit dense or soggy. So, don’t skip this step.
Step 2: Mix Dry Ingredients
In a small bowl, whisk together the flour, baking powder, baking soda, salt, and cinnamon. This ensures your leaveners are evenly distributed and helps prevent clumping later. I like doing this first because it’s easier to incorporate into the wet ingredients smoothly.
Step 3: Mix Wet Ingredients
In a large mixing bowl, beat the eggs, then add the sugars, oil, and vanilla. I use an electric mixer or a sturdy whisk—whatever gets it smooth and combined quickly. The mixture should turn a little glossy and smell amazing—that rich egg-and-vanilla aroma is the sign you’re on the right track.
Step 4: Combine
Gradually add the dry ingredients to the wet mixture, folding gently. I always do this in parts to avoid overmixing, which can make the crumb tough. When just combined, fold in the grated zucchini until evenly distributed. The batter will be thick but oh-so-tender.
Step 5: Prepare Filling
Mix the softened cream cheese with sugar and cinnamon until smooth. I sometimes add a splash of vanilla or a pinch of nutmeg for extra warmth. Spread this evenly over the batter in your prepared pan, but don’t press too hard. Keep a little texture for the swirl effect. You can also experiment with nut butters or fruit preserves if you’re feeling adventurous.
Step 6: Layer & Swirl
Spoon the remaining batter over the cream cheese layer, then use a butter knife or skewer to create swirls. Run it through the batter in gentle figure-eights or circular motions—this creates the beautiful marbled effect. Think of it as painting with batter. Don’t worry if it’s not perfectly symmetrical; it’s all about that cozy, home-baked look.
Step 7: Bake
Slide your cake into the oven and bake for 45-55 minutes. Keep an eye on it—when the top is golden and a toothpick inserted in the center comes out clean, it’s ready. Sometimes, I cover the top loosely with foil if it’s browning too fast but still needs more baking time. Every oven is a little different, so start checking around the 45-minute mark.
Step 8: Cool & Glaze
Let the cake cool in the pan for about 15 minutes, then transfer to a wire rack. When it’s just warm (not hot), whisk together your powdered sugar and milk, then drizzle over the top. This glaze is optional but adds a lovely sweetness and sheen. I love adding a touch of lemon zest or cinnamon to the glaze for extra flavor.
Step 9: Slice & Serve
Once completely cooled, slice with a serrated knife for clean cuts. I find it helps to wipe the knife between slices—especially if the glaze is sticky. Serve at room temperature with a cup of coffee or a glass of milk. This cake is fabulous warm, but leftovers keep well in an airtight container for several days. It also makes a beautiful gift — I’ve wrapped slices in parchment and tied with a ribbon just for fun!
What to Serve It With
This cake is incredibly versatile. In the morning, I love having a slice with my coffee — the cinnamon notes make it feel like a special breakfast treat. On a lazy Sunday brunch, I arrange slices on a platter surrounded by fresh berries and dollops of whipped cream. It’s equally good as a dessert, especially when served with a scoop of vanilla ice cream or a drizzle of chocolate. And on cozy afternoons, a warm piece paired with hot tea or a glass of milk hits the spot. I’ve also served it with caramel sauce or a dusting of powdered sugar for that extra indulgence. It’s become a family favorite — I swear my kids know when I’m baking this and start asking before I even turn on the oven. It’s one of those recipes that just makes everyone smile.
Top Tips for Perfecting Your Zucchini Swirl Cake
I’ve made this a dozen times, and each time I learn little tricks that help me get it just right. First, always squeeze out as much moisture from the zucchini as you can — it makes a big difference in texture. I’ve tried grating in different ways, but a box grater on the large side is easiest and yields the best moistness balance. Overmixing can lead to a dense crumb, so I always fold gently and avoid whipping the batter too much. When swirling the filling, remember that less is more — you want to see beautiful marbling but not a top-heavy layer of filling that causes sinkage. Sometimes I swap Greek yogurt for part of the cream cheese filling—it adds tang and keeps it super moist. For the baking, trust your nose and look for a golden top; every oven behaves differently, so start checking around 45 minutes. If you want a richer flavor, sprinkle chopped nuts or a handful of chocolate chips into the batter or filling—personal favorites turn it into a real showstopper.
Storing and Reheating Tips
This cake keeps surprisingly well, which is one of its many perks. If you’re having leftovers, store slices in an airtight container at room temperature for up to 2 days. After that, I pop it into the fridge — it stays fresh and moist for up to 4 days. To reheat, I gently warm a slice in the microwave for about 15 seconds or briefly rewarm in the oven at 325°F (160°C) wrapped in foil — it’s so good warm and soft. If you plan to freeze it, wrap slices tightly in plastic wrap and then foil; it’ll last up to 3 months. Thaw in the fridge overnight, then warm if you like. For the glaze, I recommend adding it just before serving so it stays shiny and fresh—otherwise, the sugar mixture can absorb into the cake over time. I’ve also experimented with adding fresh lemon juice or vanilla to the glaze for different flavor twists—trust me, it’s a game changer.
Frequently Asked Questions
Final Thoughts
This zucchini swirl cake has definitely earned a permanent spot in my dessert lineup. It’s humble yet indulgent, simple but impressive — and the aroma alone is worth every minute spent in the kitchen. Every time I bake this, I imagine I’m sharing a little piece of comfort with someone I love. It’s perfect for lazy mornings, unexpected guests, or whenever you need a little sweetness in your day. The best part? You can customize it endlessly — swap in your favorite spices, add nuts or chocolate chips, or even switch up the filling to suit your mood. I hope this becomes as special for you as it is for my family. Happy baking! And I can’t wait to hear how yours turns out — leave me a comment or share your tweaks. Let’s keep baking our way to happiness.
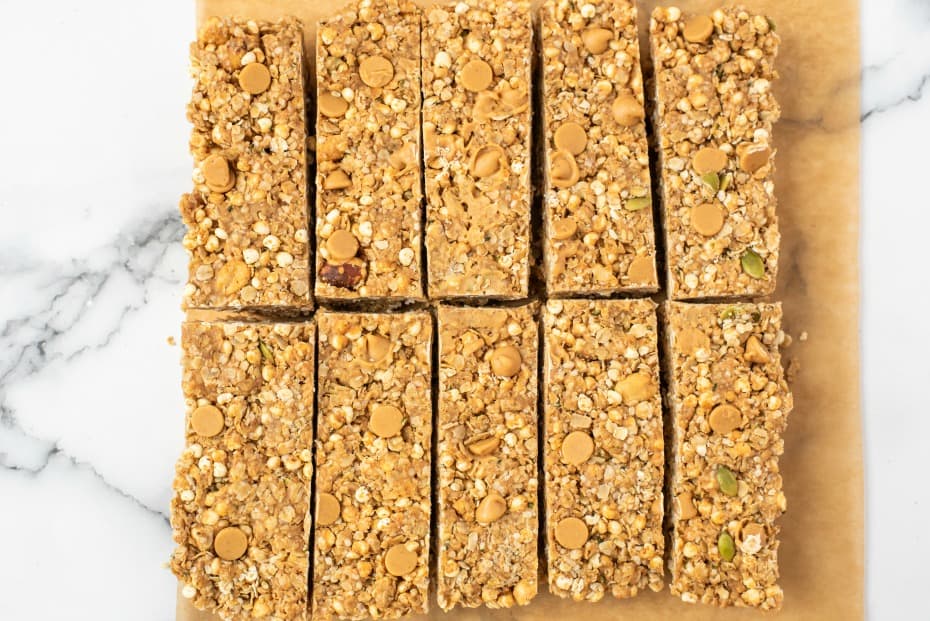
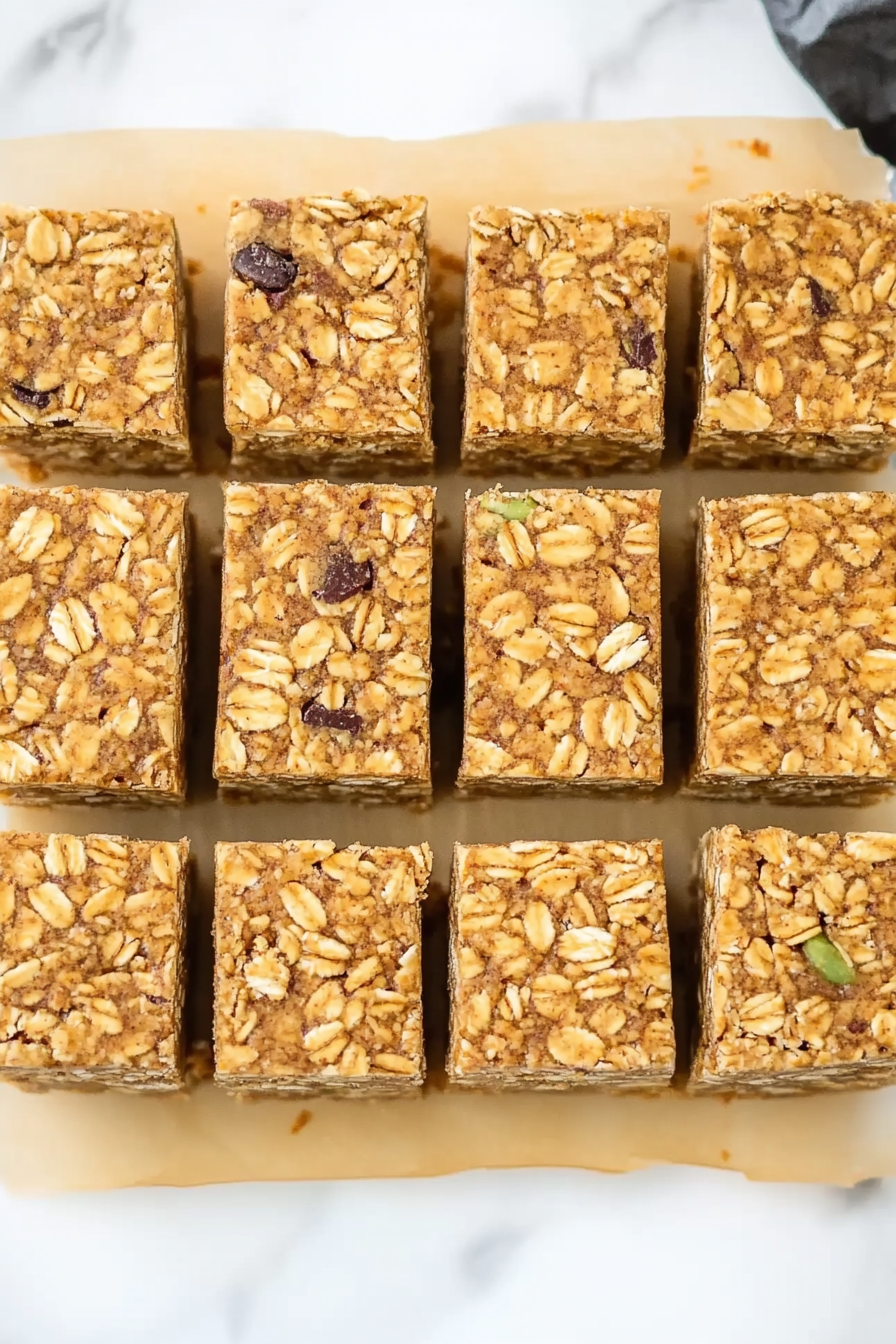
granola bars
Ingredients
Method
- Preheat the oven to 325 degrees Fahrenheit. Spread oats on a baking sheet and toast for 2-3 minutes. This step is optional.
- Line a 9-inch square dish with parchment paper and set aside.
- In a large bowl, combine toasted oats, puffed rice, and nuts.
- Place peanut butter and honey in a glass bowl. Microwave for 30 seconds to soften them for easier mixing.
- Add cinnamon and mix until well combined.
- Pour the cinnamon peanut butter mixture over the dry ingredients. Stir until combined and fold in peanut butter chips if desired.
- Press the mixture firmly into the prepared pan. Refrigerate for at least one hour or overnight for best results.
- Lift the bars out of the pan using the parchment paper. Cut into bars and store in an airtight container for up to 5 days.