Sweetheart Cake Bites How to Make Them
There’s something so nostalgic about sneaking a piece of cake when nobody’s looking, especially when it involves zucchini. Yep, zucchini! That humble vegetable that’s often relegated to salads or sautéed sides gets a sweet, dreamy makeover in this fabulous Fluffy Zucchini Chocolate Swirl Cake. I always do this when I want a dessert that feels indulgent but isn’t overly heavy — it’s how I sneak some greens into my kids’ lives, too. Honestly, the smell alone when it’s baking is enough to make everyone gather in the kitchen. My kids ask for this all the time, especially since I’ve perfected the swirl pattern — it’s almost too pretty to cut! Trust me, this one’s a lifesaver on busy nights because it’s surprisingly easy to make, and it freezes like a dream. Plus, the texture is so moist and tender, and I swear, the chocolate swirl makes it feel like a treat from a fancy bakery—without all the fuss. Whether you’re after something sweet for breakfast, an afternoon snack, or a cozy dessert, this zucchini cake hits all the right notes. I can’t wait for you to try it!
What is a Fluffy Zucchini Chocolate Swirl Cake?
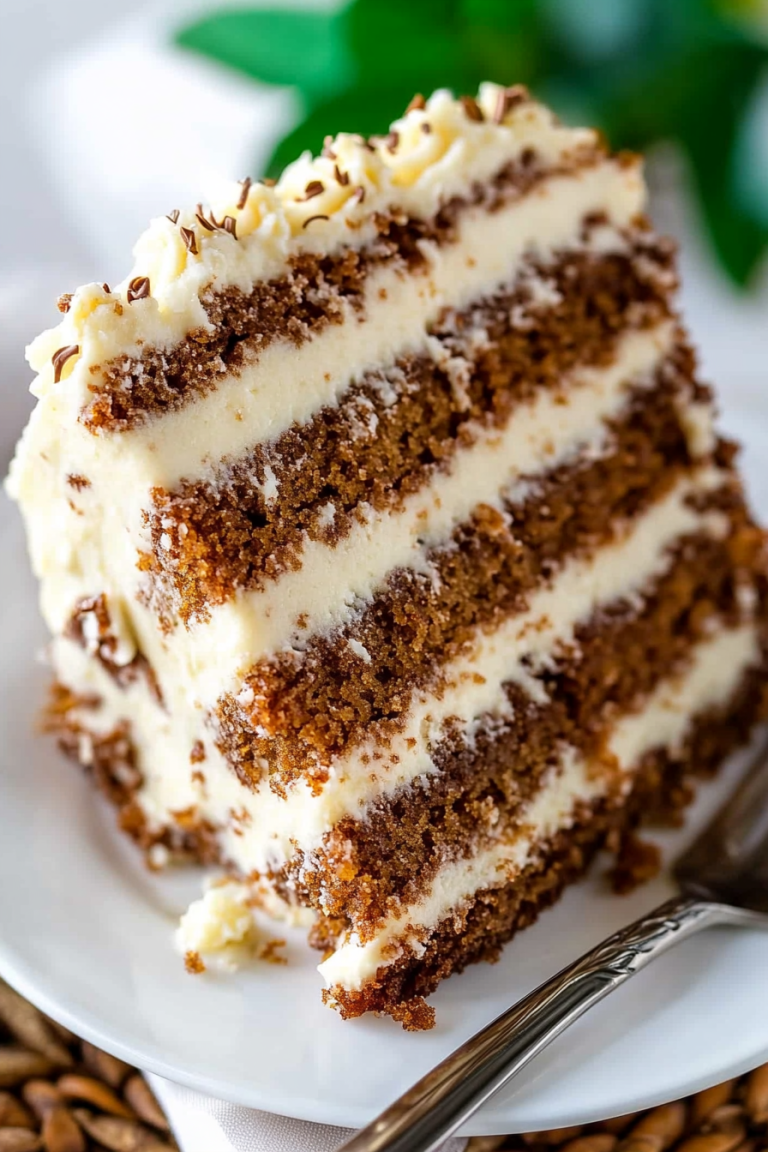
This cake is a soft, airy, vegetable-infused marvel that combines the freshness of zucchini with the richness of chocolate. Think of it as a cross between a crumbly zucchini bread and a decadent chocolate cake, but fully baked into one delightful layered masterpiece. The name pretty much sums it up: zucchini — yes, that’s secretly hiding inside — and a gorgeous swirled pattern of chocolate running through it like ribbons of joy. It’s essentially a light, moist cake that’s not overly sweet, making it perfect for a little bit of everything—breakfast, snack, or dessert. I love how the zucchini keeps the cake insanely tender and adds a hint of earthy sweetness. Plus, it’s a sneaky way to get more vegetables into your day without sacrificing flavor. This recipe has been a staple in my kitchen for years because it never fails to wow — whether I’m baking for friends, family, or just myself when craving a cozy slice with coffee.
Why you’ll love this recipe?
What I love most about this zucchini chocolate swirl cake is how effortlessly delicious it is. The flavor combo is just perfect: the subtle, fresh taste of zucchini balanced beautifully by rich, gooey chocolate streaks. It’s sweet, but not overly indulgent — more like a gentle hug in cake form. The smell alone—warm cocoa and butter—fills the house and triggers instant happy memories. And honestly, this one’s a lifesaver on busy nights because it comes together quickly and needs minimal fuss. No complicated techniques or fancy equipment required, just a good whisk and some love. Budget-wise, it’s fantastic too since you probably already have most of these ingredients tucked away in your pantry. What makes it stand out from other cakes is that the texture is so moist and fluffy—almost cloud-like—and the swirl pattern? It’s insanely pretty, and kids (and grownups) can’t resist making a little artwork before slicing. I’ve tested this with so many variations — almond milk, coconut oil, even different types of chocolate — and it always comes out perfect. It’s one of those ‘keeper’ recipes that’s reliable, cozy, and just downright satisfying.
How do I make a Fluffy Zucchini Chocolate Swirl Cake?
Quick Overview
This cake is a classic one-bowl wonder, which means you’ll love how streamlined the process is. You start by mixing your dry and wet ingredients separately, then fold them together gently—no overmixing here! After pouring half of the batter into your prepared pan, you spread a layer of rich chocolate, then top with the remaining batter. Using a skewer or knife, I swirl it all to create those beautiful marbled ribbons. It bakes up golden, moist, and bursting with chocolatey goodness. The trick to keeping it super fluffy is not overmixing once the ingredients unite. This method guarantees a light crumb that’s perfect for slicing and serving, whether it’s still warm or cooled. And let me tell you, the smell when it’s baking is so intoxicating—I honestly can’t keep my kids out of the kitchen during the last ten minutes!
Ingredients
For the Main Batter:
– 1 ½ cups all-purpose flour (I opt for unbleached for better flavor)
– 1 teaspoon baking powder
– ½ teaspoon baking soda
– ¼ teaspoon salt
– ½ cup granulated sugar (feel free to reduce a bit for less sweetness)
– ½ cup light brown sugar for a touch of caramel
– ½ cup vegetable oil (or melted coconut oil for extra flavor)
– 3 large eggs, at room temperature
– 1 teaspoon vanilla extract
– 1 ½ cups grated zucchini (squeeze out excess moisture—trust me on this!)
– ½ cup buttermilk or almond milk (to keep things tender)
For the Filling:
– ¾ cup high-quality chocolate chips or chopped chocolate (dark or semi-sweet)
– 2 tablespoons unsalted butter or coconut oil (if using chocolate chips)
For the Glaze:
– ½ cup powdered sugar
– 1-2 tablespoons cocoa powder
– 1-2 teaspoons milk or water
– A pinch of salt and vanilla (optional)
Step-by-Step Instructions
Step 1: Preheat & Prep Pan
Preheat your oven to 350°F (175°C). Grease a 9-inch round or square cake pan with butter or non-stick spray, then line the bottom with parchment paper for easy removal. I like to give the pan a quick dusting of flour, too — it’s my secret trick for preventing sticking and getting that perfect, clean slice. Setting everything ready makes your baking process so much smoother!
Step 2: Mix Dry Ingredients
In a medium bowl, whisk together flour, baking powder, baking soda, and salt. This step ensures everything is evenly distributed, which helps the cake rise beautifully. I always do this first so the dry ingredients don’t clump or settle at the bottom later. Look for a fluffy, pale mixture before moving on!
Step 3: Mix Wet Ingredients
In a large bowl, beat together eggs, sugar, and brown sugar until light and frothy—about 2-3 minutes. Then, whisk in the oil and vanilla until fully combined. Add the grated zucchini and buttermilk, stirring gently. The batter at this stage should look a little glossy and thick. I’ve tested with almond milk—trust me, it makes the cake even creamier!
Step 4: Combine
Gradually add the dry ingredients to the wet, folding gently with a spatula—no vigorous stirring! Overmixing can make the cake dense, so just fold until everything’s just combined. You want a smooth, slightly thick batter, with no streaks of flour remaining. It’s okay if it’s a little lumpy—that’s the zucchini doing its magic.
Step 5: Prepare Filling
In a small saucepan, melt the chocolate chips and butter (or coconut oil) over low heat, stirring until silky smooth. If you prefer, you can melt in short bursts in the microwave—just be careful not to scorch it. Let it cool slightly so it doesn’t seize up when you swirl it into the batter.
Step 6: Layer & Swirl
Pour half of the batter into your prepared pan, smoothing the top with a spatula. Spread the melted chocolate evenly over this layer, then spoon or dollop the remaining batter on top. Use a skewer or butter knife to gently swirl through the batter — create figure-eights or circles for a beautiful marbled effect. Don’t overdo it; the goal is a gentle swirl, not a muddled mess.
Step 7: Bake
Place in your preheated oven and bake for about 35-40 minutes. Test doneness with a toothpick—insert it into the center, and if it comes out with just a few moist crumbs, you’re golden. If it’s wet, give it a few more minutes. Every oven is different, so keep an eye on it after 30 minutes. The cake should be fragrant and slightly golden on top.
Step 8: Cool & Glaze
Let your cake cool in the pan for about 15 minutes — this helps it set and prevent crumbs from breaking off when you slice. Transfer to a wire rack if you want a crispier crust. Once cooled, mix your glaze ingredients until smooth and drizzle generously over the top. The glaze adds a lovely shine and just a touch of extra sweetness.
Step 9: Slice & Serve
Use a serrated knife for clean cuts, especially since the swirl pattern can be delicate. Serve at room temperature or slightly warm—either way, you’ll find every bite is moist and layered with chocolate. I love serving this with a dollop of whipped cream or a splash of cold milk on the side. It’s perfect for sharing, but honestly, I’ve eaten half a slice straight from the pan—don’t judge me!
What to Serve It With
This cake is so versatile, but I have a few favorites. For breakfast, a warm slice with rich black coffee or a nice chai is divine. It’s perfect for brunch alongside a fresh fruit salad and some herbal tea, making it feel a bit special without too much effort. As a dessert, it’s incredible with a scoop of vanilla ice cream or a drizzle of caramel sauce—think of it as a grown-up, chocolatey zucchini Bundt cake in disguise. And on cozy nights, I love sharing a slice with my loved ones, maybe with some hot cocoa or coffee, of course. My family likes to keep it simple—sometimes I just dust a bit of powdered sugar on top, letting the swirl detail shine. I swear, the secret to its success is how tender and moist it stays—every time I make this, it disappears in minutes!
Top Tips for Perfecting Your Fluffy Zucchini Chocolate Swirl Cake
Years of baking have taught me some tricks to really elevate this recipe—and avoid common pitfalls. First, when grating zucchini, I always squeeze out as much moisture as I can. It sounds tedious but trust me, a dry zucchini makes the cake fluffy and prevents it from turning soggy. I use a clean kitchen towel to wring out excess water, which really helps. I’ve also learned that overmixing the batter is a quick way to dense cake — so folding gently is key; patience is your best friend here. For the swirl, I like to keep a little of the melted chocolate aside so I can add more layers if I want a more dramatic look. The pattern’s all about light touches—you want it pretty but not muddled. Swapping ingredients? I’ve tested whole wheat flour, and while it’s a bit denser, it works surprisingly well if you add an extra splash of liquid. When baking, I always position the rack in the middle—the heat distributes better, preventing overbaked edges. For the glaze, I prefer a thicker consistency, so I add just enough powdered sugar and cocoa to coat without dripping excessively. Sometimes I add a tiny pinch of cinnamon or espresso powder to boost the chocolate flavor—trust me on this one, it’s a game-changer! Keep experimenting, and don’t be afraid to make it your own. The best cakes are flavored with a bit of personality!
Storing and Reheating Tips
This cake keeps beautifully—here’s how I store it to keep it fresh. At room temperature, I wrap it tightly in plastic wrap or store it in an airtight container for up to 2 days. That’s usually enough for my family, but if you’re keeping it longer, refrigerate it for up to 4 days—just make sure to cover it well so it doesn’t dry out. I find that wrapping it with foil and popping it in the fridge preserves the moist crumb. To reheat, I give individual slices 10-15 seconds in the microwave—it warms through without drying out. If you want to serve it cold, it’s just as delicious straight from the fridge, especially with the chocolate swirl setting it apart from typical zucchini bread. For freezing, I wrap individual slices tightly in plastic and store for up to 3 months. Thaw at room temperature or gently warm before serving. The glaze can be added fresh after reheating if you like that shiny, sweet finish. I’ve learned that adding the glaze too early can make the cake soggy, so I always wait until just before serving. Trust me, the cake might get even better after a day or two—it’s like the flavors meld perfectly. Just keep an eye on the moisture level, and you’ll always have a tender slice ready whenever a craving hits!
Frequently Asked Questions
Final Thoughts
This zucchini chocolate swirl cake has truly become a family favorite for me, not just because it tastes amazing, but because it’s the kind of recipe that sparks joy in the kitchen. It’s so forgiving—every batch turns out moist, tender, with that irresistible chocolate ribbon swirling through every bite. I love how it’s versatile enough to serve at breakfast, brunch, or as a cozy dessert with a cup of coffee or tea. The best part? It’s packed with veggies, so I feel just a little better about indulging. Over the years, I’ve adapted it countless times—swapping ingredients, playing with the swirl pattern, and even experimenting with different chocolates—and each time, it’s a winner. I hope you give it a try and make it your own. When you do, come back and tell me how it turned out! Happy baking, and don’t forget—sometimes the best recipes are the ones that bring a little extra love into your home.

cake balls
Ingredients
Method
- Preheat oven to 350°F. Lightly spray a cake pop pan with baking spray.
- Combine all the cake ingredients in a large mixing bowl and beat until combined. Place the batter into a pastry bag or large ziplock bag with the tip cut off.
- Pipe the batter into the prepared cake pop pan and bake about 18 minutes. Let it rest 5 minutes before opening the pan.
- Place cake balls on a wire rack and repeat with remaining batter. Using scissors, cut the seam off the balls.
- Refrigerate the cake balls for about 45 minutes to help the chocolate stick to the cake.
- Melt some white chocolate melts in the microwave according to package directions. Insert the tip of a bamboo stick into the melted chocolate, then into the cake ball, and dip each ball into the chocolate. Place onto a sheet of wax paper.
- Repeat with remaining balls and chocolate. When the chocolate hardens, place into mini cupcake liners and top with sprinkles. Drizzle with additional chocolate if desired.
- Makes 48-50 balls.