Autumnal Cheesecake Bars How Easy!
There’s something magical about a freshly baked cake that’s both wholesome and just a little indulgent, isn’t there? I remember the first time I attempted this zucchini swirl cake — I was skeptical about sneaking zucchini into a dessert, but it turned out better than I could have imagined. The moist, tender crumb perfectly balances the sweetness, and that swirl of cream cheese filling? Trust me, it’s a game-changer. This one’s a lifesaver on busy nights when I want something special but don’t have hours to fuss in the kitchen. Plus, my kids ask for this all the time, and I love how sneaky and delicious it is. I’ve made this with everything from almond milk to coconut oil, and every variation turns out lovely. The smell alone brings everyone rushing to the kitchen, eyes wide with anticipation. Honestly, this cake has become a family favorite, and I can’t wait to share it with you — it’s like a warm hug in dessert form. Let’s dive in!
What is Zucchini Swirl Cake?
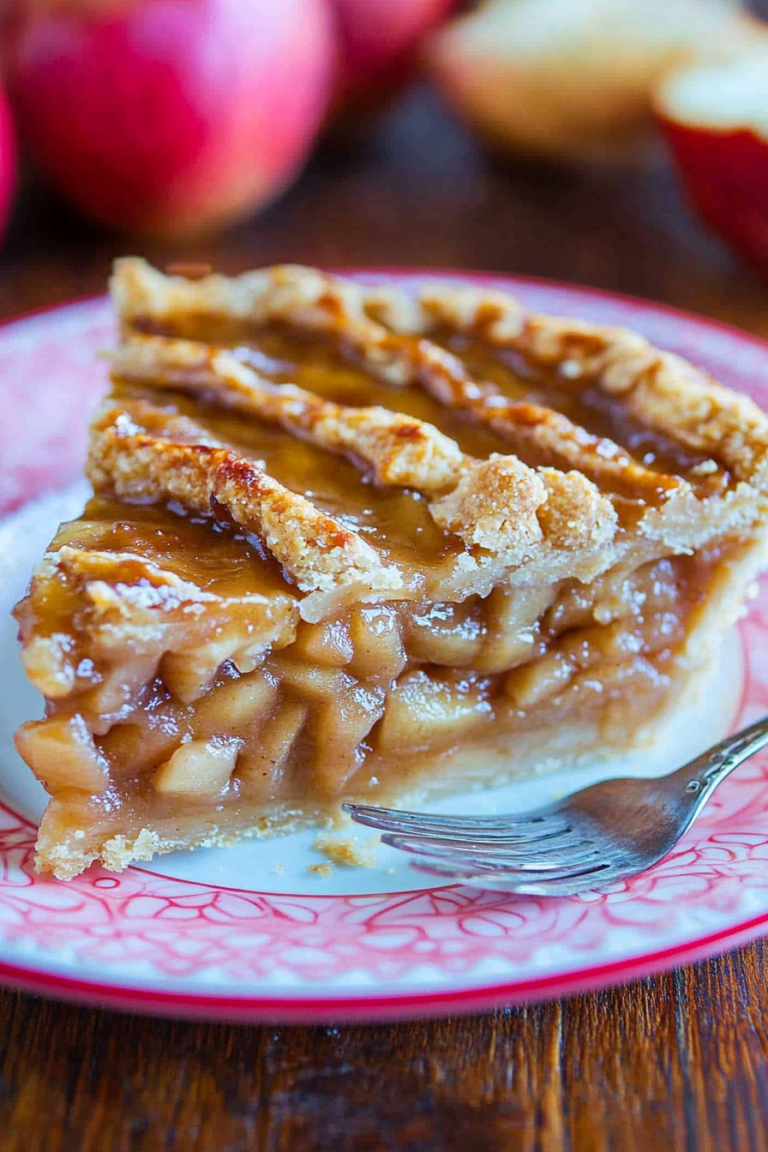
Think of zucchini swirl cake as a cozy, slightly rustic dessert that’s as forgiving as it is delicious. It’s essentially a lovingly layered cake featuring fluffy, lightly spiced zucchini batter with a luscious cream cheese filling swirled right in. The idea is simple: the zucchini adds moisture and a gentle vegetal sweetness, almost like a secret ingredient that makes the cake moist and tender. The swirl of cream cheese gives it richness and a little tang, balancing the sweetness in a way that keeps each bite interesting. The name ‘swirl’ comes from how you layer and marbly the filling into the batter, creating those beautiful, artistic veins you see in the slices. I’ve tested this with shredded carrots and shredded apple too—any grated veggie or fruit that’s sweet and soft works well. Think of it as a cross between a quick bread and a cake — perfect for breakfast, dessert, or that sneaky treat after dinner. It’s cozy, homey, and honestly, it always makes me feel like I’m back in my grandma’s kitchen.
Why you’ll love this recipe?
What I love most about this zucchini swirl cake is how it manages to be both comforting and impressive at the same time. The flavor is subtle yet rich — you get hints of vanilla, cinnamon, and that familiar essence of zucchini, which just melts into the batter. It’s sweet but not overly so, and the cream cheese swirl adds this delightful tang that makes each slice a little more special. The best part? It’s crazy easy to put together. I’ve made this on busy weeknights when I didn’t have much time but still wanted something warm and homemade. Plus, it’s super budget-friendly, relying on simple pantry ingredients like flour, sugar, and cheese. You can even customize the add-ins — think chopped nuts, chopped berries, or a sprinkle of coconut flakes on top. I’ve also tested this with coconut sugar for an even healthier twist, and honestly, it’s still incredible. If you’re into baking that’s fuss-free but yields show-stopping results, this is the one. My family always asks for seconds, and I swear, this disappeared in minutes at my house! Plus, it’s versatile enough to serve for breakfast, brunch, or dessert. It’s truly my go-to when I want something comforting yet a little fancy.
How do I make Zucchini Swirl Cake?
Quick Overview
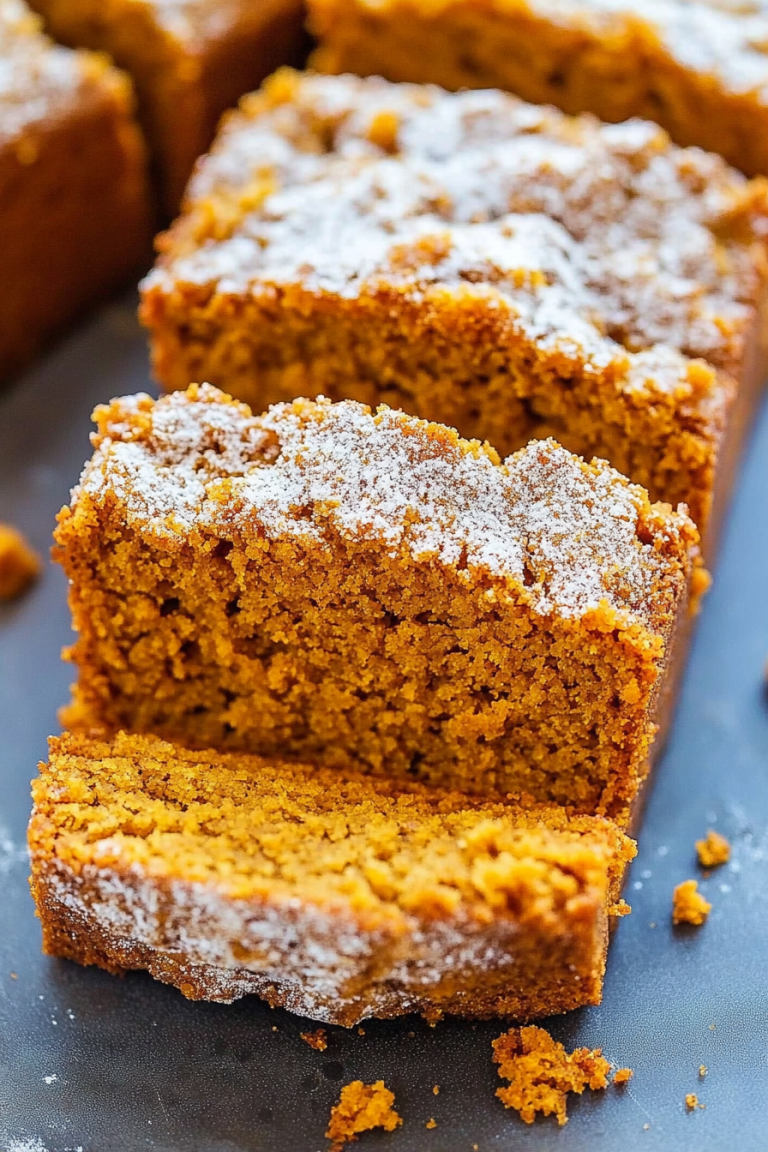
This cake is a breeze — you just mix up a simple batter, prepare your filling, layer it in a loaf pan or round cake pan, swirl that gorgeous cream cheese mixture through, and bake. The secret to that lovely marbled effect is gentle swirling — a move I’ve perfected after a few funny attempts! Once out of the oven, I let it cool just enough so the glaze doesn’t slide off, then drizzle on a sweet glaze or dust with powdered sugar depending on my mood. It’s straightforward but so impressive looking, especially when you cut into it and see those beautiful marbled veins of cream cheese. The smell of baking zucchini with cinnamon and vanilla instantly makes everyone’s mouth water — I always do this when I need a special treat or just want to brighten up our day.
Ingredients
For the Main Batter:
- 1 ½ cups all-purpose flour (or gluten-free blend if you prefer)
- 1 teaspoon baking powder
- ½ teaspoon baking soda
- 1 teaspoon ground cinnamon
- ¼ teaspoon nutmeg (optional, but I love it)
- ½ teaspoon salt
- 1 cup granulated sugar (or coconut sugar for a healthier twist)
- ⅓ cup vegetable oil or melted coconut oil
- 2 large eggs
- 1 teaspoon vanilla extract
- 1 cup grated zucchini (about 1 small zucchini, moisture squeezed out)
For the Filling:
- 8 oz cream cheese, softened
- ¼ cup powdered sugar or maple syrup (for sweetness)
- 1 teaspoon vanilla extract
For the Glaze:
- ½ cup powdered sugar
- 1-2 teaspoons milk or lemon juice (adjust for consistency)
- Optional: a pinch of vanilla or lemon zest for flavor
Step-by-Step Instructions
Step 1: Preheat & Prep Pan
I usually start by preheating my oven to 350°F (175°C). Grease your chosen pan — I prefer a loaf pan for its classic look — and line it with parchment paper if you like easy cleanup. If you’re making a round cake, go ahead and prepare your 8 or 9-inch pan and set it aside.
Step 2: Mix Dry Ingredients
In a large bowl, whisk together the flour, baking powder, baking soda, cinnamon, nutmeg, and salt. This keeps the leavening evenly distributed and prevents clumps. Trust me, overmixing dry ingredients is a rookie mistake I learned early on — so just mix until everything’s combined and set aside.
Step 3: Mix Wet Ingredients
In a separate bowl, beat the sugar, oil, eggs, and vanilla until smooth. I like to do this with a whisk — it’s quick and gets everything nicely combined. Then, fold in the grated zucchini, making sure to squeeze out as much moisture as possible beforehand. Otherwise, your batter might be a little too runny, and nobody wants a soggy cake!
Step 4: Combine
Add the wet mixture into the dry ingredients, stirring gently just until combined. Overmixing can make the batter dense — we want a light, fluffy crumb here. If the batter feels thick, I sometimes add a splash of milk to loosen it up a bit.
Step 5: Prepare Filling
In a small bowl, beat the softened cream cheese with powdered sugar and vanilla until creamy and smooth. If you prefer it sweeter, add a bit more powdered sugar; for a tangier flavor, just stick with vanilla. This filling really is the star of the show.
Step 6: Layer & Swirl
Pour about half the batter into your prepared pan. Dollop spoonfuls of the cream cheese mixture over the batter, then add the remaining batter on top. Using a toothpick or a skewer, gently swirl through the layers — try to drag the cream cheese into the batter without mixing it completely. The goal is that marbled look, so don’t overdo it!
Step 7: Bake
Bake for about 40-45 minutes, or until the top is golden and a toothpick inserted in the center comes out clean. Every oven is different; I’m a big fan of checking around the 38-minute mark and doing the toothpick test. The smell when it’s baking is irresistibly cozy — cinnamon, vanilla, and something sweet filling the air.
Step 8: Cool & Glaze
Once out of the oven, let the cake cool in the pan for about 15 minutes, then transfer to a wire rack to cool completely. While it cools, whisk together your glaze ingredients and drizzle over the top. I like a bit more lemon zest in my glaze for a citrus punch, but maple or vanilla also works beautifully.
Step 9: Slice & Serve
When it’s fully cooled and glazed, slice with a serrated knife to get clean edges. I like to serve this slightly warm or at room temperature, with a dollop of whipped cream or a few fresh berries on the side. It looks pretty in thick slices and tastes even better the next day — if it lasts that long!
What to Serve It With
This cake is incredibly versatile — it’s a hit at breakfast, brunch, or as an after-dinner treat. For breakfast, serve a slice with your favorite coffee or a cup of strong black tea — the subtle sweetness and moist texture make it a perfect morning companion. On a lazy weekend brunch, pair it with yogurt and fresh berries, adding a drizzle of honey for extra indulgence. As a dessert, a scoop of vanilla ice cream or a splash of caramel sauce makes it feel downright decadent. Or, for a cozy snack, I love just a simple dusting of powdered sugar alongside a steaming mug of tea. Over the years, I’ve played around with toppings, and honestly, a sprinkle of chopped nuts on top before baking adds a delightful crunch. This cake also travels well — I’ve wrapped slices in foil and taken them to picnics, and they disappear almost instantly. It’s a real crowd-pleaser, especially with a cup of tea or coffee. My family always requests it for birthdays or lazy Sunday mornings because of how easy and comforting it is. Give it a try, and I promise, it’ll quickly become a staple in your baking rotation too.
Top Tips for Perfecting Your Zucchini Swirl Cake
I’ve learned a few tricks after making this cake dozens of times. First, make sure to squeeze out as much moisture as possible from the grated zucchini — excess water can mess with the batter’s texture and cause sinking or uneven baking. I actually wrap the grated zucchini in a clean towel and squeeze hard; this step is essential. When mixing the batter, avoid overmixing — it’s tempting to get everything perfectly smooth, but overworking the batter can make the cake dense. Just fold gently until the flour disappears.
For the swirl, I suggest adding the cream cheese mixture in dollops and gently swirling with a toothpick or skewer. If you swirl too vigorously, the layers blend, and you lose that beautiful marbling. For a more colorful twist, I’ve added a teaspoon of cocoa powder or berry puree to the cream cheese — just a fun way to jazz it up for different seasons or moods. When baking, my oven tends to run hot, so I always check a little early to prevent over-baking. Covering the cake with foil halfway through baking can help if it’s browning too quickly on top.
As for the glaze, I love adding a splash of lemon juice or vanilla extract. If you prefer a thicker glaze, just add a bit more powdered sugar; for a drizzle-like consistency, go slow with the milk. Trust me, a good glaze makes all the difference, adding moisture and flavor without overwhelming the cake. Personal tip: I always keep a stash of leftover glaze in the fridge — it’s perfect for drizzling on toast or pancakes too!
This recipe has been a true revelation for me, especially when I want something homey but also a little special. The balance of flavors, the moist crumb, and that beautiful swirl make each slice feel like a little celebration. Don’t be afraid to tweak the spices or fillings to make it your own — that’s part of the fun in baking, isn’t it?
Storing and Reheating Tips
This cake stays fresh for about 2 days at room temperature if wrapped tightly with plastic wrap or stored in an airtight container. I recommend refrigerating it if you plan to keep it longer, especially if you’ve added the glaze or cream cheese filling. Just make sure to cover it well — I usually place it in a cake dome or wrap with foil. The cake can be refrigerated for up to a week, but I find it’s best enjoyed within 3 days for maximum moisture and flavor. If I want to enjoy leftovers later, I slice it and wrap individual pieces — then I microwave a slice for about 10 seconds to bring back the soft, warm feel. For longer storage, the freezer works great: wrap slices tightly in plastic wrap and then foil, and they can last up to 3 months. To thaw, leave them in the fridge overnight or warm them briefly in the microwave. If you’ve glazed the cake, I recommend adding the glaze fresh before serving, as it can become less shiny and a little sticky after refrigeration.
Frequently Asked Questions
Final Thoughts
Honestly, this zucchini swirl cake has become a staple in my baking routine. It’s like a little hug wrapped in a slice of tender, flavorful goodness. The combination of moist zucchini, fragrant spices, and the tang of cream cheese makes every bite memorable. And the best part? It’s so forgiving — even if you’re new to baking, I promise you’ll nail it. I love how adaptable it is: add some berries, swap spices, or switch up the glaze to match your mood. It’s a great way to sneak in some extra veggies while still baking something decadent. Whether I’m serving it for breakfast, a casual brunch, or dessert after a hearty meal, this cake always earns rave reviews. So go ahead, give it a try — I can’t wait to hear how yours turns out! And if you do customize it, drop a comment below. Sharing my favorite recipes with friends like you makes mornings so much sweeter. Happy baking!
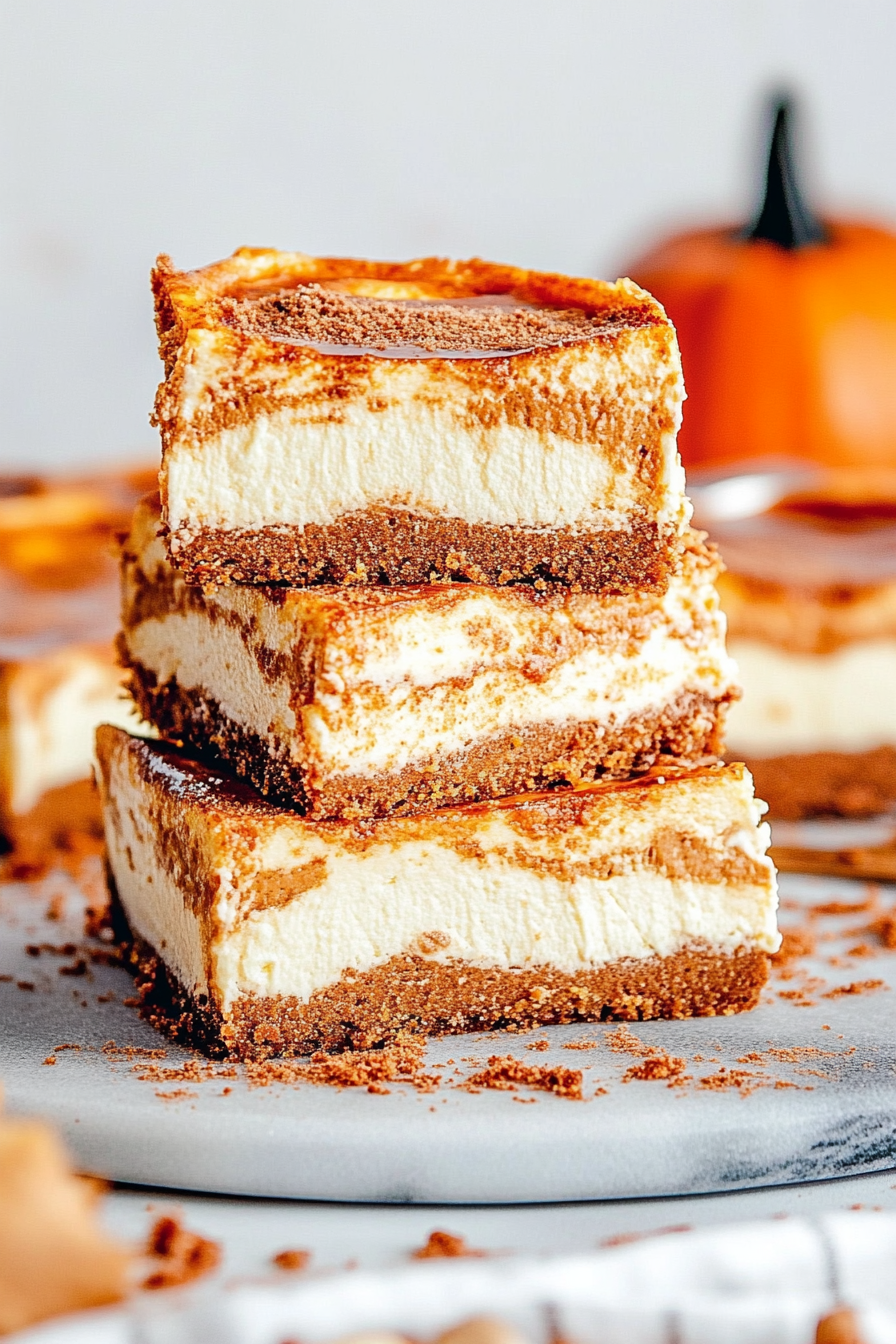
pumpkin cheesecake
Ingredients
Method
- Preheat oven to 350F. Line a 9x13-inch baking pan with parchment or foil and spray with nonstick spray.
- To prepare the crust, grind cinnamon graham crackers into fine crumbs using a food processor. Mix crumbs with melted butter until combined. Press the mixture evenly into the bottom of the prepared pan.
- In a large bowl, whisk together pumpkin puree, pumpkin pie spice, cinnamon, flour, and salt. Set aside.
- In another large bowl, beat softened cream cheese and sugar until smooth and creamy. Mix in sour cream and vanilla. Add eggs one at a time, mixing just until incorporated.
- Remove 1.5 cups of the cream cheese mixture and fold into the pumpkin mixture to create a marbled effect. Drop spoonfuls alternately into the crust and swirl with a toothpick to create a marble pattern.
- Bake for about 40 minutes or until edges are set and a toothpick inserted in the center comes out clean.
- Allow the cheesecake to cool in the pan on a wire rack for 1 hour. Then refrigerate for at least 2 hours or overnight before slicing.
- Slice and serve chilled. Optionally, top with whipped cream or caramel sauce.