Easy Baked Broccoli Macaroni Delight
There’s nothing quite like the smell of warm cinnamon and fresh zucchini drifting through the house on a lazy Saturday morning. I remember helping my grandma in her cozy kitchen, sneaking tastes of batter and waiting patiently for that first slice of her famous zucchini bread. Over the years, I’ve tweaked that beloved recipe into something I genuinely crave—something that’s moist, tender, and just subtly sweet, perfect for whenever I want a comforting treat without going overboard. This zucchini snack cake is essentially her classic, but with a little extra flair—think a silky glaze drizzled on top that makes each bite feel special. My kids ask for this all the time, especially when I want to sneak in some extra veggies—shh, don’t tell! It’s the kind of dessert that feels indulgent but isn’t heavy, and let me tell you, it’s a lifesaver on busy nights when everyone’s starving and I need to whip up something quick yet impressive. Trust me, once you try this, it’s going to become a staple in your family too. Who knew sneaking zucchini into cake could be so delicious?
What is a Moist Zucchini Snack Cake?
Think of this moist zucchini snack cake as the lovechild of a cozy coffee cake and a favorite quick bread, but with a soft, crumbly texture that just melts in your mouth. It’s essentially a simple, homey cake made with grated zucchini—yes, that green veggie you might’ve rolled your eyes at when your mom or grandma handed it to you on a plate. The name “snack cake” hints at how versatile and easy it is—perfect for breakfast, tea time, or even that late-night sweet craving. It’s not overly sweet; instead, it’s delicately flavored with warm spices like cinnamon and nutmeg, which make it feel just like a hug in cake form. The best part? No fancy equipment or complicated techniques needed—just a few humble ingredients mixed together, layered with a creamy filling (if you want to make it extra special), baked until golden, and finished with a luscious glaze. It’s homey, inviting, and honestly, it’s made with love—something I think is what “human” really means here: food that connects us to our memories, our family stories, and the simple joys of coming together over something sweet.
Why you’ll love this recipe?
What I love most about this zucchini snack cake is how it effortlessly combines darling simplicity with comfort-food qualities. The flavor? Simply divine. The cinnamon hints at cozy mornings, while the zucchini keeps it moist and tender—trust me, you won’t even notice it’s there unless you’re looking for a sneaky veggie! It’s so easy to make—just mix, pour, and bake—so it’s perfect for busy weekdays or lazy weekends when you’re craving something homemade but don’t want to fuss. Plus, this cake is budget-friendly—most of the ingredients are pantry staples, and the zucchini is often growing in my garden or handed to me by generous neighbors (or sneaked from my own backyard if I’m honest). I also love how versatile it is—you can serve it plain with a dusting of powdered sugar, or kick it up a notch with that dreamy glaze I’ve included. And the best part? It stays moist and flavorful for days, becoming even better the next morning with a hot cup of coffee. Honestly, I make this at least once a month, and every time I do, my family devours it in minutes, asking when I’ll be making it again. It’s the kind of recipe that feels like a warm hug, even when life gets hectic.
How do I make Zucchini Snack Cake?
Quick Overview
This cake is so straightforward, it’s almost unfair. You start by grating zucchini (no peeling necessary—mine always seems to have a lush green glow!), then mix it into a simple batter of flour, sugar, and warm spices. While that’s in the oven, I suggest whipping up a quick glaze that’s just sweet enough to tie everything together. The whole process takes about 45 minutes from start to finish, and trust me, it’s worth every minute. The secret to keeping it extra moist is not overmixing the batter—lumps are fine! Also, I tested this with almond milk, and it made it a bit creamier without changing the flavor—experimenting is half the fun. Once baked, let it cool—step that’s super important—then drizzle with glaze while still warm. The smell alone will have everyone rushing to the kitchen. This cake is perfect for when you want something quick and satisfying, with a touch of homemade magic.
Ingredients
For the Main Batter:
- 2 cups grated zucchini (about 2 medium zucchinis, freshly grated and squeezed dry)
- 1 1/2 cups all-purpose flour (or a mix of whole wheat and AP flour for a heartier vibe)
- 1 cup granulated sugar (or honey/maple syrup for a more natural sweet touch)
- 1/2 teaspoon baking powder
- 1/2 teaspoon baking soda
- 1 teaspoon ground cinnamon
- 1/4 teaspoon nutmeg (optional but cozy)
- 1/4 teaspoon salt
- 1/2 cup vegetable oil or melted unsalted butter
- 3 large eggs (or flax eggs for vegan version)
- 1 teaspoon vanilla extract
For the Filling (optional):
- 8 oz cream cheese (softened)
- 1/4 cup powdered sugar (or more to taste)
- 1 teaspoon vanilla extract
For the Glaze:
- 1 cup powdered sugar
- 2-3 tablespoons milk (or dairy-free alternative)
- 1/2 teaspoon vanilla extract
- Optional: a dash of lemon juice or a sprinkle of cinnamon for extra flavor
Step-by-Step Instructions
Step 1: Preheat & Prep Pan
Preheat your oven to 350°F (175°C). Grease a 9-inch round cake pan or square baking dish with butter or non-stick spray. You can also line it with parchment paper for easy removal. I always do this because it helps avoid the frustrating sticky mess—plus, it makes slicing easier and prettier!
Step 2: Mix Dry Ingredients
In a large bowl, whisk together the flour, sugar, baking powder, baking soda, cinnamon, nutmeg, and salt. Make sure everything’s well combined—this step is crucial to give your cake a uniform rise and flavor. I’ve learned not to skip on sifting, especially when using spices—clumps are fine in the bowl, but should disappear once mixed!
Step 3: Mix Wet Ingredients
In a separate bowl, beat the eggs, then add the oil (or melted butter), vanilla, and your grated zucchini. I always squeeze out as much moisture as I can from the zucchini—trust me, moisture is your friend here for that classic moist crumb. If you want to go dairy-free, almond or oat milk works beautifully—sometimes I do half almond milk and half melted coconut oil for extra richness.
Step 4: Combine
Pour the wet mixture into the dry ingredients and mix gently until just combined. Don’t overmix—lumps are A-OK! Overmixing can make the cake dense, and we’re aiming for soft and moist every time. If you notice the batter is thicker than you’d like, a splash of milk can loosen it up just a bit.
Step 5: Prepare Filling (Optional)
If you’re adding that luscious cream cheese layer, beat together the softened cream cheese, powdered sugar, and vanilla until smooth. Spread or dollop it over the batter after placing it in the pan—this adds a beautiful, creamy surprise in every bite.
Step 6: Layer & Swirl
Pour batter into the prepared pan. If you’ve prepared the filling, drop spoonfuls around the top and gently swirl with a toothpick or skewer. This creates a beautiful marbled effect that just looks fancy but is totally simple to do. It’s my favorite little trick to make the cake look extra special.
Step 7: Bake
Slide it into the oven and bake for 35-40 minutes, or until a toothpick inserted into the center comes out clean. The edges should be golden, and the house will start filling with that irresistible cinnamon smell. Start checking around the 35-minute mark—every oven is different, and you don’t want to overbake or it’ll dry out.
Step 8: Cool & Glaze
Let the cake cool in the pan for about 15 minutes, then transfer to a wire rack. Meanwhile, mix together your glaze ingredients until smooth. I like to drizzle it while the cake is still warm—this way, it seeps into all the nooks and crannies, making each bite even more delicious. Trust me on this one: patience during cooling makes the difference between a crumbly mess and a pretty, moist slice.
Step 9: Slice & Serve
Use a sharp serrated knife to cut neat slices. I love serving this slightly warm, maybe with a cup of coffee or a big glass of milk. It’s wonderful plain, but I’ve also added a handful of chopped nuts or fresh berries on top for extra flair. Whatever way you enjoy it, this cake always disappears fast at my house!
What to Serve It With
This zucchini snack cake is a real chameleon—good for so many occasions! For breakfast, I love pairing it with strong black coffee or a frothy latte. It’s satisfying and feels like a treat but still good enough to start your day. When I serve it for brunch, I like to add a dollop of whipped cream and extra cinnamon, along with fresh fruit—think blueberries or sliced strawberries. It’s also an elegant after-dinner dessert, especially when topped with a swirl of whipped cream or a dusting of powdered sugar. And for a casual snack, I like a slice alongside a glass of cold milk—my kids ask for this all the time after school. It’s the kind of cake that makes everyday moments feel special, you know? Plus, leftovers are fantastic—simply wrap tightly and store for later. Honestly, this one’s a lifesaver when I need something quick but comforting. Just cut a big slice, and everyone’s happy. I guarantee, once you make this, it’ll become part of your regular rotation too.
Top Tips for Perfecting Your Moist Zucchini Snack Cake
Over the years, I’ve learned a few tricks to make this cake even better—and trust me, they’re worth trying.
Zucchini Prep: Always squeeze out excess moisture after grating. Moist zucchini can make your batter too wet and might cause sinking or uneven texture. I do this by pressing it in a clean kitchen towel—a quick step that makes a huge difference.
Mixing Advice: When combining wet and dry, fold gently—overmixing is the enemy of soft crumb. Lumps in the batter are fine; they prevent the cake from becoming dense.
Swirl Customization: Practice your swirling technique—think of it as a little art project. You want to create gentle, flowing patterns; that marbled look makes the cake look like a bakery masterpiece.
Ingredient Swaps: I’ve tested this with coconut oil, apple sauce, and even yogurt—each gives a slightly different texture, but keeps it moist and delicious. Feel free to experiment!
Baking Tips: Keep an eye on your oven. If your oven runs hot, reduce the temperature slightly or check earlier than suggested. Always do the toothpick test—a clean toothpick means done.
Glaze Variations: For a citrus twist, add lemon or orange zest to the glaze. If you prefer something richer, stir in a spoonful of softened butter or cream cheese into the glaze. Just remember: a little goes a long way!
One thing I’ve learned from testing this is that patience during cooling is key. Rushing to slice too early can cause the cake to fall apart or be sticky. Let it cool fully, then glaze—it’s so worth it. Also, don’t be afraid to tweak the spices—more cinnamon, less nutmeg, or even a pinch of cardamom—personalize it to your taste. This is a recipe that’s forgiving and flexible, which is probably why I keep coming back to it over and over again.
Storing and Reheating Tips
This cake keeps surprisingly well—moist and flavorful for days, actually. I usually store leftovers in an airtight container at room temperature for up to two days; after that, it’s best in the fridge. Wrap it tightly with plastic wrap or store in a resealable bag. If I want to keep it longer, into the fridge it goes—just remember that the glaze might get a little sticky, so best to reheat a slice in the microwave for about 15 seconds before serving. This warms it up and reactivates that irresistible aroma.
For freezing, wrap slices individually in plastic wrap, then foil, and store in an airtight container. It’s perfect for grabbing later—just defrost at room temperature or warm briefly in the microwave. I’ve tested this several times, and honestly, it tastes just as good thawed as fresh. Just be sure to add the glaze after reheating so it stays shiny and luscious.
Regarding the glaze—if it starts to thicken in the fridge, stir in a splash of milk to loosen it up. Glaze is best added when the cake is completely cooled—then it soaks in just enough to add that finishing touch without making the cake soggy.
Frequently Asked Questions
Final Thoughts
This moist zucchini snack cake is one of those recipes I keep coming back to—it’s humble, forgiving, and incredibly satisfying. The smell alone will fill your home with warmth, and I promise, once you try it, you’ll realize how sneaky those zucchinis are. It’s perfect for sharing with loved ones, whether at the breakfast table, during a cozy afternoon, or after dinner when everyone’s craving just a little something sweet. I love how adaptable it is—add nuts, berries, or even a splash of citrus to mix things up. Most of all, I hope you enjoy making this as much as I do. It’s a simple reminder that good food doesn’t have to be complicated to be meaningful. So go ahead, give it a try. Your kitchen—and your taste buds—will thank you! And I’d love to hear how yours turns out—leave a comment, share your twists, or just tell me you’re making this again next weekend. Happy baking!
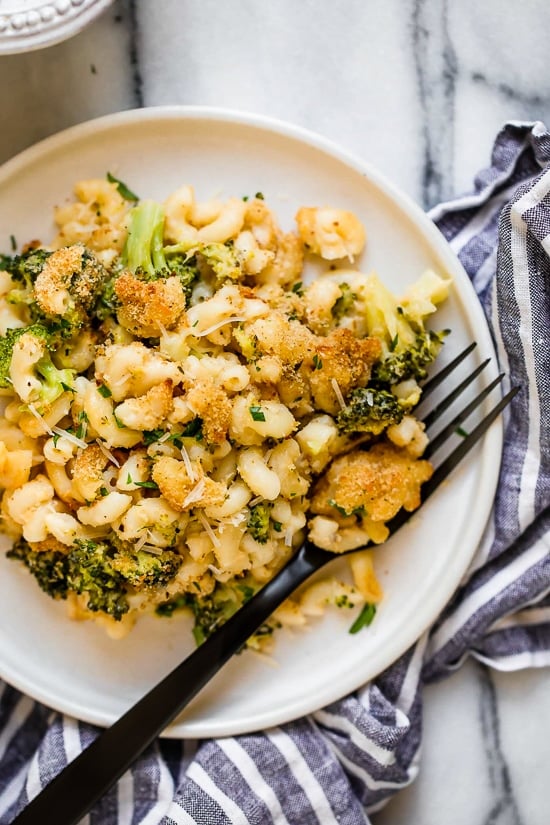
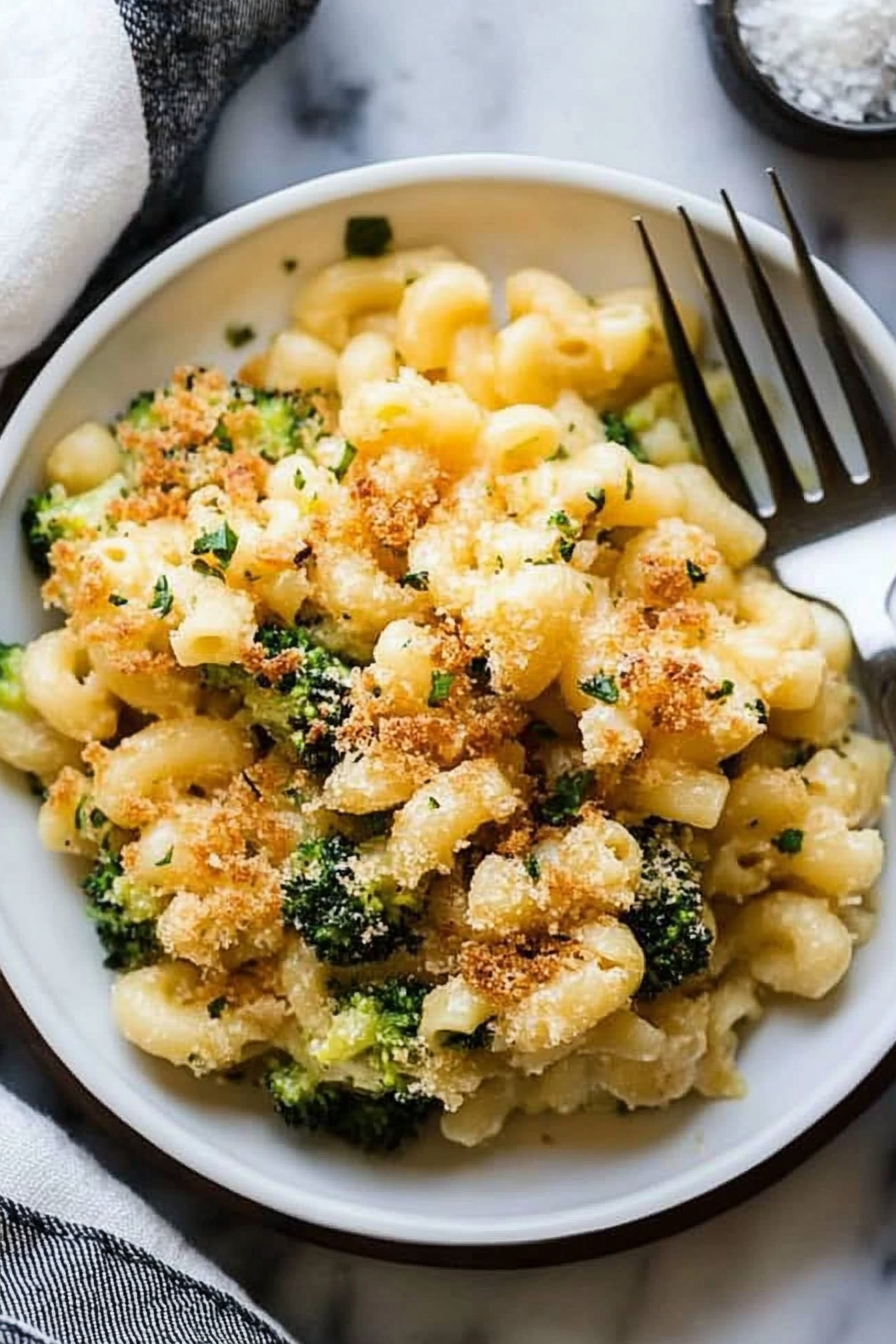
Broccoli Macaroni
Ingredients
Method
- Cook pasta and broccoli together in a large pot of salted water until al dente, about 8 minutes. Drain and set aside.
- Preheat oven to 375°F. Spray a baking dish with cooking spray.
- In a large skillet, melt butter over low heat. Add minced onion and cook for 2 minutes. Stir in flour and cook for 1 minute. Gradually whisk in milk and chicken broth, bringing to a boil. Cook for 5 minutes until sauce thickens. Season with salt and pepper.
- Remove sauce from heat and stir in shredded cheese until melted. Mix in cooked pasta and broccoli. Pour mixture into prepared baking dish.
- Top with grated parmesan and seasoned bread crumbs, then spray lightly with cooking spray.
- Bake for 15-20 minutes until golden on top. Serve hot.