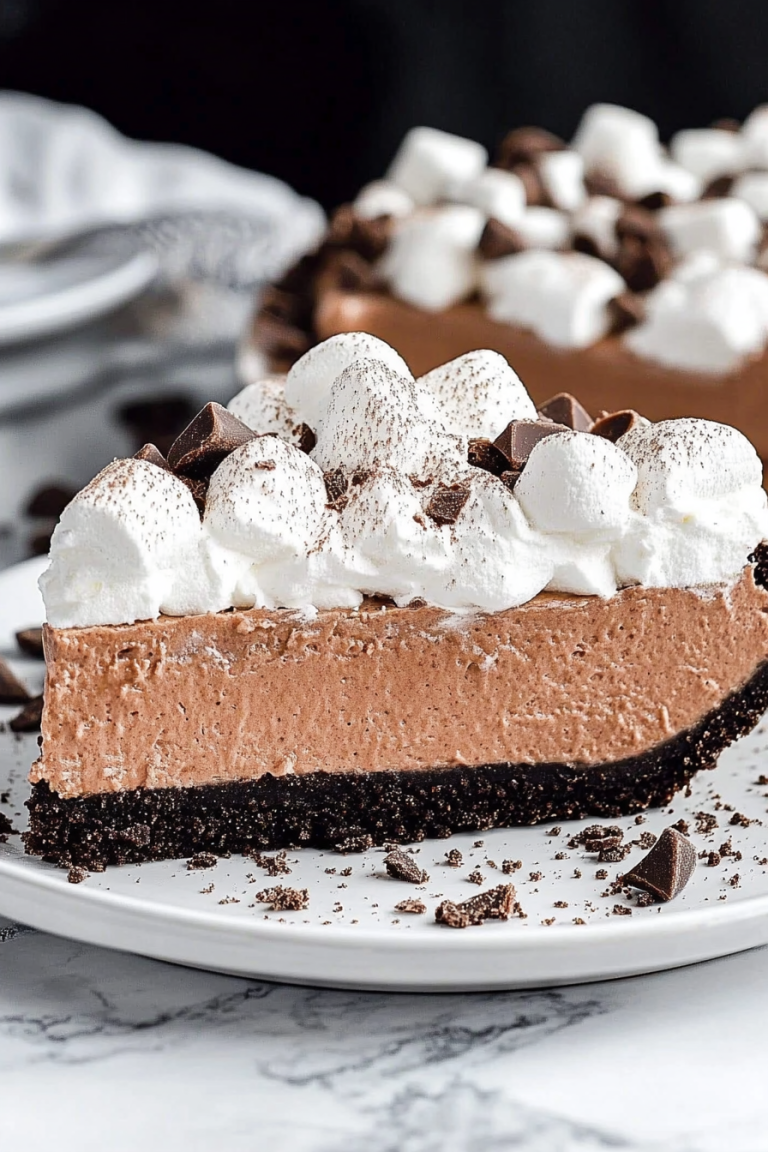
Crimson Velvet Cheesecake Cake How To
Oh, friend, let me tell you about a recipe that’s stolen my heart (and my kitchen) every summer: my absolute go-to for the coziest, most comforting chocolate swirl zucchini bread. It’s not just a recipe; it’s a hug in loaf form. I remember growing up, my grandma would always have a fresh batch cooling on the counter, the smell of cinnamon and something subtly sweet filling her little farmhouse. That aroma, for me, is pure nostalgia. This isn’t just any zucchini bread; it’s got that perfect moist crumb, a hint of spice, and then… BAM! A ribbon of rich chocolate that just takes it to another level. Forget your average banana bread; this loaf is surprisingly easy to whip up and delivers on flavor every single time. It’s truly a lifesaver when those garden zucchinis start piling up, and honestly, even my pickiest eaters devour it.
What is your family’s favorite Zucchini bread?
At its heart, this is a classic quick bread, much like a banana bread or a pumpkin bread, but with a wonderfully unique twist. It’s essentially a sweet, moist loaf cake, baked in a loaf pan, that gets its incredible tenderness and a subtle earthiness from fresh zucchini. But we’re not stopping there, are we? My version, the “Chocolate Swirl” part, means we’re weaving in a luscious ribbon of melted chocolate right into the batter. Think of it as a marble cake, but in a more rustic, comforting quick bread form. It’s what elevates a simple zucchini bread into something truly special – a dessert, a breakfast treat, or an afternoon pick-me-up all rolled into one. The zucchini melts into the background, leaving behind only moisture and a beautiful texture, while the chocolate brings that irresistible touch of indulgence.
Why you’ll love this recipe?
What makes zucchini bread so good?
- Flavor that Sings: What is the flavor that sings? The combination of warm spices like cinnamon and nutmeg with the subtle sweetness of zucchini and that glorious chocolate swirl is just divine. It’s sweet, but not overly so, with a depth of flavor that makes you want to close your eyes and savor every bite. It’s got that comfort-food vibe that you might find in a spiced apple cake, but with a lighter, more wholesome feel.
- Surprisingly Simple: I promise, if you can stir, you can make this. We’re talking about a quick bread here, meaning no yeast, no kneading, just a few bowls and a whisk. It’s the perfect project for a lazy Sunday afternoon or even a busy weeknight when you need something sweet baking in the oven. My kids even love helping grate the zucchini (under supervision, of course!).
- Budget-Friendly Ingredients: You likely have most of these ingredients in your pantry right now! Flour, sugar, eggs, oil, zucchini… it’s all super accessible and doesn’t require any fancy, expensive items. This makes it a fantastic way to use up garden bounty without breaking the bank.
- Unbelievably Versatile: This chocolate swirl zucchini bread is a chameleon! It’s incredible for breakfast with a cup of coffee, makes a fantastic addition to any brunch spread, serves as an elegant yet easy dessert, or simply as a cozy snack. I’ve even brought it to potlucks, and it disappears in minutes every single time. What I love most about this is how it manages to feel both indulgent and slightly virtuous because of the zucchini. It’s like tricking yourself into eating vegetables, but in the most delicious way possible!
How to Make Our Family’s Favorite Chocolate Swirl Zucchini Bread
Quick Overview
Making this zucchini bread is really a breeze, even for beginner bakers. You’ll essentially whisk together your dry ingredients, then your wet ingredients, combine them gently, fold in that lovely shredded zucchini, and then comes the fun part: swirling in the chocolate! It’s a pretty straightforward “dump and stir” kind of situation, which I absolutely adore on those days when I want something homemade without a lot of fuss. The secret to its incredible moistness and the beautiful chocolate pattern is all in a few simple steps. Trust me, you’ve got this!
Ingredients
For the Main Batter:
- 2 cups all-purpose flour: I always use unbleached, but regular works just fine.
- 1 teaspoon baking soda: Make sure it’s fresh for the best rise!
- 1/2 teaspoon baking powder: Works with the soda to give that perfect lift.
- 1/2 teaspoon salt: Balances all the flavors.
- 1 tablespoon ground cinnamon: The heart of that warm, cozy flavor. Don’t skimp!
- 1/4 teaspoon ground nutmeg: Adds another layer of spice. Freshly grated is even better if you have it.
- 2 large eggs: Room temperature, always, for better emulsion.
- 1/2 cup granulated sugar: For sweetness and structure.
- 1/2 cup packed light brown sugar: Adds moisture and a lovely caramel note.
- 1/2 cup vegetable oil: Or any neutral oil like canola or grapeseed. Keeps it super moist.
- 1 teaspoon vanilla extract: A must-have for any sweet baked good.
- 2 cups shredded zucchini: About 2 medium zucchinis. Don’t squeeze out the moisture!
For the Chocolate Swirl:
- 1/2 cup semi-sweet chocolate chips: Or chopped chocolate. I prefer good quality chips that melt smoothly.
- 1 tablespoon vegetable oil: A little extra oil helps the chocolate melt smoothly and swirl beautifully.
For the Glaze (Optional but highly recommended!):
- 1 cup powdered sugar: Sifted if you want it super smooth.
- 2-3 tablespoons milk: Any milk works – whole, 2%, even almond milk for a slight flavor twist.
- 1/2 teaspoon vanilla extract: To round out the sweetness.
Step-by-Step Instructions
Step 1: Preheat & Prep Pan
First things first, let’s get the oven ready. Preheat your oven to 350°F (175°C). Then, grab a standard 9×5 inch loaf pan. Grease it really well with butter or cooking spray, and for extra insurance against sticking (which is the worst, right?), I always dust it lightly with flour. You can also line it with parchment paper, leaving an overhang on the sides, which makes lifting the baked loaf out a dream!
Step 2: Mix Dry Ingredients
In a large bowl, whisk together your flour, baking soda, baking powder, salt, cinnamon, and nutmeg. Give it a good whisk until everything is thoroughly combined. This ensures your leavening agents and spices are evenly distributed throughout the zucchini bread, preventing any weird pockets of flavor or uneven rise. The texture should be light and airy.
Step 3: Mix Wet Ingredients
In a separate, medium bowl, crack your eggs and lightly beat them. Then, add the granulated sugar, brown sugar, vegetable oil, and vanilla extract. Whisk these together really well until the mixture is smooth and the sugars are mostly dissolved. It should look pale yellow and creamy. Using room temperature eggs here really helps everything come together smoothly.
Step 4: Combine
Now for the magic! Pour your wet ingredients into the dry ingredients. With a rubber spatula or wooden spoon, mix just until combined. This is crucial: don’t overmix! Overmixing develops the gluten in the flour too much, leading to a tough, dry zucchini bread instead of the tender, moist crumb we’re aiming for. A few streaks of flour are perfectly fine. Gently fold in the shredded zucchini until it’s evenly distributed. The batter will be thick, and that’s exactly what you want.
Step 5: Prepare Filling
Time for the chocolate! In a small, microwave-safe bowl, combine your chocolate chips and the tablespoon of vegetable oil. Microwave on high for 30-second intervals, stirring in between, until the chocolate is smooth and completely melted. Be careful not to overheat it, or it can seize up. It should be glossy and pourable, not thick or lumpy. If it feels a bit too thick, add another tiny dash of oil.
Step 6: Layer & Swirl
Pour about two-thirds of the zucchini bread batter into your prepared loaf pan and spread it out evenly. Then, drizzle about half of your melted chocolate over the batter. Take a knife or a skewer and gently swirl the chocolate into the batter a few times – don’t overdo it, or you’ll lose that beautiful marbling! Spoon the remaining batter over the top, spread it gently, and then drizzle the rest of the melted chocolate over that. Swirl again, trying to create those lovely ribbons. This layering ensures you get chocolate in almost every slice of your finished zucchini bread.
Step 7: Bake
Pop your loaf pan into the preheated oven. Bake for 50-60 minutes. Now, ovens can be quirky, so start checking around the 50-minute mark. You’ll know it’s done when a wooden skewer or toothpick inserted into the center (avoiding a heavy chocolate spot) comes out clean or with just a few moist crumbs attached. If the top starts to brown too quickly, you can loosely tent it with aluminum foil. This prevents burning while the inside finishes baking. The kitchen will smell absolutely heavenly, trust me!
Step 8: Cool & Glaze
Once baked, take the zucchini bread out of the oven and let it cool in the pan for about 10-15 minutes. This cooling period is important as it allows the loaf to set up and prevents it from falling apart when you remove it. After 10-15 minutes, carefully invert the loaf onto a wire rack to cool completely. While it’s cooling, whisk together your powdered sugar, milk, and vanilla extract for the glaze until it’s smooth and pourable. You might need to adjust the milk amount slightly to get your desired consistency – I like mine thick enough to cling, but thin enough to drizzle. Drizzle the glaze generously over the *cooled* zucchini bread. If you glaze it too soon, it’ll just melt right off.
Step 9: Slice & Serve
Once the glaze has set (if you used it), it’s time for the best part! Use a sharp, serrated knife to slice the zucchini bread. Slicing with a gentle sawing motion helps create clean, beautiful slices without tearing the moist crumb. Serve it slightly warm or at room temperature. It’s perfect as is, but a dollop of whipped cream or a scoop of vanilla ice cream isn’t a bad idea either, especially for dessert!
What to Serve It With
This chocolate swirl zucchini bread is truly a chameleon, fitting into so many different moments. Here are some of my favorite ways to enjoy it:
For Breakfast: There’s nothing quite like a slice of this moist zucchini bread with a steaming mug of coffee or a strong cup of English breakfast tea. The chocolate swirl makes it feel a little indulgent, but the zucchini reminds you it’s still somewhat wholesome, right? It’s perfect for those grab-and-go mornings or a leisurely weekend breakfast on the porch. Sometimes I even toast a slice and spread a thin layer of cream cheese on it – divine!
For Brunch: If you’re hosting brunch, this loaf makes a gorgeous centerpiece on a platter. Slice it up and arrange it alongside a fresh fruit salad, some yogurt parfaits, and perhaps a lovely pitcher of iced tea or mimosas. Its comforting aroma always gets people talking, and it’s a welcome alternative to muffins or pastries. It pairs beautifully with eggs benedict or a simple quiche.
As Dessert: Oh, yes, absolutely! While it’s fantastic on its own, for an elevated dessert experience, serve a warm slice with a scoop of really good vanilla bean ice cream that melts slightly into the loaf. A sprinkle of flaky sea salt on top can really enhance the chocolate notes. My family loves it with a dollop of freshly whipped cream and a few fresh berries during the summer.
For Cozy Snacks: This is my ultimate comfort snack. Picture this: a chilly afternoon, a cozy blanket, a good book, and a generous slice of chocolate swirl zucchini bread. It’s perfection. It’s also fantastic packed in lunchboxes for a sweet treat or enjoyed with a glass of milk after school. My kids ask for this all the time, especially when they need a little pick-me-up.
Top Tips for Perfecting Your Chocolate Swirl Zucchini Bread
I’ve made this chocolate swirl zucchini bread countless times, and I’ve picked up a few tricks along the way. These tips will help you get that perfect, moist loaf every single time:
- Zucchini Prep is Key: Don’t peel your zucchini! The skin adds color, nutrients, and completely softens during baking. The most important thing? Don’t squeeze out the moisture from your grated zucchini. Unlike some other zucchini recipes (like fritters), for bread, we want all that natural liquid to contribute to the moistness. Just grate it and add it right in. Fresh, firm zucchini always yields the best results.
- Mixing Advice – Less is More: When combining the wet and dry ingredients, mix just until no dry streaks of flour remain. Overmixing is the enemy of tender quick breads! It develops the gluten, making your zucchini bread tough and dense. A light hand and a quick mix are all you need. The batter will be thick, which is normal.
- Swirl Customization: The chocolate swirl is where you can get creative! For really distinct ribbons, don’t swirl too much. For a more marbled effect, you can gently fold the chocolate a few more times with a knife or skewer. If you want an even more dramatic swirl, you can reserve a little extra chocolate and drizzle it heavily on top right before baking. Sometimes, I even sprinkle a few extra chocolate chips on top of the final swirl before it goes into the oven.
- Ingredient Swaps for Flavor and Texture:
- Flour: You can swap up to half of the all-purpose flour for whole wheat pastry flour for a slightly nuttier, healthier twist, but I wouldn’t recommend all whole wheat as it can get dense.
- Oil: Melted unsalted butter can be used instead of vegetable oil for a richer flavor, but the oil gives a wonderfully consistent moistness that’s hard to beat.
- Chocolate: Feel free to use milk chocolate chips or even dark chocolate for a less sweet, more intense flavor. White chocolate could be interesting too!
- Spices: If you’re not a fan of nutmeg, you can omit it or add a pinch of allspice or ginger instead.
- Add-ins: A handful of chopped walnuts or pecans (about 1/2 cup) folded into the batter with the zucchini adds a lovely crunch. Sometimes I’ll toss in a few dried cranberries too!
- Baking Tips for Perfection: Every oven is a little different, so keep an eye on your loaf. If the top seems to be browning too quickly, tent it loosely with foil. To test for doneness, a wooden skewer or toothpick inserted into the center should come out clean. If you hit a chocolate swirl, try another spot. Don’t be afraid to add 5-10 extra minutes if it’s not quite done. A slightly underbaked zucchini bread is sad and gummy, but overbaked is dry. Find that sweet spot!
- Glaze Variations: The vanilla glaze is classic, but you could easily make a cream cheese glaze (my personal favorite for an extra decadent touch!), or even a simple lemon glaze for a brighter note. For a really quick finish, just dust the cooled loaf with powdered sugar. If you prefer no glaze, that’s totally fine too; this zucchini bread is delicious all on its own.
Storing and Reheating Tips
You’ve put all that love into baking this chocolate swirl zucchini bread, so let’s make sure it stays fresh and delicious for as long as possible!
Room Temperature: If your kitchen isn’t too warm, a freshly baked loaf will stay perfectly good for 2-3 days on the counter. Make sure it’s completely cooled before storing. I usually wrap it tightly in plastic wrap or keep it in an airtight container to prevent it from drying out. This also helps keep the glaze from getting sticky. The flavor actually deepens a bit on the second day, which is a bonus!
Refrigerator Storage: For longer storage, or if your kitchen is on the warmer side, you can store the zucchini bread in the refrigerator for up to a week. Again, wrap it tightly in plastic wrap or place it in an airtight container. This is especially good if you’ve used a cream cheese glaze, which needs to be refrigerated. Just remember to bring it back to room temperature before serving for the best texture and flavor.
Freezer Instructions: This zucchini bread freezes beautifully! It’s a lifesaver on busy nights when you crave something sweet but don’t have time to bake a whole cake. I like to slice the cooled loaf first, then wrap individual slices tightly in plastic wrap, and then place them in a freezer-safe bag or container. This way, you can grab just one slice whenever a craving hits. It will last in the freezer for up to 3 months. To thaw, just let a slice sit at room temperature for an hour or so, or pop it in the microwave for 30-60 seconds until warm.
Glaze Timing Advice: If you plan on freezing the zucchini bread, I recommend freezing it *without* the glaze. You can then whip up a fresh batch of glaze and drizzle it over the thawed loaf just before serving. This ensures the glaze has the best consistency and appearance. If you’ve already glazed it, no worries, it will still freeze, but the glaze might become a little watery or sticky upon thawing.
Frequently Asked Questions
Final Thoughts
And there you have it, my friends – our family’s beloved chocolate swirl zucchini bread. It’s truly a labor of love that has brought so much joy and deliciousness to our kitchen over the years. This recipe isn’t just about baking; it’s about creating memories, filling your home with incredible aromas, and sharing something truly special with the people you love. The moist crumb, the warm spices, and that delightful ribbon of chocolate make it simply irresistible. If you’ve enjoyed baking this, I bet you’d also adore my Pumpkin Chocolate Chip Bread or my Classic Banana Nut Muffins – they share that same comforting quick bread vibe. I can’t wait to hear how yours turns out!
Happy baking, sweet friends! Don’t forget to leave a comment below and let me know your favorite zucchini bread memories or any creative twists you add. I love hearing from you!
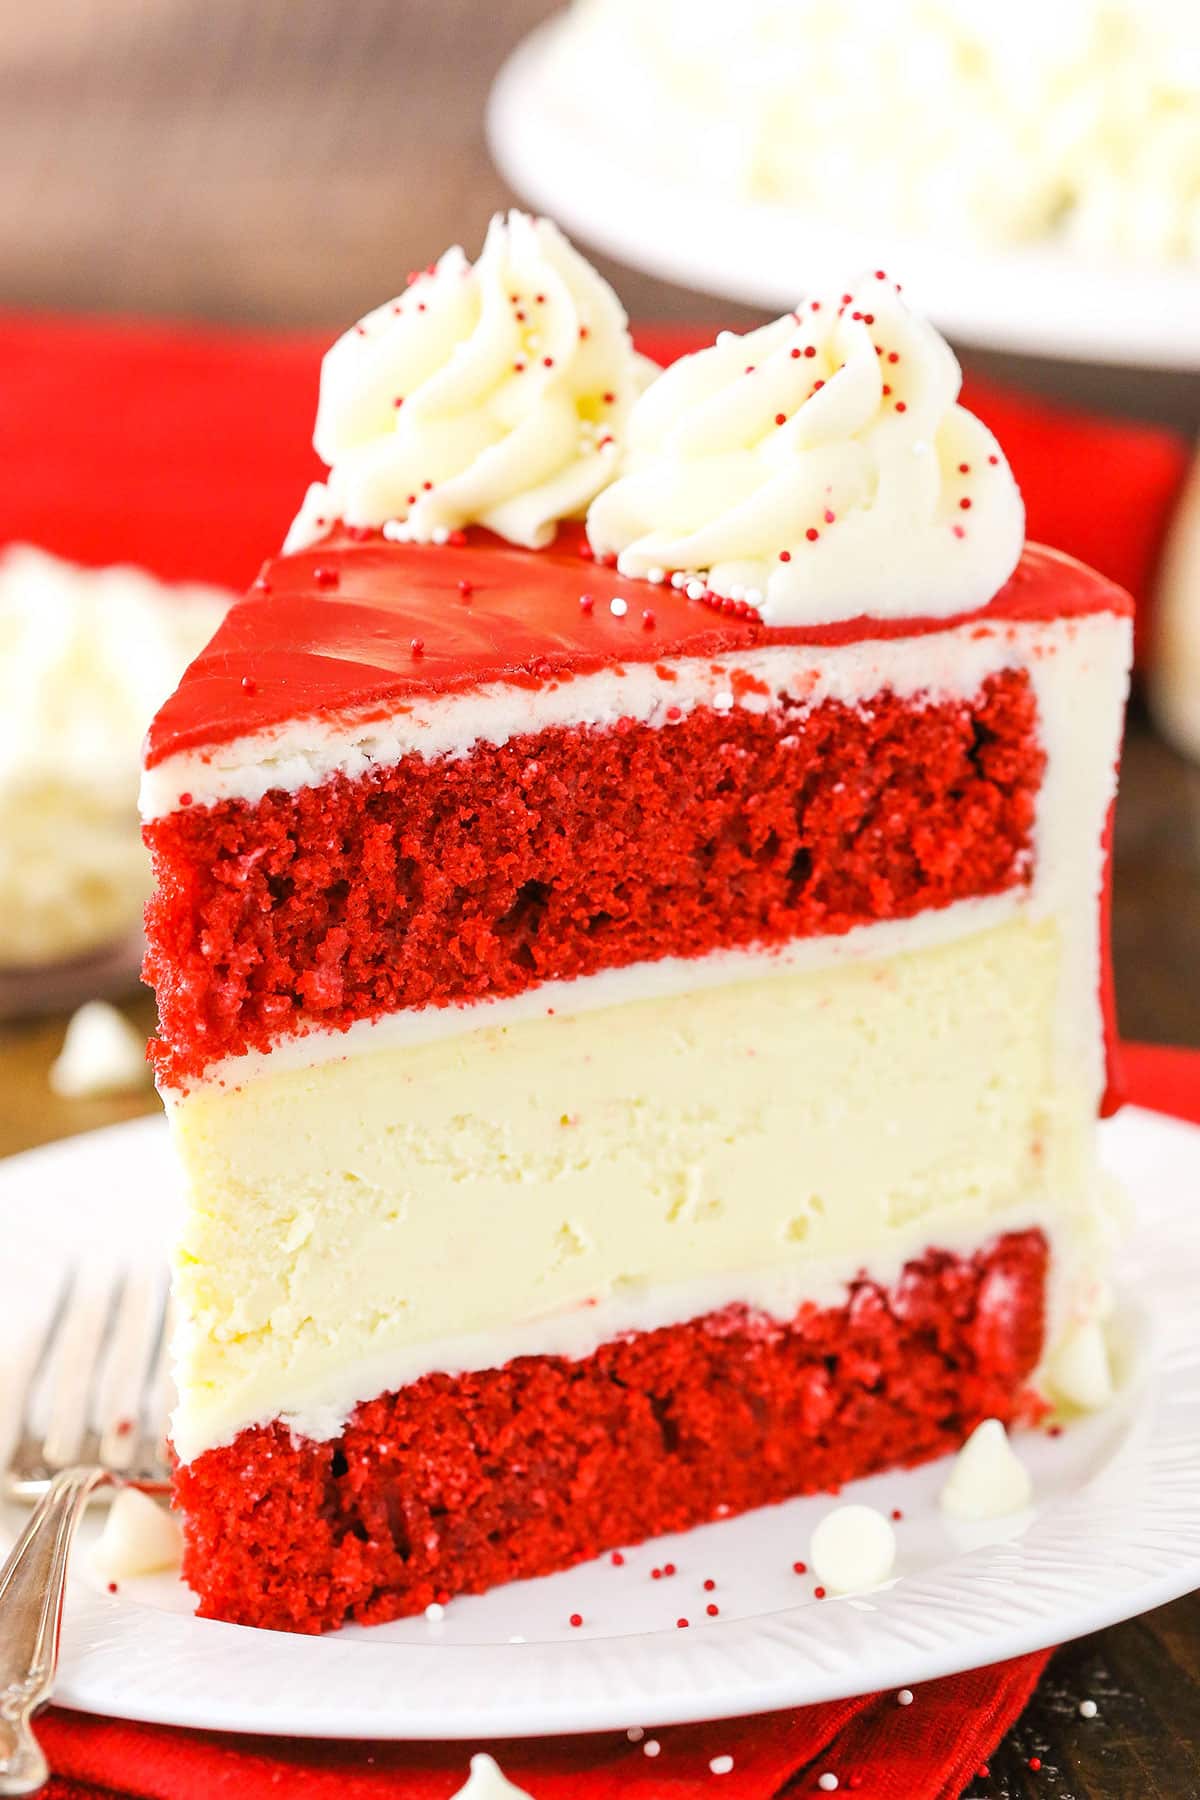
Red Velvet Cheesecake Cake
Ingredients
Method
- Preheat oven to 300°F. Line a 9-inch cake pan with aluminum foil and set aside.
- In a large bowl, beat cream cheese, sugar, and flour until smooth.
- Add sour cream and vanilla extract, mix until combined.
- Add eggs one at a time, mixing slowly after each addition.
- Pour batter into prepared cake pan.
- Place cake pan in a larger pan with warm water about halfway up the sides. Bake for 1 hour.
- Turn off oven, leave cheesecake inside with door closed for 30 minutes.
- Open oven door slightly, leave for another 30 minutes to cool slowly.
- Remove from oven, water bath, and chill for 4-5 hours until firm.
- Preheat oven to 350°F. Line two 9-inch pans with parchment and grease sides.
- Mix dry ingredients: flour, sugar, baking soda, baking powder, cocoa, salt.
- Combine wet ingredients: buttermilk, oil, vanilla, eggs, vinegar, red food coloring.
- Add wet to dry, beat until smooth. Add hot water, mix until combined.
- Divide batter evenly between pans. Bake 23-26 minutes.
- Cool cakes for 3-5 minutes, then transfer to racks to cool completely.
- Beat cream cheese and butter until smooth.
- Gradually add half of the powdered sugar, beat smooth. Mix in vanilla.
- Add remaining powdered sugar, beat to smooth. Adjust consistency as needed.
- Trim domes from cakes, break into crumbs for decoration.
- Place first cake layer on serving plate, spread 1 cup frosting.
- Use foil to lift cheesecake from pan onto cake layer.
- Spread another cup of frosting, add second cake layer, and frost outside.
- Press crumbs into sides, decorate top with leftover crumbs.
- Store in refrigerator until ready to serve, best within 3-4 days.