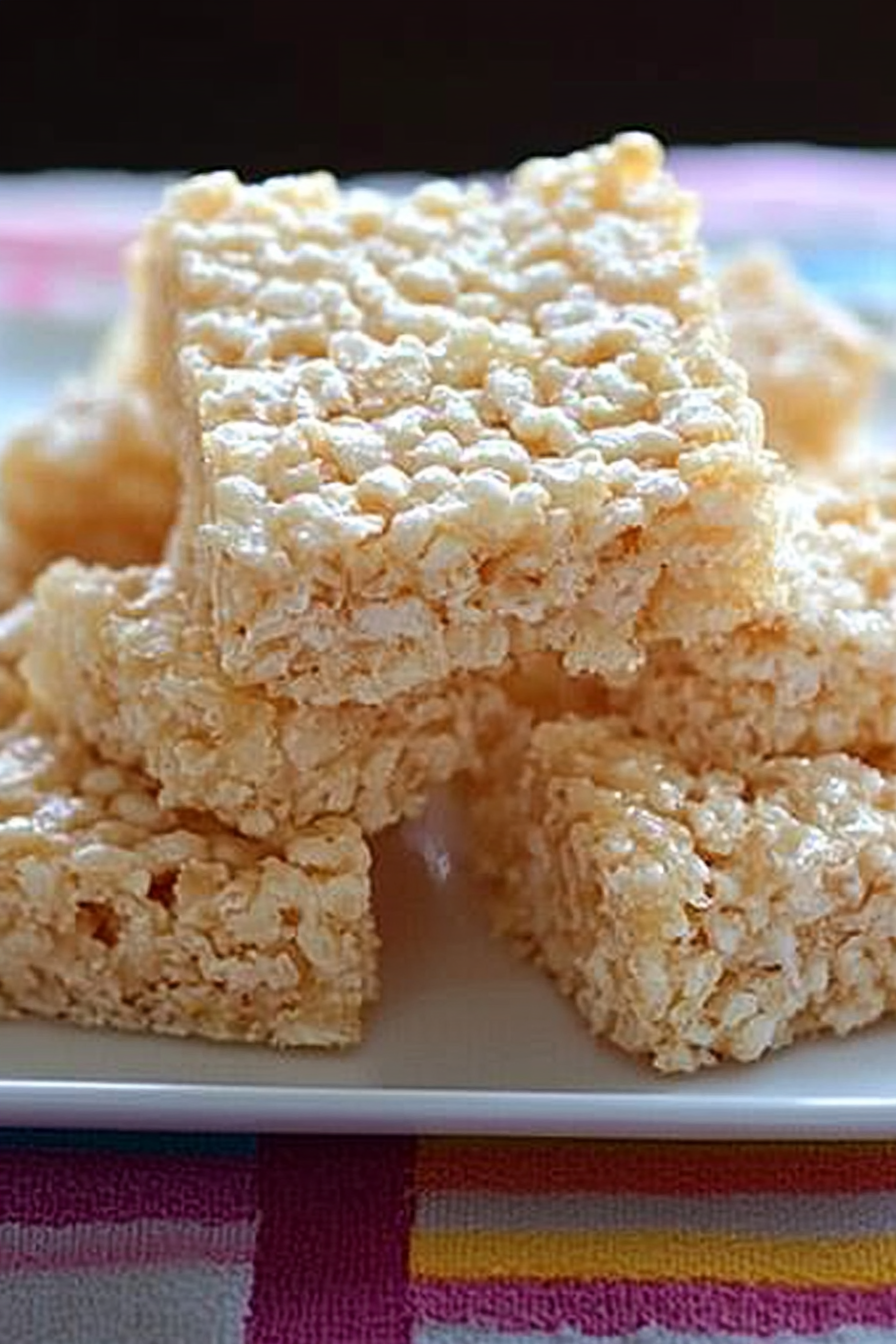
Easy Light Rice Krispy Treats Recipe
You know that feeling when you’ve got a bunch of zucchini sitting on your counter and you’re wondering what to do with it? Or maybe you’ve got ripe bananas that are practically begging to be baked into something delicious? Well, let me tell you, this zucchini banana bread with a fun, marbled swirl has turned into my family’s favorite way to use up those extra goodies. It’s the kind of recipe that feels like a warm hug — moist, flavorful, and just the right amount of sweet. Plus, I always do this when I want to bake something that’s a little special but doesn’t take hours in the kitchen. My kids actually ask for this all the time, and I love that it’s packed with goodness, sneaking in veggies without sacrificing flavor. Best part? It’s so easy to throw together on a lazy Sunday or when friends drop by unexpectedly. Trust me on this one: once you make it, it’s gonna become a staple in your house too.
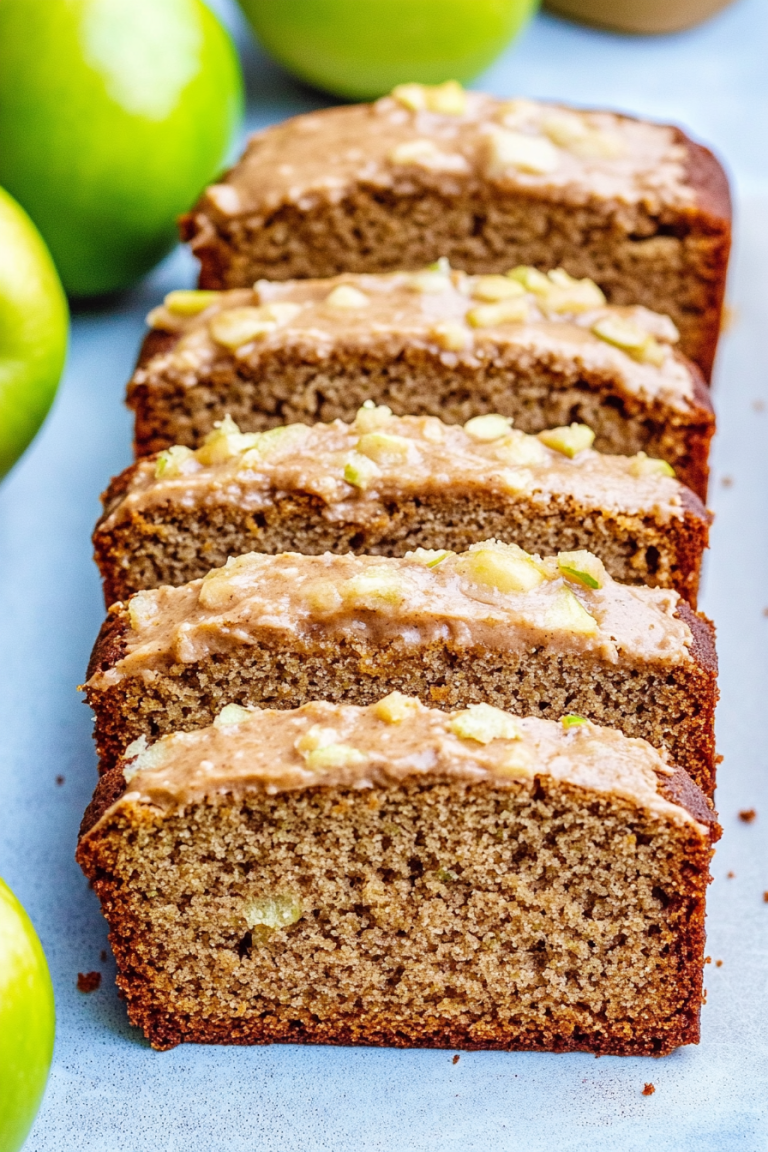
What is Zucchini Banana Bread?
Think of zucchini banana bread as that cozy, adaptable loaf that’s secretly healthy but tastes downright indulgent. It’s essentially a moist, tender bread made from mashed bananas and grated zucchini, giving it a subtle sweetness and a little extra moisture. The name might sound fancy, but it’s really just a mash-up of two delicious, seasonal ingredients — zucchinis and bananas — that come together in perfect harmony. The “bread” part is like a gentle reminder that this is a snack you can have for breakfast, brunch, or even dessert, especially when topped with a drizzle of glaze or a dusting of powdered sugar. I love that it’s versatile because you can tweak the spices, add-ins, or even swap in different fillings. Think of it as the kind of recipe that’s cozy enough for lazy mornings, yet elegant enough to impress friends at brunch. And honestly, it’s a great way to sneak those veggies into your kids’ diets without any fuss.
Why you’ll love this recipe?
This zucchini banana bread has been a staple in my kitchen for a bunch of reasons — and I bet it’ll become yours, too. First off, the flavor. It’s rich, subtly sweet, and packed with ripe banana goodness, complemented by the mild, fresh taste of zucchini. What I love most about this is how incredibly moist and tender it stays, thanks to the zucchini’s natural moisture and the bananas’ banana-y hug. Plus, it’s surprisingly simple to make. No complicated techniques or fancy equipment needed; just a bowl, a whisk, and a loaf pan actually do the trick. Budget-wise, it’s great — most of these ingredients are staples I keep around anyway. And because you can easily tweak the flavor and add extras like nuts, chocolate chips, or dried fruit, it’s infinitely adaptable. I’ve tested this with almond flour, coconut sugar, and even mashed sweet potato, and it always stays delicious. It’s perfect for breakfast, a cozy snack, or a sweet little treat to break up your day. Honestly, what I love most about this is how it makes my house smell — like heaven in the oven, and instant comfort in every bite.
How do you make Zucchini Banana Bread?
Quick Overview
This zucchini banana bread is a foolproof, one-bowl wonder that comes together quickly. You start by shredding zucchini and mashing ripe bananas, then whisk everything together with a few simple spices. The fun part? Swirling a layer of cinnamon-spiced batter with a sweet, banana-filled mixture creates a beautiful marbled effect. After layering, just bake until a golden crust forms and a toothpick comes out clean. It’s like baking a cozy hug — moist inside with a delicate, slightly caramelized top. The entire process takes about an hour, and trust me, it’s worth every minute. The best part is how forgiving it is — no overmixing, no fancy techniques. Just good, honest baking that’ll impress everyone at your table.
Ingredients
For the Main Batter:
– 2 cups all-purpose flour (or a blend of your choice)
– 1 teaspoon baking soda
– 1 teaspoon baking powder
– 1 teaspoon ground cinnamon
– ½ teaspoon salt
– ½ cup granulated sugar (or maple syrup for a richer touch)
– ⅓ cup vegetable or melted coconut oil
– 3 large eggs
– 1 teaspoon vanilla extract
– 2 ripe bananas, mashed
– 1 cup grated zucchini (squeeze out excess moisture)
For the Filling:
– ½ cup brown sugar
– 1 teaspoon cinnamon
– 1 ripe banana, mashed
– Optional: ¼ cup chopped nuts or chocolate chips for extra flair
For the Glaze:
– ½ cup powdered sugar
– 1 tablespoon milk or cream
– ½ teaspoon vanilla (optional)
– Tips: Mix until silky smooth. Want more flavor? Add a dash of lemon juice or a sprinkle of nutmeg for a different twist.
Step-by-Step Instructions
Step 1: Preheat & Prep Pan
Turn your oven to 350°F (180°C). Grease a standard loaf pan with butter or non-stick spray, and a quick sprinkle of flour or parchment paper makes everything come out neat and easy. While it’s heating up, start grating the zucchini and mashing those ripe bananas — I always do this first so I’m ready to go when I start mixing.
Step 2: Mix Dry Ingredients
In a large bowl, whisk together the flour, baking soda, baking powder, cinnamon, and salt. This helps keep the leavening even and prevents clumps. I’ve made the mistake of skipping this step, and trust me — lumps of cinnamon are not the vibe.
Step 3: Mix Wet Ingredients
In a separate bowl, mash your bananas until smooth. Whisk in the sugar, eggs, oil, and vanilla until well combined. The smell alone of the bananas and cinnamon mixing together — buddy, it’s magic already.
Step 4: Combine
Pour the wet mixture into the dry ingredients and gently stir until just combined. Be careful not to overmix; a few lumps are okay. Overmixing can make the bread dense instead of tender, and nobody wants that.
Step 5: Prepare Filling
In a small bowl, mix the mashed banana with brown sugar and cinnamon. If you’re feeling fancy, toss in some chopped nuts or chocolate chips. The filling’s what gives the swirl that visual pop and an extra hint of sweetness.
Step 6: Layer & Swirl
Pour half the batter into your loaf pan. Spoon dollops of the banana filling on top, then pour the rest of the batter over. Use a toothpick or a skewer to swirl the filling gently into the batter — creating that beautiful marbled effect. This part never gets old for me; it’s like creating a mini piece of art that smells divine.
Step 7: Bake
Pop it into the oven for about 50-60 minutes. Start checking around 50 minutes: insert a toothpick in the center, and if it comes out clean, you’re good. Sometimes my oven runs hot, so I keep a close eye on it, especially if I want the top to stay tender but not too dark.
Step 8: Cool & Glaze
Let the bread cool in the pan for 10 minutes, then transfer to a wire rack. Once cooled slightly, drizzle with your prepared glaze. I love the look of a shiny glaze dripping down the sides — makes it irresistibly inviting.
Step 9: Slice & Serve
Slice with a serrated knife for neat edges. Serve warm or at room temperature — honestly, it’s delicious both ways. If I’m feeling fancy, I add a dusting of powdered sugar on top or a splash of fresh berries for contrast. Perfect with a cup of coffee or tea, I swear.
What to Serve It With
This bread is pretty versatile. For breakfast, I love serving it with a strong cup of coffee and a dollop of yogurt or a smear of butter. It’s also fantastic when sliced thin and stacked for a brunch buffet, paired with fresh fruit and maybe some sparkling water with lemon. If you’re craving something sweet after dinner, a little dollop of whipped cream or a scoop of vanilla ice cream makes it next level. And on cozy afternoons, I cut thick slices, warm them slightly, and serve with a mug of hot cocoa — blissful! My kids especially love it for their snack time, and I often stash a few slices in the freezer for quick breakfasts on hectic mornings. Honestly, every time I bring out this loaf, the house fills with the smell of baked happiness, and everyone comes running — it’s that good.
Top Tips for Perfecting Your Zucchini Banana Bread
Over the years, I’ve learned a few tricks to make this bread even better. First off, when grating zucchini, always squeeze out as much excess moisture as you can; soggy bread is no fun. I use a clean dish towel or cheesecloth to wring out the moisture — trust me, this tiny step makes a huge difference. Another tip is to ripen your bananas well in advance — the darker, the better for a rich, sweet flavor. When mixing the batter, I avoid overdoing it because I want that tender crumb — overmixing can lead to a dense loaf. Swirling the filling is my favorite part; I try to create a pretty, marble effect but still keep the layers distinct. If you want more flavor, toss in a teaspoon of vanilla extract or a pinch of nutmeg. For substitutions, I’ve tested almond flour in place of all-purpose, and it turned out lovely — just remember, gluten-free flours sometimes need a touch more liquid. Baking at the right temperature is key — too hot, and the top burns before the middle cooks. Always do the toothpick test, and if it’s a minute or two away from done, I tent the loaf with foil to prevent overbaking. For the glaze, I’ve experimented with lemon juice, which adds a zing, or maple syrup for extra richness. Personal favorite? I like my glaze a little thicker, so I start with less milk and add until I get that perfect drizzle consistency. These little tips keep my baking consistently delicious and make me look like I know what I’m doing, even if I’m winging it half the time.
Storing and Reheating Tips
This bread stays fresh for a few days, especially if stored properly. I usually wrap it tightly in plastic wrap or keep it in an airtight container — it’s best eaten within 3 days for maximum moisture and flavor. If you want to keep it longer, refrigerate for up to a week, but I suggest bringing slices back to room temperature or giving them a quick warm-up in the microwave. Freezing is a game-changer: wrap individual slices in foil or plastic wrap, then store in a zip-top bag — good for up to 3 months. When you’re ready to enjoy, just thaw at room temperature or warm in the microwave for 15 seconds. The flavor and texture stay pretty perfect that way. If you’ve added glaze, wait until the bread is fully thawed before drizzling again — it keeps everything looking shiny and fresh. Honestly, this bread re-heats amazingly well, and it’s one of those treats I love to whip out for an easy breakfast or afternoon snack. Just a quick zap, and it’s like the first bake all over again.
Frequently Asked Questions
Final Thoughts
If you’re searching for that one loaf that’s moist, flavorful, and endlessly customizable, this zucchini banana bread is it. It’s a recipe I’ve made countless times — each batch better than the last — and I love how it brings a little bit of comfort to any day. The smell alone will brighten your kitchen, and the flavor, well, it speaks for itself. I’ve served this at brunches, given it as a gift, and even kept slices hidden in the freezer for those days when only something homey will do. My hope is that you’ll give it a try and make it your own — perhaps add a handful of chocolate chips, switch up the spices, or even experiment with other fillings. Either way, I promise it’s a win. Happy baking, and I can’t wait to hear how yours turns out! Don’t forget to let me know in the comments or share your variations — I love hearing your stories in the kitchen.
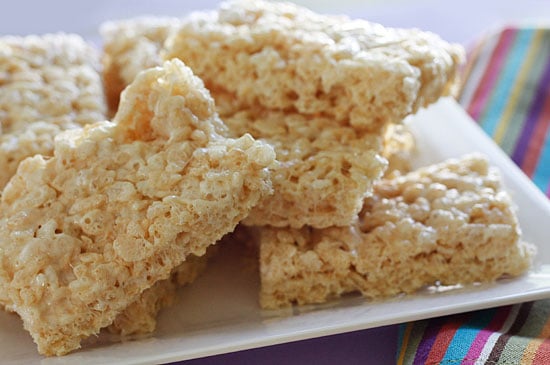
Rice Krispy Treats
Ingredients
Method
- Spray a 9x12-inch pan with cooking spray and set aside.
- Heat a large saucepan on low heat.
- Melt the light butter spread, ensuring to coat the bottom of the pot to prevent sticking.
- Add marshmallows and melt on low flame, stirring constantly until completely melted.
- Remove from heat and add Rice Krispies cereal. Stir until evenly coated and combined quickly.
- Transfer the mixture into the prepared pan. Press down evenly with wax paper.
- Allow to cool and set before cutting into 16 squares.