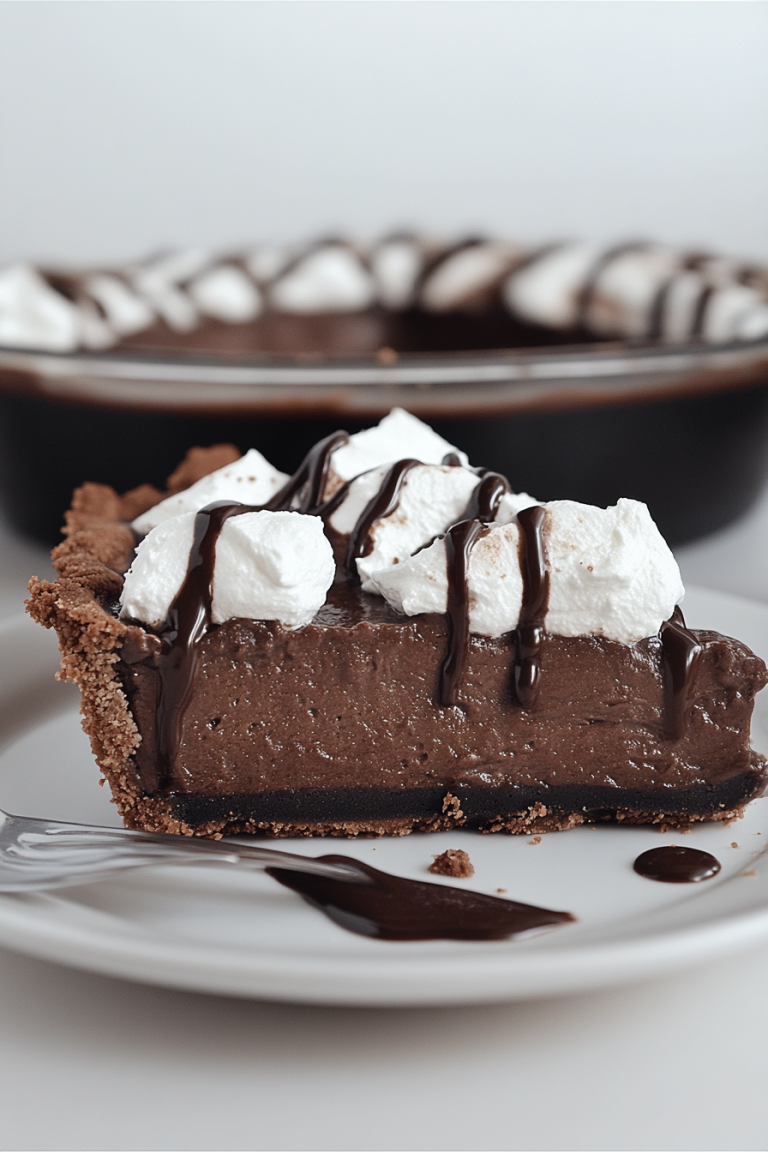
Cozy Chocolate Orbs How to Make Them
There’s something so comforting about pulling a warm slice of this zucchini and vanilla swirl loaf out of the oven, especially on those busy weeknights when I need a little sweet pick-me-up. I still remember the first time I made it — my kids were sprawled on the kitchen floor, fighting over the last crumb, and I was just so proud that I got a dessert that’s both wholesome and indulgent all in one. It’s honestly become a family favorite, kind of like those classic banana bread recipes but with a lovely surprise swirl of vanilla that makes it feel a little fancy. The smell alone — warm, inviting, with just a hint of vanilla — can practically bring everyone to the kitchen. And the best part? It’s super easy to make, even on nights when I’m running around like a headless chicken. Whether you’re after a sweet breakfast, a cozy snack, or a dessert to impress, this one’s a lifesaver on busy nights. Trust me, once you try it, it’ll be part of your regular rotation.
What is the difference between Zucchini and Vanilla Swirl Loaf?
Think of this zucchini and vanilla swirl loaf as a mash-up of a quick bread and a delightfully gentle cake. It’s essentially a spiced, moist bread, packed with grated zucchini that keeps it tender, with a luscious vanilla ribbon swirling through every slice. The name might sound fancy, but honestly, it’s just a simple, homey treat—kind of like a dressed-up banana bread but with a fresh twist. The zucchini adds moisture without any overpowering veggie flavor, making this loaf perfect for sneaking in some greens if you’re into that. The vanilla swirl isn’t just for show — it gives each bite a beautiful aromatic sweetness that balances out the more earthy notes of the zucchini. I’ve tested this countless times with different flour blends, and honestly, it’s one of those recipes that just works every time.
Why you’ll love this recipe?
What I love most about this zucchini and vanilla swirl loaf is how versatile and forgiving it is. First off, the flavor — that perfect vanilla with just a hint of cinnamon and nutmeg that makes your kitchen smell like heaven. Second, it’s super simple to whip up, even if you’re not a seasoned baker. I always do this when I need a last-minute dessert or a sweet snack for the kids’ lunchboxes; it’s honestly quicker than running to the store. Plus, it’s budget-friendly — you probably already have all the ingredients tucked away in your pantry and fridge. The beauty of this loaf is that it’s adaptable, too. Feel free to swap in different spices or add nuts or chocolate chips — whatever makes your heart happy. It’s also perfect for sharing, because it slices beautifully and stays fresh for days, making it an excellent make-ahead treat. And what’s more, I’ve learned that the zucchini keeps it so moist that even a couple of days later, it feels just baked. My kids ask for this all the time — they love that swirl of vanilla, and I love that I can sneak in a veggie without any fuss. Honestly, it’s become a bit of a family tradition to bake this together on lazy weekends, and I think that’s what makes it truly special.
How do I make Zucchini and Vanilla Swirl Loaf?
Quick Overview
This loaf is all about simple, straightforward ingredients mixed together in a way that highlights the texture and flavor. First, you grate the zucchini and squeeze out some excess moisture — don’t skip this step, or your batter might turn out too wet. Then, you prepare your dry ingredients: flour, spices, baking powder, and a pinch of salt. In a separate bowl, whisk together the wet ingredients — eggs, oil, vanilla, and sugar — until they’re beautifully combined. Fold everything together gently, just until combined, then pour half of the batter into your prepared loaf pan. Swirl in the vanilla filling mixture before topping it with the remaining batter. A quick swirl with a skewer or knife makes that gorgeous pattern you see. Into the oven it goes — and believe me, the smell that starts to fill your house is enough to make anyone hang around the kitchen. Once baked and cooled a bit, you have a divine, moist loaf that’s just begging to be sliced and enjoyed.
Ingredients
For the Main Batter:
– 2 cups grated zucchini (about 2 medium zucchinis, grated and excess moisture squeezed out)
– 1 1/2 cups all-purpose flour (or a mix of whole wheat and white for extra fiber)
– 1 teaspoon baking powder
– 1/2 teaspoon baking soda
– 1/2 teaspoon ground cinnamon
– 1/4 teaspoon ground nutmeg
– Pinch of salt
– 3/4 cup granulated sugar
– 2 large eggs
– 1/2 cup vegetable oil or melted coconut oil
– 1 tablespoon pure vanilla extract
For the Filling — Vanilla Swirl:
– 1/4 cup softened unsalted butter or neutral oil
– 1/4 cup granulated sugar
– 2 teaspoons vanilla extract
– 1 tablespoon all-purpose flour (to give it some body)
*Optional: a pinch of salt or cinnamon for extra depth*
For the Glaze (Optional):
– 1/2 cup powdered sugar
– 1-2 teaspoons vanilla or lemon juice
– Milk or cream to adjust consistency
Step-by-Step Instructions
Step 1: Preheat & Prep Pan
I always start by heating my oven to 350°F (175°C). Then, I line my loaf pan with parchment paper or give it a good greasing to prevent sticking. If you want a smoother crust, just a light spray with baking spray does the trick. Having your ingredients ready makes the whole process much smoother — I set everything out and get my grater and mixing bowls nearby. Grating the zucchini is simple but be sure to squeeze out excess moisture — I usually wrap it in a clean kitchen towel and give it a good squeeze. That way, when you mix it into the batter, your bread isn’t going to turn into a soggy mess.
Step 2: Mix Dry Ingredients
In a large bowl, whisk together the flour, baking powder, baking soda, cinnamon, nutmeg, and salt. This ensures your leavening is evenly distributed. I’ve made the mistake of only mixing the dry ingredients in one corner once — trust me, that’s a quick way to get uneven rises or dense spots. Whisking everything together really pays off with a tender, evenly textured loaf.
Step 3: Mix Wet Ingredients
In a separate bowl, beat the eggs, add the oil, vanilla, and sugar, and whisk until smooth and slightly frothy — about a minute. I do this with a whisk instead of a spoon because it helps dissolve the sugar and gives a lighter batter. I’ve tried using almond milk in place of oil, and honestly, it’s made it even creamier and lighter — so don’t be afraid to experiment!
Step 4: Combine
Pour the wet mixture into the dry ingredients and fold gently with a spatula. No overmixing! You want just combined. Overmixing can make a dense, rubbery loaf — I learned that through lots of trial and error. The batter should be thick but spreadable — think muffin batter consistency.
Step 5: Prepare Filling
In a small bowl, mash the softened butter with sugar, vanilla, and flour until you get a thick, paste-like mixture. This swirl is what makes the loaf special, adding a sweet, fragrant ribbon. You can also experiment with adding lemon zest or cinnamon here for extra flair.
Step 6: Layer & Swirl
Pour half of the batter into your prepared pan, then dollop spoonfuls of the vanilla filling across the top. Use a skewer or butter knife to gently swirl the filling through the batter — don’t overdo it, just a few gentle swirls make those stunning ribbons. Then add the remaining batter on top and give it one last swirl to blend everything beautifully. The visual pattern will surprise you when you slice it later!
Step 7: Bake
Pop it into the oven and bake for about 50-60 minutes. Every oven is different, so start checking around 50 minutes by inserting a toothpick into the center — if it comes out clean, you’re good. If not, give it a few more minutes. The house will fill with that cozy vanilla-spice aroma, which is honestly heaven. Carefully transfer the loaf to a wire rack and let it cool for at least 20 minutes before glazing or slicing.
Step 8: Cool & Glaze
Cooling is important — if you try to slice it while it’s hot, it might crumble. Once at room temperature, mix your glaze ingredients and drizzle generously over the loaf. The glaze is optional but absolutely worth it — it adds a shiny sweetness and a beautiful finishing touch.
Step 9: Slice & Serve
Use a serrated knife for clean slices, and serve at room temperature or slightly warmed. I love it with a cup of black coffee or a glass of cold milk. It’s perfect for breakfast, a snack, or even as a simple dessert — nobody ever complains! Leftovers keep well wrapped tightly for a couple of days, but honestly, this loaf disappears so fast at my house I rarely get to test that out.
What to Serve It With
This zucchini and vanilla swirl loaf is a chameleon — it fits right into so many occasions. For breakfast, pair it with a good dark roast coffee or a glass of cold milk for the kids. I love slicing it thick and warming it up slightly, then slathering a bit of butter or cream cheese on top. It’s seriously delicious like that!
At brunch, it pairs beautifully with fresh fruit or a dollop of yogurt — maybe topped with a drizzle of honey or a sprinkle of chopped nuts for that extra crunch. It’s quite honestly a showstopper if you serve it as part of a relaxed weekend spread.
As a dessert, I sometimes brush the slices with a little more vanilla glaze or dust them with powdered sugar. The lovely vanilla ribbons make it look fancy enough for guests, but honestly, my kids ask for seconds no matter what.
And if you’re craving a cozy snack, toast a slice and spread with almond butter or jam. I call this my “secret weapon” because it’s sweet enough for a treat but wholesome enough to feel good about. Plus, leftovers are perfect for breakfast the next day — just reheat a slice in the microwave for about 20 seconds and enjoy the smell of that vanilla warmth.
Top Tips for Perfecting Your Zucchini and Vanilla Swirl Loaf
Over the years, I’ve picked up some tricks that make this recipe turn out just right every single time. Here are some of my top tips:
- Zucchini Prep: Always squeeze out that excess moisture. If you skip this, your batter will be too wet, and your loaf might sink or turn out dense. I like to grate and then press the zucchini in a clean kitchen towel and give it a good squeeze. Trust me, it makes all the difference.
- Mixing Advice: Be gentle when folding the wet and dry ingredients. Overmixing is the enemy — it toughens the gluten and results in a dense texture. Stopping as soon as everything is just combined will give you a tender crumb.
- Swirl Customization: For a more dramatic swirl, layer the batter and filling in three separate steps, then use a chopstick or skewer to create a marbled effect. You can also add food coloring or cocoa powder to the vanilla filling for fun variations.
- Ingredient Swaps: Want to swap in whole wheat flour? Use it in a 1:1 ratio, but expect a slightly denser texture. Or, try dropping in some chopped nuts, chocolate chips, or dried fruit — I’ve done all of these and loved the results.
- Baking Tips: Every oven heats a little differently. If your loaf starts browning too quickly, cover the top loosely with foil for the last 10 minutes. And don’t forget to do the toothpick test — it’s the best way to tell when it’s just perfectly baked.
- Glaze Variations: For a citrus twist, add lemon zest or orange extract into the glaze. For richer flavor, mix in a bit of cream cheese or mascarpone into the glaze for a tangy finish. These little enhancements can elevate the loaf from homemade to bakery-quality.
Honestly, it took a handful of tries to perfect the swirl pattern and get the moistness just right. Mixing techniques and ingredient choices changed every time, and each mistake taught me what to avoid next time. The secret? Patience and knowing that even if it’s not perfect, it’ll still taste amazing — and that’s what really matters.
Storing and Reheating Tips
This loaf is best enjoyed within a couple of days, but if you need to store it longer, here’s what I do:
- Room Temperature: Wrap it tightly in plastic wrap or store in an airtight container. It’s good for about 2 days — after that, the moisture starts to fade, so I prefer refrigeration or freezing for longer storage.
- Refrigerator Storage: Keep it in a sturdy, airtight container or wrapped well in plastic. It stays fresh for about 4-5 days in the fridge, and honestly, it tastes even better after a quick toast.
- Freezer Instructions: Slice the loaf beforehand, wrap each slice tightly in plastic or foil, then toss into a freezer-safe bag. It’ll keep well for up to 3 months. When you’re ready, just thaw at room temp or reheat for 20 seconds in the microwave. The zucchini helps keep it moist, so don’t overheat or it can dry out.
- Glaze Timing: If you’re making glaze, I recommend adding it only after the loaf has cooled completely. That way, it stays gooey and shiny, instead of absorbing into the bread and losing its charm.
This method ensures you’ll have fresh-tasting slices no matter when you want to indulge — I’ve tested all this, and it works every time.
Frequently Asked Questions
Final Thoughts
There’s something inherently cozy about baking this zucchini and vanilla swirl loaf that turns an ordinary day into a little celebration. The combination of tender zucchini and sweet vanilla ribbons creates a perfect harmony of flavors and textures that never fail to bring smiles. I love how adaptable it is — top it with nuts, dust it with powdered sugar, or keep it simple — it’s always reassuringly delicious. Over the years, this recipe has become my go-to for last-minute guests, weekend brunches, or just when I’m craving something homemade that feels special but isn’t fussy. I hope you try it — I’d love to hear how you customize it or what variations you come up with. Happy baking, and don’t forget to share a slice (or two) with someone you love — that’s what makes it truly “human.” And if you do try it, come back and tell me — I can’t wait to hear how yours turns out!

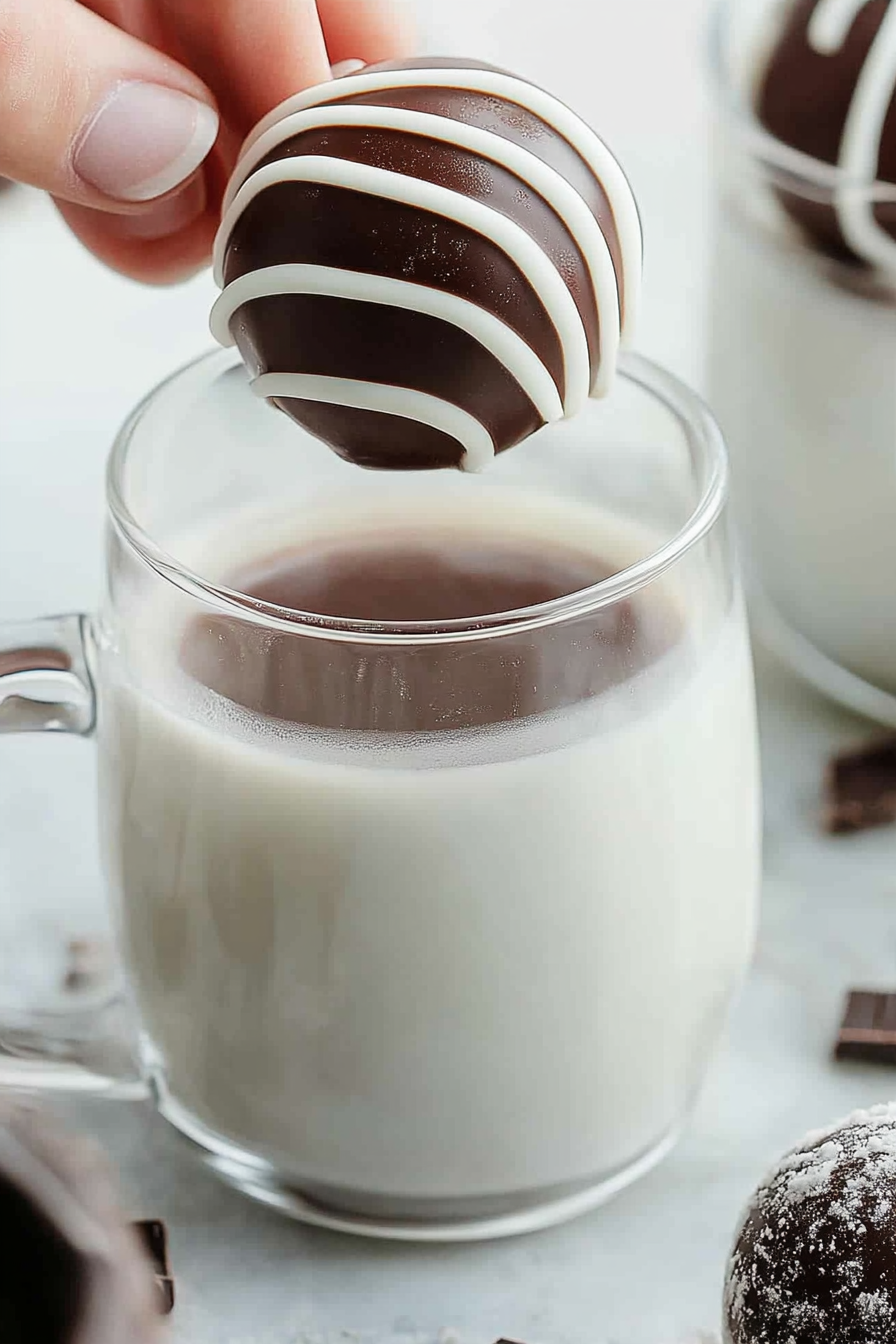
hot chocolate bombs
Ingredients
Method
- Chop the semi-sweet chocolate into fine pieces for even melting.
- Place 5 ounces of chopped chocolate in a microwave-safe bowl. Melt in 15-second intervals, stirring in between, until smooth. Use a thermometer to ensure temperature is between 100-113°F, not exceeding 120°F.
- Add remaining chocolate pieces and stir until mostly melted. Cool the mixture to about 85°F.
- Microwave the chocolate again for 15 seconds to reheat to 90°F for moldability.
- Use a basting brush or spoon to coat the inside of each silicone sphere with melted chocolate, applying two thin coats.
- Scrape excess chocolate from molds and refrigerate for 3-5 minutes until set.
- Gently pop the chocolate spheres out of the molds.
- Fill one half of each sphere with 1.5 teaspoons of hot cocoa mix and some mini marshmallows.
- Heat a plate in the microwave for 1 minute. Place the open side of each sphere onto the plate for a second to melt the rim, then quickly seal the sphere halves together.
- Melt white chocolate in a piping bag or Ziploc, then drizzle over the assembled hot chocolate bombs as decoration.