How to Store Garlic for Winter
You know those recipes that just feel like a warm hug on a plate? The ones that smell like childhood and make your kitchen feel instantly cozier? Well, this Zucchini Bread with Cream Cheese Swirl is exactly that for me. It’s the kind of treat I pull out when I need a little comfort, when friends pop over unexpectedly, or when my kids are begging for something sweet but I’m just too tired to whip up a whole cake. Seriously, this loaf disappears in minutes at my house, and it’s become my go-to for a reason. It’s like a beloved cousin to classic zucchini bread, but with this tangy, sweet cream cheese swirl running through it that just takes it to a whole other level. If you’ve ever made a moist, delicious zucchini bread before, this one takes those familiar flavors and adds a delightful surprise!
What Is Zucchini Bread with Cream Cheese Swirl?
Okay, so at its heart, this is a moist, tender zucchini bread. Think of that classic quick bread – the one packed with shredded zucchini that somehow makes it impossibly tender and keeps it from drying out. But we’re jazzing it up! The “swirl” part comes from a simple, luscious mixture of cream cheese, a touch of sugar, and maybe a hint of vanilla, which gets swirled into the zucchini bread batter before baking. It bakes up into these beautiful, creamy ribbons throughout the loaf. It’s not quite a cheesecake, and it’s not quite just zucchini bread – it’s this glorious in-between that hits all the right notes. The name says it all, really: tender zucchini bread, studded with pockets of creamy, slightly tangy, sweet goodness. It’s pure comfort food with a little bit of elegance.
Why you’ll love this recipe
Honestly, where do I even start with why I adore this recipe? First off, the FLAVOR. The zucchini itself is so mild you’d never know it’s there, but it contributes to this incredible moisture that keeps the bread tender for days. Then you have the sweet, slightly tangy cream cheese swirl. It’s like a little surprise burst of deliciousness in every bite. It balances the sweetness of the bread perfectly. And speaking of SIMPLICITY, this is a lifesaver on busy weeknights or lazy weekend mornings. You just whisk and fold, and it’s pretty forgiving. No fancy techniques required! Plus, it’s incredibly COST-EFFECTIVE. Zucchini is often abundant (especially if you have a garden!) and the other ingredients are pantry staples. You can whip this up without breaking the bank. The VERSATILITY is another huge plus. I’ll get to serving suggestions later, but honestly, it’s good warm with coffee, cold as a snack, or even jazzed up for dessert. What I love most about this is that it feels special without being fussy. It’s the perfect balance of comforting and exciting, and it always brings smiles to faces. It’s way better than just a plain zucchini bread, and honestly, I’ve found it’s a crowd-pleaser even for folks who might be a little hesitant about “vegetables” in their sweets. My neighbor tried it and said it was the best zucchini bread she’d ever had!
How to Make Zucchini Bread with Cream Cheese Swirl
Quick Overview
This recipe is surprisingly straightforward! You’ll basically mix your dry ingredients, whisk together your wet ingredients, combine them gently, and then swirl in the creamy cream cheese mixture before baking it to golden perfection. The magic happens in how the cream cheese bakes into those delicious ribbons. It’s a one-bowl wonder for the batter, and the filling is just as easy. You can totally do this, even if you’re not a seasoned baker!
Ingredients
For the Main Batter:
All-Purpose Flour: About 2 cups. I usually just grab my trusty bag of King Arthur’s, but any good quality all-purpose will do. It’s the backbone of the bread! Make sure to spoon it into your measuring cup and level it off, rather than scooping directly from the bag, to avoid packing too much in. Too much flour can make it dense.
Granulated Sugar: 1 cup. This gives us our sweetness. I’ve experimented with cutting back a *tiny* bit, but this amount really ensures a lovely tender crumb.
Baking Soda: 1 teaspoon. This is crucial for that lovely rise and tender texture.
Baking Powder: 1/2 teaspoon. Just a little extra lift never hurt anyone, right?
Salt: 1/2 teaspoon. This is key for balancing out the sweetness and bringing out all the other flavors. Don’t skip it!
Ground Cinnamon: 1 teaspoon. This adds such a warm, comforting spice note. It’s like a hug in a spice jar.
Large Eggs: 2. I always use large eggs for baking. They provide structure and richness. Make sure they’re at room temperature if you have a moment, it helps them incorporate better.
Vegetable Oil or Melted Unsalted Butter: 1/2 cup. I’ve used both! Oil tends to make it a bit more consistently moist, while butter adds a lovely flavor. You can use a neutral oil like canola or vegetable, or even melted coconut oil.
Vanilla Extract: 1 teaspoon. Pure vanilla extract makes a world of difference. It just enhances all the other flavors beautifully.
Shredded Zucchini: About 1.5 to 2 cups, packed. This is the star! You’ll want to use medium zucchini, and I usually don’t bother peeling them. Just wash, trim the ends, and shred using the large holes of a box grater. Squeeze out as much excess liquid as you can – this is important for texture! I’ll explain how later.
For the Cream Cheese Swirl:
Cream Cheese: 4 ounces, softened. Make sure it’s nice and soft so it mixes smoothly. I use full-fat for the best flavor and texture.
Granulated Sugar: 1/4 cup. Just enough to sweeten the cream cheese so it’s not too tart.
Large Egg Yolk: 1. This helps the swirl bind and get nice and creamy.
Vanilla Extract: 1/2 teaspoon. A little extra vanilla love here!
For the Glaze (Optional but Highly Recommended!):
Powdered Sugar: 1 cup.
Milk or Cream: 1-2 tablespoons. Start with 1 and add more to reach your desired drizzly consistency.
Vanilla Extract: 1/4 teaspoon.
Step-by-Step Instructions
Step 1: Preheat & Prep Pan
First things first, get your oven preheated to 350°F (175°C). Now, grab a standard 9×5 inch loaf pan. I like to grease it really well with butter or cooking spray, and then lightly flour it. Alternatively, you can line it with parchment paper, leaving some overhang on the sides – this makes lifting the bread out SO much easier. Trust me, it’s a game-changer for clean-up and presentation!
Step 2: Mix Dry Ingredients
In a large bowl – the one you’ll mix everything in – whisk together your flour, granulated sugar, baking soda, baking powder, salt, and cinnamon. Give it a good whisk until everything is well combined and there are no clumps of leavening agents. This ensures even distribution throughout the batter.
Step 3: Mix Wet Ingredients
In a separate medium bowl, whisk together the eggs, oil (or melted butter), vanilla extract, and the shredded zucchini. Make sure you’ve squeezed out as much water as possible from the zucchini first! This is key. I usually do this by wrapping the shredded zucchini in a clean kitchen towel or cheesecloth and wringing it out over the sink. It might seem like a lot of liquid, but you’d be surprised how much comes out!
Step 4: Combine
Now, pour the wet ingredients into the bowl with the dry ingredients. Gently fold everything together with a spatula until *just* combined. Seriously, don’t overmix! You want to see just a few streaks of flour remaining. Overmixing develops the gluten in the flour, which can lead to a tough, dense bread. We want tender and fluffy here!
Step 5: Prepare Filling
In a small bowl, beat the softened cream cheese until smooth and creamy. Then, beat in the granulated sugar, egg yolk, and vanilla extract until it’s all well combined and has a lovely smooth consistency. It should be thick but pourable.
Step 6: Layer & Swirl
Pour about half of the zucchini batter into your prepared loaf pan. Dollop about half of the cream cheese mixture over the batter. Then, spoon the remaining zucchini batter on top, followed by the rest of the cream cheese mixture. Now for the fun part! Grab a butter knife or a skewer and gently swirl the cream cheese mixture into the batter. Don’t overdo it; you want distinct swirls, not just a blended mess. Think figure-eights or gentle zig-zags. This creates those beautiful creamy pockets.
Step 7: Bake
Pop that pan into your preheated oven. Bake for about 50-65 minutes. The exact time can vary depending on your oven, so start checking around the 50-minute mark. You’ll know it’s done when a toothpick inserted into the center comes out clean (or with just a few moist crumbs attached, but no wet batter). If the top starts to get too brown before the inside is cooked, you can loosely tent it with foil.
Step 8: Cool & Glaze
Once it’s baked, let the loaf cool in the pan on a wire rack for about 10-15 minutes. This allows it to set up a bit before you try to remove it. Then, carefully invert it onto the wire rack to cool completely. If you used parchment paper, this step is a breeze! Once it’s completely cool (and I know it’s hard to wait!), you can whip up the optional glaze. Whisk together the powdered sugar, milk, and vanilla until smooth and pourable. Drizzle it over the top of the cooled loaf. Let the glaze set for about 15-20 minutes before slicing.
Step 9: Slice & Serve
Once the glaze has set (or if you skipped the glaze), use a serrated knife to slice the loaf. A good sharp knife makes clean cuts so much easier. Serve it at room temperature for the best flavor and texture. Enjoy every delicious bite!
What to Serve It With
This zucchini bread is so versatile, it’s practically its own meal! For a casual BREAKFAST, I love a thick slice warm with a cup of strong coffee. It’s satisfying and not too heavy to start the day. My kids love it with a glass of milk. For BRUNCH, I like to serve it a little more elegantly. Maybe with some fresh berries on the side, or alongside a quiche or some scrambled eggs. A drizzle of honey over the top can elevate it too. As a DESSERT, it’s fantastic on its own, but a small dollop of whipped cream or even a scoop of vanilla ice cream makes it feel extra special. For COZY SNACKS, it’s perfect for an afternoon pick-me-up with a cup of tea, or even a late-night craving buster when you want something sweet but not too decadent. My family tradition is to have a slice after Sunday dinner if there’s any leftover, it’s our little sweet ending. It also pairs surprisingly well with a tangy lemon or raspberry sorbet if you want something light and refreshing after a richer meal.
Top Tips for Perfecting Your Zucchini Bread with Cream Cheese Swirl
I’ve made this loaf more times than I can count, and I’ve definitely learned a few tricks along the way to ensure it comes out perfectly every single time.
Zucchini Prep: This is the MOST important step. You absolutely have to squeeze out the excess moisture. If you don’t, your bread will be dense and gummy. I use a clean tea towel or cheesecloth and wring it out like I mean it. If you have a really watery zucchini, you might even need to do it in batches. Grating it on the larger holes of your box grater is best, as it yields nice shreds that distribute well.
Mixing Advice: Remember, gentle is key! When you combine the wet and dry ingredients, mix until *just* combined. A few flour streaks are okay. Overmixing is the enemy of tender quick breads. I always use a spatula for this step, as it helps you feel when you’re done and prevents overworking the batter.
Swirl Customization: Don’t be afraid to get a little artistic with your swirls! You can do simple zig-zags, or if you’re feeling fancy, try a few figure-eights. The goal is to create distinct ribbons of cream cheese throughout the loaf, not to blend it in completely. You can even add a drop of food coloring to the cream cheese mixture for a fun pop of color, especially around holidays!
Ingredient Swaps: I’ve tested this with dairy-free milk in the glaze (almond milk works great!) and it was still lovely. For the oil, you can also use melted coconut oil if you like that subtle flavor, though it does change the texture slightly. I haven’t personally tried it with a sugar substitute in the batter, but I imagine you could experiment carefully with an equal amount of a 1:1 baking blend, keeping in mind it might alter moisture levels.
Baking Tips: Ovens really do vary! My oven runs a little hot, so I often find myself checking a few minutes before the recipe suggests. A wooden skewer or a toothpick is your best friend for testing doneness. If it comes out with wet batter, it needs more time. If it has a few moist crumbs, it’s perfect. If it comes out completely dry, it might be slightly overbaked, but still delicious! Placing the loaf in the center of the oven ensures even heat circulation.
Glaze Variations: While I love the classic powdered sugar glaze, you can also get creative. A simple dusting of powdered sugar is lovely if you prefer something lighter. You could also add a little lemon zest to the glaze for a citrusy kick, or even a tablespoon of cocoa powder to make it chocolatey. If you like a thicker glaze, just use less milk. For a thinner, more drippy glaze, add a tiny bit more milk. Apply it only when the bread is completely cool to prevent it from melting into a puddle.
Storing and Reheating Tips
This zucchini bread is surprisingly forgiving when it comes to storing. For the best freshness, store it at ROOM TEMPERATURE, loosely wrapped in plastic wrap or in an airtight container for up to 3 days. The moisture from the zucchini actually helps keep it from drying out. If you’re making it ahead for a party or just know you won’t get through it in 3 days, it’s perfectly fine in the REFRIGERATOR for up to a week. It will be a little firmer when cold, but it’s still delicious. Just let it come back to room temperature for about 30 minutes before serving. And yes, you can FREEZE this! I like to wrap the cooled loaf tightly in a double layer of plastic wrap, then a layer of foil. It’ll keep in the freezer for up to 2-3 months. Thaw it overnight in the refrigerator, then let it sit at room temperature for a bit before slicing. If you’re freezing it *with* the glaze on, the glaze might get a little sticky or soft upon thawing, so sometimes I prefer to glaze it after it’s thawed if I’m freezing it long-term. If you’re just freezing slices, you can thaw individual slices as needed, either at room temperature or briefly in the microwave (about 15-20 seconds on low power) if you want it warm and the glaze slightly melty.
Frequently Asked Questions
Final Thoughts
So there you have it – my absolute favorite Zucchini Bread with Cream Cheese Swirl. It’s more than just a recipe for me; it’s a source of comfort, a reliable crowd-pleaser, and a reminder of how simple ingredients can create something truly special. The texture is always perfect, the flavor combination is spot-on, and that swirl just makes it feel like a little treat. If you’re looking for a recipe that’s easy to make, incredibly forgiving, and guaranteed to get rave reviews, this is it. It’s perfect for using up those garden zucchinis too! Give it a try, and I have a feeling it might just become one of your favorites too. I can’t wait to hear how yours turns out! Let me know in the comments if you try it, or if you have any fun variations you’ve tried!
preserving garlic
Ingredients
Method
- Break apart your heads of garlic and peel the cloves. Place the peeled cloves of garlic in a large mixing bowl and fill with water. Use your fingertips to scrub any dirt off of the cloves. Once the cloves are cleaned, transfer them to a large strainer and rinse well.
- Depending on when your garlic was harvested, you might have very few brown spots on the cloves. My garlic was harvested late this year, so the ends were quite brown with some spots on the cloves as well. Use a small paring knife to trim the spots and then transfer the cleaned and trimmed cloves back to the strainer. Rinse again.
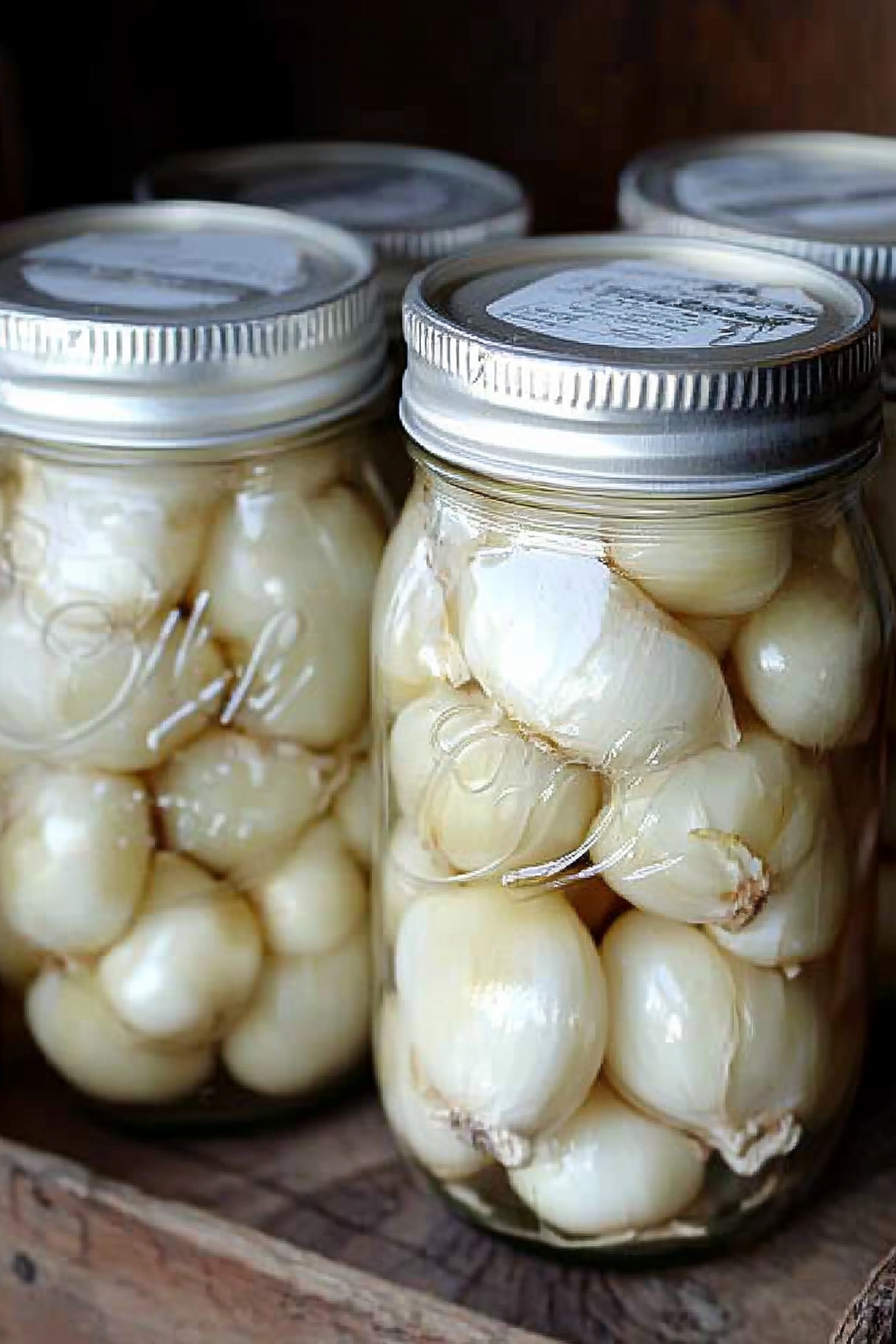
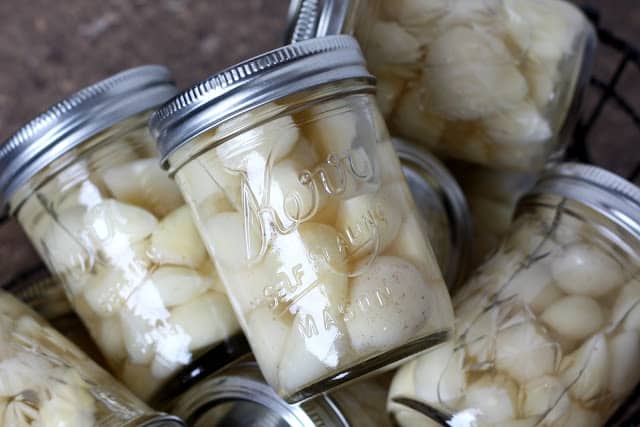
- Bring the vinegar to a boil in a large pot. For several hundred cloves of garlic, I used about 8 cups of vinegar. Place the clean garlic cloves into small jars. (I prefer to use small vs large jars to avoid contaminating a huge amount if the jar is open for too long in the refrigerator.) I filled 10 half pint jars with garlic. Once the vinegar has boiled, pour it over the garlic and screw the lids on tight.
- Let the jars come to room temperature on the counter overnight and then store in the refrigerator. This will keep in the refrigerator for up to a year. Enjoy!