Autumn Spice Muffins How to Bake Them
Oh, hey there! Come on in, pull up a chair. I’ve been *itching* to share this one with you. You know those recipes that just, well, *feel* like home? This is absolutely one of those for me. It’s my absolute favorite zucchini bread, and trust me, I’ve made a *lot* of zucchini bread in my life. It’s that perfect balance of moist, tender crumb, a hint of sweetness, and that comforting, baked-from-scratch aroma that fills the whole house. Honestly, if you’ve only ever had store-bought or perhaps a sad, dry version, get ready to have your mind (and your tastebuds) blown. This isn’t just a way to use up extra zucchini; it’s a genuine treat that my family begs for, especially when that craving for something sweet hits late at night but I don’t want to go through the fuss of a whole cake. It’s surprisingly simple, which is always a win in my book, and it always, *always* turns out beautifully. So grab a cup of coffee, and let me tell you all about my beloved zucchini bread.
What is Zucchini bread?
So, what exactly *is* this magical zucchini bread we’re talking about? At its heart, it’s a quick bread, meaning it doesn’t rely on yeast for leavening. Think of it like a cake, but one you can totally get away with having for breakfast, or as a snack with your afternoon tea. The star, of course, is the zucchini. Now, before you wrinkle your nose, hear me out! When grated and baked into a batter, the zucchini doesn’t make it taste like a salad, I promise! Instead, it lends an incredible moistness and tenderness to the crumb that you just can’t achieve with other ingredients. It’s really a genius way to sneak in some extra veggies, and nobody will ever guess. The “bread” part comes from its slightly denser, more loaf-like texture compared to a typical cake, and it’s often flavored with warm spices like cinnamon, nutmeg, and sometimes even a hint of cloves, which just make it taste like pure cozy comfort. It’s essentially a delicious disguise for vegetables, and a darn good one at that!
Why you’ll love this recipe?
Okay, so you know what it is, but *why* should this specific recipe be your new best friend? Let me count the ways! First off, the FLAVOR. Oh, the flavor! It’s that perfect harmony of sweet and spice. The cinnamon and nutmeg really sing here, and when you get a bite with a little pocket of creamy filling (more on that later!), it’s pure bliss. It’s not overly sweet, which I really appreciate. It means it’s fantastic on its own, but also plays well with others. Then there’s the SIMPLICITY. Seriously, if you can stir things together in bowls, you can make this. There’s no fancy equipment needed, no complicated steps. I can whip this up on a slightly chaotic weeknight after the kids are finally settled, and it still feels like a special treat. And speaking of kids, they absolutely devour this. It’s one of the few things I bake that I know will be gone in a flash, and they don’t even realize it’s got zucchini in it! Plus, it’s incredibly COST-EFFECTIVE. Zucchini is often abundant, especially during its peak season, and the other ingredients are pantry staples. It’s a whole lot of deliciousness for very little cost. What I love most about this recipe, though, is its VERSATILITY. You can make it plain, add nuts or chocolate chips, or like I do sometimes, swirl in a creamy, dreamy filling. It’s also fantastic at room temperature or slightly warm. If you’re a fan of my Moist Blueberry Muffins: Moist Blueberry Muffin or my Banana Bread: Classic Banana Bread, you are going to adore this zucchini bread. It has that same comforting, homemade goodness, but with its own unique, delicious personality. It’s just an all-around winner.
How to Make My Go-To Zucchini Bread
Quick Overview
The magic of this zucchini bread is how straightforward it is. You’ll essentially mix your dry ingredients, then your wet ingredients separately, combine them gently, fold in the star: the grated zucchini, and then bake it to golden perfection. If you’re feeling fancy, you’ll prepare a quick, creamy filling to swirl in before baking, which is my absolute favorite way to make it. The whole process from start to finish, including prep and baking time, is surprisingly efficient, making it perfect for busy days or when you need a comforting bake without the fuss. Trust me, the payoff is so worth the minimal effort!
Ingredients
For the Main Batter:
You’ll want about 2 cups of finely grated zucchini. Don’t worry about peeling it; the skin adds color and nutrients. Make sure to give it a gentle squeeze after grating to get out excess moisture – this is a crucial step for a non-soggy loaf! Use fresh, firm zucchini for the best results. No one wants mushy bread! You’ll also need all-purpose flour, granulated sugar for sweetness, brown sugar for that lovely depth of flavor and moisture, baking soda and baking powder for lift, salt to balance everything out, ground cinnamon and nutmeg for those warm, cozy spices, and of course, eggs, vegetable oil (or canola oil – it keeps it super moist!) and a splash of vanilla extract to tie it all together. I’ve experimented with other oils, but vegetable oil really provides that perfect tender crumb.
For the Creamy Filling (Highly Recommended!):
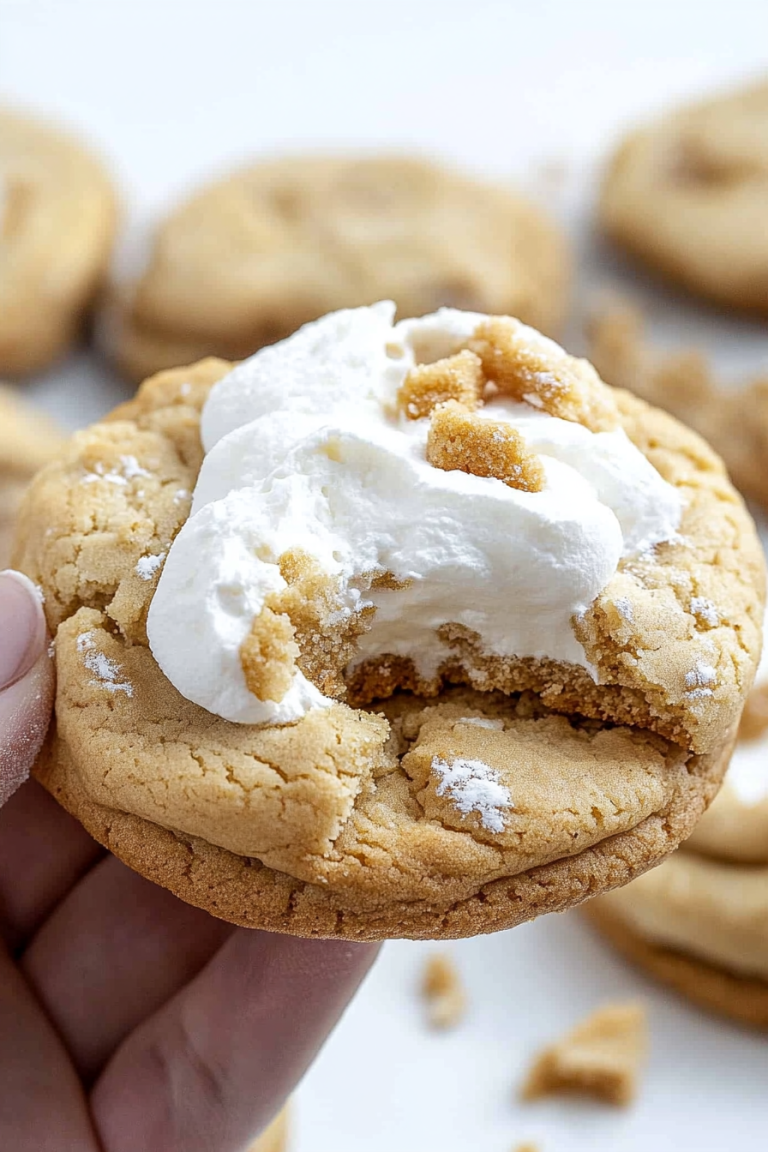
This is what takes it from great to absolutely *phenomenal*. You’ll need softened cream cheese, a bit more brown sugar for a caramel-like sweetness, a touch of vanilla extract, and a sprinkle of cinnamon. That’s it! It’s ridiculously simple but adds such a luxurious, gooey layer that makes every bite feel special. I always make this extra, just in case I want to dollop some on top too!
For the Glaze (Optional but Delicious):
If you’re feeling like a little extra indulgence, a simple glaze is perfect. You’ll just need powdered sugar and a tiny bit of milk or lemon juice. You can adjust the consistency by adding more liquid for a thinner glaze or more powdered sugar for a thicker one. Lemon juice adds a lovely tang that cuts through the sweetness beautifully.
Step-by-Step Instructions
Step 1: Preheat & Prep Pan
First things first, get that oven preheating to 350°F (175°C). While it’s warming up, grease and flour a standard 9×5 inch loaf pan. You can also line it with parchment paper for super easy removal – a trick I learned after wrestling a slightly stuck loaf one too many times! Make sure to get into all the corners so you don’t have any surprises.
Step 2: Mix Dry Ingredients
In a large bowl, whisk together your all-purpose flour, granulated sugar, brown sugar, baking soda, baking powder, salt, cinnamon, and nutmeg. Give it a good whisk until everything is well combined. This ensures your leavening agents and spices are evenly distributed, which is super important for a consistent rise and flavor. I always give it a good, thorough whisk, just to be sure!
Step 3: Mix Wet Ingredients
In a separate medium bowl, whisk together your eggs, vegetable oil, and vanilla extract until they’re nicely blended. I usually crack the eggs in first, whisk them a little, then drizzle in the oil and vanilla. This way, everything gets incorporated smoothly.
Step 4: Combine
Pour the wet ingredients into the bowl with the dry ingredients. Now, here’s the crucial part: gently fold them together until *just* combined. You don’t want to overmix! A few streaks of flour are totally fine. Overmixing develops the gluten too much, which can lead to a tough, dense loaf. Once combined, gently fold in your squeezed, grated zucchini. You want it distributed, but still don’t overwork the batter.
Step 5: Prepare Filling
While the batter is resting for a minute, quickly whip up that creamy filling. In a small bowl, beat together the softened cream cheese, brown sugar, vanilla, and cinnamon until smooth and creamy. This doesn’t take long at all, and it’s worth every second!
Step 6: Layer & Swirl
Pour about half of the zucchini batter into your prepared loaf pan. Dollop about half of the cream cheese filling over the batter. Then, pour the remaining zucchini batter on top, followed by the rest of the cream cheese filling. Now for the fun part: grab a butter knife or a skewer and gently swirl the filling through the batter. Don’t go crazy; you want distinct swirls, not a uniform mix. I usually just make a few figure-eights or zig-zags. It looks so pretty when it bakes!
Step 7: Bake
Pop that pan into your preheated oven and bake for about 50-65 minutes. The exact time can vary depending on your oven, so keep an eye on it. You’ll know it’s done when a wooden skewer or toothpick inserted into the center comes out clean, or with just a few moist crumbs attached (not wet batter!). If the top is browning too quickly, you can loosely tent it with aluminum foil for the last 15-20 minutes.
Step 8: Cool & Glaze
Once baked, let the loaf cool in the pan for about 10-15 minutes. This helps it set up. Then, carefully invert it onto a wire rack to cool completely. If you’re glazing it, this is the time to do it! Whisk together your powdered sugar and liquid until you reach your desired consistency, then drizzle it over the cooled loaf. Let the glaze set for a bit before slicing.
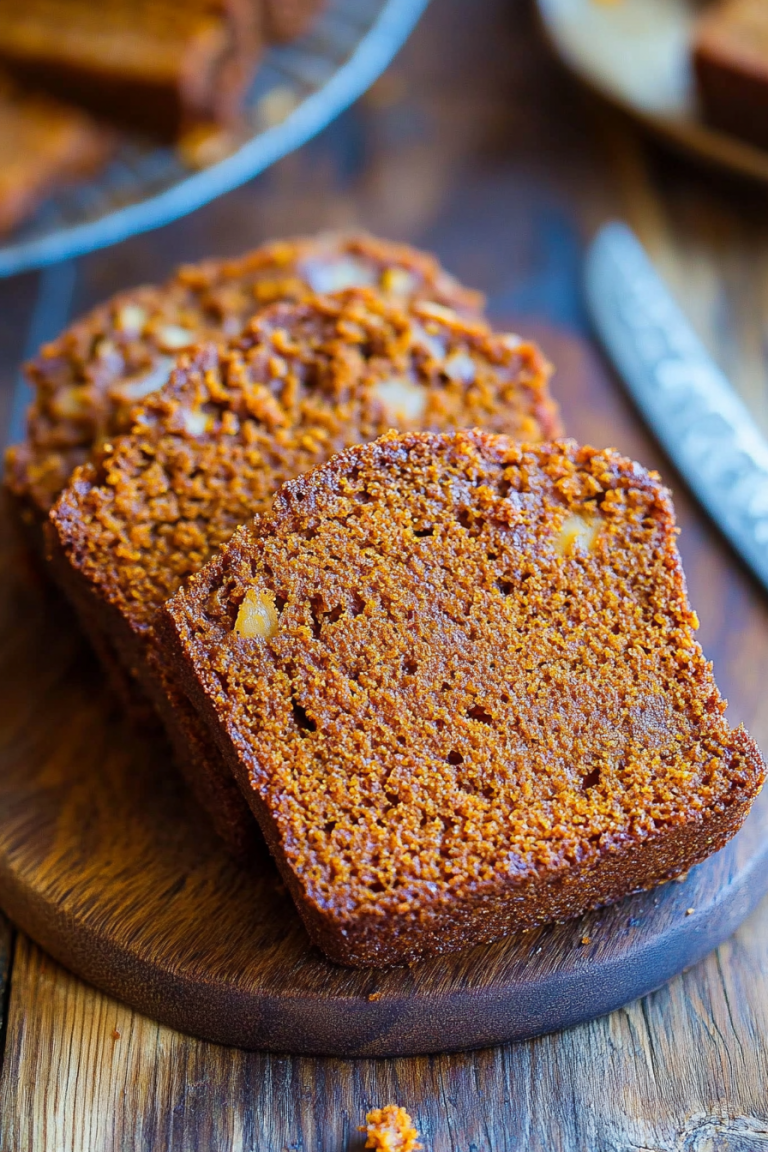
Step 9: Slice & Serve
Once completely cooled (or at least mostly cooled if you can’t wait!), slice it up with a sharp knife. The aroma alone is heavenly! Serve at room temperature for the best texture and flavor. If you added the glaze, it looks even more appealing. Enjoy!
What to Serve It With
This zucchini bread is so wonderfully versatile, it fits into almost any meal or occasion. For a quick and satisfying BREAKFAST, a warm slice toasted with a slather of butter is pure comfort. It’s also amazing with a cup of strong coffee or a glass of cold milk – a childhood staple for me! For BRUNCH gatherings, I love serving it a bit more elegantly. I’ll slice it neatly and arrange it on a pretty platter, perhaps with a side of fresh berries or a dollop of Greek yogurt. It’s a wonderful addition to a spread that includes eggs, bacon, and pastries, offering a slightly healthier, yet still decadent, option. As a DESSERT, it’s fantastic. Serve it slightly warm with a scoop of vanilla ice cream or a drizzle of caramel sauce. It’s also surprisingly good with a sharp cheddar cheese on the side, a flavor combination I discovered years ago and now swear by! And for COZY SNACKS, it’s unbeatable. Just a plain slice, enjoyed with a mug of herbal tea or hot chocolate while curled up with a good book, is pure happiness. My family also loves having a slice with their afternoon snack after school – it’s filling enough to tide them over until dinner.
Top Tips for Perfecting Your Zucchini Bread
After making this more times than I can count, I’ve picked up a few tricks that I think really make a difference. For ZUCCHINI PREP, the most important thing is squeezing out as much liquid as you can after grating. I use my hands, but a clean tea towel or cheesecloth works wonders too. This step is non-negotiable if you want a tender crumb and not a soggy bottom! For MIXING ADVICE, remember: do *not* overmix. Seriously, I’ve learned the hard way. Mix the wet and dry ingredients until they *just* come together. A few small lumps are fine, and definitely leave those little streaks of flour in there – they’ll disappear as it bakes. For SWIRL CUSTOMIZATION, don’t be afraid to get a little creative! You can add a pinch of cinnamon to the filling for an extra spice kick, or even swirl in a bit of chocolate ganache for a more decadent treat. Just aim for distinct patterns rather than over-mixing the filling in. For INGREDIENT SWAPS, I’ve experimented a lot! You can swap half the vegetable oil for unsweetened applesauce to reduce fat, but I find it slightly changes the texture. For a vegan version, I’ve successfully used flax eggs and almond milk, and it actually made it even creamier! For BAKING TIPS, always trust your oven. My oven runs a little hot, so I often reduce the temperature by 10-15 degrees. Use the toothpick test – it’s your best friend for checking doneness. If the top is browning too quickly, cover it loosely with foil. For GLAZE VARIATIONS, if you don’t want a traditional glaze, a light dusting of powdered sugar or a sprinkle of toasted nuts on top works beautifully. I’ve also made a cream cheese frosting that is absolutely divine, though it makes it feel more like a cake!
Storing and Reheating Tips
This zucchini bread is wonderfully forgiving when it comes to storage. At ROOM TEMPERATURE, if you haven’t glazed it, it will stay fresh for about 2-3 days. Just wrap it tightly in plastic wrap or store it in an airtight container. If it’s glazed, I’d probably aim for 1-2 days at room temp, as the glaze can get sticky. For REFRIGERATOR STORAGE, it will last longer, about 5-7 days, especially if wrapped well or in a sealed container. This is a good option if you’re in a warmer climate or if you know you won’t get through it quickly. When you want to enjoy it, I find it’s best served at room temperature, so just let it sit out for about 30 minutes before slicing. If you like it warm, you can gently reheat individual slices in a toaster oven or microwave for a few seconds – just until warmed through, not hot! For FREEZER INSTRUCTIONS, this bread freezes beautifully. I usually wrap the cooled loaf tightly in plastic wrap, then in aluminum foil, or place it in a freezer-safe bag. It can stay frozen for up to 3 months. To thaw, simply unwrap it and let it come to room temperature on the counter, or thaw it overnight in the refrigerator. If you glazed it, I’d recommend adding the glaze *after* thawing and reheating, or just dusting with powdered sugar. The glaze can sometimes weep when frozen and thawed.
Frequently Asked Questions
Final Thoughts
So there you have it – my absolute favorite zucchini bread recipe. It’s more than just a way to use up garden surplus; it’s a little slice of comfort, a guaranteed crowd-pleaser, and a testament to how simple ingredients can create something truly wonderful. I hope you feel inspired to give it a try, especially if you’ve been skeptical about zucchini in baked goods before. I genuinely believe this recipe might just change your mind! It’s perfect for those cozy mornings, afternoon pick-me-ups, or even a simple dessert. If you enjoyed this, you might also want to check out my Lemon Poppy Seed Loaf or my Double Chocolate Chip Cookies for more homemade goodness. I can’t wait to hear how your zucchini bread turns out! Please leave a comment below with your thoughts, ratings, or any fun variations you tried. Happy baking!
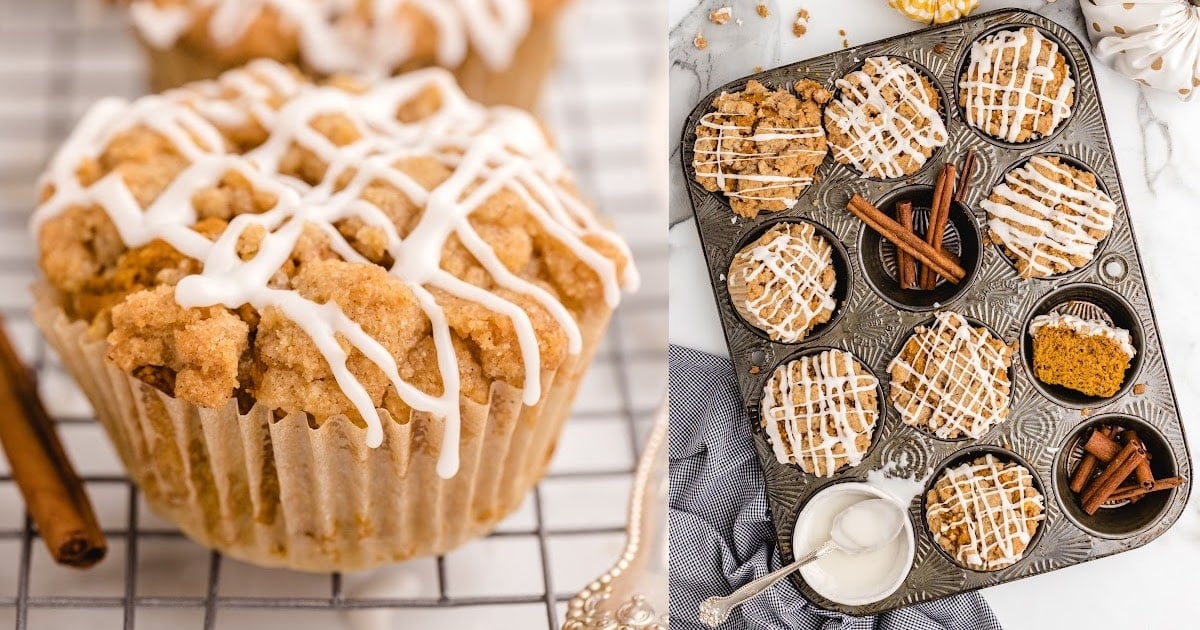
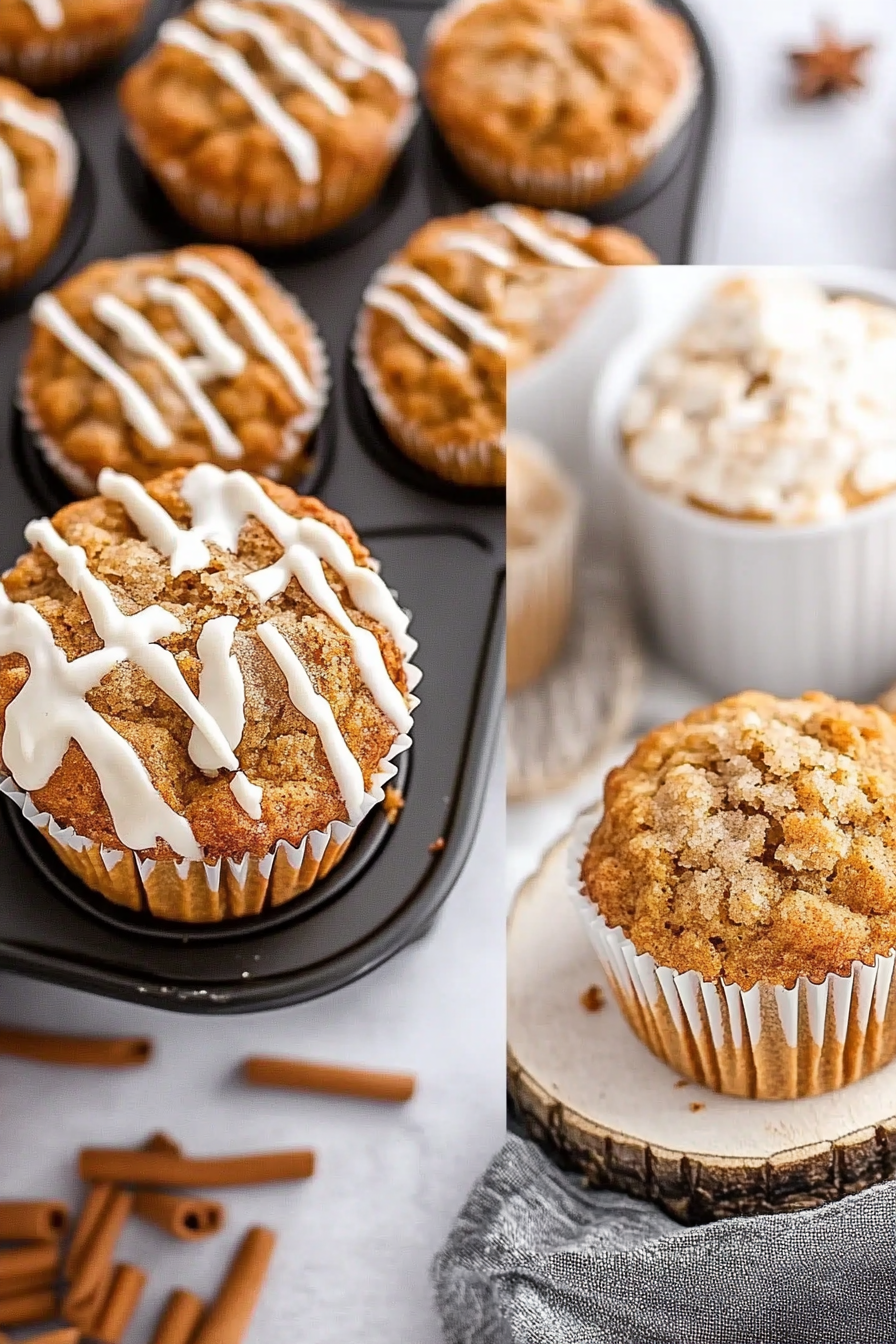
Pumpkin Streusel Muffins
Ingredients
Method
- Preheat the oven to 350 degrees F.
- In a large mixing bowl, combine the dry cake mix, 0.5 teaspoon pumpkin pie spice, cinnamon, vegetable oil, and pumpkin puree. Stir together with a large spoon until just combined.
- Place paper cups in a muffin tin pan and fill about 3/4 of the way with the muffin batter. Set aside.
- In a separate mixing bowl, combine the flour, granulated sugar, light brown sugar, 1 teaspoon pumpkin pie spice, and melted butter. Stir with a fork until crumbly and combined.
- Spoon a generous amount of streusel crumb topping over the top of each muffin. Gently push the streusel down into the pumpkin cake mix a bit using the back of your spoon.
- Place the muffin tin in the preheated oven and bake at 350 degrees F for 23-25 minutes, or until a toothpick inserted into the center of a muffin comes out clean.
- While the muffins are baking, prepare the glaze. In a small bowl, whisk together the confectioners' sugar and whole milk until smooth.
- Remove muffins from the oven and allow them to cool slightly in the pan before transferring to a wire rack. Once cooled, drizzle the prepared glaze generously over the top of each muffin. Serve warm, or at room temperature.