Easy Thai Chicken Salad with Peanut Zing
Okay, so, I’m about to share something that feels a little like giving away a family secret. It’s my absolute favorite zucchini bread recipe, and I’ve made it so many times I’ve practically memorized it. The smell alone as it bakes? Pure magic. It fills the whole house with this warm, comforting aroma that just screams “home.” And the taste? Oh, it’s just heavenly. Moist, tender, with just the right amount of sweetness and spice. It’s not overly complicated, either, which is a huge plus in my book, especially on those days when you just need a little pick-me-up without a lot of fuss. Honestly, if you’ve ever thought zucchini bread was bland or boring, you haven’t tried this one. It’s like the difference between a plain old cookie and one with all the fancy sprinkles and frosting – this is the gourmet version, but still totally approachable for any home baker. It’s a classic, but it’s *my* classic, and I think you’re going to fall in love with it too, just like my family has.
What is Zucchini bread?
So, what exactly is this glorious zucchini bread we’re talking about? At its heart, it’s a quick bread, meaning it uses baking soda and/or baking powder as leavening agents instead of yeast. This makes it super fast to whip up – no waiting around for dough to rise! The star ingredient, of course, is zucchini. Now, I know what some of you might be thinking: zucchini in a sweet bread? Sounds weird, right? But trust me on this one! The zucchini is grated, and when it bakes, it practically melts into the batter, contributing incredible moisture and a subtle, earthy sweetness. It’s the secret to that wonderfully tender, almost decadent texture. It’s not like you’re going to bite into chunks of zucchini; it’s more like it just makes the whole loaf unbelievably moist and delicious. Think of it as nature’s way of adding a secret ingredient to make your baked goods extra special. It’s not just a cake with veggies; it’s a perfectly balanced, deeply satisfying treat that happens to have a super healthy secret weapon!
Why you’ll love this recipe?
Honestly, there are so many reasons why this zucchini bread has become my go-to. First off, the flavor profile is just divine. It’s perfectly spiced with cinnamon and a hint of nutmeg that makes it so cozy and inviting. It’s sweet enough to feel like a real treat, but not so sweet that it’s cloying. The texture is where it truly shines – it’s incredibly moist and tender, thanks to the secret ingredient (yes, zucchini!). I’ve tried other quick breads, and some can be a little dry or crumbly, but this one? It’s always just right. And let’s talk about how incredibly easy this is. I can literally whip up the batter in about 15 minutes, and then it’s just a matter of baking. It’s a lifesaver on busy weeknights when the kids are asking for something sweet or when unexpected guests pop by. Plus, it’s surprisingly budget-friendly. Zucchini is usually pretty inexpensive, and the other ingredients are pantry staples. You can also totally customize it! I love adding a handful of chopped walnuts or pecans for a little crunch, or even some chocolate chips – because, well, chocolate chips make everything better, right? What I love most about this is that it feels both comforting and a little bit sophisticated. It’s the kind of thing you can serve for a casual breakfast, a lovely brunch addition, or even as a decadent dessert with a dollop of whipped cream. It’s honestly my favorite way to use up those garden zucchini when they’re in abundance. It’s a real crowd-pleaser and a recipe that I know I can count on every single time. If you’re looking for a go-to baked good that’s delicious, easy, and always gets rave reviews, this is it. It’s definitely a step up from a basic banana bread, in my humble opinion, because of that incredible moisture it brings.
How do you make
Quick Overview
This recipe is all about simplicity and achieving that perfect moist crumb. You’ll quickly whisk together your dry ingredients, then combine your wet ingredients separately before bringing them all together. A quick fold-in of the grated zucchini and any add-ins you fancy, and it’s ready for the oven. The beauty of this method is how it ensures everything is just combined, preventing that tough texture that can come from overmixing. It’s a straightforward process that guarantees a delicious, fragrant loaf every time, and the result is so much more rewarding than the effort involved.
Ingredients
For the Main Batter:
2 cups all-purpose flour (I always use unbleached, it seems to give a better texture)
1 teaspoon baking soda
1/2 teaspoon baking powder
1/2 teaspoon salt
1 teaspoon ground cinnamon (use fresh, good quality cinnamon for the best flavor!)
1/4 teaspoon ground nutmeg (optional, but it adds such a lovely warmth)
1 1/2 cups granulated sugar (you can adjust this slightly, but I find this amount perfect for sweetness and moisture)
3 large eggs (at room temperature, it helps them incorporate better)
1 cup vegetable oil (or other neutral oil like canola. I’ve tried melted butter, but oil keeps it way moister)
1 teaspoon vanilla extract (use pure vanilla extract for that authentic aroma)
For the Zucchini:
2 cups grated zucchini, packed (about 2-3 medium zucchini. Make sure to squeeze out excess moisture! This is super important.)
Optional Add-ins:
1 cup chopped walnuts or pecans (for a lovely crunch)
1 cup chocolate chips (dark or semi-sweet are my favorites!)
For the Simple Glaze:
1 cup powdered sugar
2-3 tablespoons milk (or almond milk for a creamier texture!)
1/2 teaspoon vanilla extract
Step-by-Step Instructions
Step 1: Preheat & Prep Pan
First things first, let’s get your oven fired up to 350 degrees Fahrenheit (175 degrees Celsius). While that’s heating, grab a standard loaf pan (about 9×5 inches) and give it a good grease and flour. I like to use butter or baking spray for greasing, then a light dusting of flour, tapping out any excess. This ensures your beautiful loaf won’t stick. You can also line it with parchment paper for extra insurance – it makes lifting the bread out a breeze.
Step 2: Mix Dry Ingredients
In a large mixing bowl, whisk together the flour, baking soda, baking powder, salt, cinnamon, and nutmeg (if you’re using it). Whisking them together really well ensures that the leavening agents and spices are evenly distributed throughout the batter, which is key for an even bake and consistent flavor. You don’t want any big clumps of baking soda!
Step 3: Mix Wet Ingredients
In a separate medium bowl, beat the eggs until they’re lightly fluffy. Then, whisk in the granulated sugar until well combined. Pour in the vegetable oil and vanilla extract, and whisk until everything is smooth and emulsified. The sugar will dissolve nicely into the wet ingredients.
Step 4: Combine
Now, pour the wet ingredients into the bowl with the dry ingredients. Stir with a spatula or wooden spoon *just until combined*. This is where you need to be careful not to overmix! A few streaks of flour are okay; they’ll disappear as you fold in the zucchini. Overmixing develops the gluten too much, which can lead to a tough loaf. We want tender and delicious!
Step 5: Prepare Filling
This is where the magic happens! Take your grated zucchini and, this is a crucial step I learned the hard way, squeeze out as much excess liquid as possible. You can do this by putting it in a clean kitchen towel or cheesecloth and wringing it out firmly. If you skip this, your bread can turn out gummy. Once it’s nicely squeezed, gently fold the grated zucchini into the batter. If you’re adding nuts or chocolate chips, fold them in now too. Just a gentle fold until they’re distributed.
Step 6: Layer & Swirl
Pour the batter evenly into your prepared loaf pan. Smooth the top slightly with your spatula. If you’re feeling fancy, you can sometimes swirl a bit of extra cinnamon sugar on top before baking for a nice crust, but honestly, it’s delicious without it.
Step 7: Bake
Bake in your preheated oven for about 50-65 minutes. Baking times can vary *a lot* depending on your oven, so start checking around the 50-minute mark. The best way to tell if it’s done is to insert a toothpick into the center of the loaf. If it comes out clean, it’s ready! If it comes out with wet batter, bake for a few more minutes and check again. You don’t want it to be dry, but you definitely don’t want it raw in the middle.
Step 8: Cool & Glaze
Once it’s out of the oven, let the zucchini bread cool in the pan for about 10-15 minutes. This allows it to set up properly. Then, carefully invert it onto a wire rack to cool completely. Trying to glaze a hot loaf is a recipe for a melty mess, so patience is key here! For the glaze, whisk together the powdered sugar, milk, and vanilla extract until smooth. If it’s too thick, add a tiny bit more milk; if it’s too thin, add a little more powdered sugar. Once the loaf is *completely* cool, drizzle the glaze over the top. Let the glaze set for a bit before slicing.
Step 9: Slice & Serve
Once the glaze has set, slice into thick, delicious pieces. The aroma is incredible at this point, and resisting is almost impossible! I love serving it slightly warm, but it’s also fantastic at room temperature. The beauty of this bread is how perfectly it slices – no crumbling, just neat, inviting pieces of pure deliciousness.
What to Serve It With
This zucchini bread is so versatile, it’s almost ridiculous! For breakfast, it’s just divine alongside a steaming cup of black coffee or a milky latte. I sometimes toast a slice lightly and add a thin smear of cream cheese – it’s a game-changer! For a more elegant brunch spread, I’ll slice it neatly and arrange it on a pretty platter. It pairs wonderfully with fresh fruit salads, yogurt parfaits, or even alongside some savory quiches. As a dessert, it’s absolutely perfect. A warm slice with a scoop of vanilla bean ice cream or a dollop of lightly sweetened whipped cream is pure bliss. It’s also fantastic with a drizzle of caramel sauce. For cozy snacks, which is honestly how I eat it most of the time, it’s just perfect on its own with a glass of cold milk. My kids also love it with a little dab of raspberry jam. It’s that kind of comforting, satisfying treat that just makes any moment feel a little bit special. My mom used to pack slices of this in my lunchbox when I was little, and the smell always made me feel so loved.
Top Tips for Perfecting Your Zucchini Bread
Alright, let’s dive into a few things I’ve learned over the years that really make this zucchini bread sing. First, about the zucchini prep: squeezing out that excess moisture is non-negotiable. Seriously, don’t skip it! If your zucchini is super watery, the bread can become gummy and heavy. Grating it on the large holes of a box grater usually works best, giving you nice, moist shreds without being mushy. For mixing, remember the golden rule: don’t overmix. Just combine the wet and dry ingredients until you barely see any dry flour. A few small lumps are fine! Overmixing is the quickest way to a tough, dense loaf, and nobody wants that. When it comes to swirl customization, if you decide to add things like chocolate chips or nuts, just gently fold them in. You want them distributed, not obliterated. You can also get creative with the glaze. If you want a thinner glaze, just add a touch more milk or even a squeeze of lemon juice for a little zing. For a thicker, more frosting-like glaze, use less liquid. Baking can be tricky, as ovens vary. Trust the toothpick test! If it’s coming out with a few moist crumbs, it’s perfect. If it’s clean, it’s done. If it’s wet, give it another 5 minutes. Sometimes, if the top is browning too quickly, you can loosely tent it with foil. My biggest lesson learned was about ingredient swaps: I once tried using a different oil, and it totally changed the texture for the worse. Stick to neutral oils like vegetable or canola for the best moisture. And for the glaze, if you’re not a fan of traditional glaze, a simple dusting of powdered sugar or even a light sprinkle of cinnamon sugar before baking can be lovely too. These little tweaks, from my kitchen to yours, are what elevate a good recipe to a truly great one.
Storing and Reheating Tips
This zucchini bread is wonderfully forgiving when it comes to storage, which is one of the reasons I love it so much. At room temperature, it will stay fresh and delicious for about 2-3 days, as long as it’s stored properly. I like to wrap it tightly in plastic wrap or aluminum foil, or keep it in an airtight container. This helps keep that wonderful moisture locked in. If you find yourself with more bread than you can eat within a couple of days (which, let’s be honest, is rare in my house!), you can definitely store it in the refrigerator. Wrapped well in the fridge, it can last for up to a week. The texture might be slightly firmer when cold, but it’s still perfectly tasty. My favorite way to enjoy it cold is to toast a slice lightly – it brings back that lovely soft texture. If you need to store it for longer, the freezer is your best friend. You can freeze the whole loaf or individual slices. Wrap it tightly in plastic wrap, then in a layer of aluminum foil or place it in a freezer-safe bag. It should keep well for up to 3 months. When you’re ready to enjoy it, let it thaw overnight at room temperature or gently reheat it. For reheating, you can pop a slice in a toaster oven or even the microwave for a few seconds (careful not to overheat!). For reheating a whole loaf, it’s best to let it thaw first, then warm it in a low oven (around 300°F or 150°C) for about 10-15 minutes until it’s warmed through. My advice on the glaze is to add it only *after* the bread has completely cooled, especially if you plan to store it for more than a day. If you glaze it and then refrigerate or freeze, the glaze can sometimes get a bit sticky or wet.
Frequently Asked Questions
Final Thoughts
So there you have it – my absolute favorite, tried-and-true zucchini bread recipe. It’s more than just a recipe to me; it’s memories of my kids’ delighted faces, the warmth of my kitchen on a chilly afternoon, and the simple joy of sharing something truly delicious. I genuinely hope you get a chance to make this, and when you do, I can’t wait to hear all about it! If you’re a fan of quick breads, you might also love my recipe for the ultimate banana bread or my moist blueberry muffin recipe. They’re all from the heart, just like this one. Happy baking, and may your homes be filled with wonderful aromas!
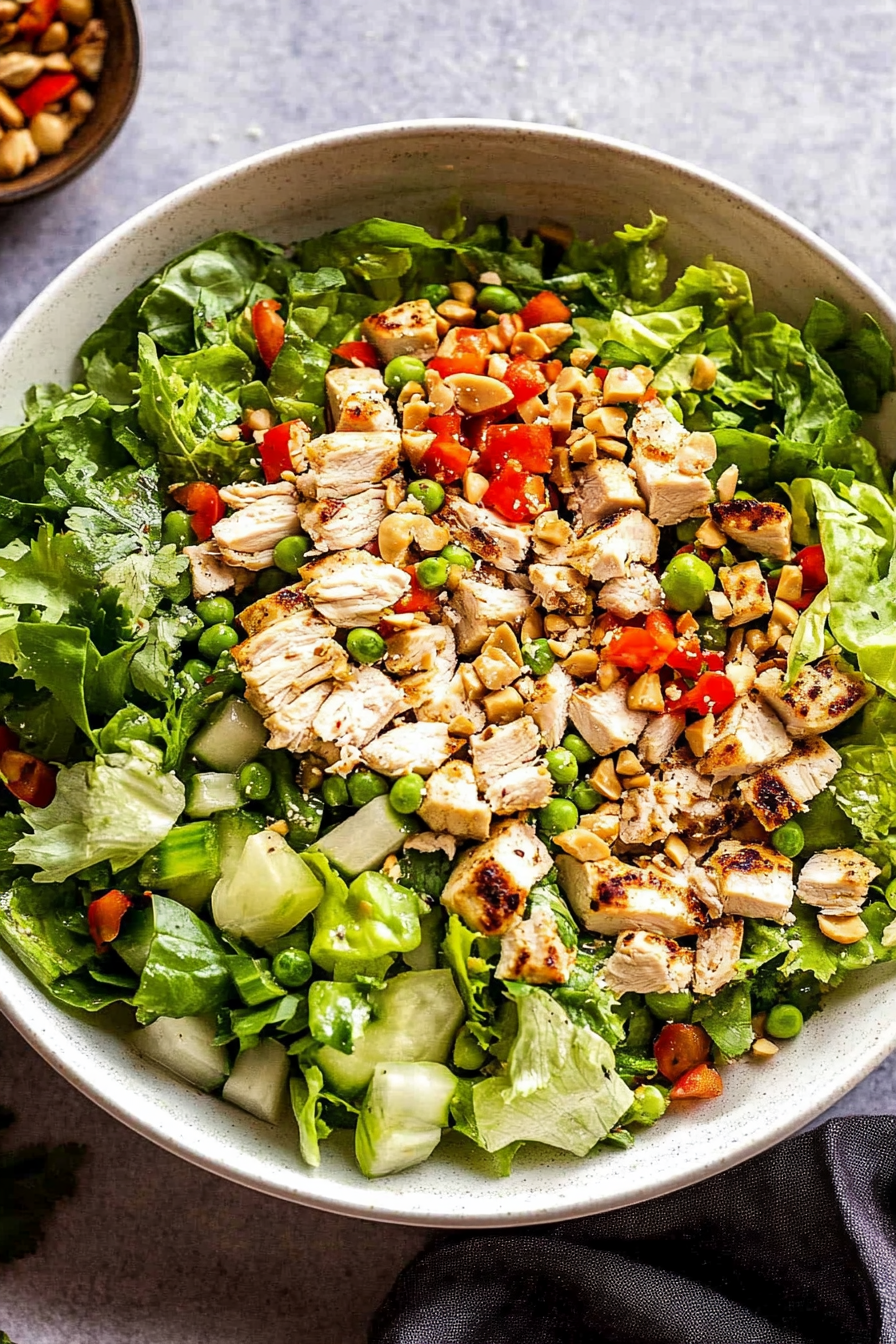
Thai Chicken Salad
Ingredients
Method
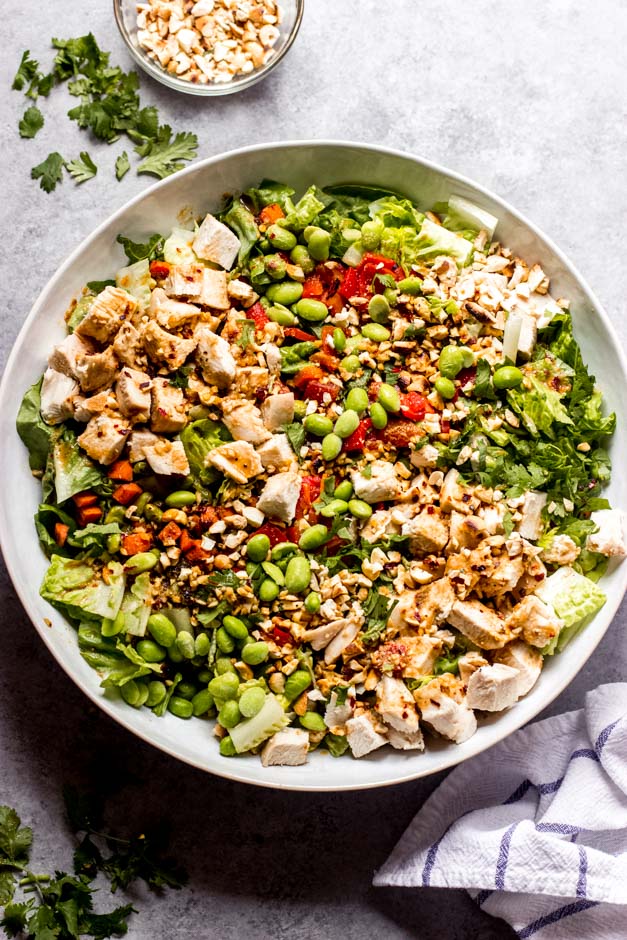
- Heat a little olive oil in a skillet over medium-high heat. Add chopped carrots and edamame, and cook until slightly charred, about 5-8 minutes. Remove from heat and set aside to cool.
- In a small bowl, whisk together all ingredients for the peanut-chili vinaigrette until well combined. Season with salt and pepper to taste.
- In a large salad bowl, combine the chopped romaine lettuce, diced cooked chicken, cooled roasted carrots, edamame, chopped roasted red peppers, cilantro, and chopped cashews.
- Pour the peanut-chili vinaigrette over the salad ingredients. Toss until everything is fully coated. Taste for seasoning and adjust with more salt or pepper if needed before serving.