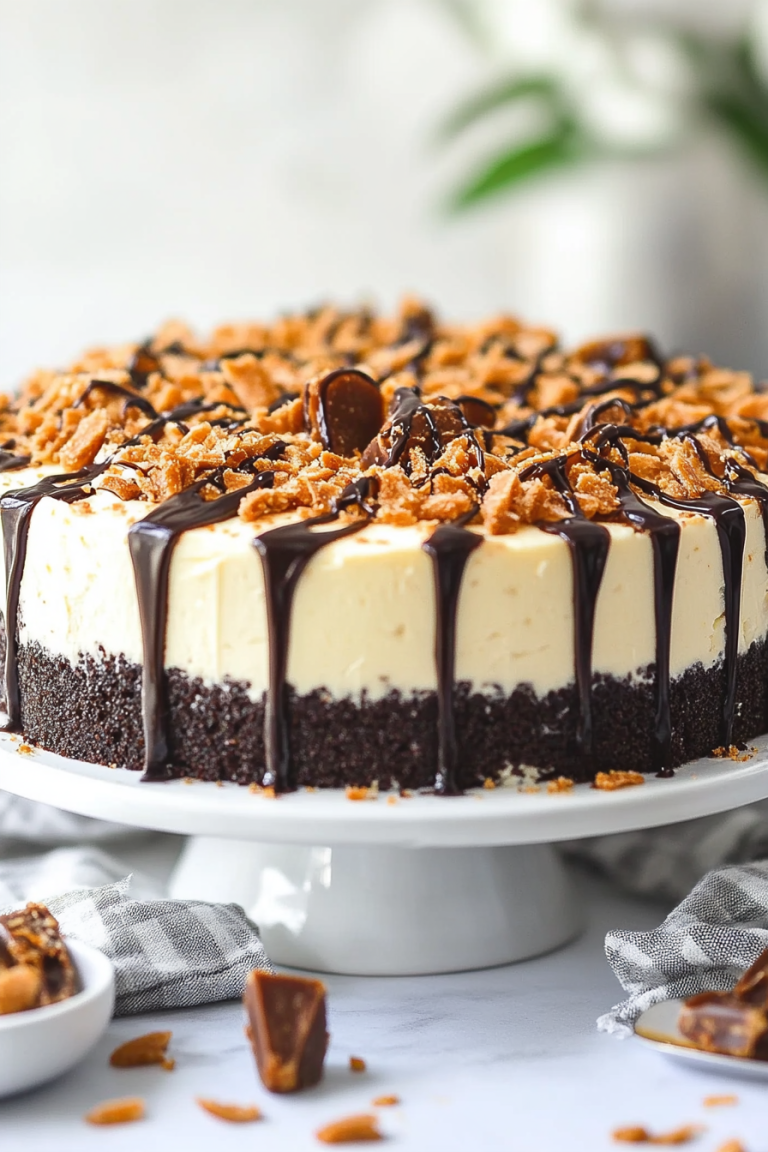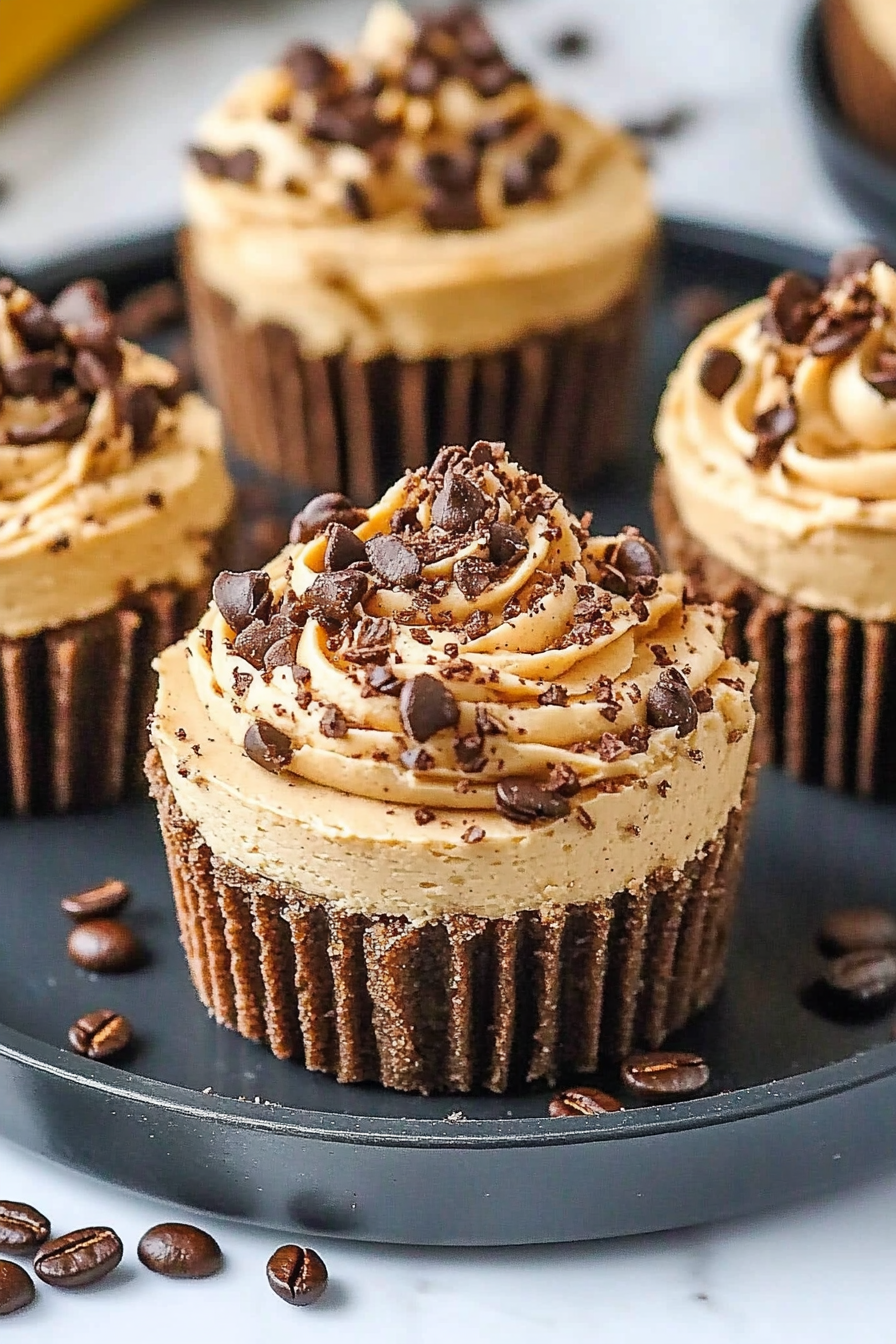
Easy Coffee Cheesecake Bites with Oreo Crust
Oh, where do I even begin with this zucchini bread? It’s one of those recipes that feels like a warm hug on a chilly day, or a sunshine burst on a dreary afternoon. I can still remember my grandma making this when I was a little kid. The entire house would fill with this unbelievably comforting, sweet, and slightly spicy aroma. It’s not just a recipe to me; it’s pure nostalgia baked into a moist, tender loaf. Honestly, if you’ve ever had a zucchini bread that was dry or bland, forget that experience entirely. This one is a game-changer. It’s the kind of thing that disappears in minutes at my house, and my kids ask for it all the time, especially after school. It’s so good, it rivals even the most decadent chocolate cake, but without all the fuss!
What is Zucchini bread?
So, what exactly is this magical thing we call zucchini bread? At its heart, it’s a quick bread, which means it doesn’t use yeast and comes together in a snap. The “zucchini” part might sound a little odd if you’re not used to it, but trust me, it’s the secret weapon! When you grate zucchini and mix it into the batter, it adds incredible moisture and a subtle sweetness without any discernible zucchini flavor. Honestly, most people wouldn’t even know it’s in there unless you told them. Think of it as nature’s way of making a cake extra tender and delightful. It’s essentially a humble vegetable turning into a delicious treat that’s perfect for breakfast, a snack, or even dessert. It’s a lifesaver on busy weeknights when you need something sweet but don’t have hours to bake.
Why you’ll love this recipe?
There are so many reasons why this zucchini bread has become my absolute go-to. First off, the flavor is just out of this world. It’s perfectly sweet, with a lovely hint of cinnamon and vanilla that makes it smell and taste like pure comfort. It’s not overly sweet, which I really appreciate – it’s balanced. The texture is probably my favorite part, though. It’s unbelievably moist and tender, almost melt-in-your-mouth good. That’s all thanks to the zucchini, of course, but the way the ingredients come together creates something truly special. And let’s talk about simplicity! This is ridiculously easy to make. You probably have most of the ingredients in your pantry right now. It’s a one-bowl wonder for the dry ingredients, and then just a few more steps. It’s also incredibly cost-efficient. Zucchini is usually pretty affordable, and the other staples are pantry regulars. This recipe feels so much more luxurious than the ingredients would suggest! Plus, it’s super versatile. You can add nuts, chocolate chips, or even a swirl of cream cheese. It’s perfect for a quick breakfast, a delightful afternoon pick-me-up, or even served warm with a dollop of whipped cream for dessert. What I love most is that it always turns out perfectly, even if I’m a bit distracted. It’s a reliable recipe that brings smiles to everyone’s faces.
How do you make Zucchini bread?
Quick Overview
Making this incredible zucchini bread is a breeze! You’ll basically whisk your dry ingredients, whisk your wet ingredients, then combine them gently. After folding in the star, grated zucchini, you pour it into a prepared loaf pan and bake until golden brown and a toothpick comes out clean. The magic happens in the oven, where the zucchini steams and infuses the bread with moisture, creating that signature tender crumb. It’s honestly one of the easiest quick breads you’ll ever whip up, and the results are consistently fantastic. Don’t be intimidated; it’s designed for home bakers!
Ingredients
For the Main Batter:
2 cups all-purpose flour: I always opt for a good quality all-purpose flour. If you’re feeling fancy, you could try a blend with a little whole wheat for a nuttier flavor, but regular AP flour is perfect.
1 teaspoon baking soda: This is what gives our bread its lovely rise. Make sure it’s not expired – a quick test is to add a bit to vinegar; it should fizz vigorously!
1/2 teaspoon baking powder: A little extra lift never hurt anyone!
1/2 teaspoon salt: Enhances all the other flavors.
1 teaspoon ground cinnamon: The warm hug spice! Don’t skimp here.
1/4 teaspoon ground nutmeg: Just a pinch adds such depth, but if you don’t have it, it’s okay to omit.
3/4 cup granulated sugar: For that perfect balance of sweetness.
1/4 cup packed light brown sugar: This adds a little extra moisture and a lovely caramel note.
1/2 cup vegetable oil (or other neutral oil like canola or melted coconut oil): This is key for moisture. You can also use unsalted butter, melted, but oil often yields a more consistently moist crumb. I’ve even tested this with almond milk and it actually made it even creamier!
2 large eggs, at room temperature: Room temperature eggs incorporate better into the batter. Just pop them in a bowl of warm water for 10 minutes if you forget to take them out.
1 teaspoon vanilla extract: Pure vanilla extract makes a big difference!
1 cup grated zucchini, squeezed dry: This is our star! Use medium-sized zucchini, the ones that aren’t too watery. You’ll want to grate them and then gently squeeze out the excess moisture. We don’t want a soggy bread!
For the Filling (Optional but Recommended!):
1/2 cup chopped walnuts or pecans: Adds a lovely crunch and nutty flavor. Toasted is even better!
1/2 cup chocolate chips (semi-sweet or dark): Because, why not? This is for those days you want a real treat.
For the Glaze:
1 cup powdered sugar: Sifted, to avoid lumps.
2-3 tablespoons milk (or buttermilk for tang): Start with 2 and add more until you reach your desired drizzling consistency.
1/4 teaspoon vanilla extract: Just a touch to enhance the sweetness.
Step-by-Step Instructions
Step 1: Preheat & Prep Pan
First things first, get your oven preheated to 350°F (175°C). Grab a standard 9×5 inch loaf pan. I like to grease it really well with butter or cooking spray, and then give it a little dusting of flour. You can also line it with parchment paper, leaving some overhang on the sides, which makes lifting the cooled bread out a total dream. This step ensures your beautiful loaf doesn’t stick!
Step 2: Mix Dry Ingredients
In a large bowl, whisk together the flour, baking soda, baking powder, salt, cinnamon, and nutmeg. Whisking them together thoroughly ensures that your leavening agents are evenly distributed, which means an even rise. It also helps break up any little clumps in the flour. Just give it a good few stirs until everything looks well combined and uniformly colored.
Step 3: Mix Wet Ingredients
In a separate medium bowl, whisk together the granulated sugar, brown sugar, oil, eggs, and vanilla extract. Whisk until everything is smooth and well combined. You want to make sure the sugars are starting to dissolve into the wet ingredients. This is where you’ll really start to smell that lovely vanilla!
Step 4: Combine
Now, pour the wet ingredients into the bowl with the dry ingredients. Gently fold them together using a spatula or a wooden spoon. It’s super important NOT to overmix here! Stop as soon as you no longer see streaks of dry flour. A few little lumps are totally fine. Overmixing can develop the gluten too much, resulting in a tougher, denser bread, and we definitely don’t want that. We’re going for tender and moist!
Step 5: Prepare Filling
If you’re adding walnuts, pecans, or chocolate chips, this is the time to fold them in gently. I like to toss my add-ins with a tablespoon of the dry flour mixture before adding them to the batter. This helps prevent them from sinking to the bottom of the loaf during baking. Just a gentle fold is all they need to be incorporated.
Step 6: Layer & Swirl
Now for the star of the show: the grated zucchini! Gently fold the squeezed, grated zucchini into the batter. Again, be careful not to overmix. You want it distributed, but don’t beat it into submission. The batter will look quite thick at this stage, which is exactly what you want. Spoon the batter into your prepared loaf pan, spreading it evenly. If you’re feeling ambitious and want to do a swirl, now is the time! You can mix a tablespoon of cocoa powder with a tablespoon of water and drizzle it over the top, then use a knife to swirl it in. Or, just sprinkle a few extra chocolate chips on top!
Step 7: Bake
Pop that pan into your preheated oven. Bake for about 50-65 minutes. Baking times can vary depending on your oven, so start checking around the 50-minute mark. You’ll know it’s done when the top is golden brown and a toothpick inserted into the center comes out clean (or with a few moist crumbs attached, but no wet batter). If the top is browning too quickly, you can loosely tent it with aluminum foil.
Step 8: Cool & Glaze
Once it’s done baking, let the loaf cool in the pan on a wire rack for about 15-20 minutes. This helps it set up a bit. Then, carefully invert the pan to remove the loaf and let it cool completely on the wire rack. Patience is key here! Trying to glaze a warm loaf will just make a melty mess. Once it’s completely cool, you can whip up the glaze by whisking together the powdered sugar, milk, and vanilla until smooth and drizzly. Drizzle it over the top, letting it drip down the sides.
Step 9: Slice & Serve
Once the glaze has set a little (about 10-15 minutes), it’s time to slice! I like to use a serrated knife for clean cuts. This bread is delicious at room temperature, but I swear it’s even better slightly warm. You can pop a slice in the microwave for 10-15 seconds if you want that just-baked feel. Enjoy every single bite!
What to Serve It With
This zucchini bread is so wonderfully versatile, it fits in at any time of day and for any occasion! For a simple, satisfying breakfast, I love serving a thick slice with a hot cup of coffee or a tall glass of cold milk. It’s easy enough to grab and go on busy mornings, but satisfying enough to feel like a treat. When we’re having a relaxed weekend brunch, I like to make it a bit more elegant. I’ll arrange slices on a pretty platter and maybe add a small bowl of fresh berries or a dollop of Greek yogurt on the side. It pairs beautifully with mimosas or a pot of freshly brewed tea. For dessert, it truly shines. Serve a warm slice (maybe reheated for just 20 seconds!) with a scoop of vanilla bean ice cream or a drizzle of caramel sauce. It’s perfect when you’re craving something sweet at 10pm but don’t want to bake a whole cake. And for those cozy, lazy afternoons? It’s the ultimate comfort snack. I just grab a slice (or two!) and curl up with a good book and a cup of tea. My family also loves it with a smear of butter. Honestly, it’s good just as it is, but these pairings just elevate the experience even further!
Top Tips for Perfecting Your Zucchini Bread
I’ve made this zucchini bread more times than I can count, and along the way, I’ve picked up a few little tricks that make it even better. Here are my top tips to ensure your loaf turns out absolutely perfect every single time!
Zucchini Prep: The most crucial step for super moist, not watery, zucchini bread is squeezing out the excess moisture. Grate your zucchini using the large holes of a box grater. Place the grated zucchini in a fine-mesh sieve and gently press down with a spoon, or even better, wrap it in a clean kitchen towel or cheesecloth and twist to wring out as much liquid as possible. You’ll be surprised how much water comes out! This step prevents your bread from becoming dense or gummy.
Mixing Advice: Remember that rule about not overmixing? It’s the most important advice for quick breads. Mix the wet and dry ingredients *just* until combined. A few streaks of flour are okay; they’ll disappear during baking. Overmixing develops the gluten, which leads to a tough texture. I always use a spatula for folding; it gives you more control than a whisk or a wooden spoon when you’re trying not to agitate the batter too much.
Swirl Customization: If you’re feeling creative, the swirl is fun! For a chocolate swirl, mix 2 tablespoons of unsweetened cocoa powder with 2-3 tablespoons of warm water until you have a thick paste. Drizzle this over the batter in the pan and then use a butter knife or skewer to swirl it through. Be careful not to over-swirl, or you’ll just mix it all in! For a cinnamon-sugar swirl, mix 2 tablespoons of brown sugar with 1 teaspoon of cinnamon and sprinkle that over the batter, then swirl. You can also add food coloring to a simple glaze for a fun look!
Ingredient Swaps: Feel free to get adventurous! For a gluten-free version, I’ve had success using a good quality 1:1 gluten-free baking flour blend. The texture might be slightly different, but still delicious. If you don’t have oil, melted unsalted butter works, but as I mentioned, oil often keeps it moister for longer. For the spices, if you don’t have nutmeg, you can just increase the cinnamon slightly. And for nuts, almonds, pecans, or even chopped pistachios would be wonderful additions!
Baking Tips: Every oven is a little different. Get to know yours! If your oven tends to run hot, you might want to reduce the temperature by 10-15 degrees and bake for a few minutes longer. Placing the loaf pan in the center of the oven ensures even heat distribution. If you notice the top is browning too quickly before the center is cooked, loosely tent it with a piece of aluminum foil. And always, always do the toothpick test!
Glaze Variations: The simple powdered sugar glaze is classic, but you can easily customize it. For a lemony twist, add a tablespoon of fresh lemon juice instead of some of the milk. A touch of orange zest can also be lovely. For a richer glaze, use cream cheese softened with a little milk. Experiment and find your favorite!
Storing and Reheating Tips
Proper storage is key to keeping this delicious zucchini bread tasting its best. Since it’s so moist, it stays fresh for a good while! Here’s how I usually handle leftovers:
Room Temperature: Once the loaf is completely cooled, I like to store it at room temperature. I usually wrap it tightly in plastic wrap or place it in an airtight container. At room temperature, it’s usually good for about 3-4 days. You’ll notice it’s best on days 2 and 3 as the flavors meld together even more.
Refrigerator Storage: If I know it’s going to be longer than 4 days, or if it’s a particularly warm day, I’ll pop it into the refrigerator. Again, an airtight container is your best friend here. It can stay fresh in the fridge for up to a week, though I find the texture is best within the first 5 days. It might firm up a bit in the fridge.
Freezer Instructions: This bread freezes beautifully! Once completely cooled (and ideally, before glazing if you plan to freeze it frosted), wrap the loaf tightly in a layer of plastic wrap, followed by a layer of aluminum foil, or place it in a freezer-safe bag. It will keep well in the freezer for up to 3 months. To thaw, unwrap it and let it sit at room temperature for a few hours, or thaw slices in the refrigerator overnight.
Glaze Timing Advice: If you’re storing at room temperature or in the refrigerator, I find it’s best to add the glaze just before serving or on the day you plan to eat it. If you’re freezing it with glaze, the glaze might become a bit sticky or slightly messy upon thawing, so it’s often better to freeze the plain loaf and glaze it after thawing. If you do freeze with glaze, ensure it’s fully set before wrapping tightly.
Frequently Asked Questions
Final Thoughts
So there you have it – my absolute favorite, go-to zucchini bread recipe! I truly hope you give this a try because it’s just one of those recipes that brings so much joy. It’s a perfect example of how humble ingredients can transform into something truly spectacular. It’s moist, flavorful, and incredibly easy to make, making it ideal for busy bakers and seasoned pros alike. It’s the kind of recipe that makes your kitchen smell amazing and your family happy. If you love this, you might also enjoy my recipe for my Best Ever Banana Bread or my Easy Apple Crumble – they have that same comforting, home-baked feel! Please, please, please let me know in the comments below how yours turns out! I’d love to hear about any variations you tried or if your family loved it as much as mine does. Happy baking, and enjoy every delicious bite!
Mini Coffee Cheesecakes with Oreo Cookie Crust
Ingredients
Method
- Preheat the oven to 325°F (160°C). Line a 12-cup muffin pan with cupcake liners.
- In a medium bowl, combine the Oreo crumbs and melted butter. Mix until well combined.
- Divide the mixture evenly among the cupcake liners (about 2 tablespoons per cup) and press firmly into the bottoms to form the crust.
- Bake the crusts for 5 minutes. Remove from the oven and let cool slightly while you prepare the filling.
- Reduce the oven temperature to 300°F (150°C).
- In a large bowl, using an electric mixer on low speed, beat the cream cheese, sugar, and all-purpose flour until just combined and smooth. Do not overmix to avoid incorporating too much air. Scrape down the sides of the bowl as needed.
- In a small bowl, combine the warm water and instant coffee granules. Stir until the granules are completely dissolved.
- Add the dissolved coffee mixture, sour cream, and 1 tsp vanilla extract to the cream cheese mixture. Beat on low speed until well combined and smooth.
- Add the eggs one at a time, beating on low speed until just incorporated after each addition. Scrape the sides of the bowl after each egg.
- Divide the cheesecake filling evenly among the prepared crusts in the cupcake liners, filling each cup almost to the top.
- Bake for 17-20 minutes, or until the edges are set but the centers still jiggle slightly. Turn off the oven and leave the cheesecakes inside with the door closed for an additional 10 minutes.
- Crack open the oven door and allow the cheesecakes to cool in the oven for another 15-20 minutes. Then, transfer them to a wire rack to cool completely at room temperature before refrigerating for at least 2 hours, or until thoroughly chilled.
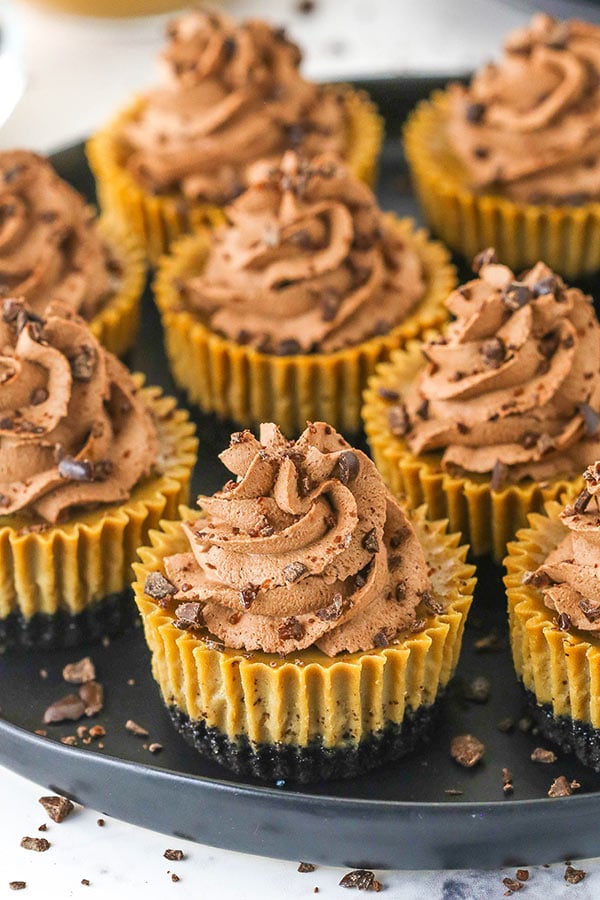
- Once the cheesecakes are fully chilled, prepare the whipped cream. In a large mixer bowl fitted with a whisk attachment, combine the cold heavy whipping cream, powdered sugar, cocoa powder, and 0.5 tsp vanilla extract.
- Whip on high speed until stiff peaks form.
- Pipe or dollop the chocolate whipped cream onto the tops of the chilled cheesecakes. Garnish with crushed chocolate-covered espresso beans, if desired.
- Keep refrigerated until ready to serve.