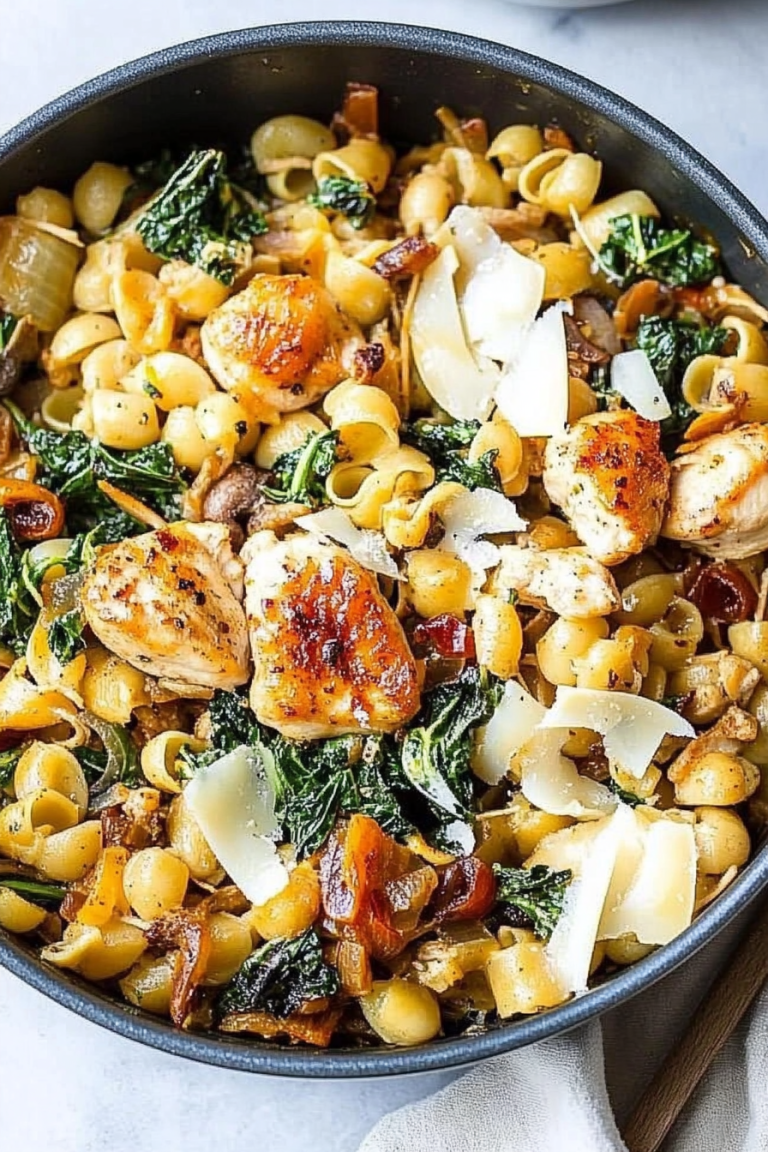
Easy Zucchini Rolls A Flavorful Delight
You know those recipes that just feel like a warm hug? The ones you find yourself coming back to again and again, not just because they taste amazing, but because they’re ridiculously foolproof? This zucchini bread is exactly that for me. It’s the kind of thing I whip up when unexpected guests pop over, or when I just need a little something sweet with my afternoon tea, and honestly, it always disappears faster than I can blink. My kids, bless their little hearts, will practically inhale it, and that’s saying something because they’re usually pretty picky. It’s not complicated, it’s not fussy, and it uses up that surplus zucchini you suddenly find yourself with from the garden (or the grocery store before it goes sad). It’s basically a miracle loaf, and I’m so thrilled to finally share my absolute favorite, fail-proof recipe with you all. Forget those dry, crumbly versions you might have tried before; this is the real deal.
What is Zucchini bread?
So, what exactly *is* zucchini bread, anyway? At its heart, it’s a quick bread, meaning it doesn’t rely on yeast for leavening. Think of it as a muffin in loaf form, but with a secret weapon: zucchini! Now, before you wrinkle your nose at the thought of a vegetable in your sweet treat, hear me out. The zucchini is totally undetectable in terms of flavor, I promise. What it *does* do is incredibly important: it adds an unbelievable amount of moisture. This is what makes this recipe so special, turning out a tender, almost impossibly moist crumb that’s far superior to most other quick breads. It’s essentially a vehicle for deliciousness, ready to be loaded up with spices, nuts, chocolate chips, or whatever your heart desires. It’s that perfect balance of comforting and comfortingly familiar, but with a delightful twist that keeps you coming back for slice after slice.
Why you’ll love this recipe?
Okay, let’s talk about why this particular zucchini bread recipe has earned a permanent spot in my recipe binder, and why I think it’s going to become your go-to, too. First off, the flavor is just *chef’s kiss*. It’s perfectly spiced with warm cinnamon and a hint of nutmeg, giving it that cozy aroma that fills your entire house as it bakes. But what truly sets it apart, and what I love most about it, is the texture. It is, without a doubt, the moistest zucchini bread I’ve ever had. Seriously, it’s like biting into a little cloud. And the best part? It’s ridiculously easy to make. I’m talking minimal fuss, one-bowl-if-you’re-feeling-lazy easy. You don’t need fancy equipment or a culinary degree for this one. Plus, it’s incredibly budget-friendly. Zucchini is usually pretty inexpensive, and the other pantry staples are things you likely already have on hand, making it a lifesaver on weeks when the grocery bill is looking a little hefty. It’s also super versatile. You can keep it simple or go wild with add-ins like chocolate chips (my personal favorite, obviously), walnuts, or even a swirl of cream cheese. If you’re a fan of my What is the best banana bread recipe?What is the comforting nature of this loaf?
How to Make Zucchini Bread
Quick Overview
The beauty of this recipe is its simplicity. You’ll start by combining your dry ingredients, then mixing your wet ingredients, and finally bringing them all together with your grated zucchini. A quick stir of your chosen add-ins, a pour into a prepared loaf pan, and into the oven it goes. The whole process from start to finish, including gathering ingredients, takes less than 20 minutes of active time. It’s that straightforward, making it perfect for busy weeknights or even a spontaneous baking project with the kids. Trust me, even if you’re a beginner baker, you can nail this.
Ingredients
For the Main Batter:
You’ll need 2 cups of all-purpose flour, 1 teaspoon of baking soda, ½ teaspoon of baking powder, 1 teaspoon of ground cinnamon, ¼ teaspoon of ground nutmeg, and a good pinch of salt. Make sure your baking soda and baking powder are fresh; it makes a world of difference! I always give them a sniff test before I use them. For the flour, any all-purpose will do, but I find that a good quality unbleached all-purpose flour gives the best texture.
For the Sweetness & Moisture:
This is where the magic happens! We’re using 1 cup of granulated sugar for sweetness, but I’ve also experimented with swapping out half of it for brown sugar for an even richer flavor. You’ll also need 2 large eggs, preferably at room temperature because they incorporate better. Then, ½ cup of vegetable oil – I usually use canola, but a mild olive oil works too, just nothing too strong in flavor. And of course, our star: 1 ½ cups of finely grated zucchini. Make sure to squeeze out as much excess moisture as you can after grating. That’s a crucial step!
For the Extra Goodies (Optional!):
This is where you can really make it your own. I adore adding 1 cup of semi-sweet chocolate chips. They melt into little pockets of gooey goodness. Chopped walnuts or pecans are also fantastic for a bit of crunch. If you like a little tang, a swirl of cream cheese or a spoonful of your favorite jam is amazing.
Step-by-Step Instructions
Step 1: Preheat & Prep Pan
First things first, get that oven preheating to 350°F (175°C). While that’s happening, grab a standard 9×5 inch loaf pan. Grease it really well with butter or cooking spray, and then flour it, tapping out any excess. This ensures your beautiful loaf doesn’t stick. I usually line the bottom with parchment paper too, just for extra insurance. It’s a little extra step, but it means you won’t cry if your loaf tries to cling to the pan.
Step 2: Mix Dry Ingredients
In a large bowl, whisk together the flour, baking soda, baking powder, cinnamon, nutmeg, and salt. Give it a good whisk until everything is evenly distributed. You want all those leavening agents and spices to be happy and mixed throughout the flour, so you don’t get weird pockets of baking soda or bland spots. I usually do this while the oven is heating up, so it’s all ready to go.
Step 3: Mix Wet Ingredients
In a separate, medium-sized bowl, whisk together the sugar and eggs until they’re well combined. Then, slowly drizzle in the vegetable oil while whisking continuously until the mixture is smooth and emulsified. It should look nice and glossy. Don’t rush this part; a good mix here means a tender crumb.
Step 4: Combine
Now, pour the wet ingredients into the bowl with the dry ingredients. Add the grated and squeezed zucchini. Gently fold everything together with a spatula or wooden spoon until *just* combined. Seriously, stop as soon as you don’t see any more dry flour streaks. Overmixing is the enemy of tender quick breads, so be gentle! A few little lumps are perfectly fine.
Step 5: Prepare Filling (If Using Add-ins)
If you’re adding chocolate chips, nuts, or anything else, this is the time. Gently fold them into the batter. If you’re doing a swirl, like cream cheese, I usually make the batter, pour half into the pan, dollop the cream cheese mixture on top, then add the remaining batter and swirl gently with a knife or skewer. For chocolate chips, just fold them in evenly.
Step 6: Layer & Swirl
Pour the batter evenly into your prepared loaf pan. If you’re doing a swirl, make sure to distribute your filling evenly across the batter. Smooth the top gently with your spatula. You want it to bake up nicely and evenly.
Step 7: Bake
Pop that pan into your preheated oven and bake for 50-65 minutes. The baking time can vary a bit depending on your oven. You’ll know it’s done when a toothpick inserted into the center comes out clean, or with just a few moist crumbs attached. If the top starts to brown too quickly, you can loosely tent it with aluminum foil for the last 15-20 minutes. I always check mine around the 50-minute mark, just to be safe.
Step 8: Cool & Glaze (Optional)
Once it’s out of the oven, let the loaf cool in the pan for about 10-15 minutes. This is super important! Then, carefully invert it onto a wire rack to cool completely. If you’re adding a glaze, this is the time to make it and drizzle it over the top once the bread has cooled down significantly but is still a little warm. I find it soaks in beautifully this way.
Step 9: Slice & Serve
Once completely cool (or just slightly warm if you can’t resist!), slice into thick, generous pieces. The smell alone is enough to make your mouth water! Serve it as is, or with a dollop of butter. It’s pure comfort on a plate.
What to Serve It With
This zucchini bread is so wonderfully versatile, it’s practically a chameleon! For a cozy breakfast, I love it toasted lightly with a smear of butter and a strong cup of coffee. The warm spices are just the perfect start to the day. If you’re planning a more elaborate brunch, this loaf is a fantastic addition to a spread. It pairs beautifully with fresh fruit salads, quiches, and mimosas. For a more decadent dessert, a drizzle of chocolate ganache or a dollop of whipped cream takes it over the top. My kids love it as a sweet afternoon snack after school, usually devoured with a tall glass of milk. It’s also surprisingly good alongside a bowl of vanilla ice cream for a simple, yet satisfying, dessert. Honestly, it’s perfect for almost any occasion when you need something comforting and delicious.
Top Tips for Perfecting Your Zucchini Bread
I’ve made this zucchini bread more times than I can count, and along the way, I’ve picked up a few tricks that I swear make all the difference. For the zucchini itself, grating it finely is key. You can use the large holes of a box grater, but I find the smaller ones give a better texture. And the squeezing part? Don’t skip it! Use a clean kitchen towel or cheesecloth to wring out as much liquid as possible. This prevents a soggy loaf and ensures that perfect moist-but-not-dense crumb. When it comes to mixing, remember: gentle is best. Overmixing develops the gluten in the flour too much, leading to a tough, chewy bread instead of a tender one. Just mix until you no longer see dry flour. If you’re adding chocolate chips, tossing them in a tablespoon of the flour mixture before adding them to the batter can help prevent them from sinking to the bottom. For the swirl effect, don’t over-swirl, or you’ll muddy the flavors and colors. Just a few gentle passes with a knife should do it. If you find your oven runs hot, it’s always a good idea to start checking for doneness a little earlier. Every oven is different, so getting to know yours is half the battle. And for the glaze, if it seems too thick, add a tiny bit more liquid (milk or lemon juice); if it’s too thin, a little more powdered sugar. You want it pourable but not watery. I once tried using lemon zest in the glaze, and it was surprisingly delightful!
Storing and Reheating Tips
One of the best things about this zucchini bread is how well it keeps. Stored at room temperature in an airtight container, it stays wonderfully moist for up to 3 days. I usually just wrap the whole loaf tightly in plastic wrap, or slice it and store the slices in a good quality container. If you need it to last a bit longer, the refrigerator is your friend. Wrapped well, it can last for about a week in the fridge. When you’re ready to enjoy a slice that’s been refrigerated, you can eat it cold (it’s still good!), or pop it in the toaster for a few minutes to bring back that fresh-baked warmth. For longer storage, this bread freezes beautifully! Wrap the cooled loaf very tightly in plastic wrap, then in aluminum foil, or place it in a freezer-safe bag. It will keep well in the freezer for up to 3 months. Thaw it overnight at room temperature or in the refrigerator. If you’ve glazed your bread, I recommend glazing it *after* thawing if you plan to freeze it, or just be aware that the glaze might soften a bit during freezing and thawing. For reheating, a quick 10-20 seconds in the microwave for a slice is usually enough to bring it back to life, or toast it as I mentioned.
Frequently Asked Questions
Final Thoughts
So there you have it – my absolute favorite, ridiculously moist zucchini bread! It’s more than just a recipe; it’s a little slice of comfort that I’m so happy to share with you. It’s the kind of baking that makes your kitchen smell divine, fills your home with warmth, and brings smiles to everyone’s faces. I truly believe that everyone should have a reliable, go-to quick bread recipe, and this is mine. If you love this, you might also enjoy my recipe for Double Chocolate Chip Cookies or my Easy Apple Crumble for more comforting baked goods. I can’t wait to hear what you think of this zucchini bread, and I’d absolutely love it if you’d share your own variations and tips in the comments below! Happy baking, everyone!
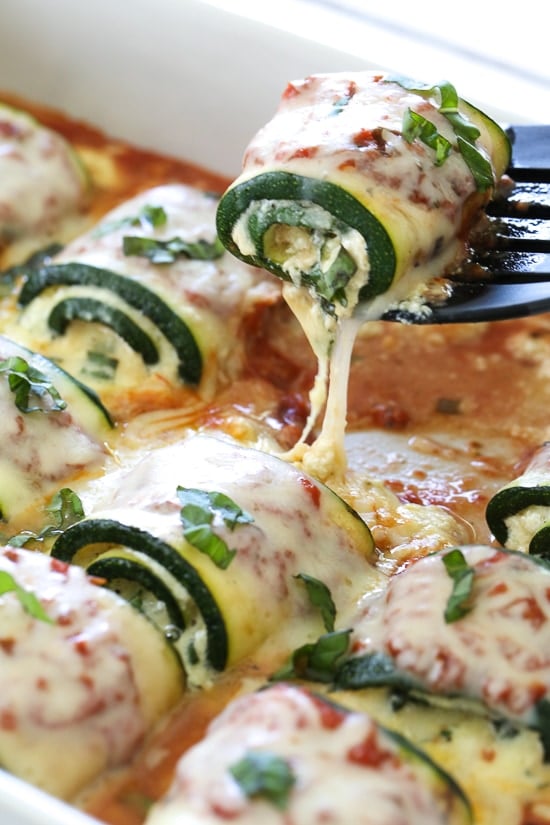
Zucchini Rollatini
Ingredients
Method
- Preheat the oven to 400°F. Spread 0.25 cup marinara sauce on the bottom of a 13 x 9-inch baking dish.
- Cut the zucchini lengthwise, into 0.25-inch thick slices until you have a total of 12 slices about the same size. It’s easiest to do this with a mandoline.
- Season both sides of the zucchini with 0.5 teaspoon salt and pepper, then grill on a grill pan over high heat to help dry out the zucchini, until pliable and grill marks form, but not fully cooked, about 2 minutes on each side.
- In a medium bowl, beat the egg then mix together with ricotta, Pecorino Romano, basil, garlic, 0.125 teaspoon salt and 0.125 teaspoon pepper.
- Spread the ricotta mixture (about 1.5 tablespoons each) evenly onto each zucchini slice, spreading to cover.
- Roll up slices and arrange them each seam side down in the prepared dish. Top each with 1 tablespoon marinara sauce and 1 tablespoon mozzarella cheese and tightly cover with foil.
- Bake 20 minutes, or until the cheese is hot and melted.