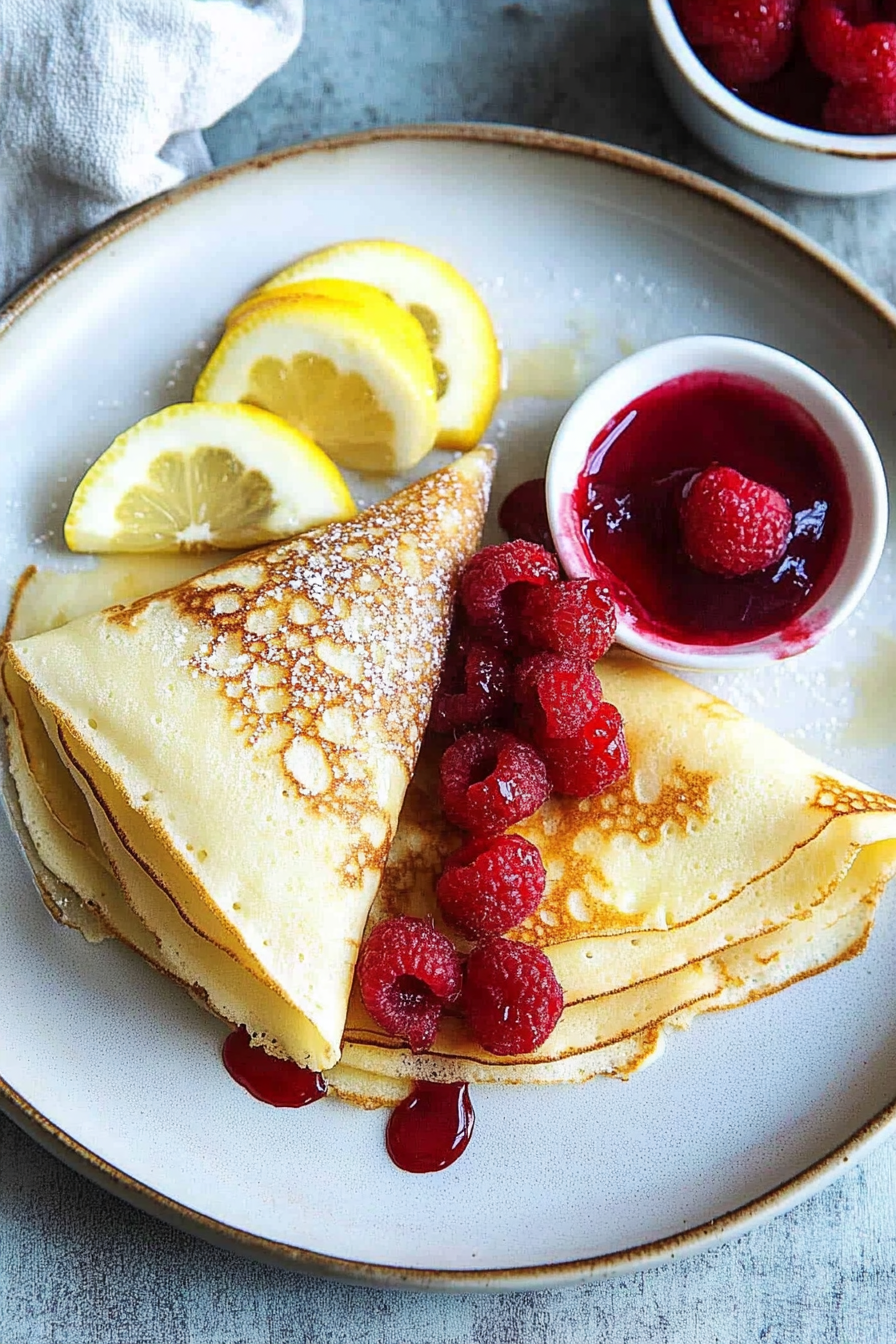
Easy Citrus Crepes with Raspberry Sauce
You know, sometimes I get asked about “the one” recipe. The one that’s my absolute go-to, the one I’ve made a gazillion times, the one that always gets rave reviews. And honestly, it’s so hard to pick just one! But if I’m being completely truthful, and I always am with you guys, my mind immediately goes to this incredibly moist and flavorful Zucchini Bread. It’s not just any quick bread; it’s the kind of thing that makes your kitchen smell like pure comfort, the kind that disappears off the plate faster than you can say “extra slice, please.” It’s funny, when I first started baking this, I was a bit skeptical about the zucchini – I mean, vegetables in a sweet bread? But trust me, it’s a game-changer. It adds this incredible moisture that you just can’t get any other way, and you don’t taste the zucchini at all, I promise! It’s like magic, but edible magic. This recipe has saved me on so many busy weeknights when I needed a quick dessert, and it’s also my secret weapon for potlucks. It’s surprisingly simple to whip up, and honestly, it rivals any bakery version I’ve ever tried, and for a fraction of the cost!
What is Zucchini bread?
So, what exactly is this wonderful thing we call zucchini bread? Think of it as a super moist, tender, and subtly sweet quick bread that happens to have grated zucchini baked right into its batter. The zucchini is the unsung hero here! When it’s baked, it completely melts into the batter, lending an incredible moisture and a soft crumb without imparting any discernible zucchini flavor. It’s not a savory bread, oh no. It’s definitely on the sweeter side, usually spiced with cinnamon and sometimes nutmeg, and often studded with goodies like chocolate chips or chopped nuts. It’s essentially a fantastic vehicle for enjoying seasonal zucchini, but honestly, I make it year-round because it’s just that good. The “quick bread” part means it uses a chemical leavener (like baking soda or baking powder) instead of yeast, so you don’t have to wait for dough to rise. It’s designed for speed and ease, perfect for when that craving strikes!
Why you’ll love this recipe?
There are so many reasons why this particular zucchini bread recipe has earned a permanent spot in my recipe box, and why I’m so excited to share it with you. First and foremost, the flavor is just divine. It’s warm and comforting, with that perfect hint of cinnamon that just hugs you from the inside. The texture is where it truly shines – it’s unbelievably moist and tender, thanks to the secret weapon: zucchini! You get this soft, yielding crumb that’s just melt-in-your-mouth delicious. And let’s talk about simplicity. This is a lifesaver on those hectic days. You can have it mixed and in the oven in about 15 minutes flat. No fancy equipment needed, just a couple of bowls and a whisk. Plus, it’s incredibly budget-friendly. Zucchini is often readily available and affordable, and the rest of the ingredients are pantry staples. What I love most is its versatility. I often add chocolate chips, because who doesn’t love chocolate? But it’s also fantastic plain, or with a handful of chopped walnuts or pecans for a little crunch. It’s perfect for breakfast, as a mid-afternoon snack, or even as a light dessert. Compared to something like a dense pound cake or a fussy layer cake, this zucchini bread is just so approachable and forgiving. It’s the kind of baking that feels like a hug, and that’s priceless.
How do you make Zucchini bread?
Quick Overview
The process is delightfully straightforward. We’ll start by getting our oven nice and hot and prepping our loaf pan. Then, it’s a simple matter of whisking together the dry ingredients, mixing the wet ingredients separately, and then bringing them together just until combined. While that rests, we’ll quickly prep our filling, layer it into the batter, give it a gentle swirl, and then it’s off to bake until golden and wonderfully fragrant. The whole thing is ready in under an hour, from start to finish. It’s honestly one of the easiest baking projects you can tackle, and the results are always so rewarding.
Ingredients
For the Main Batter:
3 cups all-purpose flour: I usually just use the regular stuff from the grocery store. Make sure it’s not too old, though. The fresher, the better for a good crumb.
1 teaspoon baking soda: This is what gives our bread its lift. Don’t skip it!
1/2 teaspoon salt: Just to balance out all the sweetness.
1 teaspoon ground cinnamon: My favorite part! Use a good quality one for the best flavor.
1/4 teaspoon ground nutmeg (optional): If you like a little extra spice, a tiny pinch of nutmeg is lovely.
1 1/2 cups granulated sugar: You can adjust this slightly if you prefer it less sweet, but this is the perfect balance for me.
2 large eggs: Room temperature eggs incorporate much better, so take them out of the fridge about 30 minutes before you start.
1 cup vegetable oil: Or any neutral oil like canola or even melted coconut oil. This is key to the moisture!
1/4 cup milk (any kind works!): I’ve even tested this with almond milk and oat milk, and it actually made it even creamier. So, use what you have!
1 teaspoon vanilla extract: A good splash of vanilla always makes things better.
2 cups grated zucchini, squeezed dry: This is the star! Use the medium-sized holes on your box grater. And squeezing out the excess water is crucial – don’t skip this step, or your bread can get soggy.
For the Filling:
1/2 cup packed brown sugar: The brown sugar gives it a lovely caramel-y note.
1 teaspoon ground cinnamon: More spice, always good!
1/2 cup chopped walnuts or pecans (optional): For a little crunch and nutty flavor. If you have nut allergies, just leave them out – it’s still amazing!
For the Glaze:
1 cup powdered sugar: Sifted, if you want a super smooth glaze.
2-3 tablespoons milk or lemon juice: Lemon juice adds a nice tang that cuts through the sweetness beautifully.
1/2 teaspoon vanilla extract (optional): For an extra layer of flavor.
Step-by-Step Instructions
Step 1: Preheat & Prep Pan
First things first, get your oven preheated to 350 degrees Fahrenheit (175 degrees Celsius). While it’s heating up, grab a standard 9×5 inch loaf pan. I like to grease it really well with butter or non-stick spray, and then give it a little dusting of flour. Tap out any excess flour. This makes sure your beautiful loaf slides right out after baking. You can also line it with parchment paper for extra insurance – I often do this when I’m feeling particularly anxious about sticking!
Step 2: Mix Dry Ingredients
In a large bowl, whisk together the flour, baking soda, salt, cinnamon, and nutmeg (if you’re using it). Whisking them together ensures that the leavening agents and spices are evenly distributed throughout the batter. You don’t want pockets of salt or baking soda, trust me! It should look like a uniform, pale mixture. This step is so simple but so important for an even bake.
Step 3: Mix Wet Ingredients
In a separate medium bowl, whisk together the granulated sugar, eggs, vegetable oil, milk, and vanilla extract until everything is well combined and smooth. The mixture will look a little glossy. Make sure there are no streaks of egg yolk or white. This is where a lot of that moisture and richness comes from!
Step 4: Combine
Now, pour the wet ingredients into the bowl with the dry ingredients. Using a spatula or a wooden spoon, gently fold them together until *just* combined. I can’t stress this enough: do NOT overmix! A few streaks of flour are okay. Overmixing develops the gluten in the flour, which can lead to a tough, dense bread. We want tender and moist, remember? Once you can barely see any dry flour, gently fold in your squeezed and grated zucchini. Again, just mix until it’s incorporated. You should have a thick, lumpy batter studded with green bits of zucchini.
Step 5: Prepare Filling
In a small bowl, stir together the brown sugar and the cinnamon for the filling. If you’re adding nuts, toss them in here too. This is your little flavor bomb that’s going to create those lovely swirls in the bread.
Step 6: Layer & Swirl
Pour about half of your zucchini batter into the prepared loaf pan and spread it out evenly. Sprinkle about half of your brown sugar filling mixture over the batter. Now, pour the remaining batter on top and spread it gently. Sprinkle the rest of the filling mixture over the top. To get those gorgeous swirls, take a knife or a skewer and gently swirl it through the batter a few times. Don’t go crazy and mix it all up; just a few passes to create ribbons of the cinnamon-sugar filling. You want to see distinct swirls, not a homogenous mixture.
Step 7: Bake
Place the loaf pan in the preheated oven. Bake for 50-65 minutes. The exact time can vary depending on your oven, so start checking around the 50-minute mark. Your zucchini bread is done when a wooden skewer or toothpick inserted into the center comes out clean, or with just a few moist crumbs attached (no wet batter!). The top should be golden brown and it will smell absolutely heavenly. If the top starts to get too brown before the inside is cooked, you can loosely tent it with aluminum foil for the last 15-20 minutes.
Step 8: Cool & Glaze
Once baked, let the bread cool in the loaf pan for about 10-15 minutes. This allows it to set up a bit before you try to remove it. Then, carefully invert the pan onto a wire rack and lift out the loaf. Let it cool completely on the wire rack. This is really important, especially before glazing. If you try to glaze a warm loaf, the glaze will just melt right off. For the glaze, whisk together the powdered sugar, 2 tablespoons of milk (or lemon juice), and the vanilla extract. Add more liquid, a teaspoon at a time, until you reach your desired drizzling consistency. It should be thick enough to coat the bread but thin enough to pour. Once the bread is completely cool, drizzle the glaze generously over the top. Let the glaze set for about 15-20 minutes before slicing.
Step 9: Slice & Serve
Once the glaze has set, grab a good bread knife and slice your masterpiece. Serve warm or at room temperature. It’s delightful on its own, but a little smear of butter is also pure bliss. Enjoy every single bite!
What to Serve It With
This zucchini bread is so versatile, it really can fit into almost any meal or occasion. For breakfast, it’s an absolute dream with a hot cup of coffee or a steaming mug of tea. I love it just as is, maybe with a tiny pat of butter if I’m feeling fancy. The sweetness is just enough to make you feel like you’re starting the day with a treat. For brunch, it’s a fantastic addition to a spread. I like to cut it into smaller, bite-sized pieces and arrange them on a platter with other pastries or fruit. It pairs wonderfully with a glass of fresh orange juice or even a mimosa! As a dessert, it’s just perfect for when you’re craving something sweet but don’t want to bake a whole cake. I sometimes serve it with a dollop of whipped cream or a scoop of vanilla bean ice cream, especially if I’ve added chocolate chips to the batter – pure decadence! And for those cozy snack moments, it’s my go-to. It’s the perfect accompaniment to an afternoon cup of tea or a glass of milk while curled up with a good book. My family also loves it as a late-night snack; it’s sweet enough to satisfy without being too heavy.
Top Tips for Perfecting Your Zucchini Bread
Over the years, I’ve learned a few tricks that I think make a big difference in getting this zucchini bread just right, every single time. First, when it comes to the zucchini itself, really squeeze out as much moisture as you can. I usually use a clean kitchen towel or cheesecloth and give it a good wring. This step is non-negotiable for preventing a gummy texture. Also, don’t shred it too finely; a medium shred is perfect. For mixing, the “just combined” rule is your best friend. Seriously, stop mixing the moment you don’t see big streaks of dry flour. A few tiny bits are fine, they’ll disappear during baking. Overmixing is the enemy of tender quick breads! When you’re preparing the filling for swirling, make sure your brown sugar and cinnamon mixture is lump-free. This ensures those beautiful ribbons of flavor throughout your bread. For the swirl itself, I find that just a couple of passes with a knife are enough. You want distinct layers, not a muddy mess. If your oven tends to run hot, or if you notice the top browning too quickly, don’t hesitate to loosely tent your loaf pan with aluminum foil for the last 20-30 minutes of baking. This allows the inside to cook through without the top getting burnt. And for the glaze, patience is key! Make sure your bread is *completely* cool before you drizzle it. I’ve learned this the hard way, ending up with a sticky mess instead of a neat glaze. If you find your glaze is too thick, add milk or lemon juice a teaspoon at a time until it’s pourable. Too thin? Add a little more powdered sugar. I’ve tested this recipe with a few different flours, and while all-purpose is my favorite, a good quality gluten-free blend can work too, though you might need a touch more liquid. And if you don’t have milk, a dairy-free alternative like almond or soy milk works beautifully, and sometimes even makes it a bit more tender!
Storing and Reheating Tips
Keeping this zucchini bread fresh is thankfully pretty easy! At room temperature, it stays wonderfully moist for about 2-3 days. I usually store it in an airtight container or wrap it tightly in plastic wrap, leaving it on the counter. It’s perfect for grabbing a slice anytime. If you think you’ll need it for longer than that, or if your kitchen is particularly warm, I highly recommend refrigerator storage. Wrapped well in plastic wrap and then tucked into an airtight container, it can last for a good 5-7 days. The texture might firm up slightly in the fridge, but don’t worry, it’s easily remedied. For longer storage, this bread freezes beautifully! Once it’s completely cooled, wrap it tightly in a layer of plastic wrap, then a layer of aluminum foil, or place it in a freezer-safe bag. It will keep its best quality in the freezer for up to 3 months. When you’re ready to enjoy a slice from the fridge or freezer, you can either let it come to room temperature on its own, or for a little treat, warm it up gently. A few seconds in the microwave (about 10-15 seconds per slice) will bring back that wonderful soft texture. If you plan to freeze it *with* the glaze, make sure the glaze is fully set before wrapping. Honestly, though, I find it’s often best to glaze it *after* thawing and reheating, if you’re freezing a whole loaf or large portions, just to keep the glaze looking its freshest.
Frequently Asked Questions
Final Thoughts
So there you have it – my absolute favorite zucchini bread recipe! It’s more than just a recipe to me; it’s a reminder of cozy afternoons, shared moments with family, and the simple joy of creating something delicious from scratch. What I love most about this particular recipe is how it delivers on every promise: incredible moisture, fantastic flavor, and surprising ease. It’s one of those recipes that truly makes you feel like a baking rockstar, even if you’re just starting out. It’s perfect for when you’re looking for something comforting and satisfying, and it’s guaranteed to be a hit. If you love this recipe, you might also enjoy my recipe for Easy Banana Bread Muffins or my Classic Blueberry Scones. They’re all made with that same love and focus on simple, delicious results. I really hope you give this zucchini bread a try. I’m just itching to hear what you think! Let me know in the comments below if you make it, and how you customize it – maybe you add white chocolate chips or a hint of orange zest? I can’t wait to hear all about your baking adventures!
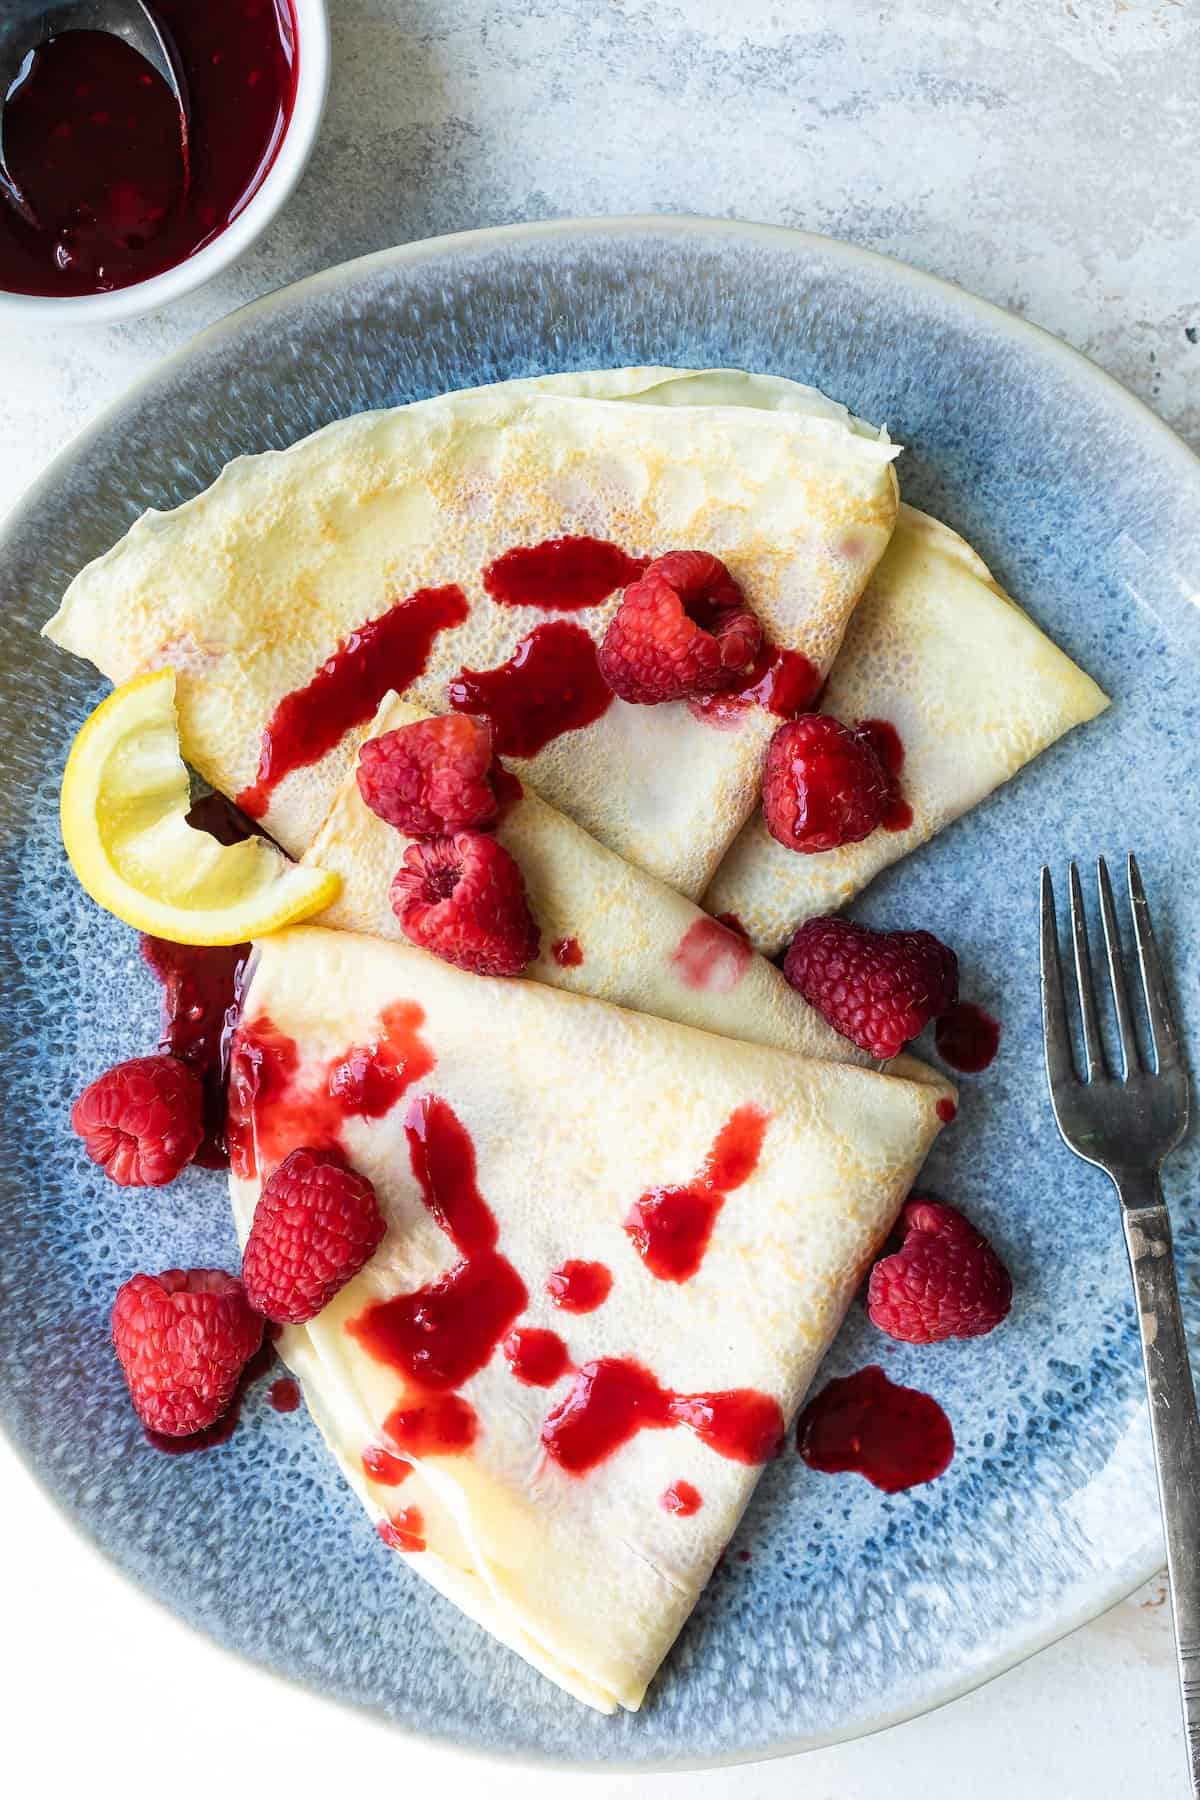
Lemon Crepes
Ingredients
Method
- Whisk together flour and salt in a medium bowl.
- In a separate bowl, whisk together milk, eggs, lemon juice, lemon zest and vanilla.
- Gradually add milk mixture to flour mixture, whisking until smooth. Let stand 15 minutes.
- Lightly grease a large frying pan with cooking spray and set over medium heat.
- Add 0.33 cup batter and swirl to completely cover bottom of pan.
- Cook until edges of crepe curl-up and underside of crepe is golden brown, about 2 or 3 minutes.
- Flip the crepe and continue to cook for 1 more minute.
- Remove crepe from skillet and repeat with remaining batter.
- Coat pan with cooking spray in between each crepe.
- Combine raspberries, lemon juice and powdered sugar in a saucepan.
- Cook until raspberries are broken down and reduced, about 10 minutes.
- Remove from heat and strain through sieve to eliminate seeds.
- Spread about a tablespoon of the warm raspberry sauce over each crepe and serve.