How to Store Garlic for Winter
Okay, so you know how some recipes just feel like a warm hug? This zucchini bread is *that* recipe for me. It’s the one I whip up when I’m feeling a little nostalgic, or when I’ve got a mountain of zucchini from the garden that needs taming. Honestly, the smell that fills the house while this is baking is pure magic. It’s like a comforting blanket of cinnamon and sugar. My kids? Oh, they go absolutely bonkers for it, and they’re usually pretty picky! If you’ve ever tried to make a really good zucchini bread and ended up with something a little… well, meh, dry or bland, you’ve come to the right place. This isn’t just *any* zucchini bread; this is the one that’ll make you think, “Wow, this is what zucchini bread is *supposed* to taste like!” Forget those dense, flavorless bricks you might have encountered. We’re talking incredibly moist, perfectly spiced, and just the right amount of sweet. It’s a classic, for sure, but this version has a few little twists that make all the difference. Think of it as my elevated take on a beloved childhood treat.
What is Zuc
So, what exactly *is* zucchini bread? At its heart, it’s a quick bread, meaning it uses baking soda or baking powder as leavening instead of yeast, so you don’t have to wait around for dough to rise. The “zucchini” part, well, that’s the secret ingredient! Grated zucchini might sound a little unusual in a sweet bread, but trust me, it’s a game-changer. When baked, the zucchini breaks down and adds this incredible moisture and a subtle, almost undetectable flavor that just makes the whole thing unbelievably tender and rich. It’s not like you’re eating a loaf of vegetables; it’s more like the zucchini is the unsung hero behind that perfect, cake-like crumb. The name itself is pretty straightforward – it’s a loaf of bread featuring zucchini. But the *experience* of eating it? That’s where the real story is. It’s essentially a delicious excuse to use up all that summer squash, transformed into something utterly delightful that tastes like pure comfort.
Why you’ll love this recipe?
There are so many reasons why this zucchini bread has earned a permanent spot in my recipe binder, and I just know you’re going to fall in love with it too. First off, let’s talk about the flavor. It’s just divine. We’re talking a beautiful balance of warm spices – cinnamon, nutmeg, maybe a hint of cloves if you’re feeling it – with a subtle sweetness that doesn’t overpower. The zucchini itself adds this inherent richness that you just can’t get from butter or oil alone. It’s naturally moist, almost like a bundt cake, but with that wonderful bread texture. And the simplicity! Oh my goodness, this recipe is a lifesaver on busy nights. You can literally have it mixed and in the oven in about 15 minutes. No fancy techniques, no complicated steps. It’s mostly just mixing things in bowls! Plus, it’s incredibly budget-friendly. Zucchini is often super affordable, especially when it’s in season. You probably already have most of the other ingredients in your pantry. I also love how versatile it is. You can easily add chocolate chips, nuts, or even a bit of cream cheese swirl if you’re feeling fancy. It’s perfect for breakfast on the go, a delightful afternoon treat with a cup of tea, or even as a lighter dessert. Compared to, say, a rich chocolate cake, this feels a bit more wholesome, even though it’s just as satisfying. What I love most about this recipe is that it always, always turns out. No guesswork, no stress. It’s just pure, delicious, comforting goodness every single time.
How do you make Zucchini bread?
Quick Overview
This recipe is all about simplicity and amazing results. You’ll start by whisking your dry ingredients together, then combine your wet ingredients, and finally, bring them all together. The grated zucchini gets mixed right into the batter, adding its magic moisture. A quick swirl of a simple filling before baking adds an extra layer of flavor and texture. It’s a straightforward process that yields an incredibly moist and flavorful loaf. The whole thing from start to finish takes less than an hour, making it one of my go-to recipes when I need something delicious without a lot of fuss.
Ingredients
For the Main Batter:
You’ll need about 2 cups of grated zucchini. Make sure to squeeze out any excess moisture – this is super important for texture! I usually use a fine grater for a smoother texture, but a medium grate works too if you don’t mind a few little zucchini bits. You’ll also need 2 cups of all-purpose flour (I’ve tested this with gluten-free blends, and it works pretty well, though the texture can be slightly different). For sweetness, 1.5 cups of granulated sugar is standard, but I sometimes cut it back to 1 cup if I’m adding a lot of chocolate chips. And of course, 2 teaspoons of baking soda for that lift, 1 teaspoon of ground cinnamon for warmth, and half a teaspoon each of salt and ground nutmeg. If you like a little more spice, feel free to add a pinch of ground cloves or ginger! Lastly, 2 large eggs, beaten, and half a cup of melted unsalted butter or a neutral oil like vegetable or canola oil. I’ve even tried this with melted coconut oil, and it was delicious!
For the Filling:
This is where we add an extra layer of yum! You’ll need about 1/2 cup of packed brown sugar (light or dark works), 1 teaspoon of ground cinnamon, and a pinch of salt. Some people like to add a few tablespoons of chopped pecans or walnuts here too, which is always a fantastic idea. It adds a lovely crunch.
For the Glaze:
This is totally optional, but oh-so-worth-it. For a simple glaze, whisk together 1 cup of powdered sugar with 2-3 tablespoons of milk or cream until it’s smooth and pourable. You can also use lemon juice or orange juice for a citrusy kick! I sometimes add a tiny splash of vanilla extract to the glaze, too.
Step-by-Step Instructions
Step 1: Preheat & Prep Pan
First things first, let’s get that oven fired up to 350 degrees Fahrenheit (175 degrees Celsius). While it’s preheating, grab a standard 9×5 inch loaf pan. I like to grease it really well with butter or cooking spray, and then dust it with a little flour. This ensures your beautiful loaf doesn’t stick. For extra insurance, you can also line the pan with parchment paper, leaving a little overhang on the sides. This makes lifting the finished loaf out a breeze!
Step 2: Mix Dry Ingredients
In a large mixing bowl, I like to whisk together the flour, sugar, baking soda, cinnamon, salt, and nutmeg. Whisking them together thoroughly is key! It ensures that the leavening agent (baking soda) and the spices are evenly distributed throughout the batter. This means you won’t get any weird pockets of baking soda taste or a clump of cinnamon in one bite. Just a nice, uniform flavor in every slice.
Step 3: Mix Wet Ingredients
In a separate medium bowl, whisk together the beaten eggs, melted butter (or oil), and your grated, squeezed-out zucchini. Give it a good stir until everything is well combined. The mixture might look a little thick or lumpy because of the zucchini, and that’s perfectly fine. Don’t overthink it!
Step 4: Combine
Now, pour the wet ingredients into the bowl with the dry ingredients. Using a spatula or a wooden spoon, gently fold everything together until *just* combined. It’s really important not to overmix here. Seriously, this is the biggest secret to a tender zucchini bread. A few streaks of flour are okay; they’ll disappear as you finish mixing. Overmixing develops the gluten in the flour, which can lead to a tough, chewy loaf, and nobody wants that. We’re going for soft and tender!
Step 5: Prepare Filling
While the batter is waiting, quickly mix together the brown sugar, cinnamon, and pinch of salt for the filling in a small bowl. If you’re adding nuts, toss them in now too. This mixture will add a wonderful caramel-like flavor and a bit of chewiness to your bread.
Step 6: Layer & Swirl
Pour about half of the batter into your prepared loaf pan and spread it evenly. Sprinkle about half of the brown sugar filling mixture over the top. Then, spoon the remaining batter over the filling, making sure to cover it completely. Finally, sprinkle the rest of the brown sugar mixture over the top of the batter. Now, for the fun part: take a knife or a skewer and gently swirl it through the batter and filling. This creates those beautiful ribbons of spiced sugar throughout the loaf. Don’t swirl too much, or you’ll just mix everything together; aim for a few gentle passes.
Step 7: Bake
Pop that loaf pan into your preheated oven. Bake for 50-65 minutes. The exact time will depend on your oven, so keep an eye on it. You’ll know it’s done when a wooden skewer or toothpick inserted into the center comes out clean, or with just a few moist crumbs attached (no wet batter!). If the top starts browning too quickly before the inside is cooked, you can loosely tent it with aluminum foil.
Step 8: Cool & Glaze
Once it’s baked to perfection, carefully remove the loaf pan from the oven. Let it cool in the pan for about 10-15 minutes. This allows it to set up a bit and makes it easier to handle. Then, gently invert the pan onto a wire cooling rack to remove the loaf. Let it cool completely on the rack before glazing. If you glaze it while it’s still warm, the glaze will just melt right off! Once it’s totally cool, drizzle your prepared glaze all over the top. Let the glaze set for a few minutes before slicing.
Step 9: Slice & Serve
This is the moment we’ve all been waiting for! Once the glaze has set, use a sharp knife to slice your beautiful zucchini bread. The aroma alone will have everyone gathering in the kitchen. Serve it up warm or at room temperature. It’s absolutely delicious on its own, but it’s also fantastic toasted and buttered.
What to Serve It With
This zucchini bread is so versatile, it’s become a staple for so many different occasions in my house! For a simple breakfast, I love to have a slice alongside a hot mug of coffee or a glass of fresh orange juice. Sometimes, I’ll lightly toast it and spread a thin layer of cream cheese or butter on it, which is just divine. It’s a much more satisfying start to the day than a sugary cereal, and it feels like a treat! For brunch, it feels a bit more elegant. I’ll serve it on a pretty platter alongside some fresh fruit salad, maybe some scrambled eggs, and a mimosa. The warm spices complement just about any brunch fare perfectly. As a dessert, it’s surprisingly satisfying. It’s not overly rich, so it’s perfect after a larger meal. I love serving it with a dollop of whipped cream or even a scoop of vanilla bean ice cream if I’m feeling indulgent. The warm spices and moist crumb pair beautifully with creamy textures. And for those cozy snacks? This is where it truly shines. On a chilly afternoon, or when that 10 pm craving hits and you don’t want to bake a whole cake, a slice of this is pure bliss. I’ll pair it with a cup of herbal tea or hot chocolate. My family tradition is to always have a slice ready after school for the kids, and it’s often gone before dinner! Honestly, it’s good with just about anything, or nothing at all.
Top Tips for Perfecting Your Zucchini Bread
Over the years, I’ve learned a few things that make this zucchini bread consistently amazing, so I’m happy to share them with you! First, Zucchini Prep is Crucial. I can’t stress enough how important it is to squeeze out as much moisture as possible from your grated zucchini. If you skip this, your bread can end up gummy or soggy. Use a fine-mesh sieve or a clean kitchen towel to really wring out that liquid. For grating, a food processor works quickly, but I often just use the large holes on a box grater. Fresh zucchini is best, but if you have frozen zucchini, make sure it’s fully thawed and squeezed *very* dry. My Mixing Advice is simple: don’t overmix! As I mentioned, a few small lumps of flour are fine. Just mix until you don’t see large dry patches. Overworking the batter develops gluten, leading to a tough texture. Gentle is key. For Swirl Customization, get creative! You can add cocoa powder to your brown sugar mixture for a chocolate swirl, or a bit of instant coffee powder for a mocha flavor. You can also add different spices like cardamom or a touch of allspice. Just remember not to swirl too vigorously, or you’ll lose the distinct swirl effect. When it comes to Ingredient Swaps, I’ve experimented quite a bit! If you want to reduce the sugar, you can swap up to half of the granulated sugar for a less sweet alternative like coconut sugar or even some unsweetened applesauce, but be aware this might slightly alter the texture and density. For the butter, a neutral oil like vegetable or canola oil works perfectly, and I’ve even had success with melted coconut oil for a subtle tropical note. My Baking Tips are all about ensuring even cooking. Make sure your oven rack is in the center of the oven. If you notice the top browning too quickly, loosely tenting with foil is a lifesaver. Ovens can vary, so always do the toothpick test to be sure. For Glaze Variations, the possibilities are endless! If you prefer a thicker glaze, use less liquid. For a thinner, more drippy glaze, add a bit more milk or juice. A little lemon zest or orange zest can add a bright, fresh counterpoint to the sweet spice. You can also skip the glaze entirely and simply dust the cooled loaf with powdered sugar for a more rustic look.
Storing and Reheating Tips
This zucchini bread is so delicious, you’ll likely want to enjoy it over a few days, and thankfully, it stores beautifully! For Room Temperature Storage, once the loaf is completely cooled and any glaze has set, I wrap it tightly in plastic wrap or place it in an airtight container. It will stay fresh and moist for about 3-4 days. It’s perfect for grabbing a quick slice without any fuss. If you’re in a warmer climate or live in a humid area, you might want to opt for refrigerator storage sooner rather than later. For Refrigerator Storage, wrap the cooled loaf tightly in plastic wrap and then place it in an airtight container or a heavy-duty zip-top bag. It will keep well in the fridge for up to a week. The texture might firm up slightly in the fridge, but don’t worry, reheating is easy! Freezer Instructions are my secret for making sure I always have a loaf on hand. Once completely cooled, I wrap the loaf tightly in a layer of plastic wrap, then a layer of aluminum foil, and finally tuck it into a freezer-safe bag. It can be stored in the freezer for up to 3 months. To thaw, simply remove it from the freezer and let it come to room temperature on the counter, still wrapped, for a few hours. If you’ve frozen slices, you can often thaw them directly in the toaster or oven. For Glaze Timing Advice, I highly recommend glazing only the portions you plan to eat soonest if you’re storing at room temperature or in the fridge. If freezing, it’s often best to freeze the bread *without* the glaze and add it after thawing for the freshest look and taste. However, a simple powdered sugar dusting holds up well to freezing.
Frequently Asked Questions
Final Thoughts
So there you have it – my go-to recipe for the most wonderfully moist and flavorful zucchini bread. It’s a recipe that’s stood the test of time in my kitchen, a true crowd-pleaser that always brings smiles. The beauty of this bread is in its simplicity and how it transforms humble zucchini into something truly special. It’s proof that sometimes, the most comforting and delicious treats come from the most unexpected ingredients. If you love this recipe, you might also enjoy my Classic Banana Bread or my Easy Blueberry Muffins, which share that same spirit of simple, homey goodness. Don’t be afraid to experiment with add-ins like nuts or chocolate chips – this recipe is wonderfully forgiving! I can’t wait to hear how your zucchini bread turns out, so please leave a comment below and let me know your favorite variations or any success stories! Happy baking, and may your kitchen always be filled with the warm scent of deliciousness!

Preserving Garlic
Ingredients
Method
- Break apart your heads of garlic and peel the cloves. Place the peeled cloves of garlic in a large mixing bowl and fill with water. Use your fingertips to scrub any dirt off of the cloves. Once the cloves are cleaned, transfer them to a large strainer and rinse well.
- Depending on when your garlic was harvested, you might have brown spots on the cloves. Use a small paring knife to trim any spots and then transfer the cleaned and trimmed cloves back to the strainer. Rinse again.
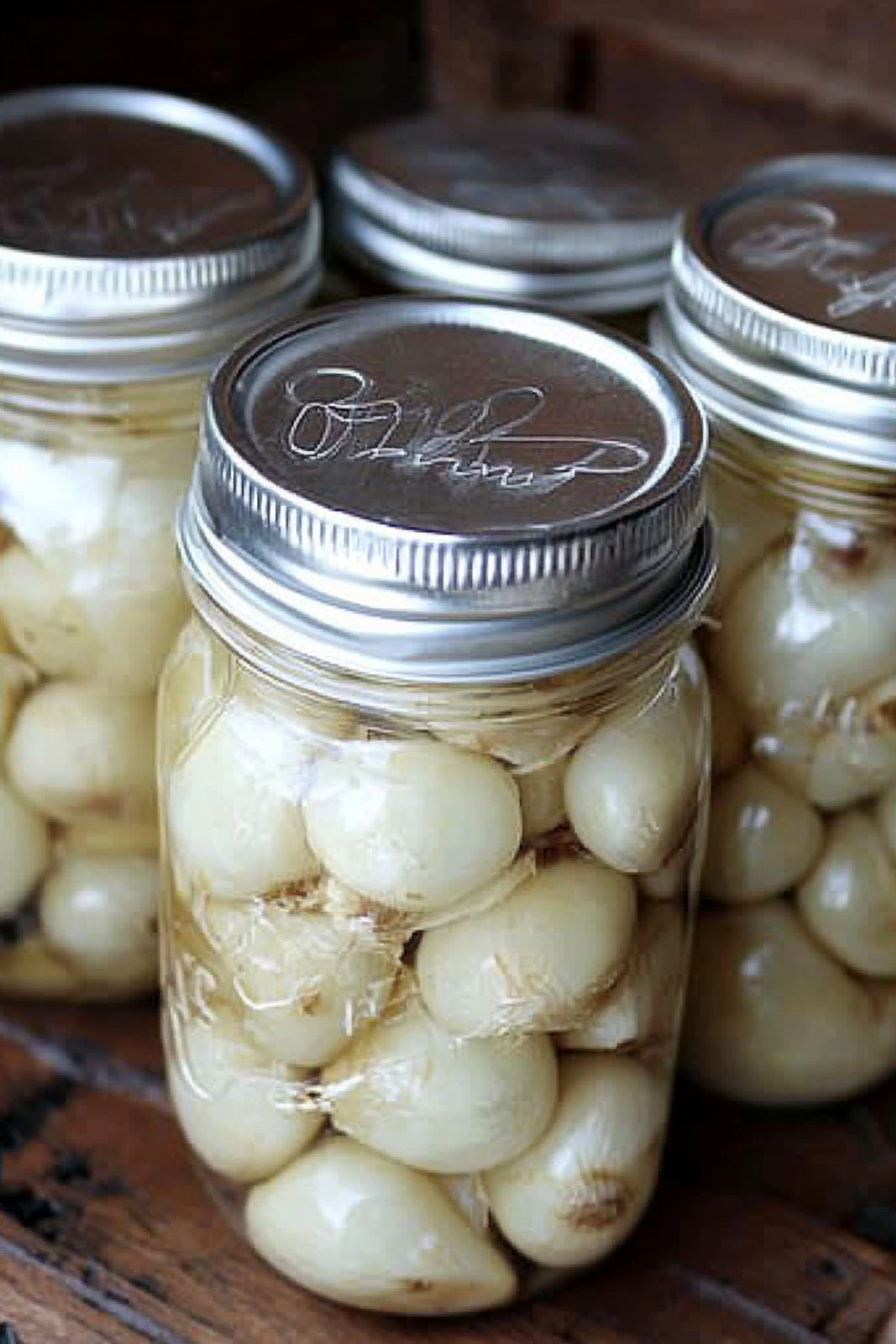
- Bring the vinegar to a boil in a large pot. Place the clean garlic cloves into small jars (half-pint jars recommended). Once the vinegar has boiled, pour it over the garlic and screw the lids on tight.
- Let the jars come to room temperature on the counter overnight and then store in the refrigerator. This will keep in the refrigerator for up to a year. Enjoy!