Spiced Cinnamon Cake A Simple Poke Delight
You know those days? The ones where you just need something warm, sweet, and utterly comforting, but the thought of tackling a full-blown cake feels like a marathon? Yeah, me too. That’s precisely when my mind drifts to this Zucchini Swirl Loaf. It’s not just *a* recipe; it’s *the* recipe that has saved my sanity on countless busy evenings, been the star of countless weekend brunches, and has my kids practically begging for it before they’ve even finished their breakfast. It’s like a hug in loaf form, and honestly, it’s so ridiculously easy, you’ll wonder why you haven’t been making it forever. Think of it as the cousin to your favorite banana bread, but with an extra layer of moistness and a delightful surprise swirl that makes it feel extra special. It’s the kind of thing you can whip up with ingredients you probably already have lurking in your pantry and fridge, and the aroma that fills your kitchen as it bakes? Pure magic. This is the kind of bake that doesn’t demand perfection; it just asks for a little love and a willingness to create something delicious.
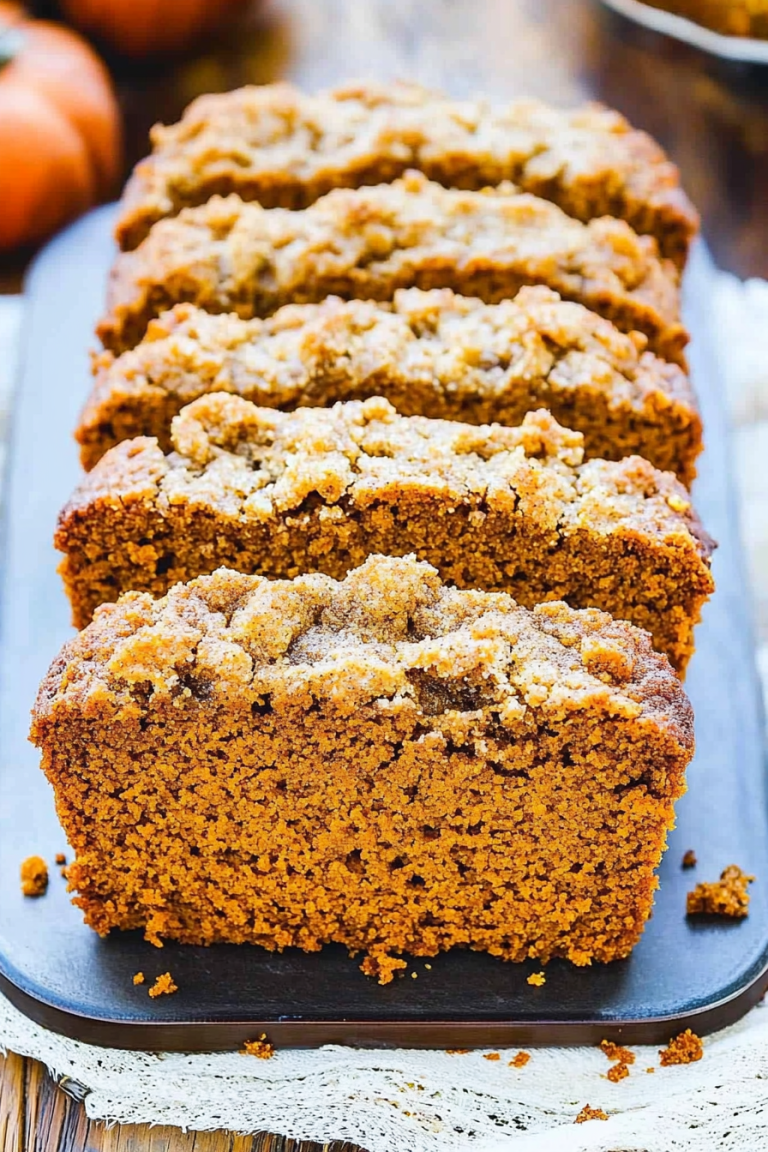
What is Zucchini Swirl Loaf?
So, what exactly is this Zucchini Swirl Loaf I keep gushing about? At its heart, it’s a wonderfully moist and tender quick bread, similar in spirit to a classic zucchini bread, but with a secret weapon: a gorgeous, ribboned swirl of something extra-special baked right into the center. The “swirl” can be anything from a cinnamon-sugar mix, a chocolate ganache, or even a tangy cream cheese filling – today, we’re going with a classic, decadent chocolate swirl because, well, who can resist? The zucchini might sound a bit odd in a sweet bake, but trust me on this one, it’s the unsung hero. It lends an incredible, almost unbelievable moisture to the loaf without imparting any strong vegetable flavor. You’d never guess it was there, but your taste buds will thank you for it. It’s essentially a fluffy, flavorful cake-like bread that’s elevated by that beautiful, marbled center, making it feel a little bit fancy, even though it’s ridiculously simple to prepare. It’s the perfect balance of wholesome and indulgent.
Why you’ll love this recipe?
There are so many reasons why this Zucchini Swirl Loaf has become a permanent fixture in my recipe rotation, and I just know you’re going to feel the same way. First and foremost, the flavor and texture are just out of this world. It’s incredibly moist and tender thanks to the secret ingredient (shhh, it’s the zucchini!), with a beautiful crumb that’s not too dense and not too airy. And that swirl? Oh, that swirl! It adds this decadent richness that just makes every bite sing. It’s the perfect contrast to the subtly sweet, spiced bread. Beyond the taste, the simplicity of this recipe is a lifesaver. Seriously, you can have this mixed up and in the oven in under 15 minutes, which is a total game-changer on those chaotic weeknights when you need a quick dessert or an impressive treat for unexpected guests. And let’s talk about cost-efficiency. Zucchini is usually super affordable, and the rest of the ingredients are pantry staples. You get a gourmet-looking, delicious bake for pennies on the dollar compared to anything you’d buy at a fancy bakery. Plus, it’s wonderfully versatile. While I adore the chocolate swirl, you can easily swap it out for cinnamon and sugar, a spiced apple filling, or even a berry jam. It’s also a fantastic way to use up those extra zucchini from your garden or farmer’s market haul! What I truly love most about this recipe, though, is the feeling it evokes. It’s pure comfort, nostalgia, and a little bit of kitchen magic all rolled into one. It’s way more satisfying than a quick trip to the grocery store for a pre-made treat, and the smiles it brings to faces are absolutely priceless.
How do you make Zucchini Swirl Loaf?
Quick Overview
Making this Zucchini Swirl Loaf is a breeze! You’ll simply whisk together your dry ingredients, then mix your wet ingredients separately. Combine them gently until just incorporated, then layer half the batter into your prepared loaf pan, spoon over your luscious swirl filling, and top with the remaining batter. A few gentle swirls with a knife, and into the oven it goes! It’s that straightforward. The beauty lies in its simplicity and the forgiving nature of the batter, ensuring even beginner bakers can achieve fantastic results. You’ll end up with a beautifully moist loaf with that irresistible ribbon of flavor running through it.
Ingredients
For the Main Batter:
2 cups all-purpose flour (I sometimes use half whole wheat for a nuttier flavor)
1 teaspoon baking soda
1/2 teaspoon baking powder
1/2 teaspoon salt
1 teaspoon ground cinnamon
1/4 teaspoon ground nutmeg
1/4 teaspoon ground cloves (optional, but I love the warmth it adds!)
1 1/2 cups granulated sugar (you can reduce this slightly if you prefer, but it’s perfect as is for me)
3 large eggs, at room temperature
1 cup neutral oil (like vegetable, canola, or even light olive oil)
1 teaspoon vanilla extract
1 1/2 cups finely grated zucchini, squeezed dry (this is key! We’ll talk more about this later)
For the Filling:
1/2 cup semi-sweet chocolate chips, finely chopped (or use a good quality dark chocolate bar)
2 tablespoons unsalted butter, melted
1 tablespoon granulated sugar
1/2 teaspoon cocoa powder (for an extra chocolatey punch)
For the Glaze:
1 cup powdered sugar, sifted
2-3 tablespoons milk (or almond milk for extra creaminess!)
1/2 teaspoon vanilla extract
Step-by-Step Instructions
Step 1: Preheat & Prep Pan
First things first, get your oven preheated to 350 degrees Fahrenheit (175 degrees Celsius). While that’s warming up, take a standard 9×5 inch loaf pan and give it a good grease and flour, or line it with parchment paper. I always opt for parchment paper if I have it because it makes getting the loaf out a dream, no sticking worries whatsoever. Make sure the parchment creates little overhangs on the sides – it’s like a built-in handle!
Step 2: Mix Dry Ingredients
In a large bowl, whisk together your all-purpose flour, baking soda, baking powder, salt, cinnamon, nutmeg, and cloves (if you’re using them). You want to give this a good whisk to make sure everything is evenly distributed. This step is super important because it prevents pockets of leavening agents or spices in your final loaf. You’re aiming for a uniform, pale beige mixture here.
Step 3: Mix Wet Ingredients
In a separate medium bowl, whisk together the granulated sugar and the eggs until they’re well combined and slightly lighter in color. Then, slowly pour in the neutral oil while whisking continuously. It should emulsify into a smooth, pale yellow mixture. Stir in the vanilla extract. This is where you get that lovely richness that will make your loaf incredibly tender.
Step 4: Combine
Now, pour the wet ingredients into the bowl with the dry ingredients. Using a spatula or wooden spoon, mix everything together until *just* combined. Seriously, do not overmix! A few streaks of flour are perfectly fine; they’ll disappear as you fold in the zucchini. Overmixing develops the gluten too much, which can lead to a tough, rubbery loaf, and we absolutely don’t want that. This is one of those little secrets to a tender bake.
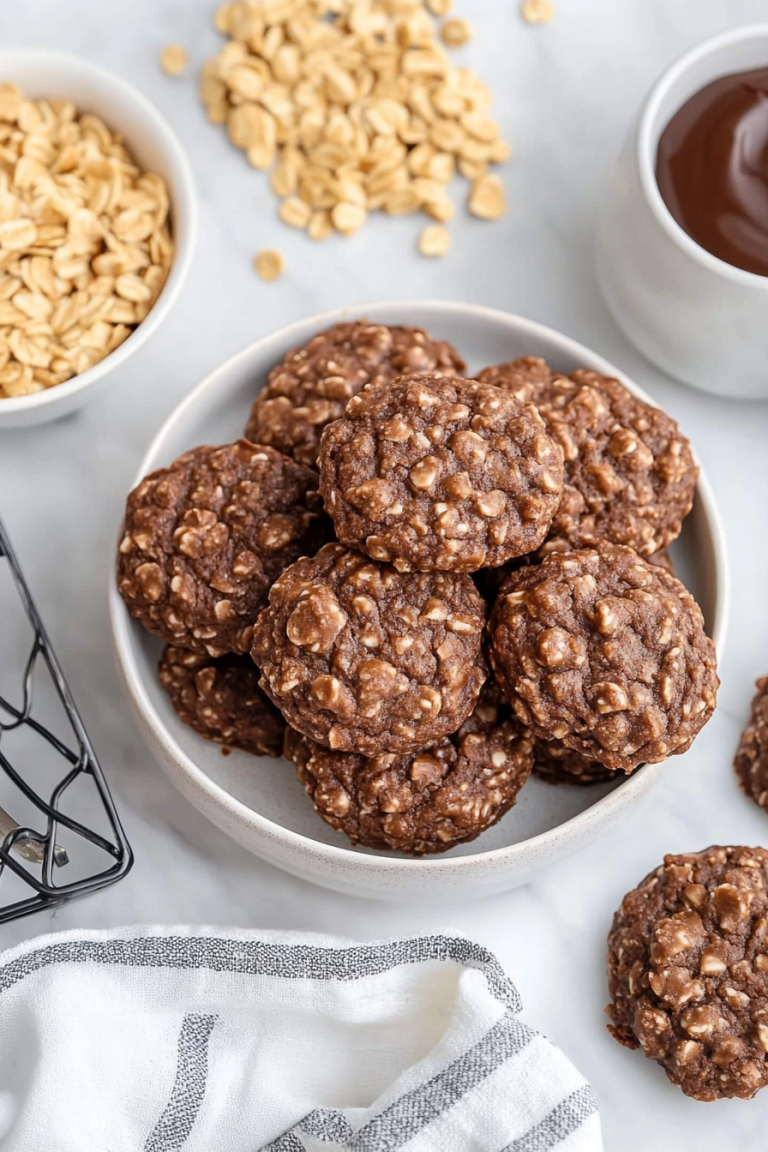
Step 5: Prepare Filling
In a small bowl, combine your finely chopped chocolate chips (or chocolate bar pieces), melted butter, sugar, and cocoa powder. Stir it all together until you have a thick, paste-like consistency. This is your decadent swirl! If it seems too stiff, you can add a tiny splash more melted butter, but you don’t want it to be runny at all. It should be thick enough to spoon easily.
Step 6: Layer & Swirl
Add the grated, squeezed zucchini to your batter and fold it in gently until it’s evenly distributed. It might look like a lot of zucchini, but it will bake down beautifully! Now, spoon about half of the batter into your prepared loaf pan and spread it out evenly. Dollop spoonfuls of your chocolate filling over this layer. Then, spoon the remaining batter over the top, trying to cover as much of the filling as you can. Take a butter knife or a skewer and gently swirl it through the batter a few times to create those beautiful marbled patterns. Don’t over-swirl; you want distinct ribbons, not a muddy mess!
Step 7: Bake
Pop the loaf pan into your preheated oven. Bake for 50-65 minutes. The exact time will depend on your oven, so start checking around the 50-minute mark. You’ll know it’s done when a wooden skewer or toothpick inserted into the center comes out clean, or with just a few moist crumbs attached (no wet batter!). If the top starts browning too quickly before the center is cooked, you can loosely tent it with aluminum foil.
Step 8: Cool & Glaze
Once it’s baked, take the loaf out of the oven and let it cool in the pan on a wire rack for about 15-20 minutes. This allows it to set up properly. Then, carefully lift it out using the parchment paper overhangs (if you used them) or invert it onto the wire rack to cool completely. This is crucial – you *must* let it cool completely before glazing, otherwise, the glaze will just melt off. While it’s cooling, whisk together the sifted powdered sugar, milk, and vanilla extract until smooth and drizzly. Add more milk a tiny bit at a time if it’s too thick, or more powdered sugar if it’s too thin. Once the loaf is completely cool, drizzle that glorious glaze all over the top, letting it drip down the sides.
Step 9: Slice & Serve
Once the glaze has set a little (which happens pretty quickly!), it’s time to slice and enjoy! Use a serrated knife for the cleanest cuts. This loaf is fantastic served at room temperature, but if you’re a warm-baked-goods person (like me!), a slightly warm slice is pure bliss. I love serving it with a cup of coffee or a glass of milk. It looks so impressive, but you know how easy it was to make!
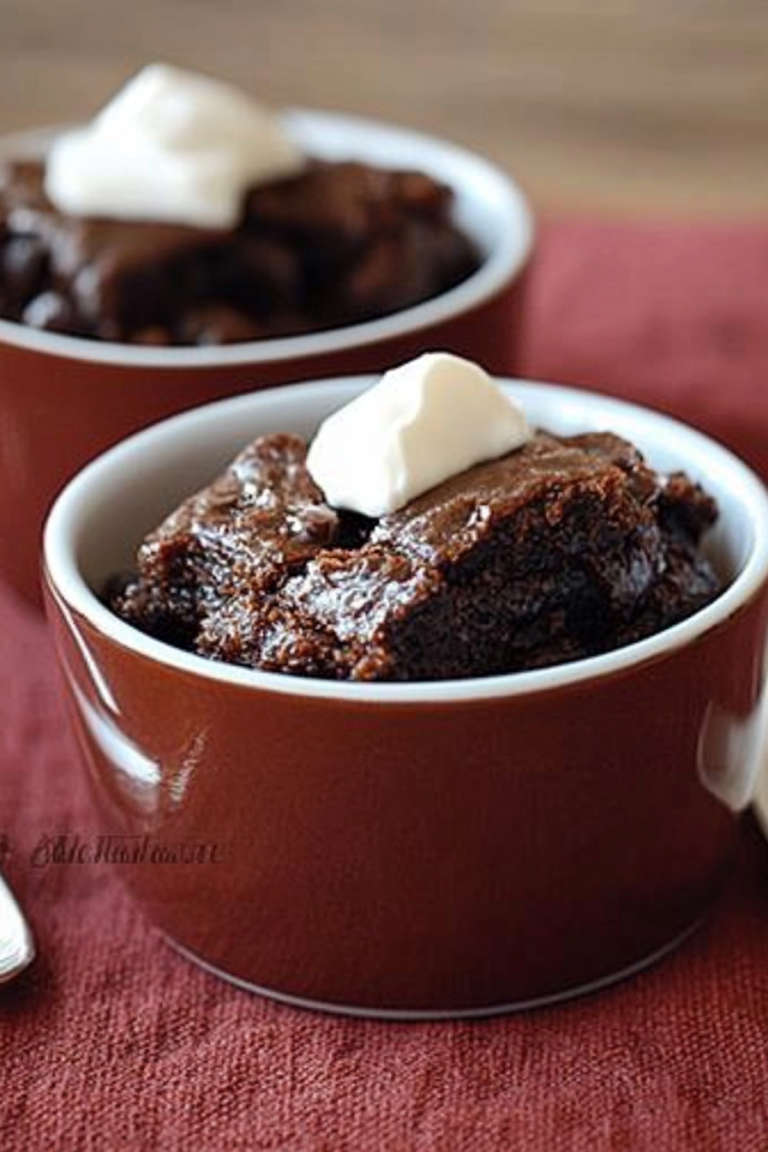
What to Serve It With
This Zucchini Swirl Loaf is so versatile, it fits into almost any meal or occasion! For a cozy breakfast, a thick slice with a steaming mug of coffee or a creamy latte is absolute perfection. The subtle sweetness and warmth of the spices are just what you need to ease into the day. If you’re hosting brunch, this loaf shines. Slice it a bit more thinly and arrange it on a pretty platter. It pairs beautifully with a fresh fruit salad and a sparkling mimosa. For dessert, it’s a dream! Serve a warm slice with a scoop of vanilla bean ice cream or a dollop of whipped cream. The contrast of warm bread and cold creaminess is divine. And for those late-night cravings or afternoon pick-me-ups, it’s ideal. Just grab a slice (or two!) with a glass of milk – it’s comforting, satisfying, and hits that sweet spot without being overly fussy. My family loves it for an after-school snack, and honestly, I’ve been known to sneak a piece with my afternoon tea when I need a little something sweet to get me through.
Top Tips for Perfecting Your Zucchini Swirl Loaf
Okay, let’s dive into some of my hard-won wisdom that’ll help you make this Zucchini Swirl Loaf absolutely foolproof. These are the little things I’ve learned over dozens of bakes, and they make all the difference!
Zucchini Prep: This is NON-NEGOTIABLE. You *must* grate your zucchini (a medium or fine grate is best) and then squeeze out as much moisture as humanly possible. I usually wrap it in a clean kitchen towel or cheesecloth and wring it out until no more liquid comes out. If you skip this step, your loaf will be gummy and soggy, and nobody wants that. Fresh, firm zucchini works best!
Mixing Advice: I can’t stress this enough: DO NOT OVERMIX. As soon as you combine the wet and dry ingredients, mix only until you no longer see dry flour. A few lumps are fine! Then, when you fold in the zucchini, be gentle. The goal is a tender crumb, and overmixing is the enemy of tender quick breads.
Swirl Customization: My chocolate swirl is a personal favorite, but feel free to get creative! A classic cinnamon-sugar swirl is made by mixing 1/2 cup brown sugar, 1 tablespoon cinnamon, and 2 tablespoons melted butter. A berry jam swirl is also fantastic – just dollop spoonfuls of your favorite jam over the first layer of batter. For a more pronounced visual, don’t over-swirl; think delicate ribbons rather than a uniform color.
Ingredient Swaps: While this recipe is perfect as is, I’ve experimented! For a dairy-free version, you can easily swap the milk in the glaze for almond or soy milk, and use oil instead of butter in the swirl. I’ve also successfully used unsweetened applesauce in place of half the oil for a slightly less rich, but still moist, loaf. For gluten-free bakers, a good quality 1:1 gluten-free flour blend usually works well, though you might need an extra tablespoon or two of liquid and a slightly longer bake time. I tested this with almond milk in the glaze and it actually made it even creamier and less sweet!
Baking Tips: Ovens can be quirky! If your oven tends to run hot, you might want to reduce the temperature by 10-15 degrees Fahrenheit. Always test for doneness in the thickest part of the loaf, away from any potential pockets of filling. If the top is browning too quickly, tenting with foil is your best friend. I usually place my loaf pan on the middle rack for even heat distribution.
Glaze Variations: If you’re not a fan of a sweet glaze, you can skip it entirely! The loaf is delicious on its own. Another option is to dust it with a little powdered sugar after it’s cooled, or make a simple lemon glaze by mixing powdered sugar with lemon juice instead of milk. For a richer finish, you could even melt some chocolate and drizzle that over the top.
Storing and Reheating Tips
This Zucchini Swirl Loaf is wonderfully forgiving when it comes to storage, which is another reason I love it so much. It stays moist and delicious for days! Here’s how I usually handle it:
Room Temperature: Once the loaf is completely cooled and any glaze has set, you can store it in an airtight container or wrap it tightly in plastic wrap. It will stay wonderfully fresh at room temperature for about 2 to 3 days. This is my preferred method if we plan to eat it within that timeframe. The texture actually improves slightly after the first day, as the flavors meld together.
Refrigerator Storage: If your kitchen is particularly warm, or you want it to last a bit longer, you can store it in the refrigerator. Again, make sure it’s in an airtight container. It should keep well for up to 5 days in the fridge. Just a heads-up, the texture might become slightly denser when chilled, but it’s still perfectly delicious.
Freezer Instructions: This loaf freezes like a dream, which is fantastic for making ahead or for those times you bake an extra one (which I often do!). Once completely cooled and the glaze is set (or if you plan to glaze it after thawing), wrap the loaf tightly in a double layer of plastic wrap, followed by a layer of aluminum foil or a freezer-safe bag. It will keep well in the freezer for up to 2-3 months. To thaw, simply unwrap it and let it sit at room temperature for a few hours, or thaw overnight in the refrigerator. If you froze it without glaze, you can then prepare and apply the glaze once it’s fully thawed.
Glaze Timing Advice: For the best results, I always glaze the loaf *after* it has completely cooled. If you’re storing it at room temperature or in the fridge, the glaze will hold up well. If you plan to freeze it with glaze, make sure the glaze is fully set before wrapping it tightly. Sometimes, I’ll even freeze slices of the loaf and then drizzle glaze over them just before serving after they’ve thawed.
Frequently Asked Questions
Final Thoughts
There you have it – my go-to Zucchini Swirl Loaf recipe! It’s more than just a bake; it’s a little slice of comfort that’s perfect for any time of day. The incredible moistness from the zucchini, combined with that decadent swirl and a lovely hint of spice, makes it truly special. It’s the kind of recipe that makes you feel like a kitchen rockstar, even when you’re just throwing ingredients together on a busy Tuesday. If you love this recipe, you might also enjoy my “Ultimate Fudgy Brownies” or my “Easy Apple Crumble Pie” for more comforting bakes. Don’t be afraid to experiment with the swirl; that’s where the real fun begins! I can’t wait to hear how yours turns out, so please leave a comment below and tell me your favorite swirl combination or any family tweaks you’ve made. And if you snap a pic, tag me! Happy baking, everyone!
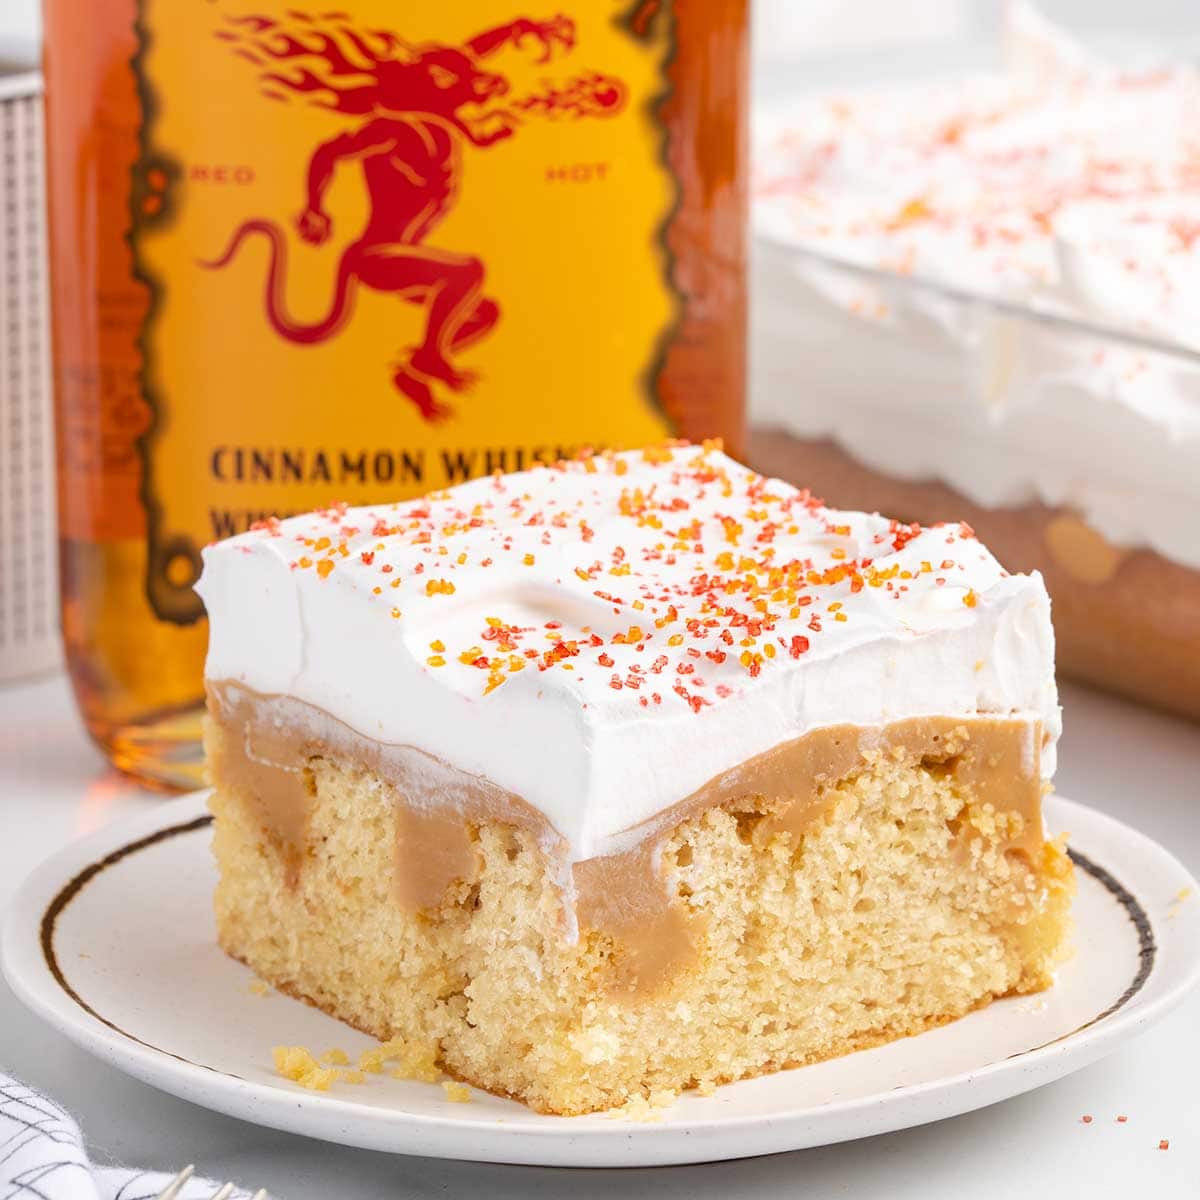
Fireball Poke Cake
Ingredients
Method
- Preheat oven to 350°F. Spray the bottom of a 9x13 baking pan with baker’s spray. Set aside.
- In a mixing bowl, using a handheld mixer on medium speed, mix together the yellow box cake mix, eggs, vegetable oil, and water according to the directions on the box. Spread the batter into the prepared pan and bake according to the box directions for 28-30 minutes, or until a toothpick inserted into the center comes out clean.
- Allow the cake to cool for 5 minutes, then poke holes over the entire surface of the cake. I like to use a round-handled wooden spoon to poke the holes. Allow the cake to continue to cool on the counter while you prepare the pudding mixture.
- In a 2 quart-sized saucepan on medium heat, add the cook & serve butterscotch pudding mix, whole milk, and Fireball cinnamon whisky. Bring the pudding mixture to a boil while whisking constantly, and cook for 1-2 minutes once it has started to boil. Remove the pot from the heat and continue whisking the pudding until the mixture starts to thicken up. It will continue to thicken as it cools.
- While the pudding is still hot and not fully set, slowly pour it into the holes that were poked into the yellow cake. Once you have filled all the holes in the cake with the warm pudding, you can pour the rest of the pudding over the rest of the cake. You can use an offset spatula or the back of a large spoon to spread out the warm pudding, covering the entire surface of the cake.
- Allow the cake and pudding to continue to cool on the counter for another 20 minutes to allow the pudding to start to firm up before spreading on your final layer of the thawed whipped topping.
- Spread the whipped topping evenly over the entire surface of the cake. If you choose to add the garnish of red and orange sugar sanding sprinkles, you can add them at this time.
- Place the Fireball poke cake into the refrigerator to chill for a minimum of 8 hours or up to overnight. Slice and serve.