Retro Fruit Salad Recipe Simple & Sweet
You know those recipes that just feel like a warm hug? The ones that instantly transport you back to childhood, or make your kitchen smell like pure magic? Well, this zucchini bread is *that* recipe for me. Seriously, I’ve made it more times than I can count, and every single time, it’s a little bit of heaven. It’s the perfect answer to that “I need something sweet but don’t want to go through a whole production” craving. Forget those dry, crumbly versions you might have tried before; this one is moist, tender, and packed with just the right amount of spice. It’s so good, my kids have been known to sneak slices straight off the cooling rack! It’s a lifesaver when I have extra zucchini from the garden, and honestly, it’s just my go-to for any occasion that calls for a little homemade goodness. Think of it as a more sophisticated, deeply satisfying cousin to your basic quick bread, but way, way easier than a fancy cake. I’m so excited to share this with you!
What is Zucchini bread?
So, what exactly *is* this wonderful thing we call zucchini bread? At its heart, it’s a sweet quick bread, similar in texture and concept to banana bread or pumpkin bread. The “zucchini” part is the star ingredient, and honestly, you’d never guess it was in there just by the taste. The zucchini itself is pretty neutral, but what it *does* is pure gold: it lends an incredible amount of moisture and tenderness to the baked goods, making them incredibly soft and decadent. It’s essentially a delicious vehicle for delicious spices, maybe some nuts or chocolate chips, and a hint of sweetness, all bound together with simple pantry staples. The name is straightforward, and the concept is simple: use up that abundance of garden zucchini or that random one you picked up at the store in a way that’s utterly delightful. It’s not a cake, it’s not a muffin, but it’s got the comforting qualities of both, making it a true stand-alone treat.
Why you’ll love this recipe?
I have been making zucchini bread for a few years now and I know you willflavor is just out of this world. It’s perfectly spiced with cinnamon and a touch of nutmeg, giving it that warm, cozy aroma that fills the house. The moisture from the zucchini makes it so incredibly tender that it practically melts in your mouth. And let’s talk about the simplicity. This recipe is a dream for busy weeknights or lazy weekends. You can whip up the batter in about 10-15 minutes, pour it into the pan, and let the oven do the rest. No complicated techniques, no fancy equipment. Plus, it’s incredibly cost-effective. Zucchini is often very affordable, especially when it’sversatility. While I adore it plain, it’s fantastic with a sprinkle of walnuts for crunch, or for the chocolate lovers out there, a generous handful of chocolate chips. It’s like a blank canvas for deliciousness! I’ve even seen people add a swirl of cream cheese filling, which sounds divine, but I’m a purist when it comes to this classic. If you enjoy my Moist Chocolate Chip Banana Bread or my Spiced Apple Crumble Loaf, I promise you’ll find the same comforting, homemade goodness here, but with that special zucchini twist!
How to Make My Ultimate Zucchini Bread
Quick Overview
Making this zucchini bread is incredibly straightforward. You’ll start by grating your zucchini and squeezing out any excess moisture (this is key!). Then, you’ll whisk together your dry ingredients, mix your wet ingredients separately, and combine them gently. Stir in any add-ins like nuts or chocolate chips, pour the batter into a prepared loaf pan, and bake until a toothpick comes out clean. The whole process, from start to finish, is remarkably quick, making it a perfect bake for when time is short but the craving for something homemade is strong. It really is that simple to achieve a moist, delicious result.
Ingredients
For the Main Batter:
All-purpose flour – about 2 cups. I always use unbleached flour for a slightly better texture, but any all-purpose will do. Make sure to spoon and level it rather than scooping directly from the bag to avoid a dense bread.
Baking soda – 1 teaspoon. This is what helps it rise beautifully and become light and fluffy.
Salt – 1/2 teaspoon. Just enough to balance the sweetness and enhance all the other flavors.
Ground cinnamon – 2 teaspoons. Don’t be shy with this! It’s essential for that cozy, warm flavor.
Ground nutmeg – 1/2 teaspoon. A little pinch goes a long way and adds a lovely depth.
Eggs – 2 large. These bind everything together and add richness. Make sure they’re at room temperature if you have time, it helps them incorporate better.
Granulated sugar – 1 cup. This gives it sweetness and helps with that lovely tender crumb. You can reduce it slightly if you prefer, but I find this is the sweet spot.
Brown sugar – 1/2 cup, packed. The brown sugar adds moisture and a lovely caramel note.
Vegetable oil – 1/2 cup. This is the secret to a super moist bread! You can also use melted coconut oil or even a mild olive oil, but vegetable oil is my go-to for its neutral flavor.
Vanilla extract – 1 teaspoon. Pure vanilla extract, always! It just makes everything taste better.
Grated zucchini – 2 cups, packed. This is the star! Make sure it’s finely grated and you’ve squeezed out as much liquid as possible. More on that later!
For the Filling (Optional but Highly Recommended!):
Chopped walnuts or pecans – 1/2 cup. Toasting them beforehand really brings out their flavor! (Optional, of course, if you have nut allergies or just aren’t a fan.)
Chocolate chips – 1/2 cup. Mini or regular, semi-sweet or milk chocolate, whatever your heart desires!
For the Glaze:
Powdered sugar – 1 cup. Sifted if you want it super smooth.
Milk or half-and-half – 2-3 tablespoons. Start with 2 and add more until you reach your desired drizzling consistency.
Vanilla extract – 1/2 teaspoon. For a touch of extra flavor in the glaze.
Step-by-Step Instructions
Step 1: Preheat & Prep Pan
First things first, get your oven preheating to 350 degrees Fahrenheit (175 degrees Celsius). This ensures it’s nice and hot when your batter is ready. Then, grab a standard 9×5 inch loaf pan. Grease it really well with butter or cooking spray, and then lightly dust it with flour, tapping out any excess. This is a crucial step to prevent your beautiful bread from sticking. I’ve learned that the hard way more times than I care to admit! Some people like to line their pan with parchment paper for extra security, which is a great idea too.
Step 2: Mix Dry Ingredients
In a large bowl, whisk together the flour, baking soda, salt, cinnamon, and nutmeg. Whisking them together well ensures that the leavening agents and spices are evenly distributed throughout the batter, which is super important for an even bake and consistent flavor. Make sure there are no clumps of baking soda or spice. This is a simple step, but it makes a big difference in the final result!
Step 3: Mix Wet Ingredients
In a separate medium bowl, whisk together the eggs until they’re lightly beaten. Then, add in the granulated sugar, packed brown sugar, vegetable oil, and vanilla extract. Whisk everything together until it’s well combined and the sugars are mostly dissolved. It should look smooth and nicely emulsified. Don’t overmix here, just get it nicely combined.
Step 4: Combine
Now, pour the wet ingredients into the bowl with the dry ingredients. Using a spatula or a wooden spoon, gently fold them together until *just* combined. It’s really important not to overmix here! A few streaks of flour remaining are perfectly fine. Overmixing develops the gluten in the flour too much, which can lead to a tough, dense bread. We want tender and moist, remember?
Step 5: Prepare Filling
(If you’re adding nuts or chocolate chips!) Gently fold in your chopped nuts and/or chocolate chips into the batter. Again, just a few stirs to distribute them evenly. Don’t go crazy here; we don’t want to overwork the batter. If you’re not adding anything, you can skip this step and just proceed to pouring the batter into the pan.
Step 6: Layer & Swirl
Pour about half of the batter into your prepared loaf pan. If you’re doing a cinnamon swirl or chocolate chip swirl, this is where you’d add half of your filling ingredients over the first layer of batter. Then, carefully pour the remaining batter on top, followed by the rest of your filling ingredients. If you’re making a swirl, you can use a knife or skewer to gently swirl the filling into the batter. Be careful not to over-swirl, as you don’t want to mix it in too much. The goal is just to create pretty ribbons of flavor and texture!
Step 7: Bake
Place the loaf pan in the preheated oven. Bake for 50-65 minutes. Now, oven temperatures can vary, so I always recommend keeping an eye on it. The bread is done when a wooden skewer or toothpick inserted into the center comes out clean, or with just a few moist crumbs attached (no wet batter!). If the top starts to get too brown before the inside is cooked, you can loosely tent it with aluminum foil for the remaining baking time. I usually start checking around the 50-minute mark.
Step 8: Cool & Glaze
Once it’s done, carefully remove the loaf pan from the oven and let the bread cool in the pan on a wire rack for about 10-15 minutes. This allows it to set up properly. Then, carefully invert the pan to remove the bread and let it cool completely on the wire rack before glazing. Glazing while it’s still warm will just make the glaze melt and slide off!
Step 9: Slice & Serve
Once the bread is completely cool, it’s time for the magic touch: the glaze! In a small bowl, whisk together the sifted powdered sugar, 2 tablespoons of milk, and the vanilla extract. Add more milk, a teaspoon at a time, until you reach a thick but pourable consistency. Drizzle it generously over the top of the cooled zucchini bread. Let the glaze set for about 15-20 minutes before slicing. For the best slices, use a serrated knife and gentle sawing motions. Serve warm or at room temperature. It’s perfection!
What to Serve It With
This zucchini bread is honestly amazing all on its own, but I love pairing it with a few things to make it extra special depending on the occasion. For a simple breakfast, I usually just have a slice with my morning coffee. It’s so satisfying and gives me a great start to the day. Sometimes, if I’m feeling fancy, I’ll toast a slice lightly and spread it with a little bit of softened butter or cream cheese – pure bliss! When I’m hosting for brunch, I like to serve it alongside some fresh fruit salad and maybe a nice yogurt parfait. It adds a lovely homemade touch that everyone appreciates. For an easy dessert, it’s fantastic with a scoop of vanilla bean ice cream or a dollop of whipped cream. The contrast between the warm bread and cold ice cream is just divine! And for those cozy snack times, it’s perfect with a hot cup of tea or even a glass of cold milk. My kids absolutely devour it with a glass of milk after school – it’s a guaranteed hit every single time. I’ve even made mini loaves to give as little edible gifts, and they’re always so well-received!
Top Tips for Perfecting Your Zucchini Bread
I’ve been making this recipe for years, and through trial and error (and a few less-than-perfect bakes!), I’ve picked up a few tricks that I think make all the difference. When it comes to zucchini prep, the most crucial step is squeezing out as much liquid as possible. Use a fine-mesh sieve lined with a clean kitchen towel or cheesecloth. Grate the zucchini, place it in the towel, twist it up, and wring out the excess moisture. This prevents a soggy loaf and ensures a tender crumb. Seriously, don’t skip this! For mixing advice, remember the golden rule of quick breads: do NOT overmix. Mix the wet and dry ingredients until *just* combined. A few flour streaks are okay; they’ll disappear during baking. Overmixing develops gluten, leading to a tough texture, and we want this bread to be as tender as possible. When it comes to swirl customization, if you’re adding chocolate chips or nuts, gently fold them in. For a swirl effect with something like chocolate chips, you can sometimes add half the batter, then a layer of chips, then the rest of the batter, and then swirl them through gently with a knife. Don’t overdo the swirling, or you’ll just end up with chocolate chip bread, which isn’t a bad thing, but it won’t be a swirl! For ingredient swaps, I’ve had success using half whole wheat flour for a nuttier flavor, though it can make the bread slightly denser. You can also try using different oils like melted coconut oil (it adds a subtle tropical note!) or even a neutral-flavored olive oil. For baking tips, always use the middle rack in your oven for the most even heat distribution. If your oven tends to run hot, you might need to reduce the temperature by 25 degrees or use the foil tenting trick I mentioned earlier. And for glaze variations, if you want a brighter, tangier glaze, add a squeeze of lemon juice to the powdered sugar and milk mixture. Or, for a chocolate glaze, whisk in a tablespoon or two of cocoa powder.
Storing and Reheating Tips
One of the best things about this zucchini bread is how well it stores, meaning you can enjoy it for days (if it lasts that long!). For storing at room temperature, keep the cooled, un-glazed loaf wrapped tightly in plastic wrap or aluminum foil, or store it in an airtight container. It should stay fresh and moist for about 2-3 days. If you’ve already glazed it, it’s best to leave it uncovered on the counter for the glaze to set fully, then cover loosely, or cut it and store slices in an airtight container for up to 2 days. If you live in a warmer climate or your kitchen is particularly warm, refrigerator storage might be a better option to prevent spoilage. Wrap the cooled loaf tightly in plastic wrap, then in foil, and store it in the fridge for up to a week. The texture might change slightly, becoming a bit firmer, but it’s still delicious. When you’re ready to eat it from the fridge, I find it’s best to let it come to room temperature for about 30 minutes or gently warm a slice in the toaster oven or microwave for a few seconds. For longer storage, this bread freezes beautifully! Wrap the completely cooled, un-glazed loaf tightly in plastic wrap, then in a layer of aluminum foil, and place it in a freezer-safe bag. It will keep well in the freezer for up to 3 months. To thaw, simply unwrap it and let it sit at room temperature for a few hours. For glaze timing advice, I always recommend glazing *after* the bread has cooled completely and *before* storing, if you plan to eat it within a day or two. If you’re freezing it, it’s best to freeze the un-glazed bread and glaze it after thawing. The glaze can get a bit sticky in the freezer, and it’s just easier to add it fresh!
Frequently Asked Questions
Final Thoughts
So there you have it – my tried-and-true, super moist, incredibly delicious zucchini bread recipe. It’s more than just a recipe to me; it’s a little piece of home, a guaranteed crowd-pleaser, and my go-to for turning those garden zucchini into something truly special. The ease of it, the comforting aroma as it bakes, and the pure joy on everyone’s faces when they take that first bite – it’s all just wonderful. If you love comforting bakes like this, you might also enjoy my Blueberry Muffin Bread or my Lemon Poppy Seed Loaf. Give this zucchini bread a try; I’m genuinely convinced it’s going to become a favorite in your household too! I can’t wait to hear how yours turns out, so please leave a comment below and let me know what you think, or share any of your own fun variations. Happy baking, everyone!

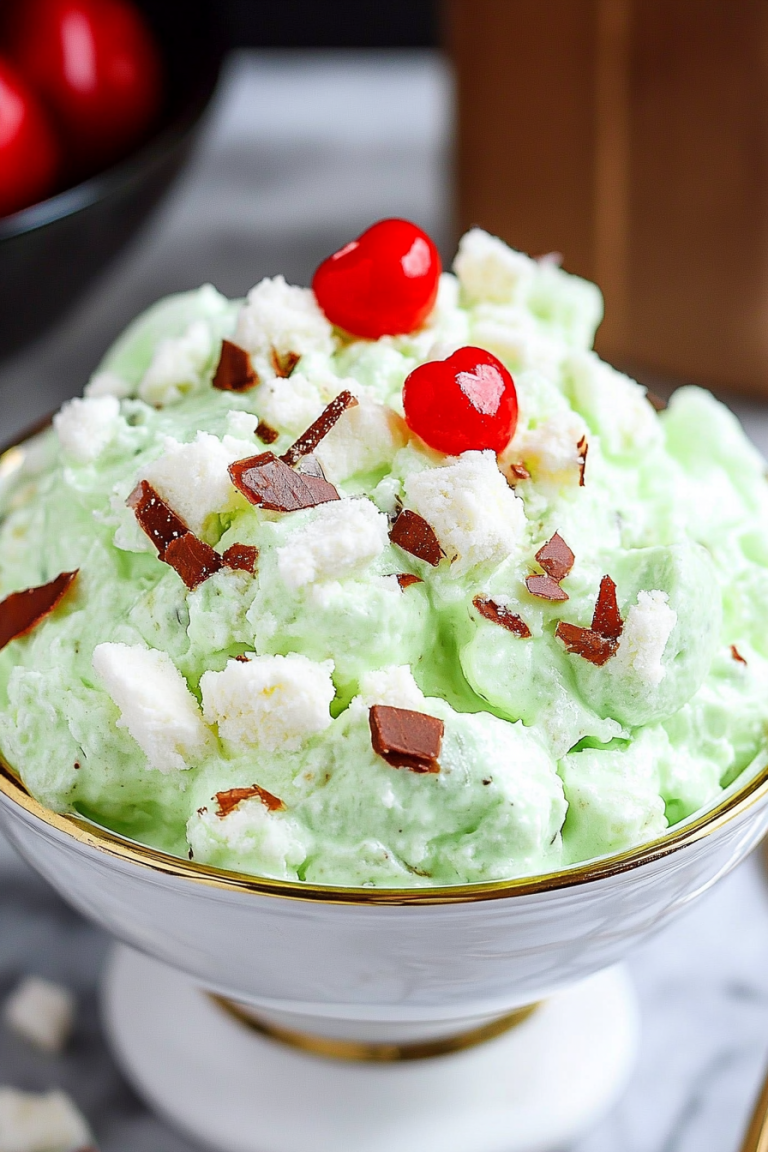
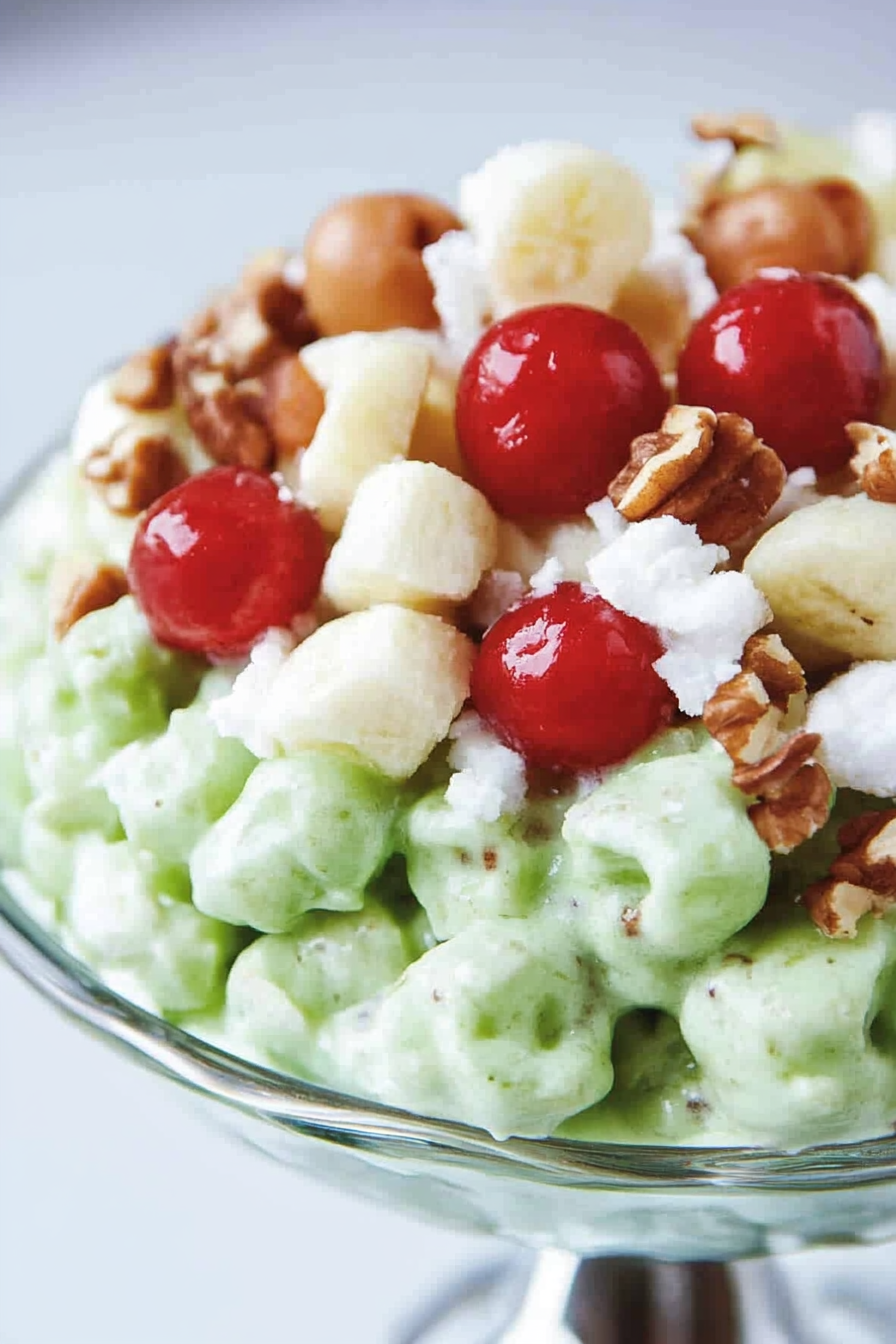
Watergate Salad
Ingredients
Method
- Mix all ingredients in a large bowl until well combined.
- Cover the bowl and chill in the refrigerator for at least one hour before serving to allow the flavors to meld and the salad to set.