Tender Pork with Apples A Simple Slow Cooker Meal
There are some recipes that just stick with you, aren’t there? They become part of your kitchen’s soundtrack, the scent that fills the house on a lazy Saturday morning, or the answer to that “what can I whip up quickly?” question that pops up unexpectedly. For me, that recipe is my zucchini bread. Now, I know what you might be thinking – zucchini bread? Is it really *that* special? Oh, my friends, let me tell you. This isn’t just any zucchini bread; this is the kind of zucchini bread that makes people, even those who usually shy away from anything green in their sweets, ask for seconds. It’s moist, it’s perfectly spiced, and it has this incredible, comforting flavor that just screams ‘home.’ It’s a little bit like a moist, spiced cake, but with that sneaky goodness of hidden veggies. Honestly, it’s a lifesaver on busy nights when I need a quick treat, or when unexpected guests pop by. I’ve tried so many zucchini bread recipes over the years, and some are just dry or bland, but this one? This one’s a keeper. It’s actually the recipe I compare all other quick breads to. You’re going to love it.
What is Zucchini bread?
So, what exactly is this magical zucchini bread that I’m raving about? Think of it as a deliciously moist, lightly sweet quick bread, kind of like banana bread’s more understated, but equally charming cousin. It’s made from a simple batter, much like you’d use for muffins or pancakes, but baked in a loaf pan until golden and fragrant. The star ingredient, of course, is zucchini. Now, don’t let that scare you! Zucchini is pretty neutral in flavor, especially when baked. What it really does is add incredible moisture and a tender crumb to the bread, making it unbelievably soft. The ‘bread’ part comes from the leavening agents like baking soda and baking powder, which give it that lovely rise. It’s usually spiced with cinnamon, sometimes nutmeg, and often studded with nuts or chocolate chips. It’s essentially a fantastic way to use up that garden abundance (or that sale at the grocery store!) while creating something truly delicious. It’s not a dense, heavy bread, nor is it a super-sweet cake. It lives in that perfect sweet spot that makes it endlessly adaptable.
Why you’ll love this recipe?
There are so many reasons why this zucchini bread recipe has earned a permanent spot in my recipe box, and I’m betting it’ll quickly become a favorite for you too. First and foremost, the **flavor**. It’s got this warm, comforting spice profile from the cinnamon that just feels like a hug. It’s sweet enough to satisfy a craving, but not so sweet that it’s overwhelming. It’s that perfect balance. Then there’s the **texture**. This is where the zucchini truly shines. It makes the bread unbelievably moist and tender. Seriously, you’ll be amazed at how soft it is, every single bite. It’s the opposite of dry, crumbly bread, which is a huge win in my book!
And let’s talk about **simplicity**. I honestly can’t stress this enough. This recipe is so forgiving and straightforward. You don’t need any fancy equipment – just a couple of bowls, a whisk, and a spatula. It’s the kind of thing I can whip up even when I’m feeling a bit tired, and it always turns out beautifully. This makes it incredibly **cost-efficient** too. Zucchini is usually pretty budget-friendly, and the other ingredients are pantry staples. You get a gorgeous, homemade loaf for a fraction of the cost of buying a fancy baked good.
What I love most, though, is its **versatility**. This recipe is a blank canvas! I’ll show you later how you can easily add chocolate chips or walnuts, but it’s also fantastic plain. It’s the perfect companion to a cup of coffee in the morning, a delightful afternoon snack, or even a simple, elegant dessert. It’s the kind of recipe that makes people feel good. It’s much easier than making a traditional cake, and it has that comforting, rustic charm. If you’re a fan of my Double Chocolate Muffins, you’ll appreciate the ease and the deeply satisfying flavor profile here. This zucchini bread is truly a game-changer for busy bakers and anyone who appreciates a truly delicious, no-fuss treat.
How do you make Zucchini bread?
Quick Overview
Making this zucchini bread is surprisingly simple. You’ll whisk together your dry ingredients, then your wet ingredients, combine them gently, fold in the star – the grated zucchini – and bake. The magic happens as it bakes, transforming simple ingredients into a fragrant, moist loaf. What makes this method special is how it ensures maximum moisture without any soggy bits, thanks to a simple draining step for the zucchini. It’s truly foolproof, I promise! Even if you’re new to baking, you can totally nail this.
Ingredients
For the Main Batter:
2 cups all-purpose flour (I usually use unbleached, it seems to give a nicer texture)
1 teaspoon baking soda
1/2 teaspoon salt
1/2 teaspoon ground cinnamon (or a little more if you love cinnamon like I do!)
1/4 teaspoon ground nutmeg (optional, but it adds a lovely depth)
1 cup granulated sugar (you can reduce this slightly if you prefer, but I find it perfect)
2 large eggs, at room temperature (this helps them incorporate better)
1/2 cup vegetable oil (or a neutral-flavored oil like canola or melted coconut oil)
1/4 cup milk (whole milk gives great richness, but I’ve tested this with almond milk and it actually made it even creamier!)
1 teaspoon vanilla extract
1 ½ cups grated zucchini (about 2 medium zucchinis – squeeze out excess moisture, more on that later!)
For the Filling (Optional, but highly recommended!):
1/2 cup chocolate chips (semi-sweet or dark are my favorites)
OR
1/2 cup chopped walnuts or pecans (toasted for extra flavor, if you have time!)
For the Glaze (Optional, but makes it extra special!):
1 cup powdered sugar
2-3 tablespoons milk or lemon juice (lemon juice adds a nice tang)
1/2 teaspoon vanilla extract
Step-by-Step Instructions
Step 1: Preheat & Prep Pan
First things first, get your oven preheating to 350°F (175°C). While that’s warming up, grease and flour a standard 9×5 inch loaf pan. You can use butter or cooking spray for greasing. For the flour, just a light dusting ensures the bread won’t stick. Some people like to line their pan with parchment paper too, leaving a little overhang on the sides, which makes lifting the bread out super easy. I usually do this when I know I’ll be serving it right away. Let’s aim for about 50-60 minutes of baking time, but ovens can be so different, so keep an eye on it!
Step 2: Mix Dry Ingredients
In a large bowl, whisk together your flour, baking soda, salt, cinnamon, and nutmeg (if you’re using it). Give it a good whisking to make sure everything is evenly distributed. This is important because you don’t want pockets of baking soda or salt in your bread. You’re looking for a uniform mixture. It’s a simple step, but it really sets the stage for an evenly baked loaf.
Step 3: Mix Wet Ingredients
In a separate, medium-sized bowl, whisk together the granulated sugar and eggs until they’re well combined and slightly lighter in color. Then, slowly drizzle in the vegetable oil while whisking constantly. Add the milk and vanilla extract and whisk until everything is smooth and emulsified. This mixture should look nice and glossy. Make sure your eggs are at room temperature; it really does make a difference in how they blend!
Step 4: Combine
Now, pour the wet ingredients into the bowl with the dry ingredients. Use your spatula or a wooden spoon to gently mix everything together until *just* combined. You’ll see some dry streaks still, and that’s okay! The key here is not to overmix. Overmixing develops the gluten in the flour, which can make your bread tough. Stop mixing as soon as you don’t see large patches of dry flour. A few little lumps are totally fine!
Step 5: Prepare Filling
This is where you can add your delicious extras! If you’re using chocolate chips or nuts, gently fold them into the batter now. Just a few turns of the spatula to distribute them. Make sure they’re evenly spread so you get that goodness in every slice. This is also the time to fold in your grated zucchini. Make sure you’ve squeezed out as much excess moisture as you can before adding it. Don’t get me wrong, you want some moisture, but not so much that it waters down your batter.
Step 6: Layer & Swirl
(This step is more for when you’re adding swirl-ins like a cinnamon-sugar mixture or a different flavored batter, but for a straightforward zucchini bread with chips/nuts, you’ll just pour the batter into the prepared pan.) Pour the batter evenly into your greased and floured loaf pan. Smooth the top slightly with your spatula. If you were making a marbled bread, you’d dollop your other batter on top and then swirl gently with a knife. For this recipe, just ensure the batter is spread evenly to the edges of the pan.
Step 7: Bake
Pop the loaf pan into your preheated oven. Bake for about 50-60 minutes. The best way to tell if it’s done is to insert a toothpick into the center of the loaf. If it comes out clean, or with just a few moist crumbs attached, it’s ready. If there’s wet batter, give it another 5-10 minutes and check again. If the top is browning too quickly, you can loosely tent it with foil. I usually find mine is perfectly done around the 55-minute mark.
Step 8: Cool & Glaze
Once baked, take the loaf pan out of the oven and let it cool in the pan for about 10-15 minutes. This is important because it allows the bread to firm up slightly, making it easier to remove without breaking. After that initial cooling, carefully invert the pan onto a wire rack to release the bread. Let the bread cool completely on the wire rack before you even *think* about slicing it. If you’re adding the glaze, whisk together the powdered sugar, milk (or lemon juice), and vanilla extract until smooth and pourable. Drizzle it over the cooled bread. It should be thick enough to coat but still run slightly. If it’s too thick, add a tiny bit more liquid; if it’s too thin, add a bit more powdered sugar.
Step 9: Slice & Serve
Once the glaze has set (or if you skipped it), slice your beautiful zucchini bread with a sharp serrated knife. I find the best slices are about ¾-inch thick. Serve it at room temperature for the best texture and flavor. You can enjoy it as is, or with a little smear of butter if you’re feeling decadent. The aroma alone is heavenly, and the first bite is pure comfort!
What to Serve It With
This zucchini bread is so wonderfully versatile, it can honestly fit into almost any meal or occasion. For **Breakfast**, it’s absolute perfection. I love having a slice with my morning coffee – it’s a bit of a treat without being too heavy. It pairs beautifully with a simple cup of black coffee or a latte. The subtle sweetness is just enough to kickstart your day.
When it comes to **Brunch**, this bread feels a little more elegant. I like to serve it on a nice platter, perhaps with a side of fresh berries or a dollop of whipped cream (if you’re feeling fancy!). It complements fruit salads and yogurt parfaits wonderfully. A mimosa or a sparkling cider would be a lovely beverage pairing here.
As **Dessert**, it’s a winner every time. After a hearty meal, a slice of this warm zucchini bread, perhaps with a scoop of vanilla bean ice cream or a drizzle of caramel sauce, is pure bliss. It’s less heavy than a traditional cake, making it a great option when you want something sweet but not overly rich.
And for those **Cozy Snacks**, this is the ultimate go-to. It’s my favorite for an afternoon pick-me-up with a cup of herbal tea. It’s also what I’ll grab when I’m craving something sweet at 10pm but don’t want to bake a whole cake. My family just loves it warmed up slightly. My kids, especially, will ask for this all the time when they have friends over. It’s that reliable, crowd-pleasing treat. I’ve also found it’s delicious with a smear of cream cheese – don’t knock it till you try it!
Top Tips for Perfecting Your Zucchini Bread
Over the years, I’ve learned a few things that help make this zucchini bread absolutely perfect every time. Let’s dive into some of my best tips!
Zucchini Prep: This is probably the most crucial step. You need to grate your zucchini – I usually use the medium-sized holes on my box grater. After grating, place it in a colander set over a bowl or sink and let it drain for at least 10-15 minutes. Then, take a handful of the grated zucchini and squeeze out as much excess liquid as you possibly can. You can use your hands, or wrap it in a clean kitchen towel or cheesecloth. This step is vital to prevent a soggy loaf and ensure your bread bakes up properly. It doesn’t need to be bone dry, just not dripping wet!
Mixing Advice: Remember what I said about not overmixing? This is really important. Mix the wet and dry ingredients until *just* combined. A few streaks of flour are perfectly fine because they’ll disappear during baking. Overmixing develops the gluten, leading to a tough, dense bread, and we want it light and tender! So, resist the urge to stir it too much once the flour is added.
Swirl Customization: While this recipe focuses on a classic zucchini bread, if you wanted to get fancy and do a swirl, say with a cinnamon-sugar mixture, you’d prepare that separately. Once your batter is in the pan, you’d dollop spoonfuls of the cinnamon-sugar mixture on top and then gently swirl it through with a knife or skewer. Aim for distinct swirls, not a muddy mix. This adds a lovely textural and flavor contrast.
Ingredient Swaps: I’ve experimented a lot! For a dairy-free version, plant-based milk like almond or oat milk works beautifully. I’ve even used applesauce as a partial fat substitute in a pinch, though it can change the texture slightly. If you don’t have vegetable oil, melted and cooled unsalted butter can also be used, but it will lend a slightly different flavor and richness. For the sugar, you can reduce it by about a quarter cup if you prefer, but the current amount really balances the spices and zucchini.
Baking Tips: Always use the middle rack of your oven for the most even heat distribution. Ovens vary, so my 55 minutes might be your 50 or 60. Trust the toothpick test! If the top is browning too fast before the inside is cooked, tent it loosely with aluminum foil for the last 15-20 minutes. This prevents the outside from burning while the inside finishes baking.
Glaze Variations: The simple powdered sugar glaze is classic, but don’t be afraid to play! A touch of lemon juice instead of milk adds a wonderful zing that cuts through the sweetness. You could also add a tiny pinch of cinnamon to the glaze, or even a little orange zest for a brighter flavor. If you want a thinner glaze, just add milk a teaspoon at a time. For a thicker one, add more powdered sugar.
Storing and Reheating Tips
Properly storing your delicious zucchini bread will ensure it stays moist and flavorful for days. I’ve got this down to a science!
Room Temperature: Once completely cooled, you can store the loaf tightly wrapped in plastic wrap or aluminum foil at room temperature. It will stay wonderfully moist for about 3-4 days. If you’ve glazed it, wait until the glaze is fully set before wrapping. I often just leave it on the counter in a loosely tented piece of foil if we plan on eating it within a day or two.
Refrigerator Storage: If you live in a very warm climate or want to keep it for a bit longer, refrigerating is an option. Wrap it well in plastic wrap, and then in foil, or store it in an airtight container. It should stay good in the fridge for about a week. Just note that refrigeration can sometimes slightly dry out baked goods, so I tend to avoid this unless I absolutely have to.
Freezer Instructions: This bread freezes like a dream! This is a lifesaver for me when I bake a double batch. Once completely cooled, wrap the loaf (or individual slices) tightly in plastic wrap, then in a layer of aluminum foil, and finally place it in a freezer-safe bag or container. It will keep its best quality for up to 3 months. To thaw, unwrap it and let it come to room temperature on the counter for a few hours. If it seems a little dry after thawing, you can gently warm slices in the microwave for about 10-15 seconds.
Glaze Timing Advice: For room temperature or refrigerator storage, it’s best to add the glaze *after* the bread has cooled completely and just before serving or storing. If you glaze it and then wrap it tightly, the glaze can sometimes stick to the wrapping. For freezing, I highly recommend glazing the bread *after* it has thawed. This keeps the glaze looking fresh and prevents it from getting soggy during freezing.
Frequently Asked Questions
Final Thoughts
So there you have it – my tried-and-true, beloved zucchini bread recipe. I truly hope you give it a try. It’s more than just a recipe to me; it’s a little piece of comfort, a reliable treat that always brings smiles. The way it stays so incredibly moist, the perfect balance of spices, and the fact that it’s so darn easy to make – these are the things that make me come back to it again and again. It’s perfect when you need a quick dessert, a thoughtful bake sale contribution, or just a moment of sweet indulgence.
If you enjoy this recipe, you might also love my recipe for [Link to another relevant recipe, e.g., ‘Moist Banana Bread’] or my [Link to another relevant recipe, e.g., ‘Easy Apple Crumble’]. They share that same homey, comforting vibe.
I can’t wait to hear what you think! Let me know in the comments below if you try it, and how yours turns out. Do you have any favorite additions or variations? I’m always eager to hear about your baking adventures! Happy baking, everyone!

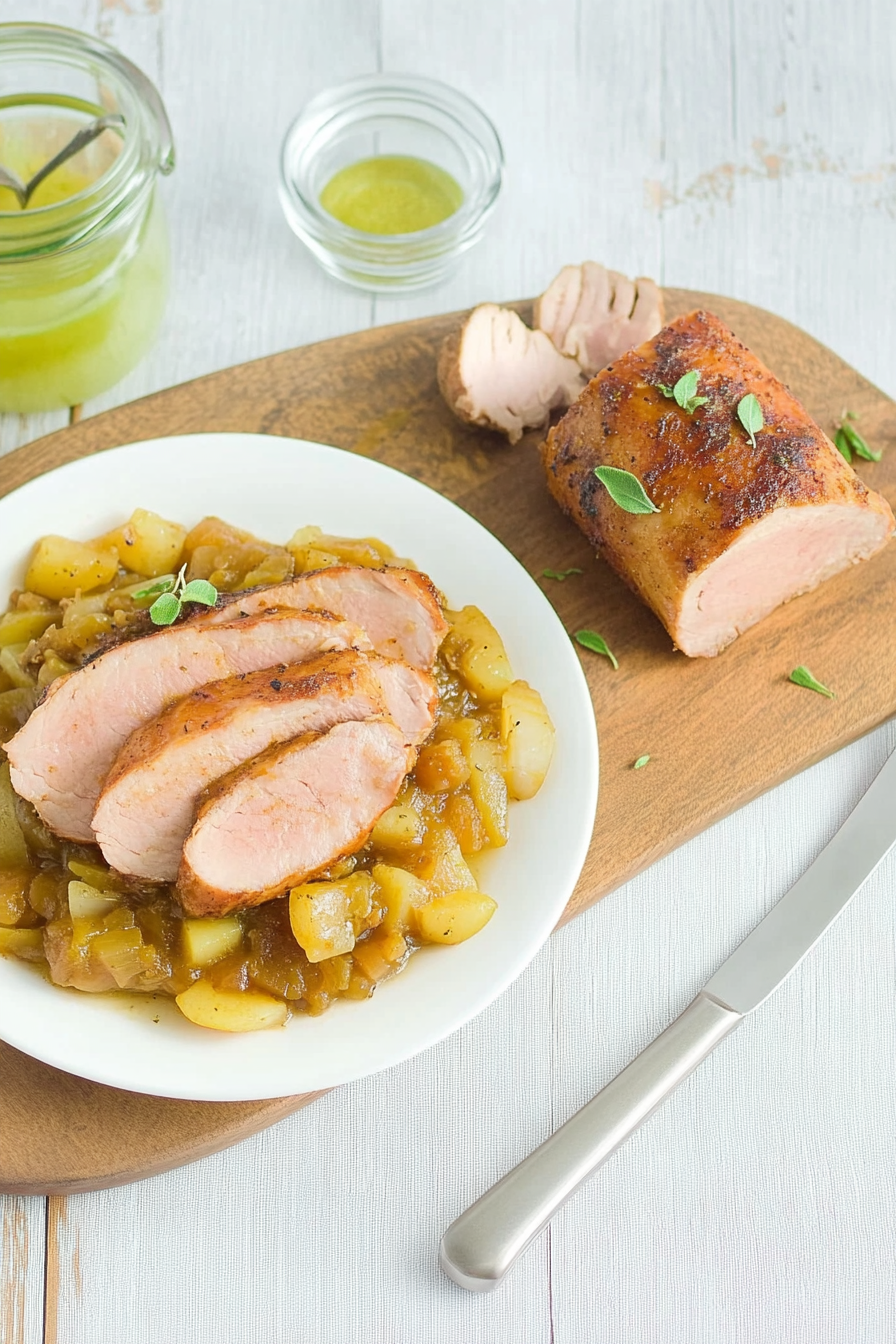
Slow Cooker Pork Tenderloin and Apples
Ingredients
Method
- Pat the pork tenderloin dry with paper towels. Rub thoroughly with salt and black pepper.
- Place the sliced yellow onions in the bottom of a 6-quart slow cooker. Top with the sliced apples.
- Place the seasoned pork tenderloin over the apples and onions in the slow cooker.
- In a small bowl, whisk together the chicken broth, apple cider vinegar, Dijon mustard, brown sugar, and dried thyme until well combined.
- Pour the prepared sauce evenly over the pork, apples, and onions in the slow cooker.
- Cover the slow cooker and cook on low for 4-5 hours, or on high for 2-3 hours, until the pork is tender and cooked through (internal temperature reaches 145°F).
- Carefully remove the pork from the slow cooker and let it rest on a cutting board for 5-10 minutes before slicing. Serve the sliced pork with the warm apple and onion mixture and the delicious sauce from the slow cooker.