Autumn Spice Brownies How to Bake Bliss
You know that feeling when you walk into your kitchen and the smell of something warm and comforting hits you like a hug? That’s exactly how I felt the first time I baked this zucchini banana bread. My kids were bouncing around, asking when it would be ready, and honestly, I couldn’t stop sneaking a taste while it cooled—because it’s just that addictive. This isn’t your average banana bread; it’s got a delightful twist with tender zucchini sneaking in, making every bite super moist and naturally wholesome. Trust me, it’s one of those recipes I turn to when I want something sweet but don’t want to feel guilty afterward. Plus, it’s great for using up those overripe bananas sitting on your counter, especially when conversion to a healthy-ish snack is what we need. Believe me, I’ve tested it with different tweaks—almond milk instead of regular, less sugar, a handful of walnuts—and each time, it’s a winner. An incredibly flavorful, cozy treat that disappears from my kitchen in minutes, I promise it’ll become part of your family, too. Ready to bake something really special? Let’s dive in!
What is Zucchini Banana Bread?
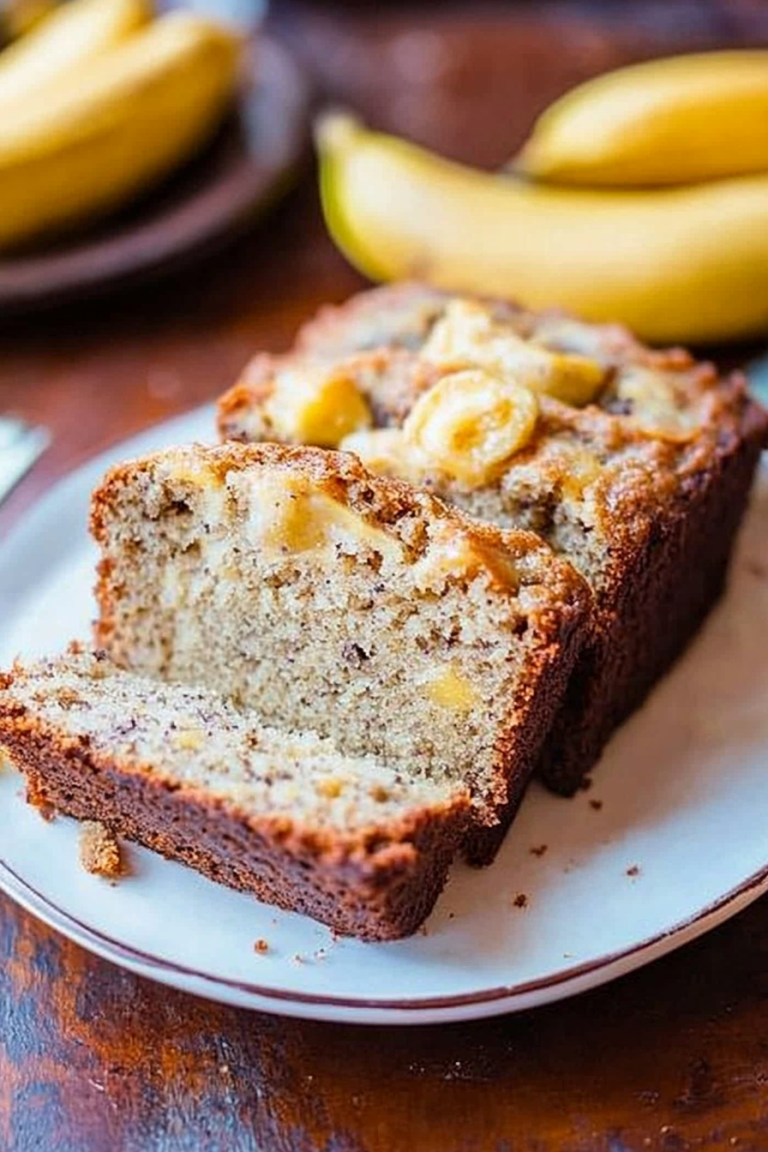
Think of zucchini banana bread as the lovechild of a classic banana loaf and a veggie-packed snack. It’s essentially a moist, tender bread that makes the most of those slightly bruised bananas and a humble zucchini—yes, zucchini!—grated right into the batter. The name says it all: a mashup that’s been around in my family for ages, handed down from my grandma who believed sneaking in veggies was our secret for sneaking in nutrition without kids noticing. It’s a quick bread, which means no fussing over yeast or complicated rising times. The zucchini keeps everything moist, and since it’s so mild, you barely notice it’s there—only that your bread is extra soft and tender, with a subtle veggie sweetness that complements the bananas perfectly. It’s like a warm hug in every slice, cozy enough for breakfast, lunch, or a little treat before bedtime. Plus, it’s a wonderful way to clean out your fruit bowl and vegetable stash at the same time!
Why you’ll love this recipe?
Honestly, what I love most about this zucchini banana bread is how it combines comfort and health in one. The flavor? Scrumptious—moist, banana-rich, with hints of vanilla and a gentle sweetness that feels just right. The smell alone, when it’s baking, fills my whole house and instantly turns everyone into eager taste testers. It’s also super simple; I’ve made this for last-minute snacks and dinner guests, and it always comes together with minimal fuss. The best part? It’s budget-friendly, using ingredients I usually have on hand—overripe bananas, zucchinis from the garden, some basic pantry staples. I especially love how versatile it is: you can add walnuts, chocolate chips, or even a drizzle of honey on top for a special touch. This bread is like a blank canvas—you’re free to tweak and make it your own. And I promise, once you make it, you’ll find yourself reaching for it all the time. It’s the perfect little pick-me-up that my family asks for repeatedly. Plus, it keeps well, and it’s even better the next day!
How do you make Zucchini Banana Bread?
Quick Overview
This zucchini banana bread is a straightforward one-bowl wonder with simple steps. First, you grate the zucchini, toss your bananas, and gather the ingredients. Then, you mix the dry and wet components separately before bringing them together gently—no overmixing here, folks! The batter gets poured into a loaf pan, with optional extras like chopped nuts or chocolate chips folded in, and baked until golden. When it comes out, give it time to cool—a little patience makes all the difference—then drizzle with a sweet glaze or enjoy warm with a pat of butter. The beauty? It’s quick enough for a weekday treat but special enough for guests. And yes, I’ve tested this recipe countless times; trust me, it’s foolproof!
Ingredients
For the Main Batter:
– 2 cups all-purpose flour (or a mix of whole wheat and white for extra fiber)
– 1 teaspoon baking soda
– 1/2 teaspoon baking powder
– 1/2 teaspoon salt
– 1 teaspoon cinnamon (optional but adds cozy warmth!)
– 1/2 cup sugar, or maple syrup for a healthier swap
– 1/2 cup brown sugar (adds richness)
– 1/3 cup vegetable oil or melted coconut oil
– 2 large eggs
– 3 ripe bananas, mashed (the uglier, the better—freaking perfect for baking!)
– 1 teaspoon vanilla extract
– 1 cup grated zucchini (squeeze out excess moisture to avoid sogginess)
For the Filling (Optional):
– 1/2 cup chopped walnuts or pecans
– 1/2 cup chocolate chips or dried cranberries (for a sweet twist!)
For the Glaze (Optional):
– 1/2 cup powdered sugar
– 1-2 teaspoons milk or lemon juice
– A splash of vanilla
– Extra sprinkles or zest for flair
Step-by-Step Instructions
Step 1: Preheat & Prep Pan
Set your oven to 350°F (175°C). Grease your loaf pan with butter or line it with parchment paper—this makes removing the bread a breeze. If you want perfectly even slices, you can also lightly dust the pan with flour.
Step 2: Mix Dry Ingredients
In a large bowl, whisk together the flour, baking soda, baking powder, salt, and cinnamon. This little step ensures everyone’s ingredients are evenly distributed, so the bread rises and bakes uniformly. Trust me, it makes a difference!
Step 3: Mix Wet Ingredients
In a separate bowl, mash your bananas until smooth. Add the sugars, oil, eggs, and vanilla—beat until everything’s combined and slightly frothy. I like doing this in the same bowl to save cleanup. At this stage, the batter should smell sweet and banana-y; that’s how you know you’re on the right track.
Step 4: Combine
Pour the wet ingredients into your dry mixture. Use a spatula or wooden spoon to fold just until combined—don’t overmix, or your bread might turn out dense instead of fluffy. Stop as soon as there are no streaks of flour. It’s okay if it’s a little lumpy; that’s what makes it tender!
Step 5: Prepare Filling
If you’re adding nuts or chocolate chips, fold them into the batter now. My kids love when I toss in chocolate chunks—they think it’s a special treat, and honestly, it’s their favorite part. For a twist, you could sprinkle some on top before baking too.
Step 6: Layer & Swirl
Pour half the batter into your pan, then dollop some of the filling or extra banana slices on top. Add the remaining batter and gently swirl with a skewer or knife for a marbled effect. This little swirl makes the loaf look so pretty without any fuss.
Step 7: Bake
Pop it in the oven and bake for about 55-60 minutes. Check for doneness by inserting a toothpick into the center; it should come out clean or with just a few moist crumbs. If it starts to brown too quickly, tent it with foil for the last 15 minutes. Look at that golden top—perfection!
Step 8: Cool & Glaze
Let the bread cool in the pan for about 10 minutes, then transfer it to a wire rack. Once fully cooled (or warm, if you can’t wait), drizzle with your homemade glaze or simply dust with powdered sugar. I love adding a splash of lemon juice to the glaze for a tangy kick—I think it balances the sweetness beautifully.
Step 9: Slice & Serve
Use a serrated knife and cut with a gentle sawing motion. This bread is tender, so don’t press down too hard. Serve slices warm with a pat of butter, or for a more fancy presentation, pair it with fresh berries and a drizzle of honey. Honestly, it’s just as good at room temperature too—my family often snacks on it all week long.
What to Serve It With
This zucchini banana bread is so versatile, I’ve served it in many ways that suit different moods and occasions. For breakfast, I love slicing it warm and spreading a bit of butter or cream cheese. My favorite coffee partner, a strong dark roast, pairs perfectly with a slice in the morning hustle. When I have friends over for brunch, I like adding a scoop of Greek yogurt and some fresh fruit on the side—it’s fancy enough to impress but effortless to prepare.
As a mid-afternoon snack, I’ll warm a piece and sprinkle a little extra cinnamon on top—pure comfort. My kids actually ask for this all the time after school, and I don’t mind because I know it’s packed with goodness. For dessert, I sometimes drizzle a honey glaze or serve it alongside vanilla ice cream—trust me, it’s a crowd-pleaser whether you’re feeding family or friends. The subtle zucchini flavor keeps it tasting fresh and just a little wholesome, even when it’s being enjoyed as a sweet treat.
Top Tips for Perfecting Your Zucchini Banana Bread
Over the years, I’ve picked up quite a few tricks that make this bread turn out perfect every single time. First, when grating zucchini, I always do this last and squeeze out as much moisture as possible. Excess moisture can make the bread soggy—nobody wants that! I use a clean dish towel or cheesecloth to squeeze out the extra water. And speaking of moisture, I learned that swapping half the butter or oil with applesauce can make it even healthier without sacrificing too much moisture—my taste testers couldn’t tell the difference.
When mixing the batter, gentle folding is key. Overmixing creates dense bread you won’t love. I stop just as the ingredients come together. For an extra picture-perfect swirl, use a toothpick to drag through the batter in a figure-eight pattern—so pretty! If you want to experiment, adding a teaspoon of ginger or nutmeg gives it a whole new vibe. The oven plays tricks sometimes—my trick is to rotate the loaf halfway through baking to ensure even browning.
On the glaze front, I’ve tested adding lemon zest, orange extract, and even a splash of bourbon for grown-up flavor. Honestly, it’s a forgiving recipe, so don’t be afraid to get creative. A little sprinkle of sea salt on top of the glaze just before serving enhances all the flavors—trust me on this one. My biggest lesson: patience, letting the bread cool fully before slicing, prevents it from crumbling. Oh, and store it wrapped tightly in plastic at room temperature for up to three days or freeze slices for later. The texture stays tender and delicious, even after days.
Storing and Reheating Tips
This bread keeps surprisingly well, which is great because I often make it ahead of time. Store it in an airtight container or wrapped tightly in plastic wrap. At room temperature, it stays moist and flavorful for up to three days—perfect for grabbing a quick snack. If you want to keep it longer, pop it into the refrigerator for about a week. Just remember to bring it back to room temp or gently warm slices in the microwave—you’ll notice the moisture re-absorbing, making each bite just as yummy. For longer storage, I recommend wrapping individual slices tightly in foil or plastic and freezing them; they reheat beautifully in the toaster or oven without drying out. A trick I’ve learned is to add the glaze or a splash of lemon juice only when you’re about to serve, so it stays fresh and shiny. This way, each slice is as delightful as when it first baked.
Frequently Asked Questions
Final Thoughts
Whenever I bake this zucchini banana bread, it feels like a little miracle—transforming simple ingredients into something special. It’s not just about the taste, though that’s definitely a highlight; it’s about the joy of sharing something wholesome and comforting with loved ones. The aroma alone has a way of making everyone gather in the kitchen, eager for a slice. Plus, it’s so forgiving—you can swap ingredients, add your own twists, and it still turns out beautifully. I always keep a loaf in the freezer, ready for unexpected guests or lazy mornings when I need a quick, satisfying breakfast. If you’re looking for a cozy, flavorful, and versatile treat, give this a try. I can’t wait to hear how yours turns out! Drop a comment, share your variations, and happy baking—your home is about to smell amazing.
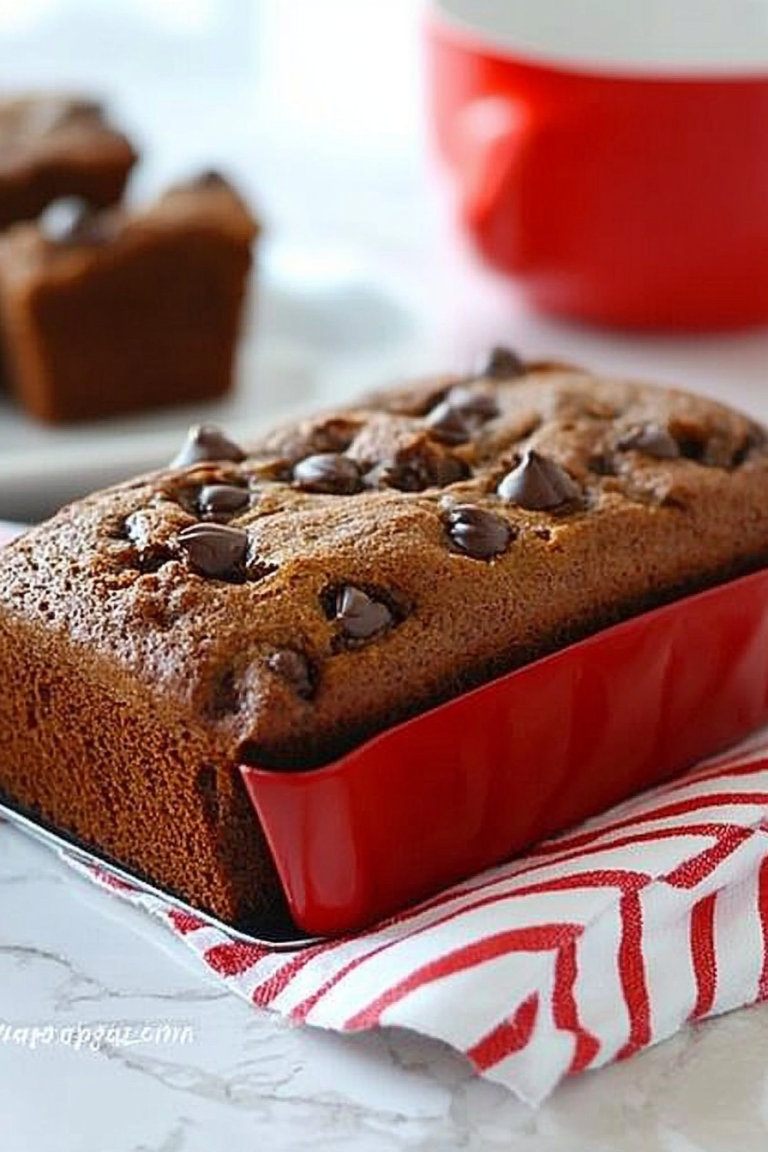
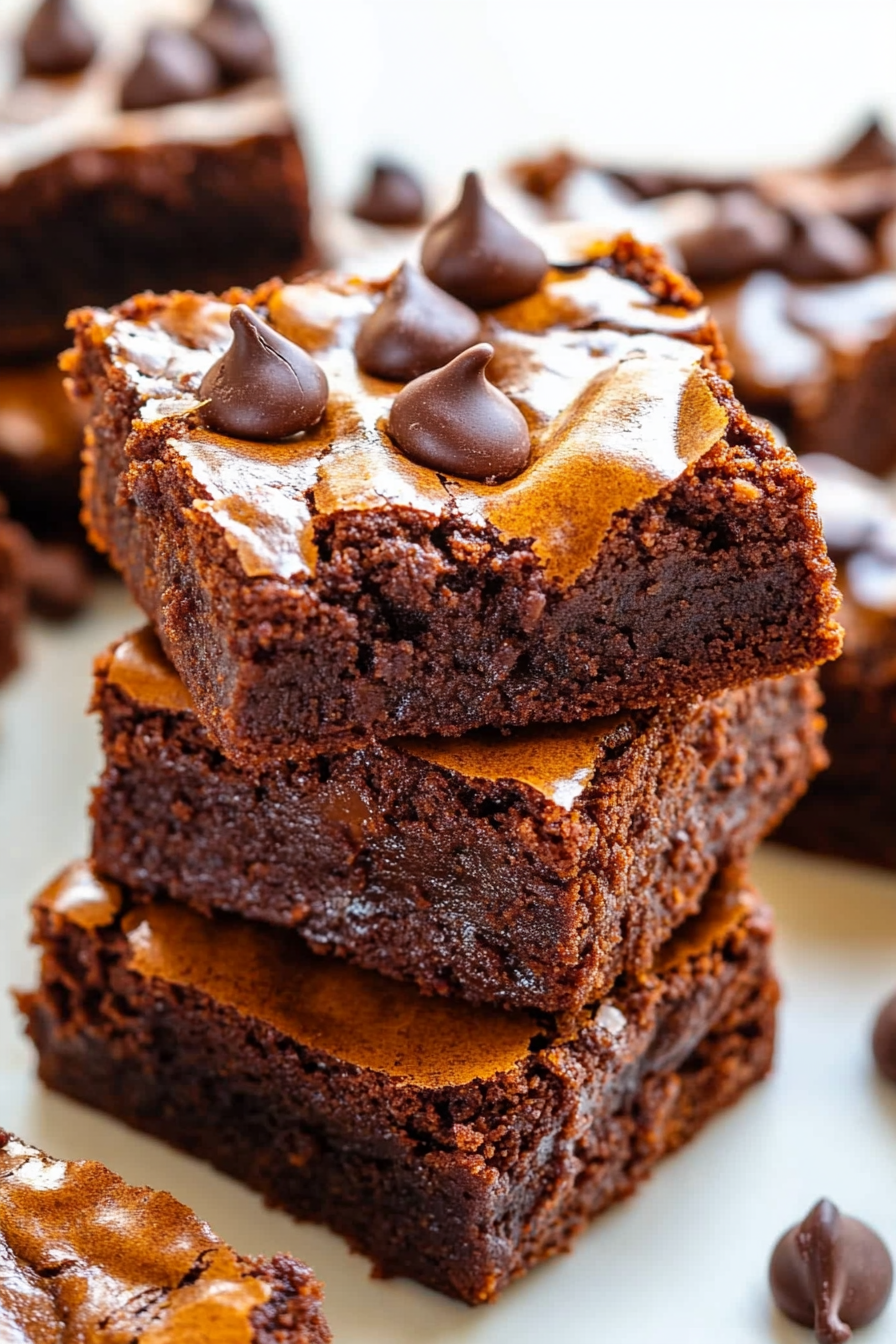
pumpkin brownies
Ingredients
Method
- Preheat oven to 350F. Line an 8-inch square pan with aluminum foil leaving overhang and spray with cooking spray, or grease and flour the pan; set aside.
- In a microwave-safe bowl, melt the butter and chocolate, about 2 minutes, stirring after 1 minute until smooth.
- Allow mixture to cool briefly before adding eggs. Add eggs, sugar, vanilla, coffee, and espresso granules if using; whisk vigorously.
- Add flour and salt; stir until smooth without overmixing.
- Pour batter into prepared pan, smoothing the surface. Set aside.
- In a medium bowl, combine pumpkin puree, egg yolk, brown sugar, pumpkin pie spice, and vanilla.
- Pour pumpkin mixture over brownie batter, spreading evenly, then sprinkle with chocolate chips.
- Bake for 35 to 40 minutes until a toothpick inserted into the deepest part feels thick and set. Cool before slicing.