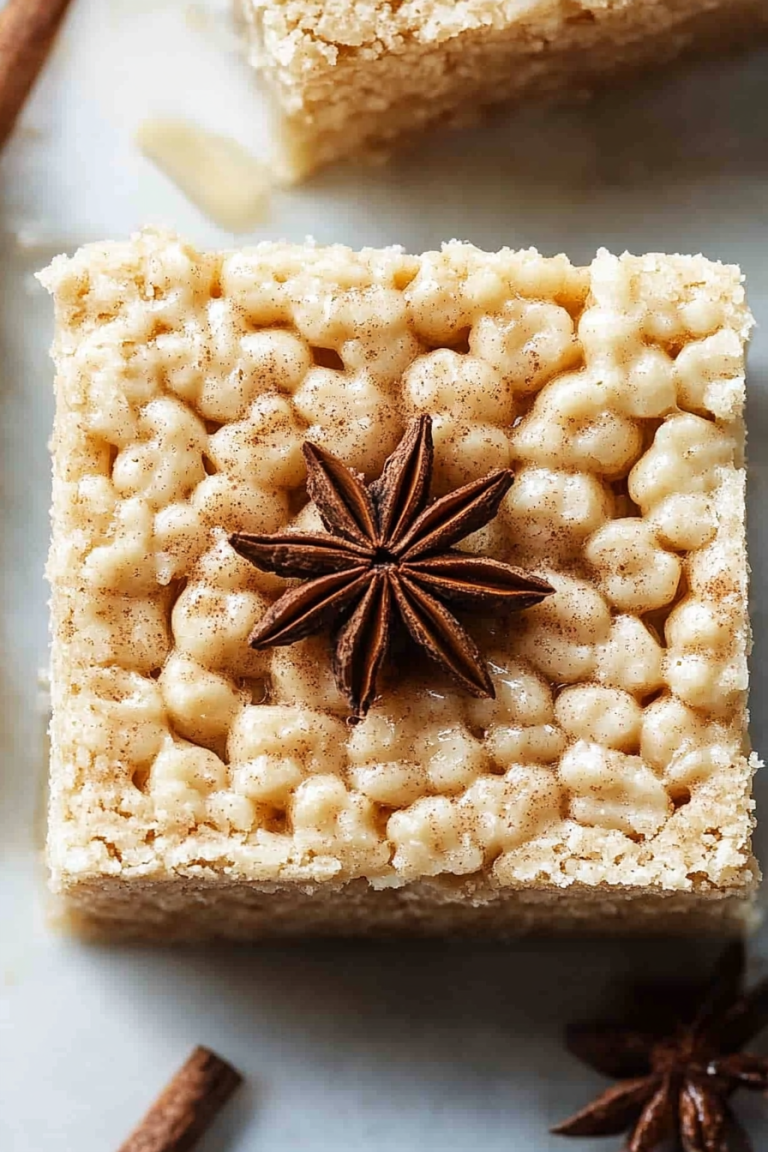
Autumnal Monkey Bread How Sweet It Is
You know those recipes that just *feel* like home? The ones that smell amazing while they’re baking and disappear off the plate in mere minutes? Well, this zucchini bread is absolutely one of those for me. It’s not just any zucchini bread; it’s *the* zucchini bread. I’ve been tweaking this recipe for years, trying to get it just right, and I honestly think I’ve finally nailed it. It’s the perfect balance of moist, tender crumb, a hint of sweetness, and that comforting spiced flavor that just makes you want to curl up with a cup of tea. Honestly, it’s my secret weapon when I need a quick, crowd-pleasing treat. I’ve made this for countless bake sales, potlucks, and impromptu coffee dates, and people always rave about it. It’s even better than some of those fancy bakery muffins I’ve tried, and so much easier to whip up!
What is Zucchini bread?
So, what exactly is this magical zucchini bread all about? Think of it as a super moist, delicately spiced quick bread that happens to have grated zucchini hidden inside. Now, don’t let the “zucchini” part scare you! You can’t really taste the zucchini itself, but it’s the secret ingredient that makes this bread unbelievably tender and moist. It’s not like a dense cake, but it’s definitely richer than a standard loaf of bread. It’s got a beautiful crumb, usually infused with warm spices like cinnamon and nutmeg, and often studded with nuts or chocolate chips. The name, well, it’s pretty straightforward – it’s bread, and it has zucchini! My grandmother used to make something similar, and I think that’s where my love for it really started. It’s a classic for a reason, a testament to how simple, humble ingredients can come together to create something truly wonderful.
Why you’ll love this recipe?
What are some good reasons to try zucchini bread?flavor is just out of this world. It’s warm, comforting, and perfectly spiced. The cinnamon and nutmeg create this cozy aroma that fills your entire house when it’s baking, and the subtle sweetness is just right – not too much, not too little. Then there’s the simplicity. Seriously, if you can stir a few ingredients together, you can make this! It’s a one-bowl wonder for the batter, and the rest is just as straightforward. This recipe is a lifesaver on busy weeknights when you want a treat but don’t have hours to spare. Plus, it’s incredibly cost-efficient. Zucchini is usually pretty affordable, and the other pantry staples are things you likely already have on hand. You get a deliciousversatility! While I adore it plain with a simple glaze, you can totally customize it. Add chocolate chips (my kids’ favorite!), some chopped walnuts or pecans for a bit of crunch, or even a swirl of cream cheese for an extra decadent touch. What I love most about this recipe is how forgiving it is. Even if you’re a beginner baker, you’re going to achieve fantastic results. It’s that reliable, go-to recipe that you’ll come back to again and again, just like my grandmother’s original version which inspired this one.
How to Make Zucchini Bread
Quick Overview
In a nutshell, making this zucchini bread involves mixing some dry ingredients, then some wet ingredients, combining them gently, folding in your grated zucchini, and baking it until golden brown. The magic happens because the zucchini adds moisture, and the simple spices give it that irresistible aroma. It’s a quick process from start to finish, making it perfect for those moments you need a homemade treat without a fuss. You’ll have a beautiful, fragrant loaf ready to enjoy in under an hour and a half, including baking time!
Ingredients
For the Main Batter:
This is where all the good stuff comes together to create that tender crumb. I always make sure my flour is fresh, as old flour can sometimes lead to a denser bake. All-purpose flour is perfect here, no need for anything fancy. Baking soda and baking powder are essential for that lovely lift, so double-check those expiration dates! A pinch of salt really brings out all the flavors, don’t skip it! And for the warmth, I use a good amount of ground cinnamon and a whisper of nutmeg. It just smells like autumn in my kitchen when these go in.
For the Filling:
Here’s where the star of the show, the zucchini, comes in. You’ll want medium-sized zucchini, and the trick is to grate them on the larger holes of your box grater. No need to peel them! The peel adds a nice little fleck of color and extra nutrients. Make sure you squeeze out as much excess moisture as you can – this is a CRUCIAL step for preventing a soggy loaf. You can do this by wrapping the grated zucchini in a clean kitchen towel or cheesecloth and wringing it out. For a bit of sweetness and moisture, granulated sugar and a touch of brown sugar give it a lovely depth of flavor. And of course, we need a binder and richness, so eggs and vegetable oil (or another neutral oil) are key. I’ve tried melted butter, but oil truly makes it moister for longer.
For the Glaze:
This is totally optional, but I highly recommend it! It adds a lovely finishing touch. Powdered sugar is the base, and I use just a splash of milk (or almond milk for a creamier texture!) to thin it out. A tiny bit of vanilla extract enhances the sweetness. If you want to get fancy, a little squeeze of lemon juice can add a lovely tang, or a dash of cinnamon. The trick is to get it to a drizzle-able consistency – not too thick, not too thin. You want it to coat the top beautifully without running off completely.
Step-by-Step Instructions
Step 1: Preheat & Prep Pan
First things first, preheat your oven to 350 degrees Fahrenheit (175 degrees Celsius). This gives the oven plenty of time to get nice and hot so your bread bakes evenly from the start. While the oven is heating up, grab a standard 9×5 inch loaf pan. I like to grease it really well with butter or cooking spray, and then lightly flour it. This ensures that your beautiful zucchini bread will slide right out of the pan after baking, without any sticking. Sometimes, I even line the bottom with a strip of parchment paper, leaving a little overhang on both sides – that’s my trick for super easy removal!
Step 2: Mix Dry Ingredients
In a large bowl, whisk together your all-purpose flour, baking soda, baking powder, salt, cinnamon, and nutmeg. Give it a good whisk until everything is well combined. This step is important because it distributes the leavening agents evenly, making sure your bread rises beautifully. You don’t want pockets of baking soda that make it taste bitter! I usually use a balloon whisk for this, it really aerates the flour and makes the batter lighter.
Step 3: Mix Wet Ingredients
In a separate medium bowl, whisk together your granulated sugar and brown sugar. Then, crack in your eggs, one at a time, whisking after each addition. Pour in your vegetable oil and whisk until everything is smooth and well combined. This creates the base for that moist, tender crumb that we’re all after.
Step 4: Combine
Now, pour the wet ingredients into the bowl with the dry ingredients. Using a spatula or a wooden spoon, gently fold them together until *just* combined. I can’t stress this enough: do NOT overmix! Overmixing develops the gluten in the flour, which can lead to a tough, dense loaf. A few streaks of flour are perfectly fine; they’ll disappear as you fold in the zucchini.
Step 5: Prepare Filling
This is the most crucial step for that signature moistness! Take your grated zucchini (remember, squeezed super dry!) and gently fold it into the batter. I usually use a spatula and make sure the zucchini is distributed evenly throughout the batter, but again, don’t go crazy stirring. You’re just incorporating it. If you’re adding chocolate chips or nuts, this is the time to fold those in too.
Step 6: Layer & Swirl
Pour the batter evenly into your prepared loaf pan. If you’re feeling fancy, you can add a swirl here. I sometimes mix a tablespoon of cinnamon with a tablespoon of sugar and sprinkle it over the top before baking, or even swirl in a bit of melted chocolate. For this basic recipe, just smoothing the top is perfect.
Step 7: Bake
Pop the pan into your preheated oven. Bake for about 55-65 minutes. The exact time can vary depending on your oven, so start checking around the 50-minute mark. You’ll know it’s done when a toothpick inserted into the center comes out clean or with just a few moist crumbs attached (not wet batter!). The top should be golden brown and a little firm to the touch. If the top is browning too quickly but the center isn’t done, you can loosely tent it with aluminum foil.
Step 8: Cool & Glaze
Once baked, let the loaf cool in the pan for about 10-15 minutes. This allows it to set up properly. Then, carefully invert it onto a wire rack to cool completely. Once it’s totally cool (and I know this is hard!), you can whisk together your glaze ingredients in a small bowl until smooth. Drizzle it generously over the top of the cooled bread. Let the glaze set for about 15-20 minutes before slicing.
Step 9: Slice & Serve
Once the glaze has set, use a sharp serrated knife to slice the bread. The slices should be about 3/4 inch thick. I find it best served at room temperature. The aroma when you slice into it is just heavenly, and seeing that moist crumb is so satisfying!
What to Serve It With
This zucchini bread is so versatile, it’s practically a chameleon! For Breakfast, I love a thick slice toasted and slathered with a little butter. It’s hearty enough to keep you going without feeling heavy. A simple cup of good quality coffee or a milky tea is the perfect companion. For Brunch, I like to get a little more elegant. I’ll serve it slightly warm, perhaps with a dollop of Greek yogurt and a scattering of fresh berries on the side. It looks beautiful on a brunch spread and pairs wonderfully with mimosas or even a light sparkling rosé. When it comes to Dessert, it’s fantastic on its own, but a scoop of vanilla bean ice cream alongside it is pure bliss. For those late-night cravings or a simple afternoon pick-me-up, it’s perfect for Cozy Snacks. Just grab a slice (or two!) and a warm mug of hot chocolate or chai latte. My kids also love it with a glass of cold milk, and honestly, who am I to argue with that?
Top Tips for Perfecting Your Zucchini Bread
Over the years, I’ve picked up a few tricks that make this zucchini bread consistently amazing. For Zucchini Prep, the biggest thing is squeezing out that moisture. I can’t say it enough! If you don’t, you’ll end up with a gummy, heavy loaf, and nobody wants that. Grating it on the large holes gives you little flecks of zucchini that are barely noticeable in the final bake, and the skin adds a nice touch. For Mixing Advice, remember my mantra: gentle folding! You want to combine the wet and dry ingredients just until they come together. Lumps are okay! Overmixing is the quickest way to a tough bread. Think of it as coaxing the ingredients together, not aggressively beating them. When it comes to Swirl Customization, if you’re adding something like chocolate chips or nuts, toss them with a little bit of the dry flour mixture before adding them to the batter. This helps prevent them from sinking to the bottom during baking. For Ingredient Swaps, if you’re out of vegetable oil, a neutral oil like canola or grapeseed oil works just as well. Some people even use unsweetened applesauce for a lower-fat version, but it will change the texture slightly, making it a bit more cake-like. For Baking Tips, always trust the toothpick test, but be aware of your oven. If you find your oven runs hot, reduce the temperature by 10-15 degrees. Also, baking in the center rack of the oven ensures the most even heat distribution. If the top is browning too fast, tent it loosely with foil. Finally, for Glaze Variations, don’t be afraid to experiment! A little bit of orange zest can add a bright, sunny flavor, or a touch of almond extract can complement any nuts you’ve added. The consistency is key here; aim for a thick drizzle that coats the back of a spoon.
Storing and Reheating Tips
Proper storage is key to keeping this zucchini bread delicious. For Room Temperature storage, once completely cool, I wrap the loaf tightly in plastic wrap and then place it in an airtight container. It will stay wonderfully moist for about 2-3 days this way. If you plan on slicing it over a few days, just rewrap the cut end tightly. For Refrigerator Storage, if you live in a very warm or humid climate, or if you want it to last a little longer, you can store it in the fridge. Again, wrap it tightly in plastic wrap, then an airtight container or a resealable bag. It should keep well for up to a week. The texture might be a little firmer when cold, but it’s easily fixed with a quick reheat. For Freezer Instructions, this bread freezes beautifully! Once completely cooled, I wrap it tightly in a couple of layers of plastic wrap, then a layer of aluminum foil, and finally slip it into a freezer-safe bag. It’ll keep for up to 3 months. To thaw, just unwrap it and let it come to room temperature on the counter, or for a quicker thaw, you can gently warm slices in the oven at a low temperature. For Glaze Timing Advice, if you plan to freeze it, it’s best to store it *without* the glaze. Glaze can sometimes get sticky or crackle in the freezer. Add the glaze after thawing and bringing it back to room temperature. If you’re just storing it for a couple of days, you can add the glaze before slicing and serving.
Frequently Asked Questions
Final Thoughts
This zucchini bread recipe is more than just a bake; it’s a warm hug in loaf form. It’s that reliable, delicious treat that brings smiles to faces and makes any day feel a little brighter. The blend of moistness from the zucchini, the comforting spices, and the ease of preparation makes it a true pantry staple for me. It’s the kind of recipe that makes you feel like a baking pro, even if you’re just starting out. If you love this recipe, you might also enjoy my Moist Blueberry Muffins or my Easy Apple Crumble Bars for more comforting baked goods. I really hope you give this zucchini bread a try and that it becomes a favorite in your home too. I can’t wait to hear how yours turns out, so please leave a comment below with your thoughts and any delicious variations you try! Happy baking!

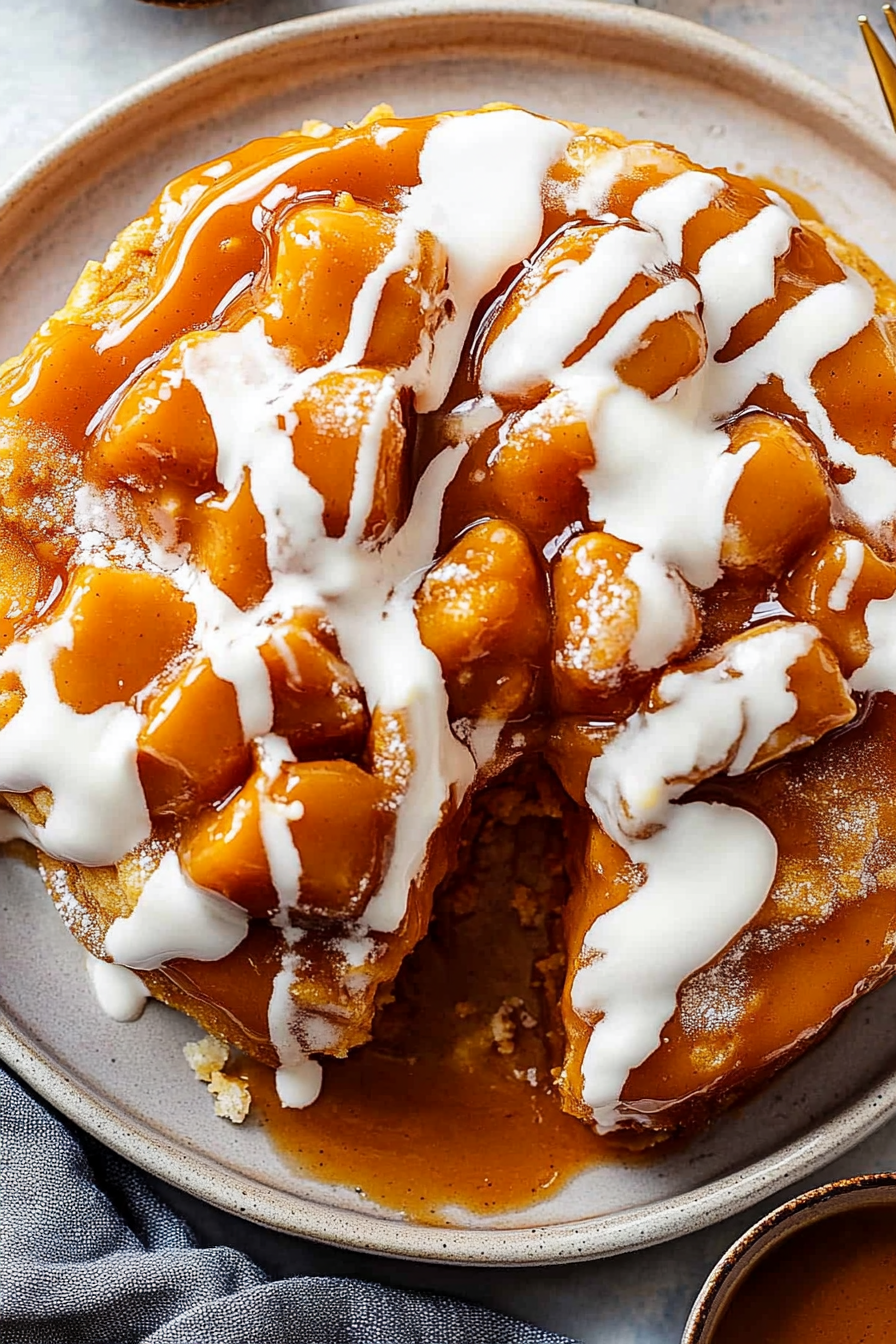
Pumpkin Caramel Monkey Bread
Ingredients
Method
- Melt butter in a small saucepan. Add brown sugar, heavy cream, pumpkin, vanilla, and salt. Whisk until smooth. Bring to a low simmer and let it bubble gently until it’s incorporated and slightly thickened, 3-5 minutes (you don’t want to overcook it or it will get too thick). Remove from heat.
- Preheat the oven to 350 degrees F. Cut the biscuits into 6 even pieces (half, then into thirds). Toss the biscuit pieces with cinnamon and sugar. Transfer to a round 9-inch cake pan or baking dish.
- Pour most of the pumpkin caramel over the biscuits until mostly covered. Set aside the remaining 0.25 to 0.5 cup caramel for topping.
- Bake for 20 minutes. Remove from the oven, let rest for just 2-3 minutes and then invert onto a serving plate.
- Melt the white chocolate and coconut oil in the microwave in 15 second increments, stirring in between. Once melted, drizzle over the monkey bread. Drizzle with reserved pumpkin caramel (optional). Serve warm.