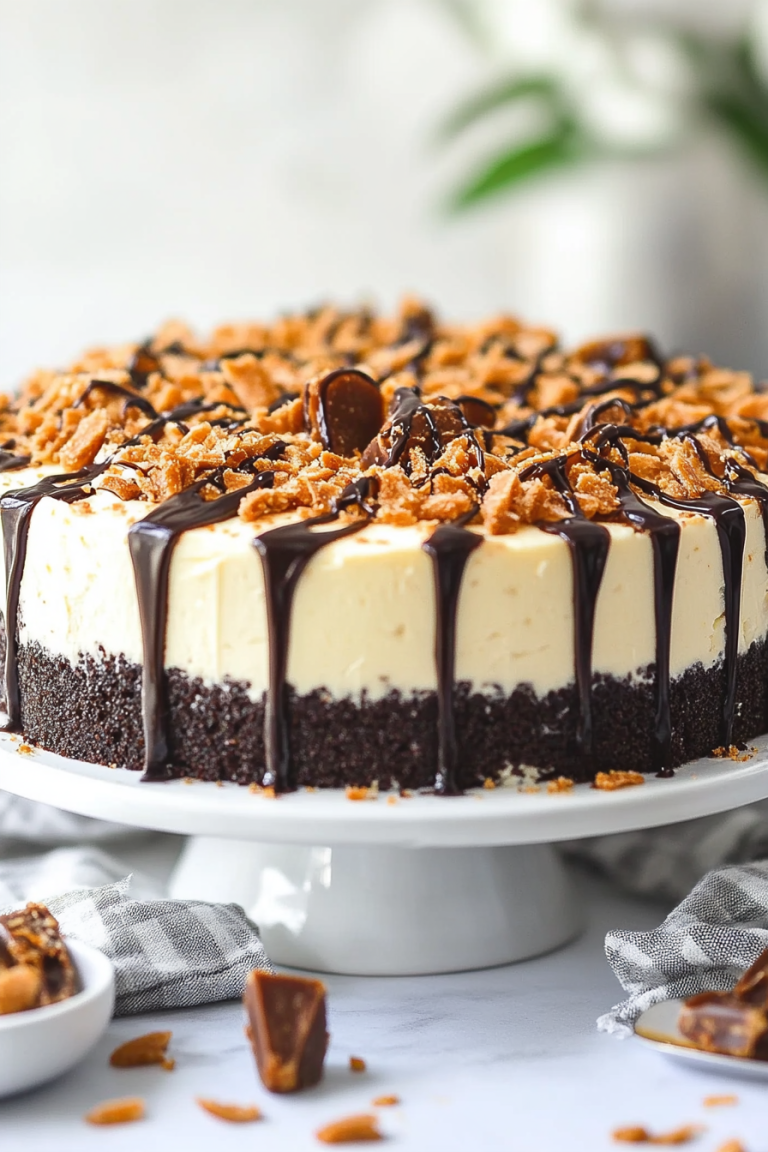
Campfire Treat Pie A Simple Dessert
There’s something about pulling a warm slice of coffee cake out of the oven that instantly makes my house feel cozy and full of love. I grew up sneaking pieces straight from my grandma’s kitchen, the sweet aroma of cinnamon and baked goodness wrapping around me like a favorite blanket. Today, I want to share a recipe that’s similar in spirit but with a little modern twist—my favorite zucchini swirl coffee cake. It’s incredibly moist, tender, and packed with just the right touch of sweetness. Plus, the zucchini keeps it wonderfully tender and adds a sneaky veggie boost that my kids actually ask for all the time. This one’s a lifesaver on busy nights when a homey treat is exactly what you need. And honestly, I can’t tell you how many times I’ve made this when I was craving something sweet but wanted to keep it a little healthier—trust me, the zucchini makes it genuinely moist without changing the flavor at all. I always do this when I want a comforting, easy-to-make dessert that feels special but isn’t complicated. It disappears in minutes at my house, and I love how every slice is like a little hug from the oven.
What is Zucchini Swirl Coffee Cake?
Think of this as a classic coffee cake with a sneaky twist—swirling in grated zucchini, which keeps the cake incredibly moist and tender. The name says it all: it’s a coffee cake, so it pairs perfectly with your morning coffee or afternoon tea, but it’s also the kind of dessert you’d happily serve after dinner or at brunch. It’s essentially a fluffy, buttery cake layered with a cinnamon-sugar swirl, and then marbled with shredded zucchini that’s virtually invisible but makes the texture so wonderful. The name “swirl” refers to that pretty marbling—it’s like a little piece of art on your plate. It’s a simple recipe, but don’t let that fool you—each bite is packed with flavor, with notes of warm cinnamon and vanilla that hit just right. Plus, the grated zucchini adds a subtle earthy note, balancing out all that sweetness. I always say this cake is like a lazy Sunday morning wrapped up in a slice, but honestly, I make it on any day I want to feel cozy and satisfied.
Why you’ll love this recipe?
What I love most about this zucchini swirl coffee cake is how versatile it is—it’s perfect for breakfast, brunch, or an afternoon snack. The flavor is just enough sweetness—nothing cloying—and the cinnamon and vanilla give it that classic comforting aroma. The beauty of it is also in how simple it is to pull together; you don’t need fancy ingredients or complicated techniques. Just a basic batter, grated zucchini, and a quick cinnamon-sugar swirl, and you’re golden. Budget-wise, it’s pretty friendly since zucchini and pantry staples like flour, sugar, and oil are common household ingredients—plus, zucchini is in season for most of the year and super affordable. This cake is incredibly forgiving, too. I’ve tested it with almond milk, which made it even creamier, and I’ve swapped out some of the sugar for coconut sugar with great results. The texture—crumby, moist, tender—never fails. It’s also a great way to get more veggies into your kids’ diets without them realizing it. My kids ask for this all the time, and I love how it feels like a special treat that’s actually good for us. Plus, it’s so gorgeous with that cinnamon swirl on top—you almost don’t want to cut it, but I promise, once you do, it’s worth every crumb.
How do I make Zucchini Swirl Coffee Cake?
Quick Overview
This recipe is honestly as easy as mixing your ingredients, layering some zucchini and cinnamon-sugar swirls, then baking until golden. The trick is to grate the zucchini ahead of time, squeeze out excess moisture, and fold it gently into the batter. The swirl comes together fast—just a sprinkle of cinnamon and sugar. Once baked, you get a beautifully marbled cake that’s tender, moist, and studded with cinnamon goodness. It’s great for a quick weeknight dessert or a cozy weekend breakfast. What makes this cake so special is how forgiving and adaptable it is—oh, and that smell when you open the oven? Heaven.
Ingredients
For the Main Batter:
– 1 ½ cups all-purpose flour (I like unbleached for extra flavor)
– 1 teaspoon baking powder
– ½ teaspoon baking soda
– ½ teaspoon salt
– ½ cup unsalted butter, softened (or coconut oil if you prefer)
– 1 cup granulated sugar (or coconut sugar for a caramel undertone)
– 2 large eggs
– 1 teaspoon vanilla extract
– ½ cup milk (dairy or almond milk works beautifully)
– 1 cup grated zucchini, squeeze out moisture (I use a box grater—don’t skip this step!)
For the Filling:
– ¼ cup granulated sugar
– 1 teaspoon ground cinnamon
For the Glaze (optional but recommended):
– ½ cup powdered sugar
– 1-2 teaspoons milk
– A splash of vanilla or lemon juice for extra zing
Step-by-Step Instructions
Step 1: Preheat & Prep Pan
Set your oven to 350°F (175°C). Grease a 9-inch square baking dish or line it with parchment paper—whatever you prefer. A little butter or non-stick spray on the pan helps everything come out smoothly. While it heats, grate your zucchini, then give it a good squeeze to remove excess water. Trust me, this step keeps your cake from getting soggy—overly moist zucchini is the enemy of a perfectly fluffy cake! I do this the night before if I want to save time, just keep it in a sealed container in the fridge.
Step 2: Mix Dry Ingredients
In a bowl, whisk together the flour, baking powder, baking soda, and salt. This step ensures everything is evenly distributed and helps your cake bake evenly. Think of this as laying a solid foundation—you want your baking powder and soda to be evenly dispersed, or you’ll get uneven rise.
Step 3: Mix Wet Ingredients
In your stand mixer or a big bowl, beat the softened butter and sugar until fluffy—this is the secret to a tender crumb. Add eggs one at a time, mixing well after each. Stir in vanilla and milk. The mixture should look smooth and slightly fluffy. If it looks curdled or separated, don’t worry—just keep going. I tested this with almond milk, and it made the cake even a little creamier, so don’t hesitate to swap it out! Finally, fold in the grated zucchini gently, being careful not to deflate the batter.
Step 4: Combine
Add the dry ingredients to the wet, mixing gently just until combined. Overmixing can make the cake dense, so mix until you see no streaks of flour. It should be thick but still pourable—if it’s too stiff, a splash more milk will do the trick.
Step 5: Prepare Filling
Mix the sugar and cinnamon in a small bowl. This will go into your swirl—think of it as the spicy sweet layer that makes every bite exciting.
Step 6: Layer & Swirl
Pour half the batter into your prepared pan and spread evenly. Sprinkle half of the cinnamon-sugar mixture over it. Add the remaining batter on top, then sprinkle with the rest of the cinnamon-sugar. Using a butter knife or skewer, swirl everything together gently—don’t overdo it, just enough to create pretty marbled patterns. This swirl is what makes the cake look so inviting, almost like a work of art—trust me, I’ve made this dozens of times, and each swirl looks a little different and always charming.
Step 7: Bake
Pop it into the oven and bake for about 40-45 minutes. Keep an eye on the color—once it turns golden brown and a toothpick inserted in the center comes out clean, it’s done. Every oven is a little different, so start checking at 38 minutes. If you notice the edges browning too quickly, tent with foil for the last 10 minutes. I usually do the toothpick test—if it comes out with just moist crumbs, you’re good. Let it cool in the pan for about 15 minutes before transferring to a wire rack (if you’ve used parchment, lifting it out is easy).
Step 8: Cool & Glaze
Wait until the cake cools slightly before glazing—it helps the glaze stay put. Mix the powdered sugar, vanilla, and milk until you get a smooth, pourable consistency. Drizzle generously over the top while the cake is still warm. The glaze adds just the right touch of sweetness and a shiny finish. If you prefer, dust it with a little powdered sugar instead, especially if you want something quick and fuss-free.
Step 9: Slice & Serve
Once fully cooled, cut into squares and serve. I like to use a serrated knife for clean cuts, especially around the swirls. Best enjoyed slightly warm or at room temperature with a big mug of coffee or tea. Leftovers are just as good the next day—store in an airtight container at room temp for up to 2 days, or in the fridge for up to 4. Reheat gently in the microwave or enjoy chilled, your call!
What to Serve It With
This cake is so versatile—I love serving it in different ways depending on the occasion. For breakfast, pair it with fresh fruit and your favorite brew; the flavors are gentle enough to start your day with a cozy touch. It’s perfect for brunch too—set it out with a side of Greek yogurt, whipped cream, or a dollop of cream cheese spread. As a dessert, I like to serve it with a scoop of vanilla ice cream or a drizzle of dark chocolate ganache if I’m feeling festive. And honestly, on casual days, a simple tea or coffee alongside a slice makes for the perfect treat. I remember my grandma used to make this for Sunday mornings when we’d all gather around the table—she always said, “The smell alone brings everyone to the kitchen,” and she was right. It’s also great for brunch parties or a cozy afternoon snack with friends. Honestly, the best days are when I share a slice of this with someone I love—sweet, tender, and just the right amount of cinnamon magic.
Top Tips for Perfecting Your Zucchini Swirl Coffee Cake
Over the years, I’ve learned a few tricks to make this cake perfect every time. First, when grating the zucchini, use a fine grater and always squeeze out as much moisture as possible—we don’t want a soggy mess. Trust me, I tested this with different zucchinis, and the drier the better. Second, don’t overmix once you add the flour; a gentle fold keeps the cake fluffy and prevents it from becoming dense. My secret is to add a splash of lemon juice or vanilla to the zucchini—it brightens the flavor and keeps the zucchini tasting fresh. When swirling the cinnamon mixture, try to create distinct layers for a gorgeous marbled look, but don’t obsess—imperfections add character. I’ve also experimented with various substitutions: coconut sugar works beautifully, and swapping out some butter for applesauce can make it even lighter. Baking times can vary depending on your oven—so start checking at around 38 minutes and keep an eye on that golden color. If I find the top browning too quickly, I tent with foil midway through baking. As for glazes, adding a touch of lemon juice instead of vanilla gives a fresh twist, and dusting with cocoa powder or chopped nuts on top adds nice texture. Remember, every oven is different, and part of baking is embracing the little surprises—most importantly, have fun and taste as you go. I’ve made this at least a dozen times, and each time I learn a little tweak that makes it even better.
Storing and Reheating Tips
This cake keeps surprisingly well. If you’re planning to enjoy it over a couple of days, store it in an airtight container at room temperature for up to 2 days—just keep it covered with a clean cloth or plastic wrap. For longer storage, pop it in the fridge—wrapped tightly in plastic wrap or stored in an airtight container, it’ll stay fresh for up to 4 days. If you want to keep it for even longer, freezing slices works great. Wrap individual pieces tightly in plastic wrap, then in foil, and store in the freezer for up to 3 months. To reheat, microwave a slice for about 20-30 seconds, just enough to warm it through—be careful not to overdo it, or the texture can get a little rubbery. If you added the glaze, I recommend adding it after reheating, or at least at room temperature, to keep it shiny and fresh-looking. When you’re ready to serve, just take it out of the fridge or freezer early enough for it to come to room temp—this way, it’s perfectly moist and flavorful, no matter when you eat it!
Frequently Asked Questions
Final Thoughts
This zucchini swirl coffee cake has become more than just a favorite dessert in my house; it’s a symbol of cozy weekends, spontaneous brunches, and simple comforts. The combination of moist zucchini, fluffy cake, and cinnamon swirls makes every bite feel just right—comforting but not too sweet. I love how versatile it is, how forgiving it can be with substitutions, and how everyone always ends up asking for seconds. If you’re looking for a treasure of a recipe that’s easy to whip up, delightful to eat, and sneaks some veggies into your family’s diet, give this one a try. I promise, once you’ve made it a few times, it’ll be a staple in your rotation. Happy baking! And I’d love to hear how yours turns out—leave a comment or send me a photo. Sharing food always makes me smile, and I hope this cake brings a little warmth and sweetness into your home, just like it does mine.
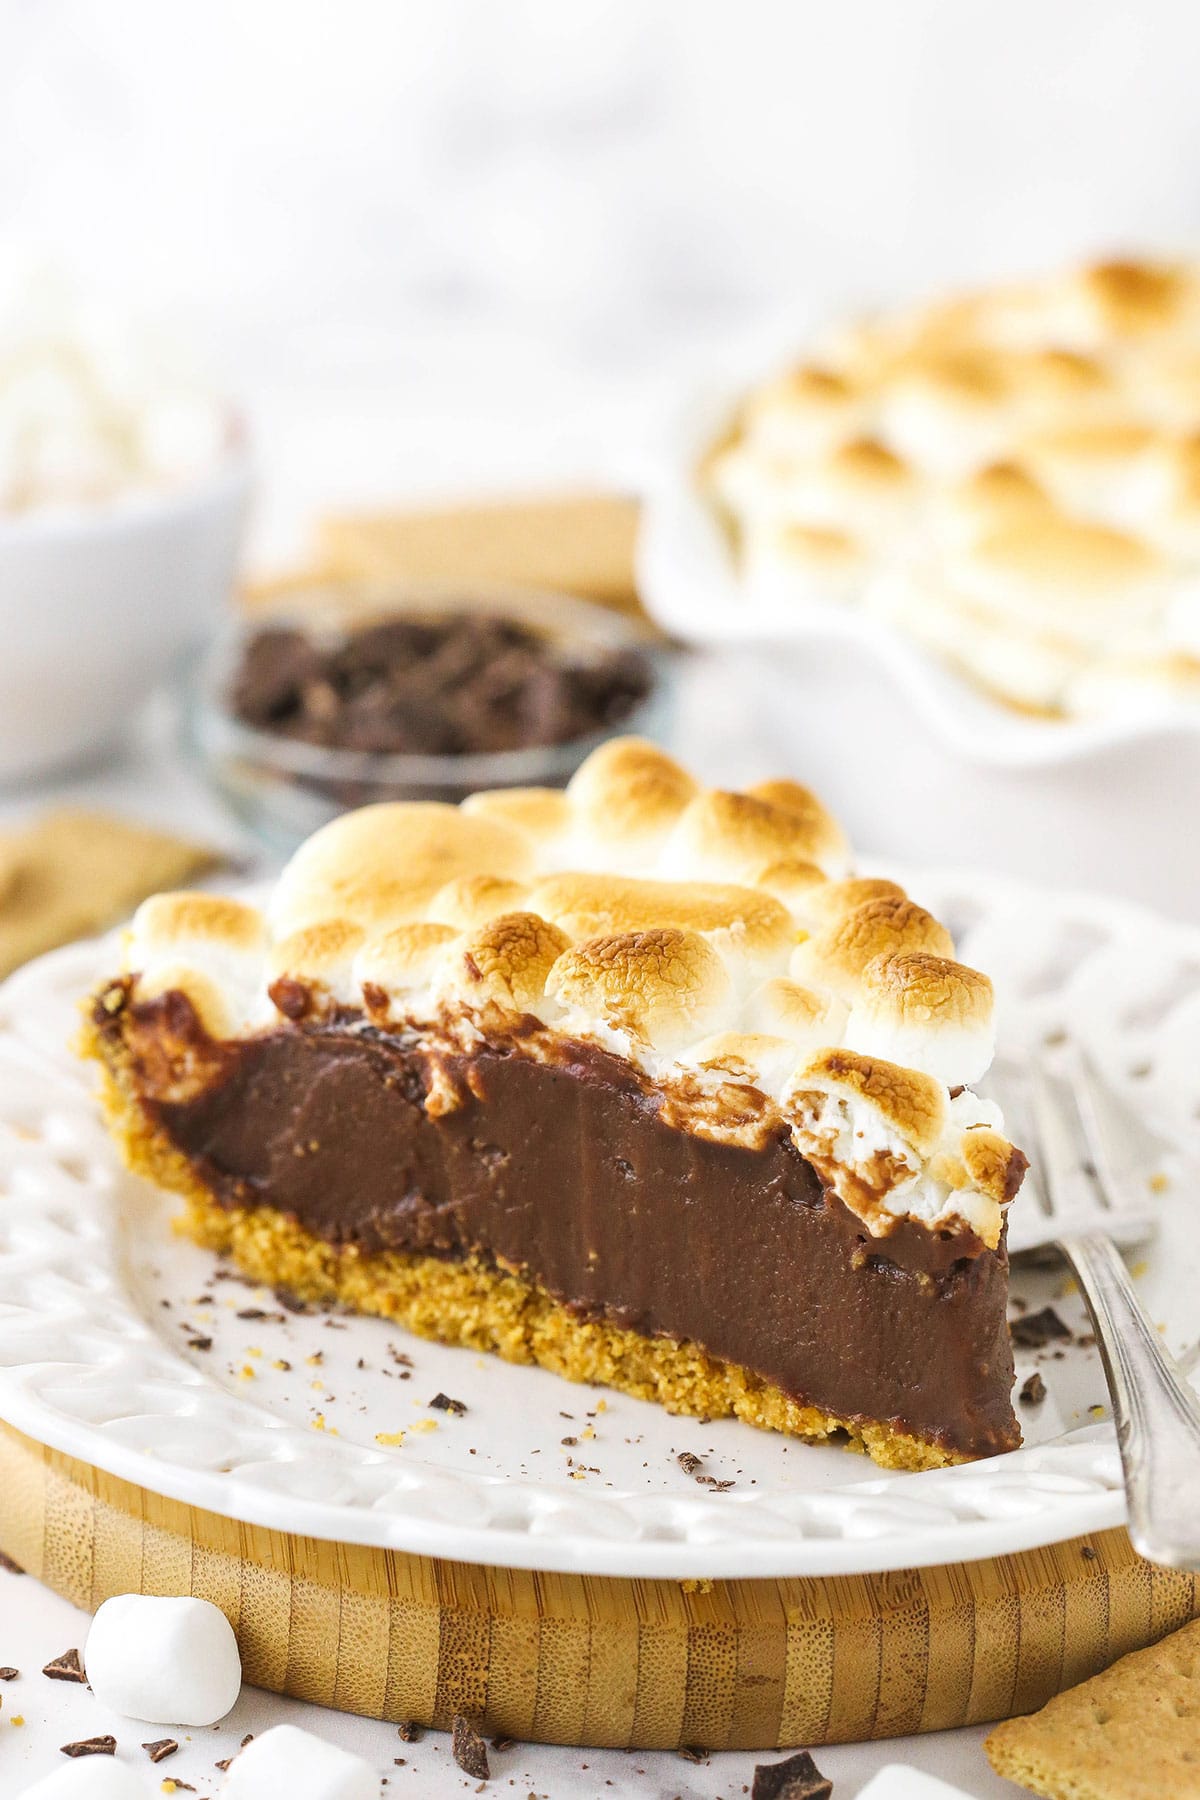
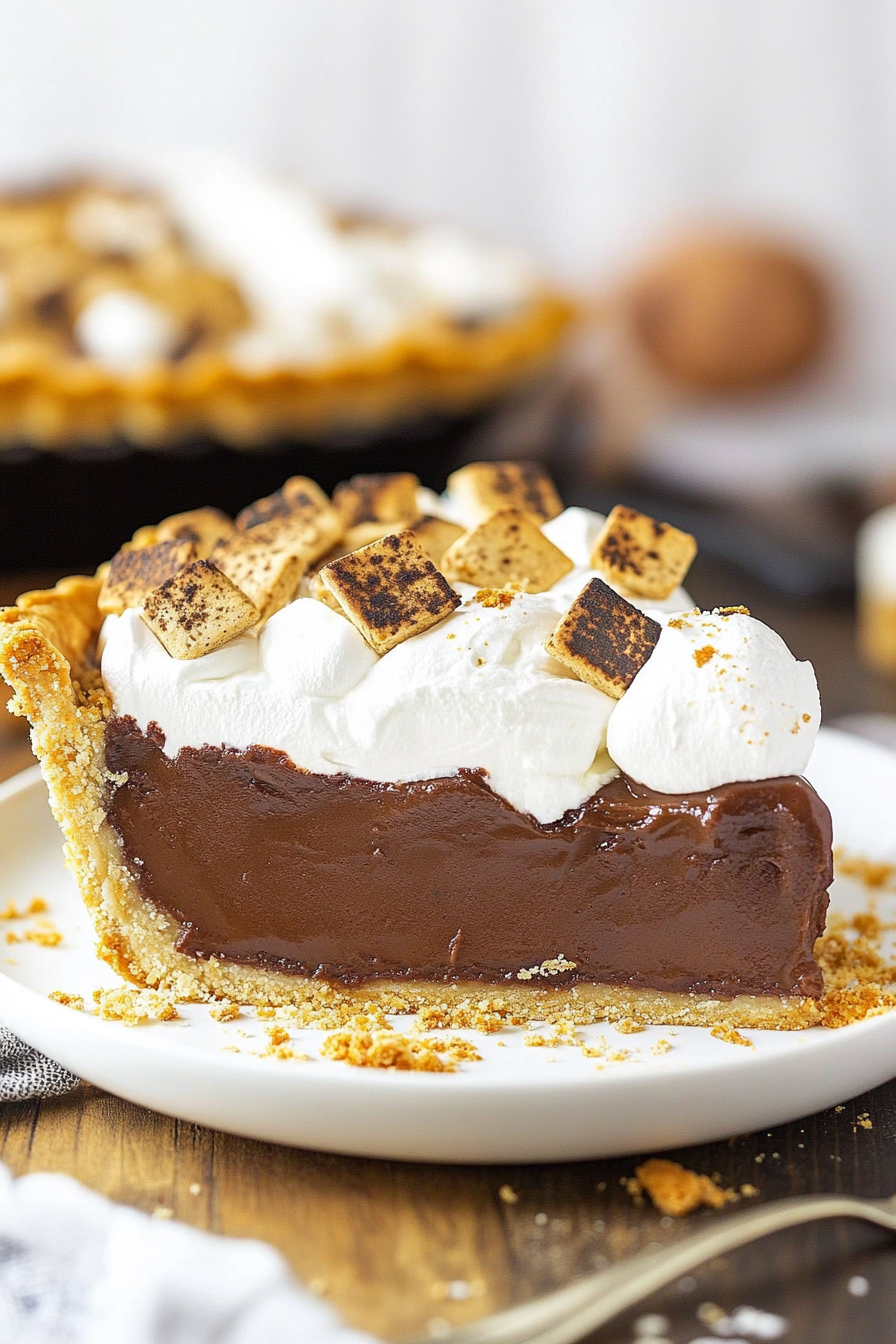
smores pie
Ingredients
Method
- Preheat oven to 325 degrees F.
- To make the crust, add the graham cracker crumbs, sugar, and salt to a large bowl and stir to combine. Add the melted butter and stir until well combined and crumbly.
- Pour the mixture into a 9-inch deep dish pie pan and spread the crumbs around so that they are evenly dispersed. Press the crumbs into the bottom and up the sides of the pan.
- Bake for 8-10 minutes, then set aside to cool.
- To make the filling, whisk the cornstarch, sugar, and salt together in a medium-sized saucepan.
- Add the egg yolks, milk, and heavy cream and whisk to combine.
- Heat over medium heat while whisking constantly until the mixture starts to bubble around the edges and thickens to a pudding-like consistency.
- Remove mixture from the heat and stir in the chocolate, butter, and vanilla extract. Stir until combined and the mixture is smooth.
- Pour mixture into the prepared pie crust. Smooth the top and refrigerate for 5-6 hours until cooled and firm.
- Preheat oven to 350 degrees F. Place regular-sized marshmallow halves around the top of the pie, filling in the space with mini marshmallows.
- Bake for 3-4 minutes or until marshmallows are puffy, then broil on low for 2-4 minutes until browned as desired.
- Serve warm or cooled, according to preference. Store leftovers in the fridge.