Crimson Velvet Cheesecake How to Make It
You know that feeling when you bite into a warm slice of something that instantaneously brings back childhood afternoons? That cozy aroma drifting through the house, the sweet, spicy scent of cinnamon mingling with the freshness of summer zucchini? That’s exactly what I felt the first time I made this zucchini coffee cake—except this one’s got a little twist, a swirl of nutty goodness, and it’s pretty much become my go-to when I want something comforting and not overly indulgent. It’s surprising how this humble vegetable—yes, zucchini—can turn into something so irresistibly good, especially when baked into a soft, tender cake that’s just sweet enough. It’s like a little slice of nostalgia, but with a modern flair. Honestly, my kids ask for this all the time, and I swear, the smell alone can clear the house of chaos. It’s incredible how a cake can do that, right? Perfect for lazy weekend mornings or when friends drop by unannounced—trust me, this disappeared in minutes at my house. And the best part? You don’t need any fancy ingredients. Just those simple staples you probably already have stashed away!
What is Zucchini Coffee Cake?
Think of zucchini coffee cake as a love letter to your taste buds—moist, tender, slightly sweet, and bursting with warm cinnamon flavor. It’s basically a comforting cake that’s perfect for mornings, brunches, or even as a cozy snack with a cup of coffee (hence the name). The name might sound a little fancy, but honestly, it’s super straightforward—kind of like a cross between a muffin and a quick bread but baked in a cake pan. The star is, of course, the zucchini, which keeps the cake incredibly moist. I love calling it “coffee cake” because that subtle hint of cinnamon and the nutty swirl makes it just right when paired with your early morning brew or afternoon tea. It’s a forgiving recipe, too—no piping hot oven needed, and it works perfectly with grated zucchini that’s been lightly salted to remove excess water. Think of it as a sneaky way to get your kids to eat their greens—without any complaints!
Why you’ll love this recipe?
What I love most about this zucchini coffee cake is its versatility. It’s equally fabulous for breakfast, a snack, or even as dessert. The flavor? Lightly sweet, topped with that cinnamon-sugar swirl and crunchy nuts, which give every bite a delightful texture. The smell when it’s baking? Pure heaven — I swear, it fills the entire house with warmth and comfort. And let’s be honest: it’s crazy easy to make. I’ve tested this countless times, and it’s practically foolproof. You just mix, layer, and bake—no fancy techniques required. Plus, it’s budget-friendly. Zucchini is in season all summer, and I always do this when I have a surplus—grate and keep it in the freezer for later. The best part? It’s flexible. Want it dairy-free? I’ve tested this with almond milk, and it actually made it even creamier! Want to boost the flavor? Toss in some chopped pecans or walnuts. Honestly, I think this has become a staple in my kitchen because it checks all my boxes—tasty, easy, and a little bit nostalgic.
How do I make Zucchini Coffee Cake?
Quick Overview
This zucchini coffee cake comes together pretty effortlessly. You start by prepping your zucchini and mixing the dry ingredients. Then, you whisk together wet ingredients—think oil, eggs, a splash of vanilla—and gradually stir them into the dry. The magic happens when you layer the batter with a cinnamon-sugar swirl and a handful of chopped nuts. Pop it into your oven, and in under an hour, you’ll be greeted with that irresistible aroma of cinnamon and baked goodness. The key is not overmixing—trust me on this, you want that tender crumb. Once cooled slightly, drizzle with a simple glaze or just dust with powdered sugar. It’s such a comforting, homey treat—you’ll want to make it again and again.
Ingredients
For the Main Batter:
– 2 cups grated zucchini (about 2 small zucchinis, grated and lightly salted)
– 1 1/2 cups all-purpose flour (or your favorite gluten-free blend)
– 1/2 cup granulated sugar
– 1/2 cup packed light brown sugar
– 1 teaspoon baking powder
– 1/2 teaspoon baking soda
– 1 teaspoon ground cinnamon
– 1/2 teaspoon salt
– 1/2 cup vegetable oil (or melted coconut oil for extra flavor)
– 3 large eggs
– 1 teaspoon vanilla extract
For the Filling:
– 1/4 cup brown sugar
– 1 teaspoon ground cinnamon
– 1/2 cup chopped pecans or walnuts (optional but highly recommended)
For the Glaze:
– 1 cup powdered sugar
– 2-3 teaspoons milk or cream (dairy or plant-based)
– Drop of vanilla (optional)
Step-by-Step Instructions
Step 1: Preheat & Prep Pan
Set your oven to 350°F (175°C). Lightly grease a 9-inch square or round cake pan. If you want the cake to come out even easier, line it with parchment paper. Then, grate your zucchini and sprinkle it with a tiny bit of salt. Let it sit for a few minutes, then squeeze out any excess moisture with a clean towel or paper towels. This step keeps the cake moist without making it soggy. Trust me, wet zucchini ruins the texture if you skip this part!
Step 2: Mix Dry Ingredients
In a big bowl, whisk together the flour, sugars, baking powder, baking soda, cinnamon, and salt. I like to double-check after mixing to make sure there are no lumps—nothing worse than a clumpy batter. This is also the moment to toss in any optional spices (like nutmeg) if you’re feeling fancy.
Step 3: Mix Wet Ingredients
In a separate bowl, whisk the eggs, oil, vanilla, and a splash of milk if you want your batter a little more pourable. I always do this with a fork or a whisk for smoothness. The oil makes it moist, and the vanilla adds that warm depth of flavor. Be careful not to overbeat here—just a gentle whisk is enough.
Step 4: Combine
Gradually add the wet mixture into the dry ingredients, folding gently with a spatula until just combined. Avoid overmixing—that’s how gluten develops and makes your cake tough. A few streaks of flour here and there are totally okay; it’ll bake out nicely.
Step 5: Prepare Filling
Mix the brown sugar and cinnamon together. Chop your nuts if using. Set aside. This filling will create that irresistible swirl and crunch.
Step 6: Layer & Swirl
Pour about half of the batter into your prepared pan. Spread evenly. Then, sprinkle half of the cinnamon-sugar mixture and nuts over the batter. Pour remaining batter on top and gently swirl with a knife or toothpick to create a marbled effect—don’t overdo it, or it might turn into a muddy mess. You want pretty, swirling ribbons of cinnamon and nutty bits.
Step 7: Bake
Pop it into your preheated oven and bake for 45-50 minutes. Start checking around 45; insert a toothpick in the center—the cake is done when it comes out clean. Oven temps can vary, so if your cake is browning too fast, tent it with foil. I usually bake mine until it’s wonderfully golden on top and smells like a cinnamon dream.
Step 8: Cool & Glaze
Let it cool in the pan for about 15 minutes. Once slightly cooled, transfer to a wire rack if you used parchment. Mix powdered sugar with milk and vanilla until smooth. Drizzle over the cake for that pretty, glossy finish. Trust me, this final touch makes all the difference.
Step 9: Slice & Serve
Use a sharp knife to cut clean slices—warm or at room temperature. The cake is tender, but slicing gently ensures clean cuts. Serve it with a cup of coffee or tea, and watch it disappear! I love pairing it with a dollop of Greek yogurt or a smear of butter for extra richness. Honestly, I’ve even eaten leftovers cold straight out of the fridge—still just as good.
What to Serve It With
This zucchini coffee cake is a chameleon—great for almost anything! For breakfast, I love to serve it with a bold black coffee or a warm chai latte. The subtle sweetness pairs beautifully with a hot mug and a quiet morning. When I have friends over for brunch, I’ll add a side of fresh berries or a drizzle of honey—something to brighten up the plate. It’s also perfect as an afternoon snack—slice it up and serve with a cold glass of milk or a chilled iced coffee. And if you’re craving something after dinner, warm slices with a scoop of vanilla ice cream or a drizzle of caramel make it feel extra special. My family loves it a lot—especially when I add a few extra nuts on top before baking for that irresistible crunch. It’s become our “special occasion” treat, even though it’s so simple to whip up. I swear, this cake has saved many busy mornings and casual afternoons alike!
Top Tips for Perfecting Your Zucchini Coffee Cake
Over the years, I’ve learned a few tricks that make this cake turn out amazing every time. First, don’t skip squeezing out the excess moisture from the zucchini—that tiny step makes a huge difference in keeping the cake moist but not soggy. I like to grate zucchini ahead of time and store it in the fridge, ready to go. When mixing, resist the urge to overblend—just fold until combined. Overmixing is the enemy of tender crumb, and this cake is all about that melt-in-your-mouth texture. For the swirl, I recommend using a butter knife or skewer—not a spatula—to gently create those beautiful marble patterns. This adds visual appeal and ensures every bite has that generous cinnamon-y surprise. If you want to customize it, chopped dried fruit like cranberries or chopped dark chocolate add fun flavor pops—I’ve tested this with small batches, and it works beautifully. When baking, keep an eye on your oven—every oven runs a little differently. If the top is golden but the middle isn’t quite done, cover it loosely with foil and bake a few extra minutes. For the glaze, I prefer mine thick but pourable; adding just a teaspoon of milk at a time helps control consistency. Remember, the aroma alone is reason enough to keep your oven door closed until it’s ready—nothing beats how this cake makes your home smell!
Storing and Reheating Tips
This cake keeps surprisingly well. After completely cooling, store leftovers in an airtight container at room temperature for up to two days. Cover loosely with foil or plastic wrap—this keeps it from drying out. If you want it to last longer, pop it into the fridge for up to five days. Just be sure to cover it well to preserve freshness—this cake can dry out if left exposed. For longer storage, freeze slices wrapped individually in plastic wrap and kept in a freezer-safe bag or container for up to three months. When you’re ready to enjoy again, thaw at room temperature or warm gently in the microwave for about 20 seconds. If you’ve glazed it, I recommend adding the glaze after reheating, as it’s more vibrant when fresh. I’ve found that warming it just slightly restores that soft, moist texture without making it fall apart. Honestly, this cake is like a good friendship—easygoing, comforting, and always better when shared. Trust me on this—you’ll appreciate having leftovers for a quick breakfast or a midnight snack!
Frequently Asked Questions
Final Thoughts
This zucchini coffee cake isn’t just a recipe; it’s a little celebration of simple ingredients transformed into something warm and inviting. Its moist crumb, cinnamon swirl, and crispy nuts—plus that nostalgic scent—make it a true comfort food. I’ve shared this with friends, taken it to family gatherings, and even enjoyed a slice after a long day—every single time, it brings a smile. It’s one of those recipes that feels like a warm hug, the kind that quietly makes you happy without complication. If you love baking with zucchini or just crave something sweet, moist, and full of flavor, give this a try. I promise, once you do, it’ll become a staple in your kitchen, too. Can’t wait to hear how yours turns out! And hey, if you tweak the recipe or add your own twist, share it—I love hearing about new ideas! Happy baking, friends!
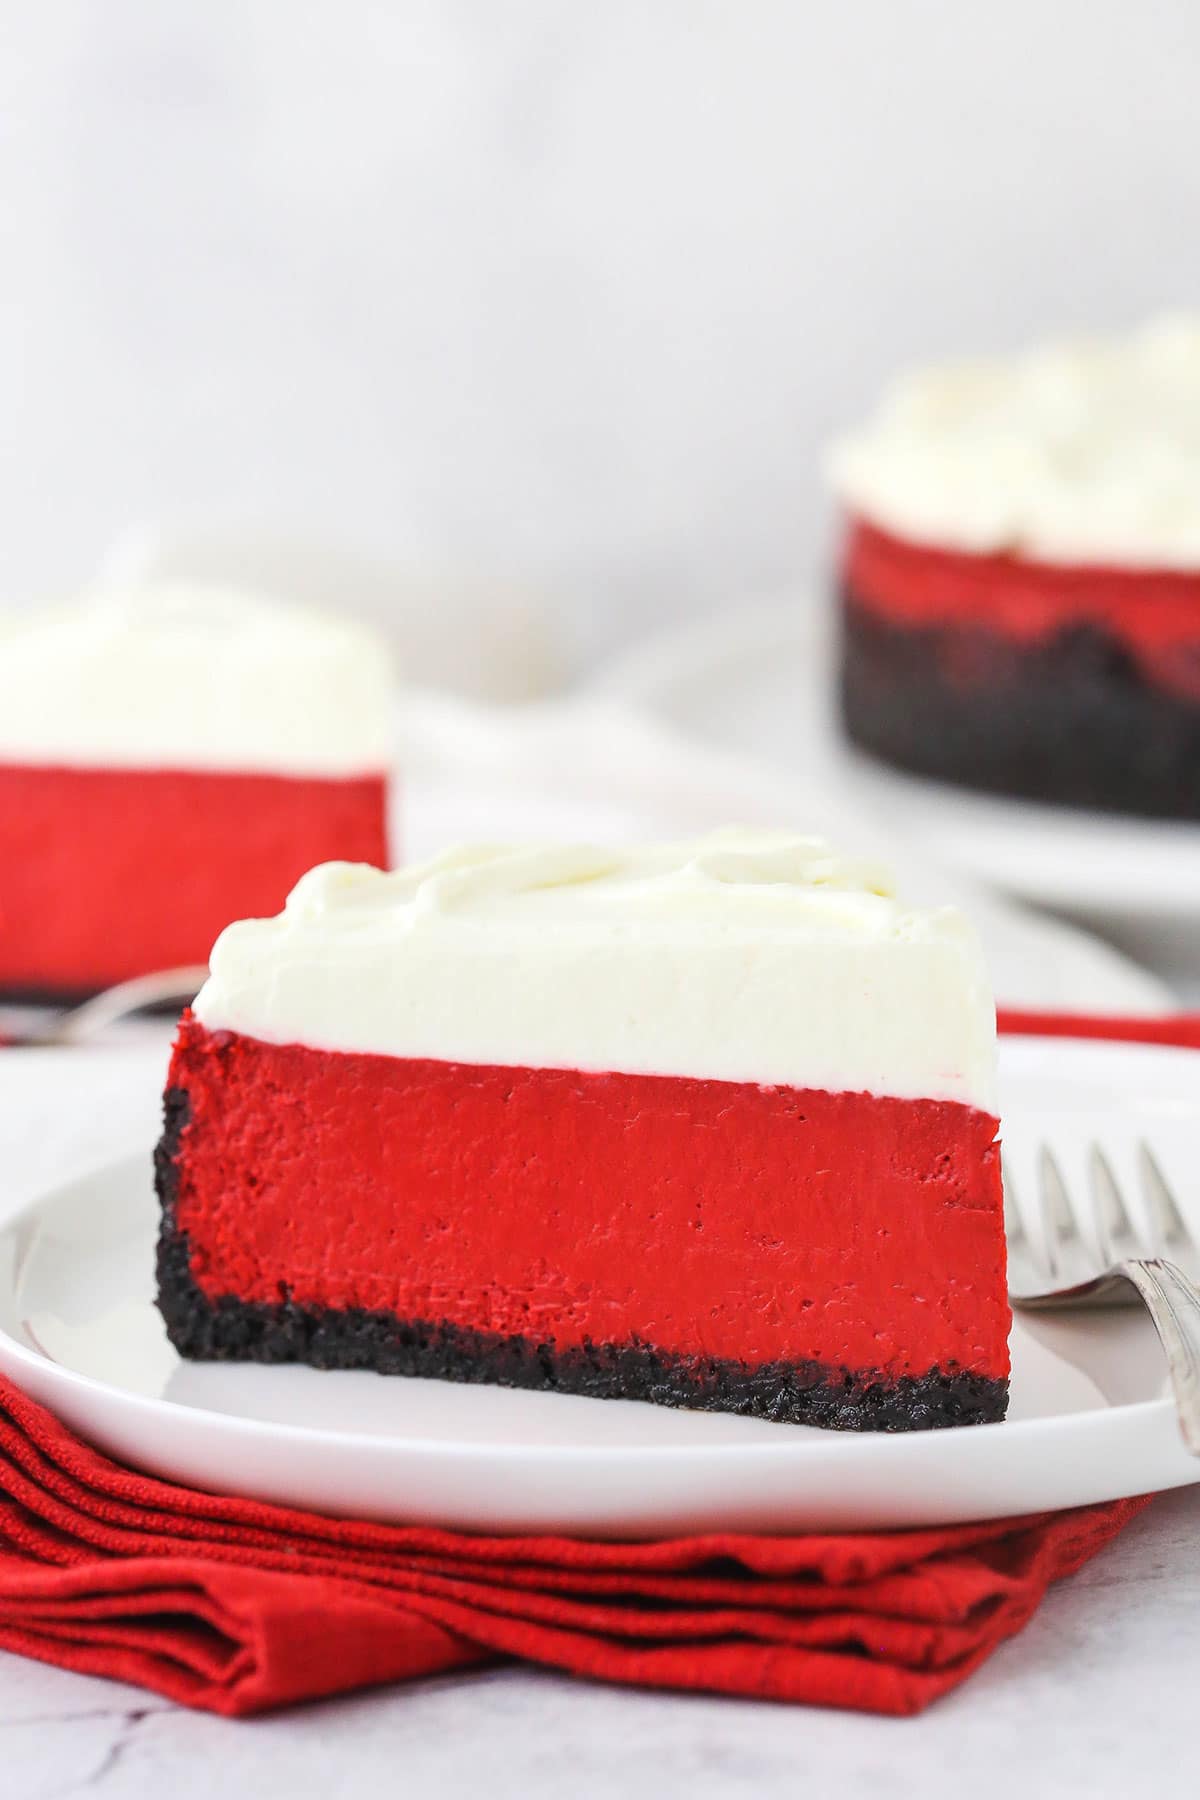
red velvet cheesecake
Ingredients
Method
- Preheat oven to 325°F. Line a 9-inch springform pan with parchment paper and grease the sides.
- Combine Oreo crumbs with melted butter and press into the bottom of the pan. Bake for 10 minutes and set aside to cool.
- In a large bowl, beat cream cheese, sugar, and cocoa powder until smooth. Add sour cream and buttermilk, mixing well.
- Add eggs one at a time, mixing slowly after each. Stir in vinegar, vanilla, and red food coloring.
- Pour batter over crust. Place in a water bath and bake for 1 hour 45 minutes. Turn off oven and let sit for 30 minutes.
- Remove from oven, refrigerate until firm, about 6 hours or overnight.
- Whip heavy cream with powdered sugar and vanilla until stiff peaks form. Spread on cooled cheesecake.
- Refrigerate until ready to serve.