Easy Baked Banana Slices – A Sweet Treat
Oh, where do I even begin with this zucchini bread? It’s not just a recipe; it’s a memory, a feeling, a little slice of pure comfort. I remember my Grandma, her hands dusted with flour, humming as she pulled a golden loaf from her oven. That smell… it’s still one of my favorite kitchen scents. This isn’t your average dry, crumbly quick bread. This is the kind of zucchini bread that’s incredibly moist, packed with warm spices, and has just the right amount of sweetness. It’s the perfect thing to make when you have a bunch of zucchini hanging around, and honestly, it’s a lifesaver on busy mornings or when that 10 pm sweet craving hits and you don’t want to fuss with a whole cake. Think of it as the cooler, more delicious cousin to your basic banana bread, but somehow even more satisfying. If you’ve ever had zucchini bread that tasted… well, like zucchini, forget that. This one is pure magic.
What is Zucchini bread?
So, what exactly *is* zucchini bread? At its heart, it’s a quick bread, meaning it uses leavening agents like baking soda and baking powder instead of yeast, so it’s super fast to whip up. The star ingredient, of course, is zucchini! Now, before you picture a vegetable loaf, let me assure you, the zucchini doesn’t make it taste like a salad. It’s there for a secret purpose: moisture! Grated zucchini lends an unbelievable tenderness and moistness to the crumb, making it melt-in-your-mouth delicious. The name comes from that key ingredient, but honestly, if you didn’t know, you’d probably guess it was some kind of spiced cake or maybe even a very decadent banana bread. It’s essentially a sweet, tender quick bread with a hint of warmth from spices like cinnamon and nutmeg, often studded with nuts or chocolate chips. It’s the ultimate way to sneak some veggies into your family’s diet without them even realizing it!
Why you’ll love this recipe?
There are so many reasons why this zucchini bread has become my go-to, the one I’ve made countless times and never, ever gets old. First off, the flavor is just out of this world. It’s perfectly spiced – not too much, not too little – with cinnamon and a whisper of nutmeg that just sings. The moisture from the zucchini is key; it means every bite is tender and rich, never dry or tough. And let’s talk about ease. Seriously, this recipe is so straightforward, even if you’re new to baking. I can whip this up on a weeknight after the kids are in bed when I’m craving something sweet but don’t want to spend hours in the kitchen. It’s also incredibly budget-friendly, especially when zucchini is in season and practically begging to be used. Plus, it’s so versatile! You can leave it plain, toss in some walnuts for crunch, or my personal favorite, loads of mini chocolate chips. It’s that kind of reliable recipe that always turns out beautifully, making you look like a baking pro even when you’re just following simple steps. It truly is my favorite quick bread, and I think it will be yours too.
How do you make Zucchini bread?
Quick Overview
Making this amazing zucchini bread is surprisingly simple! We’ll start by getting our pan ready and preheating the oven. Then, it’s a matter of whisking together the dry ingredients, mixing the wet ingredients separately, and gently combining them. The magic happens when we fold in the grated zucchini and any add-ins. The batter goes into the prepared pan, bakes until golden and a tester comes out clean, and then cools before we add a simple, delicious glaze. It’s a straightforward process that guarantees a wonderfully moist and flavorful loaf every single time. Trust me, the hardest part is waiting for it to cool!
Ingredients
For the Main Batter:
2 cups all-purpose flour (I like to use unbleached for a better texture)
1 teaspoon baking soda
½ teaspoon baking powder
½ teaspoon salt
1 ½ teaspoons ground cinnamon (the star spice!)
¼ teaspoon ground nutmeg (just a hint for warmth)
1 cup granulated sugar (you can slightly reduce this if you prefer)
½ cup unsalted butter, softened (or melted for a slightly denser loaf, but softened is my preference for lightness)
2 large eggs, at room temperature
1 teaspoon vanilla extract
1 cup finely grated zucchini (about 1 medium zucchini, squeezed dry – more on this later!)
For the Filling:
½ cup chopped walnuts or pecans (optional, for added crunch)
½ cup mini chocolate chips (optional, but highly recommended for pure indulgence!)
For the Glaze:
1 cup powdered sugar
2-3 tablespoons milk (any kind works, I’ve even used almond milk and it was great!)
½ teaspoon vanilla extract (optional, for extra flavor)
Step-by-Step Instructions
Step 1: Preheat & Prep Pan
First things first, let’s get our oven ready. Preheat it to 350°F (175°C). Now, grab a standard 9×5 inch loaf pan. I like to grease it really well with butter or cooking spray, and then give it a light dusting of flour. This ensures your beautiful loaf doesn’t stick. Sometimes, I even like to line the bottom and sides with parchment paper; it makes lifting the loaf out so much easier and guarantees a perfect release.
Step 2: Mix Dry Ingredients
In a medium-sized bowl, whisk together the flour, baking soda, baking powder, salt, cinnamon, and nutmeg. Give it a good whisk for about 30 seconds. This step is important because it evenly distributes all the dry ingredients, preventing pockets of baking soda or salt and ensuring your bread rises beautifully and tastes uniformly spiced.
Step 3: Mix Wet Ingredients
In a larger bowl, cream together the softened butter and granulated sugar until light and fluffy. This usually takes about 2-3 minutes with an electric mixer, or a bit longer by hand. Then, beat in the eggs one at a time, making sure each is incorporated before adding the next. Stir in the vanilla extract. This creaming step is crucial for a tender crumb!
Step 4: Combine
Now, we add the dry ingredients to the wet ingredients. Do this in about three additions, mixing on low speed (or stirring gently with a spatula) until just combined after each addition. Be careful not to overmix! Overmixing develops the gluten in the flour, which can lead to a tough, dense bread. We want tender, not tough. Once the flour is mostly incorporated, gently fold in the grated zucchini (make sure it’s squeezed dry – we’ll talk about that more later!). If you’re adding walnuts or chocolate chips, fold those in now too. The batter will be thick.
Step 5: Prepare Filling
This step is all about optional deliciousness! If you’re adding nuts or chocolate chips, this is where they come in. I usually toss them directly into the batter in the previous step. For chocolate chips, I love using mini ones because they distribute more evenly and melt into little pockets of gooey goodness. If you’re using nuts, give them a quick chop. Some people like to toast their nuts first for an extra layer of flavor, which is a fantastic idea!
Step 6: Layer & Swirl
Pour the batter into your prepared loaf pan and spread it out evenly. For an extra bit of flair, you can even create a swirl. If you’re adding chocolate chips or nuts, they’ll naturally create some texture, but you could also do a quick cinnamon-sugar swirl by sprinkling some on top and gently swirling with a knife before baking. I often just let the chips and nuts be the stars.
Step 7: Bake
Pop that pan into the preheated oven and bake for 50-65 minutes. How long it takes can vary depending on your oven, so keep an eye on it. The bread is done when a toothpick or cake tester inserted into the center comes out clean, or with just a few moist crumbs attached (especially if you have chocolate chips!). The top should be a beautiful golden brown.
Step 8: Cool & Glaze
Once it’s done, let the loaf cool in the pan for about 10-15 minutes. This allows it to set up a bit. Then, carefully invert it onto a wire rack to cool completely. This is crucial! If you try to glaze it while it’s warm, the glaze will melt right off. Once it’s totally cool, whisk together the powdered sugar, milk, and vanilla extract for the glaze. Start with 2 tablespoons of milk and add more, a teaspoon at a time, until you reach your desired drizzling consistency – thick enough to coat but thin enough to run a little. Drizzle it all over the top!
Step 9: Slice & Serve
This is the moment you’ve been waiting for! Once the glaze has set a bit, slice into that glorious loaf. I love serving it at room temperature. The smell as you slice into it is just incredible. It’s perfect on its own, or maybe with a little pat of butter if you’re feeling decadent.
What to Serve It With
This zucchini bread is a star all on its own, but it also plays incredibly well with others! For a quick and easy breakfast, I love a thick slice with just a smear of butter. It’s also fantastic alongside a hot cup of coffee; the warmth of the coffee and the sweet spices in the bread are a match made in heaven. If you’re planning a brunch, this bread adds a touch of homemade charm to any spread. I like to serve it alongside some fresh fruit salad or yogurt parfaits. For a more elegant presentation, I’ll sometimes slice it thinly and arrange it on a platter with a dollop of whipped cream or even a light cream cheese frosting. And for those cozy snack times? Oh, it’s perfection. A mug of hot chocolate or a glass of cold milk, and a generous slice of this bread is pure bliss. My kids always ask for it after school, especially if I’ve added chocolate chips. It’s just that comforting and delicious.
Top Tips for Perfecting Your Zucchini Bread
I’ve made this zucchini bread more times than I can count, and along the way, I’ve picked up a few tricks that I think make all the difference. For starters, that zucchini prep is key! You absolutely must squeeze out as much moisture as possible. I usually grate my zucchini using the large holes of a box grater, then I wrap it in a clean kitchen towel or some cheesecloth and wring it out really, really well. This step is non-negotiable for avoiding a gummy or overly wet bread. When it comes to mixing, remember my mantra: don’t overmix! Once the dry ingredients are just incorporated into the wet, stop. A few streaks of flour are fine; they’ll disappear during baking. Overmixing is the number one culprit for tough quick breads. For swirl customization, if you’re adding chocolate chips, just folding them in is usually enough for a great texture. If you want a more pronounced swirl, you could mix a tablespoon of cinnamon and a couple tablespoons of sugar together, sprinkle that over the batter in the pan, and then gently swirl it with a knife. For ingredient swaps, if you don’t have all-purpose flour, you can try a 1:1 gluten-free baking blend, though the texture might be slightly different. I’ve tested this recipe with half the sugar, and it was still good, just less sweet. And for baking, always trust the toothpick test! Ovens can be fickle, so use it as your guide. For glaze variations, if you don’t want a sweet glaze, you can simply dust the cooled bread with a little powdered sugar, or serve it with a dollop of cream cheese. I’ve even made a lemon glaze by adding a tablespoon of lemon juice to the powdered sugar mixture – so bright and tasty!
Storing and Reheating Tips
This zucchini bread is so good, it rarely lasts long in my house, but when it does, I’ve got a few go-to storage methods. If I know we’ll be eating it within a couple of days, I just wrap the cooled loaf tightly in plastic wrap or store it in an airtight container at room temperature. It stays perfectly moist for about 2-3 days this way. If I need it to last a bit longer, or if my kitchen is particularly warm, I’ll pop it into the refrigerator. Stored in an airtight container in the fridge, it will keep well for up to a week. The texture might firm up a little in the fridge, but don’t worry, it’s easily remedied. For longer storage, freezing is your best friend. Wrap the cooled loaf tightly in plastic wrap, then in a layer of aluminum foil, or place it in a freezer-safe bag. It will keep in the freezer for up to 3 months. To reheat, you can bring it back to room temperature gradually, or for a warm slice, pop a piece in the toaster oven or microwave for a few seconds until heated through. If you’ve frozen slices, they can be toasted directly from frozen. And a quick note on the glaze: if you plan to freeze the bread, I recommend glazing it *after* thawing. This keeps the glaze looking its best.
Frequently Asked Questions
Final Thoughts
So there you have it – my absolute favorite, fail-proof zucchini bread recipe. It’s more than just a treat; it’s a little bit of kitchen magic that brings warmth and deliciousness to any table. The way it stays so incredibly moist, the perfect balance of spices, and the sheer ease of making it – it all adds up to a recipe that I know you’ll love as much as I do. If you’re a fan of quick breads, you might also want to check out my recipe for the ultimate blueberry muffins or my classic banana bread – they’re in a similar vein of comforting, easy-to-make goodness! I truly hope this zucchini bread brings a smile to your face and a happy hum to your kitchen. I can’t wait to hear how yours turns out! Don’t hesitate to leave a comment below with your favorite variations or any questions you might have. Happy baking!

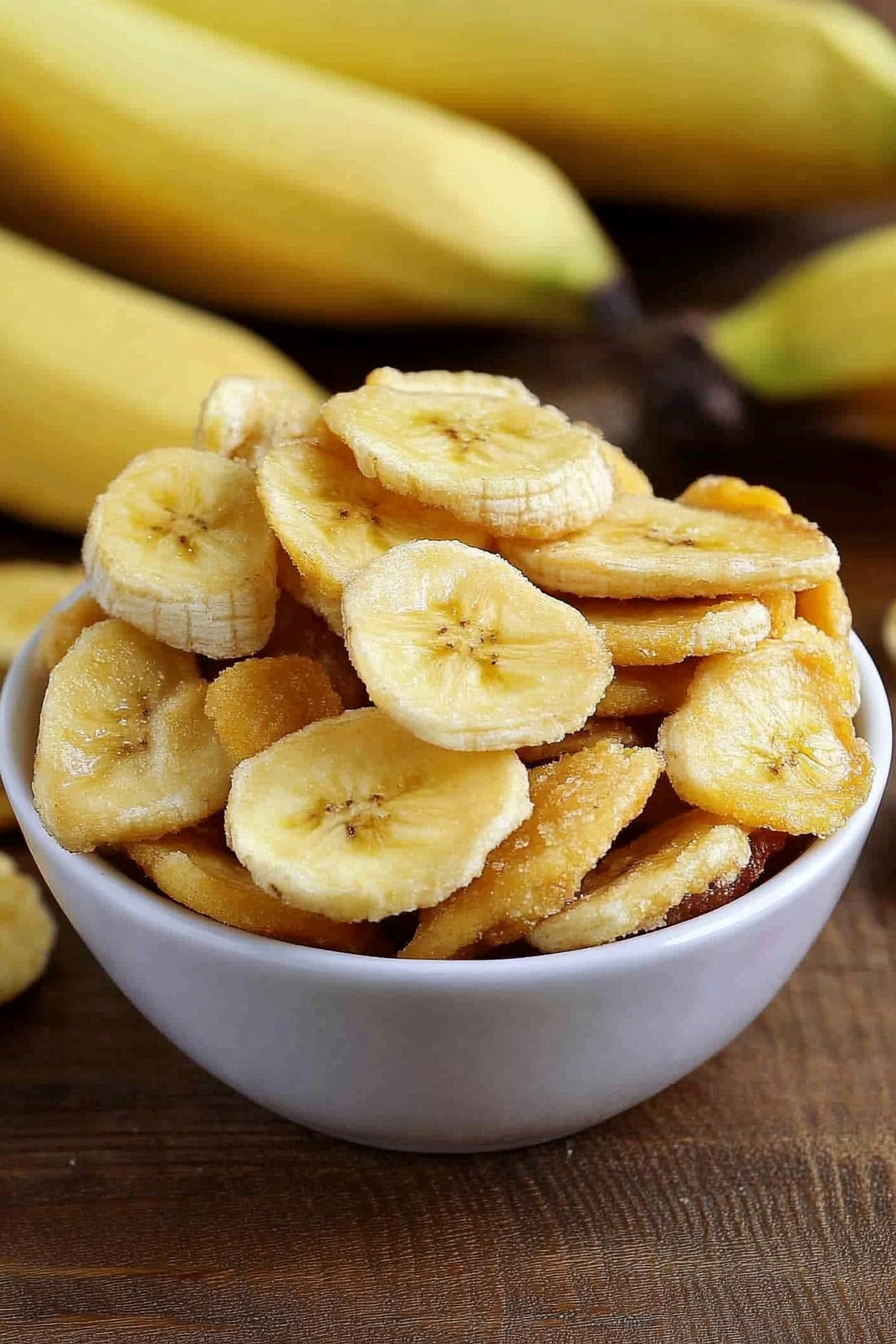
banana chips
Ingredients
Method
- Prepare a bowl with 2 cups of water and 0.5 cup lemon juice.
- Slice bananas evenly (about 1/8 inch thick) and add to the lemon water bowl. Allow to soak for 5 minutes.
- While bananas are soaking, preheat your oven to 200 degrees Fahrenheit (93°C). Line a baking sheet with foil or parchment paper.
- Remove banana slices from the lemon water, pat them dry gently, and place them in a single layer on the prepared baking sheet.
- Bake for 1 hour, then carefully flip each chip. Continue baking for another 1 hour, or until the chips are dry and crispy. Cooking time may vary based on slice thickness and oven.
- Let the banana chips cool completely on the baking sheet. They will crisp up further as they cool.