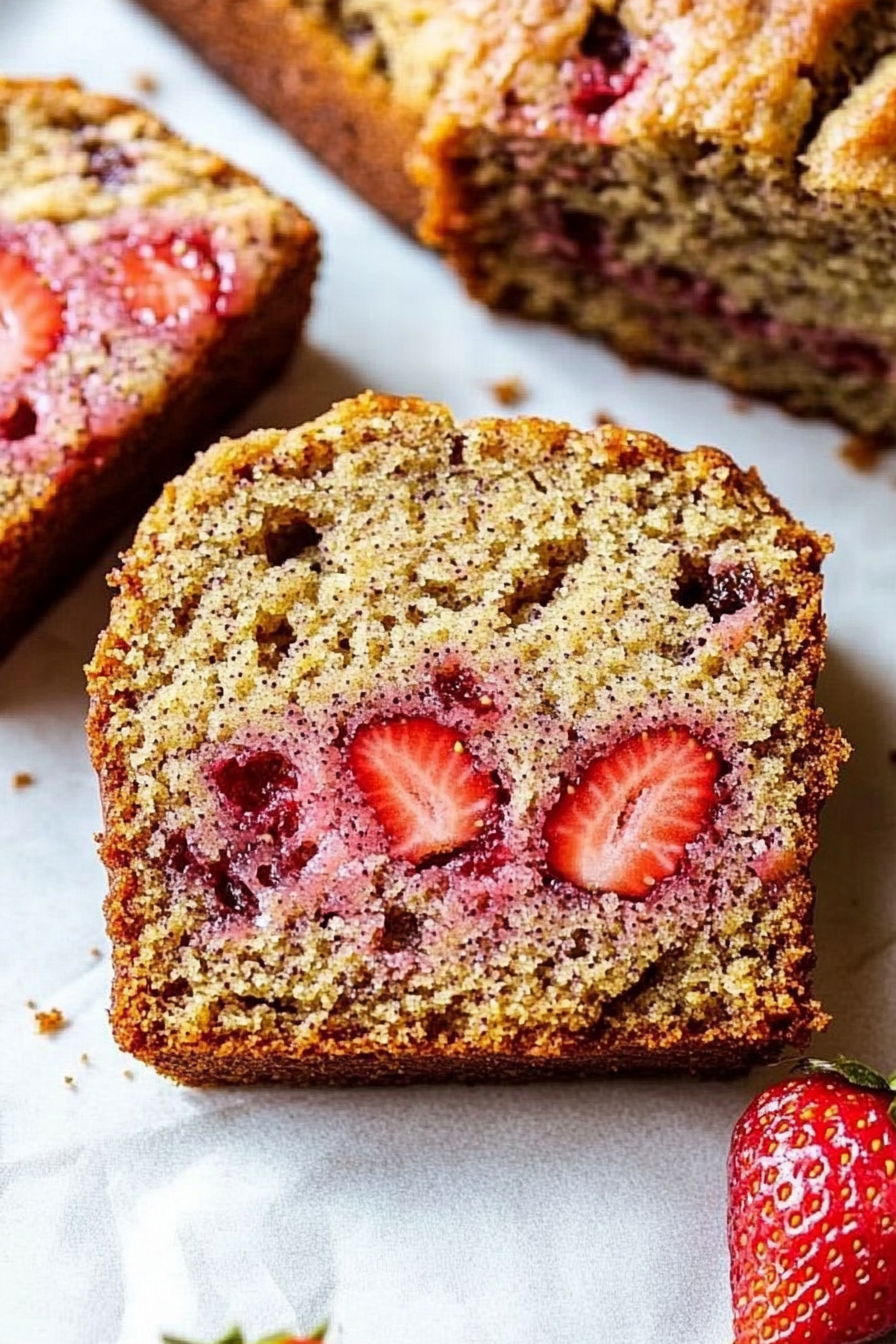
Easy Baked Strawberry Banana Bread
There are some recipes that just stick with you, aren’t there? This zucchini bread is one of those for me. It’s not just any zucchini bread; it’s the kind that makes your kitchen smell like a cozy hug and disappear from the pan in about ten minutes flat. I remember my grandma making this when I was a kid, and it always felt like a special treat. The smell alone would draw my cousins and me like magnets. It’s way more exciting than a plain old muffin, and honestly, it’s so incredibly moist and flavorful, it rivals any fancy dessert. This recipe is a lifesaver on busy nights when I need a quick, delicious bake that feels homemade and comforting. It’s the perfect answer when that 10 PM craving hits but I really don’t want to get out all the stops for a whole cake. It’s the humble hero of my baking repertoire, and I’m so thrilled to finally share it with you.
What is
So, what exactly *is* this magical zucchini bread? Think of it as a super moist, incredibly tender quick bread that happens to have zucchini baked right into it. The name might sound a little… well, green, but trust me, you won’t taste the zucchini directly! It works its magic by adding unparalleled moisture and a subtle sweetness to the batter. It’s essentially a delicious vehicle for warm spices like cinnamon and nutmeg, often studded with nuts or chocolate chips, and finished off with a delightful glaze or a simple dusting of powdered sugar. It’s the kind of treat that’s perfectly at home on your breakfast table, alongside your afternoon coffee, or as a comforting dessert after dinner. It’s not cake, it’s not a muffin, it’s its own wonderful thing, born from the simple brilliance of using garden-fresh ingredients to make something truly extraordinary.
Why you’ll love this recipe
There are so many reasons why this zucchini bread has become my go-to, and I have a feeling it’ll become yours too. First off, the flavor is just out of this world. It’s not overly sweet, but perfectly balanced with those warm, comforting spices. Every bite is so incredibly moist, thanks to the secret weapon: zucchini! It makes the bread practically melt in your mouth. And speaking of magic, the simplicity of this recipe is a total game-changer. I’ve tried other zucchini bread recipes that felt like a huge production, but this one? It’s genuinely easy, even if you’re not a seasoned baker. You can whip it up in under 20 minutes of active time, which is a lifesaver on those chaotic days. Plus, it’s surprisingly budget-friendly! Zucchini is often one of the most abundant and affordable veggies, making this a treat that won’t break the bank. What I truly love most is its versatility. It’s fantastic on its own, of course, but it’s also wonderful with a dollop of cream cheese, a smear of butter, or even a drizzle of honey. If you’re a fan of my Spiced Apple Crumble Bread, you’re going to adore this – it has that same cozy, comforting vibe but with its own unique charm. This is the kind of recipe that makes you feel like you’ve accomplished something wonderful in the kitchen, even when you’ve barely broken a sweat.
How
Quick Overview
The process for this amazing zucchini bread is delightfully straightforward. You’ll start by mixing your dry ingredients, then your wet ingredients, and then bringing them together for that perfect, tender crumb. While that’s happening, you’ll whip up a quick, flavorful filling and get your pan ready. Then it’s just a matter of layering, swirling, baking, and glazing. It sounds like a few steps, but each one is simple and leads you closer to that warm, fragrant loaf that will fill your home with the most incredible aroma. It’s foolproof, I promise!
Ingredients
For the Main Batter:
You’ll need about 2 cups of grated zucchini. Make sure it’s fresh and firm! I usually grate mine using the large holes of a box grater. Don’t worry about squeezing out all the liquid; a little bit of moisture is exactly what we want for that tender texture. We’re also going to use all-purpose flour, baking soda, baking powder, salt, and of course, plenty of warm spices like cinnamon, nutmeg, and a pinch of ground cloves for that extra cozy factor. For sweetness, we’ll use a mix of granulated sugar and some packed brown sugar, which adds a lovely caramel note. Then come the wet ingredients: eggs, vegetable oil (or melted butter for a richer flavor – I’ve tried both and they’re delicious!), vanilla extract for that classic warmth, and a splash of milk. I tested this with almond milk once and it actually made it even creamier!
For the Filling:
This is where you can really have some fun! My go-to filling is a simple mix of brown sugar, cinnamon, and a touch of flour to help it thicken up. Sometimes, I’ll throw in chopped walnuts or pecans for a little crunch, or even some mini chocolate chips because, well, chocolate makes everything better, right? You can even get creative with dried cranberries or raisins if you like a bit of chewiness.
For the Glaze:
This is optional but highly recommended! It’s just powdered sugar mixed with a little milk or lemon juice until you get a pourable consistency. For a little extra zing, a tiny bit of lemon zest or a drop of vanilla extract in the glaze is divine. If you prefer something simpler, a light dusting of powdered sugar right after it cools is also lovely.
Step-by-Step Instructions
Step 1: Preheat & Prep Pan
First things first, get your oven preheating to 350°F (175°C). This is a crucial step for even baking, so don’t skip it! While the oven heats up, grease and flour a standard loaf pan. You can also line it with parchment paper, leaving a little overhang on the sides – this makes it super easy to lift the bread out once it’s done. I usually do this with a good amount of butter or cooking spray, then a light dusting of flour, tapping out any excess. This prevents any sticking disasters!
Step 2: Mix Dry Ingredients
In a large bowl, whisk together your all-purpose flour, baking soda, baking powder, salt, cinnamon, nutmeg, and ground cloves. Give it a good whisk to make sure everything is evenly distributed. This is important because it ensures your leavening agents (baking soda and powder) are spread throughout, giving your bread a nice, even rise. No one wants a sunken middle or a tough spot!
Step 3: Mix Wet Ingredients
In a separate medium bowl, whisk together your eggs, vegetable oil (or melted butter), granulated sugar, brown sugar, vanilla extract, and milk. Whisk until everything is well combined and smooth. If you’re using melted butter, make sure it’s cooled slightly so it doesn’t scramble the eggs.
Step 4: Combine
Now, pour the wet ingredients into the bowl with the dry ingredients. Gently fold them together with a spatula until *just* combined. It’s really important not to overmix here! A few streaks of flour are okay – they’ll disappear as you add the zucchini. Overmixing develops the gluten too much, which can lead to a tough, dense bread. We want tender and moist, remember?
Step 5: Prepare Filling
In a small bowl, mix together the brown sugar, cinnamon, and flour for your filling. If you’re adding nuts or chocolate chips, stir them in now. This mixture is going to create those lovely pockets of spice and sweetness throughout your bread.
Step 6: Layer & Swirl
Spoon about half of the batter into your prepared loaf pan and spread it evenly. Sprinkle about half of the filling mixture over the batter. Dollop the remaining batter on top and spread it gently. Then, sprinkle the rest of the filling mixture over the top. For that signature swirl, you can run a knife or a skewer through the batter a few times. Don’t overdo it, just a gentle swirl to create pretty patterns. It looks so professional!
Step 7: Bake
Pop that loaf pan into your preheated oven and bake for about 50-65 minutes. The exact time can vary depending on your oven, so keep an eye on it. You’ll know it’s done when a wooden skewer or toothpick inserted into the center comes out clean, or with just a few moist crumbs attached. If the top is browning too quickly, you can loosely tent it with aluminum foil.
Step 8: Cool & Glaze
Once it’s baked, let the bread cool in the pan for about 10-15 minutes. This helps it set. Then, carefully invert it onto a wire rack to cool completely. If you’re using a glaze, whisk together the powdered sugar and your liquid of choice until you reach a smooth, pourable consistency. Drizzle it over the cooled bread. It’s so satisfying to watch it drip down the sides!
Step 9: Slice & Serve
Once the glaze has set (or if you’re just dusting with powdered sugar), it’s time to slice and enjoy! I like to use a serrated knife for the cleanest cuts. Serve it at room temperature for the best flavor and texture. Enjoy every delicious, moist bite!
What to Serve It With
This zucchini bread is so incredibly versatile, it’s perfect for almost any occasion! For a simple and satisfying **Breakfast**, I love it toasted with a smear of butter and a hot cup of coffee. It’s a step up from boring toast and gets my day off to a great start. For a lovely **Brunch**, I like to serve it slightly warm, maybe with a dollop of Greek yogurt or a drizzle of honey. It looks so elegant when presented on a nice platter. As a light **Dessert**, it’s wonderful after a hearty meal. I’ll often serve it with a scoop of vanilla bean ice cream or a light berry compote to complement the spices. And for those **Cozy Snacks**, it’s simply unbeatable. It’s the perfect companion to a mug of tea on a rainy afternoon, or a little pick-me-up when you need a treat. My family has a tradition of having it as an after-school snack with a glass of cold milk – it always disappears in minutes!
Top Tips for Perfecting Your Zucchini Bread
I’ve made this zucchini bread more times than I can count, and through all those bakes, I’ve picked up a few tricks that I think make a big difference. Here are my top tips to help you achieve zucchini bread perfection:
Zucchini Prep: While I don’t usually squeeze out the moisture from the zucchini, if your zucchini is particularly watery (like from the garden in peak season), you might want to give it a gentle squeeze just to remove excess water. Grating it on the large holes of your box grater is key – it breaks down the zucchini nicely without making it mushy. And use fresh zucchini if possible; it has the best flavor and moisture content.
Mixing Advice: Seriously, don’t overmix! This is the most common mistake people make with quick breads. Fold the wet and dry ingredients until *just* combined. A few streaks of flour are perfectly fine and will disappear during baking. You want a tender crumb, not a tough one.
Swirl Customization: When you’re creating the swirl, don’t go too deep or mix too much. Just a few gentle passes with a knife or skewer will create beautiful patterns without compromising the cake’s structure. You can also play with the filling ingredients – adding mini chocolate chips or chopped nuts adds wonderful texture and flavor contrast.
Ingredient Swaps: I’ve experimented quite a bit! For a richer flavor, you can swap the vegetable oil for melted unsalted butter (use about 3/4 cup butter for 1 cup oil). For a dairy-free version, unsweetened almond milk or soy milk works beautifully in place of regular milk. If you don’t have brown sugar, you can use more granulated sugar, but you’ll lose a bit of that lovely caramel depth.
Baking Tips: Always preheat your oven! And use the middle rack for the most even baking. If your oven tends to run hot, you can reduce the temperature by 25 degrees Fahrenheit and add a few extra minutes to the baking time. The toothpick test is your best friend here – when it comes out clean, it’s ready.
Glaze Variations: For a thinner glaze, add more liquid (milk or lemon juice) a teaspoon at a time. For a thicker glaze, use less liquid or more powdered sugar. If you want a citrusy kick, use lemon juice instead of milk and add a bit of lemon zest to the glaze. Alternatively, a simple dusting of powdered sugar is elegant and still delicious!
Storing and Reheating Tips
Keeping your delicious zucchini bread fresh is super easy, and thankfully, it stays wonderfully moist for days. Here’s how I handle storage:
Room Temperature: Once completely cooled, wrap the loaf tightly in plastic wrap or place it in an airtight container. It will stay delicious at room temperature for about 3-4 days. The flavors actually tend to deepen and improve a bit on the second day!
Refrigerator Storage: If you want it to last a bit longer, especially in warmer weather, you can store it in the refrigerator. Again, an airtight container is best. It should keep well for up to a week in the fridge, though it might lose a tiny bit of its incredible moistness compared to room temperature storage.
Freezer Instructions: This bread freezes beautifully! Once it’s completely cool, wrap the loaf tightly in a layer of plastic wrap, then a layer of aluminum foil, or place it in a freezer-safe bag. It can be frozen for up to 3 months. To thaw, unwrap it and let it come to room temperature on the counter. You can also reheat slices gently in a toaster oven or microwave.
Glaze Timing Advice: If you plan to store your bread for more than a day, I recommend adding the glaze *after* it has cooled completely and *just before* serving or storing. If you glaze it too early and then wrap it tightly, the glaze can sometimes become sticky or melt onto the plastic wrap.
Frequently Asked Questions
Final Thoughts
Honestly, this zucchini bread recipe is pure comfort in loaf form. It’s the perfect blend of tender, moist cake with warm, inviting spices, and that little bit of extra sweetness from the filling and glaze just makes it sing. It’s a testament to how simple ingredients can create something truly special, and it always brings smiles to faces, whether it’s a quick breakfast treat or an after-dinner indulgence. What I love most is that it’s so forgiving and adaptable. If you’re looking for more cozy bakes, you might also enjoy my Cranberry Orange Scones – they have that same cheerful, homemade vibe!
I really hope you give this zucchini bread a try. I’m so eager to hear what you think! Let me know in the comments below if you tried it, what variations you experimented with, or if your family devoured it as quickly as mine does! Happy baking!
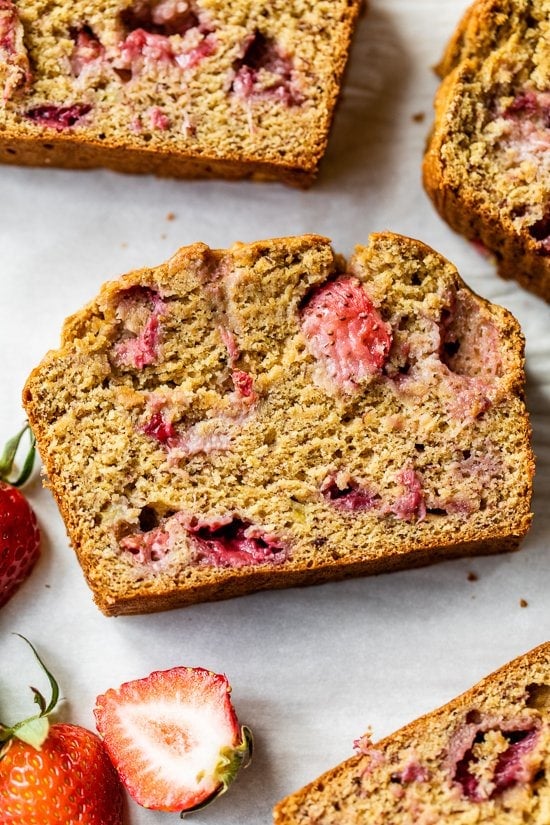
strawberry banana bread
Ingredients
Method
- Preheat oven to 350°F. Lightly spray a loaf pan with baking spray.
- Place the strawberries on a baking sheet and roast for 25 minutes, remove and set aside.
- In a medium bowl, combine flour, baking soda and salt with a wire whisk. Set aside.
- In a large bowl cream butter and sugar with an electric mixer.
- Add egg whites, bananas, apple sauce and vanilla, and beat at medium speed until thick. Scrape down sides of the bowl.
- Add flour mixture and blend at low speed until combined, do not over mix.
- Fold in strawberries and pour batter into the prepared loaf pan; bake in the center rack for about 50 minutes, or until a toothpick inserted in the center comes out clean.
- Let the pan cool at least 20 minutes, bread should be room temperature before slicing.