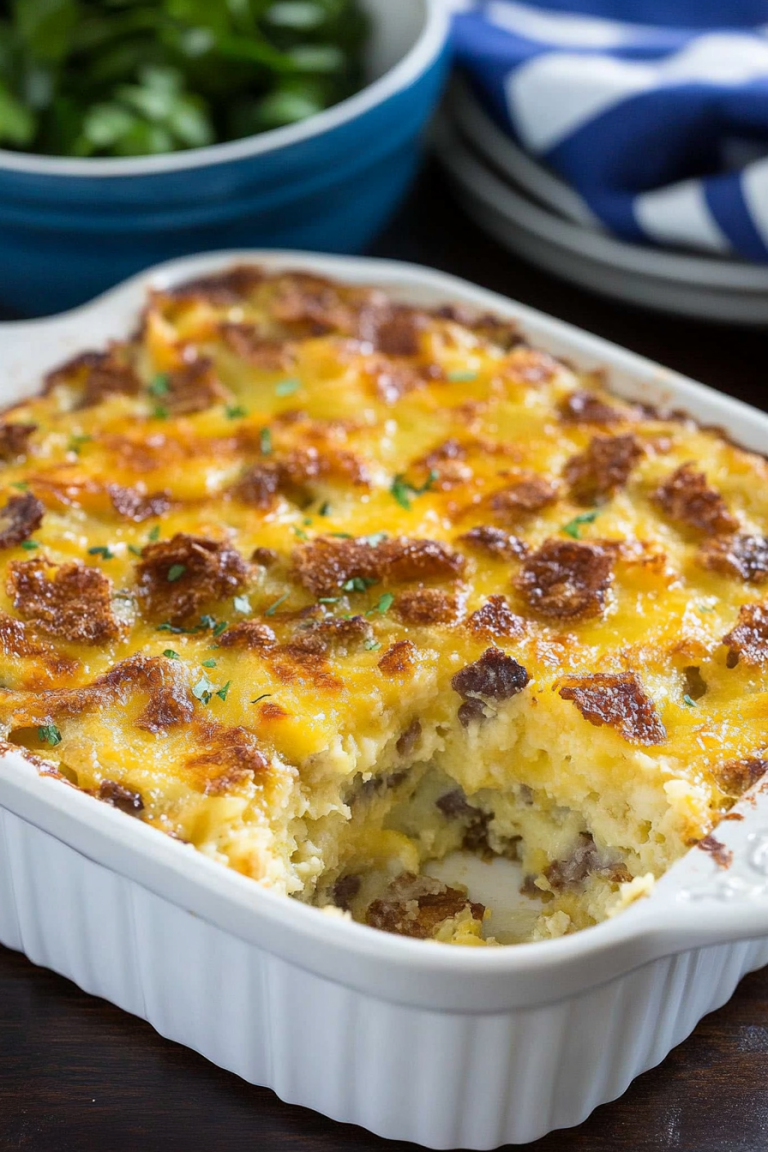
Easy Loaded Potatoes with Broccoli Cheese
You know those recipes that just instantly transport you back in time? This zucchini bread is one of those for me. It’s more than just a baked good; it’s the scent of my grandma’s kitchen on a Saturday morning, the cozy hug of a warm slice on a chilly afternoon, and the sheer joy of watching my kids devour something I’ve made with love. I’ve tried countless zucchini bread recipes over the years, searching for that perfect balance of moistness, tender crumb, and just the right amount of sweetness, but none ever quite hit the mark like Grandma’s. This one, though? It’s the real deal. It’s so unbelievably moist and tender, it practically melts in your mouth, and it has this subtle, beautiful sweetness that makes it taste more like a decadent dessert than a simple quick bread. Forget those dry, crumbly zucchini loaves that leave you reaching for a glass of milk. This is what you want when you’re craving something utterly delightful, and the best part? It’s ridiculously easy to whip up, even on a busy weeknight. Honestly, this zucchini bread has become my absolute go-to, and I just know you’re going to adore it as much as we do.
What is Grandma’s secret Zucchini Bread?
So, what exactly makes this zucchini bread so special? Well, it’s a little bit of magic, a whole lot of love, and a few clever tricks Grandma swore by. Think of it as a classic quick bread, but elevated. It’s essentially a tender, moist cake-like batter infused with the subtle goodness of grated zucchini, warm spices, and just enough sweetness to make it sing. The zucchini itself is the secret weapon here; it disappears completely into the batter, adding incredible moisture and a tender crumb without a hint of vegetable flavor. It’s the perfect way to use up that surplus summer squash that seems to grow overnight! The name “Grandma’s Secret” isn’t just for show; it’s a nod to the little nuances she incorporated that set it apart. It’s not overly spiced, not overly sweet, but perfectly balanced. It’s the kind of bread that makes you close your eyes with the first bite and just savor the moment. It’s the ultimate comfort food, really, but in a way that feels a little bit fancy.
Why you’ll love this recipe?
Let me tell you, there are so many reasons why this zucchini bread has earned a permanent spot in my baking rotation. First off, the flavor is just out of this world. It’s that perfect blend of comforting spices – cinnamon and a hint of nutmeg – that feels like a warm hug. But the real star is the moisture. Thanks to the clever use of zucchini, this bread is unbelievably tender and moist, almost like a cake. You know how some quick breads can be a bit dry? Not this one, not ever! And simplicity? Oh, it’s a lifesaver on those chaotic mornings or when you’ve got unexpected guests. You can literally have this mixed and in the oven in about 15 minutes. Plus, it’s incredibly cost-effective. Zucchini is usually pretty affordable, and the other ingredients are pantry staples. What I love most about this is its versatility. It’s fantastic on its own, of course, but it’s also amazing with a smear of cream cheese or a drizzle of honey. It’s perfect for breakfast, a mid-afternoon snack, or even a light dessert. Compared to other zucchini breads I’ve tried, this one has a superior texture – it’s never gummy or heavy. It’s a crowd-pleaser, for sure. My kids ask for this all the time, and honestly, so do I!
How do I make Zucchini bread?
Quick Overview
Making this incredible zucchini bread is surprisingly straightforward. We’ll start by prepping our pan and preheating the oven, then quickly whisk together the dry and wet ingredients separately before bringing them together. The magic really happens when we fold in the grated zucchini and pour the batter into the prepared pan. A gentle bake, a cool down, and then a simple glaze – that’s all there is to it! The beauty of this method is how it ensures maximum moisture and a tender crumb every single time. It’s a foolproof process that even beginner bakers can nail.
Ingredients
For the Main Batter:
You’ll need about 2 cups of all-purpose flour. I always use a good quality, unbleached all-purpose flour for the best texture. Make sure it’s measured correctly by spooning it into your measuring cup and leveling it off, not scooping directly from the bag, which can pack it too tightly. We’re also going to use 1 teaspoon of baking soda and ½ teaspoon of salt. The baking soda is crucial for that lovely rise and tender crumb, and the salt helps balance the sweetness and enhance all the other flavors. And for that warm, comforting aroma and taste, we’ll add 1 teaspoon of ground cinnamon and a tiny pinch, maybe ¼ teaspoon, of ground nutmeg. Don’t skip the nutmeg; it adds a subtle depth that’s just divine. For sweetness, you’ll need 1 ½ cups of granulated sugar. I know that sounds like a lot, but it really helps create that moist, cake-like texture. If you’re feeling adventurous, I’ve experimented with using half brown sugar, and it adds an even richer, caramel-like note!
For the Filling:
This is where the zucchini magic happens! You’ll need 2 cups of grated zucchini. It’s super important to squeeze out as much liquid as you can from the grated zucchini. Seriously, this is one of Grandma’s biggest secrets! Use a clean kitchen towel or cheesecloth and give it a good squeeze. This step prevents the bread from becoming soggy and ensures that perfect moist, tender crumb. I usually grate mine on the medium holes of a box grater. You’ll also need 2 large eggs, lightly beaten. These act as a binder and add richness. For that essential moisture and richness, ½ cup of vegetable oil is key. You can also use canola oil or even melted coconut oil if you prefer. If you’re feeling fancy, I once tried this with melted unsalted butter, and oh my goodness, the flavor was incredible, though it did make it a tad denser. And for that extra layer of moisture and a slight tang, ¼ cup of buttermilk or plain yogurt works wonders. If you don’t have buttermilk, you can easily make a substitute by adding 1 teaspoon of lemon juice or white vinegar to ¼ cup of milk and letting it sit for 5-10 minutes.
For the Glaze:
This is optional, but I highly recommend it because it takes this bread from delicious to absolutely divine! You’ll need 1 cup of powdered sugar, sifted to ensure a smooth consistency. Then, about 2-3 tablespoons of milk. You can use any kind – whole milk, skim, or even a dairy-free alternative like almond milk, which I tested once and it actually made it even creamier! Add the milk a tablespoon at a time until you reach your desired consistency. For a little extra flavor boost, a ½ teaspoon of vanilla extract is perfect. It rounds out the sweetness beautifully.
Step-by-Step Instructions
Step 1: Preheat & Prep Pan
First things first, let’s get our oven ready. Preheat it to 350 degrees Fahrenheit (175 degrees Celsius). You’ll want to grease and flour a 9×5 inch loaf pan. My grandma always used butter for greasing, but vegetable oil or baking spray works just as well. Then, dust it lightly with flour, tapping out any excess. This step is super important to prevent the bread from sticking, and nobody wants a loaf that’s stuck in the pan, right? For extra insurance, I sometimes like to line the bottom and sides with parchment paper, leaving a little overhang so you can easily lift the bread out later. Trust me, it’s a lifesaver!
Step 2: Mix Dry Ingredients
In a large mixing bowl, whisk together the all-purpose flour, baking soda, salt, cinnamon, and nutmeg. Whisking these together ensures that the leavening agents and spices are evenly distributed throughout the batter. This is a small step, but it makes a big difference in the final texture and flavor. You want to make sure there are no clumps of baking soda or spices. Just a nice, uniform blend of dry goodness. It should look like a pale, sandy mixture, smelling faintly of spice.
Step 3: Mix Wet Ingredients
In a separate medium bowl, whisk together the granulated sugar, lightly beaten eggs, vegetable oil, and buttermilk (or your milk substitute). Whisk until everything is well combined and the mixture is smooth and emulsified. The oil and buttermilk are crucial for that incredibly moist and tender crumb that we’re aiming for. I always check that the eggs are fully incorporated; you don’t want any pockets of raw egg in your batter. The mixture should have a lovely, golden hue.
Step 4: Combine
Now, it’s time to bring those wet and dry ingredients together. Pour the wet ingredients into the bowl with the dry ingredients. Using a spatula or a wooden spoon, gently fold them together until *just* combined. It’s really important not to overmix here! You’ll see a few streaks of flour still, and that’s perfectly okay. Overmixing develops the gluten in the flour, which can lead to a tough, dense bread, and we definitely don’t want that. Grandma always said, “Mix until you can’t see the flour anymore, but stop right there!”
Step 5: Prepare Filling (Zucchini!)
This is the key step for our amazing moisture! Take your thoroughly squeezed grated zucchini and gently fold it into the batter. Be careful not to overmix at this stage either. We just want to distribute the zucchini evenly throughout the batter. You should see little flecks of green distributed throughout your mixture. It’s not a thick batter, but it should hold its shape loosely. If your batter seems too dry after adding the zucchini, don’t worry, it’s the zucchini releasing its moisture as it bakes.
Step 6: Layer & Swirl (Optional, but fun!)
Now, pour the batter into your prepared loaf pan. Smooth the top gently with your spatula. If you want to add a little flair, this is where you can get creative! You could swirl in a tablespoon or two of melted chocolate or some extra cinnamon and sugar for a cinnamon-swirl effect. For a cinnamon swirl, just mix about 2 tablespoons of sugar with 1 teaspoon of cinnamon and sprinkle it over the top of the batter, then use a knife or skewer to gently swirl it in. Don’t over-swirl, or you’ll lose the definition.
Step 7: Bake
Pop that pan into your preheated oven. Bake for about 50-65 minutes. The exact time can vary depending on your oven, so start checking around the 50-minute mark. You’ll know it’s done when a wooden skewer or toothpick inserted into the center comes out clean, or with just a few moist crumbs attached. The top should be beautifully golden brown and slightly springy to the touch. If the top starts to brown too quickly before the inside is cooked, you can loosely tent it with aluminum foil for the last 15-20 minutes of baking.
Step 8: Cool & Glaze
Once it’s baked to perfection, carefully remove the loaf pan from the oven. Let the zucchini bread cool in the pan on a wire rack for about 10-15 minutes. This allows it to set up properly. Then, gently invert the pan to remove the bread onto the wire rack to cool completely. It’s *really* important to let it cool completely before glazing. While it’s cooling, whisk together the powdered sugar, 2 tablespoons of milk, and vanilla extract in a small bowl. Add more milk, a teaspoon at a time, until you reach a thick but pourable consistency. Once the bread is totally cool, drizzle the glaze over the top, letting it drip down the sides. It hardens up beautifully!
Step 9: Slice & Serve
Once the glaze has set, which usually takes about 30 minutes, it’s time to slice and enjoy! Use a sharp serrated knife for the cleanest cuts. The aroma alone will have everyone gathering in the kitchen. Serve slices warm or at room temperature. It’s absolutely divine on its own, but don’t hesitate to add a dollop of whipped cream or a smear of butter if you’re feeling indulgent.
What to Serve It With
This zucchini bread is so versatile, it works for almost any occasion! For breakfast, it’s fantastic with a simple cup of coffee or a refreshing glass of orange juice. I love serving it slightly warm, with a thin spread of butter – it’s just so comforting and satisfying to start the day. For brunch, it really shines. I often cut thicker slices and serve them alongside a fresh fruit salad or even as part of a larger spread with quiches and savory dishes. A little dollop of cream cheese on the side is always a hit. As a dessert, this is a winner. I sometimes serve it with a scoop of vanilla bean ice cream or a drizzle of chocolate sauce – it’s decadent enough to feel like a treat but still light enough that you don’t feel overly full. And for cozy snacks? This is the absolute champion. It’s perfect with a hot mug of tea on a rainy afternoon or with a tall glass of cold milk for the kids after school. My family traditions often involve having a slice (or two!) with our afternoon tea, and it just never disappoints. It’s also wonderful packed in a lunchbox for a special treat.
Top Tips for Perfecting Your Grandma’s Secret Zucchini Bread
Alright, let’s talk about making this the best it can possibly be, every single time. Grandma always had a few little tricks up her sleeve, and I’ve picked up a few more over the years.
Zucchini Prep: The absolute, non-negotiable step is squeezing out the moisture from the zucchini. I can’t stress this enough! Grate your zucchini on the medium holes of a box grater. Place it in a clean kitchen towel or a few layers of paper towels and give it a really good, firm squeeze. You’ll be amazed at how much water comes out. This is the secret to preventing a soggy loaf and ensuring that perfect, tender crumb. If you don’t squeeze it well, you risk the bread being dense and heavy.
Mixing Advice: The biggest mistake most people make with quick breads is overmixing. Once you combine the wet and dry ingredients, mix only until *just* combined. You should still see a few faint streaks of flour. Seriously, stop there! Overmixing develops the gluten, which results in a tough, chewy bread. Gently fold in the zucchini at the very end, just to distribute it evenly. Think of it as a gentle hug, not a vigorous workout for the batter.
Swirl Customization: While the basic recipe is fantastic, adding a swirl is a fun way to elevate it. My favorite is the cinnamon-sugar swirl. Just mix about 2 tablespoons of sugar with 1 teaspoon of cinnamon. Sprinkle this mixture over the batter in the pan and then use a butter knife or a skewer to gently swirl it through the top layer. Don’t go too deep, or you’ll mix it into the whole batter, which can make it less defined. A nice marbled effect is what we’re going for.
Ingredient Swaps: I’ve experimented a lot! For a richer flavor, swap half the granulated sugar for light brown sugar. For a dairy-free version, almond milk or oat milk works beautifully in the batter and for the glaze. If you don’t have vegetable oil, a neutral-flavored oil like canola or even melted and slightly cooled coconut oil can be used. For a touch of nutty flavor, I’ve even tried using whole wheat pastry flour mixed with all-purpose flour (about a 50/50 ratio), which gives it a slightly denser, heartier texture. I tested this with almond milk and it actually made it even creamier!
Baking Tips: Every oven is a little different, so always do the toothpick test. Insert a toothpick into the center of the loaf; it should come out clean or with a few moist crumbs attached. If the top is browning too quickly but the inside isn’t cooked, loosely tent the loaf with aluminum foil. Placing the loaf on the middle rack ensures even heat distribution.
Glaze Variations: The basic vanilla glaze is my go-to, but you can play with it! For a citrusy kick, add a teaspoon of orange or lemon zest to the glaze. A pinch of cardamom can add a lovely warmth. If you prefer a less sweet glaze, use less powdered sugar and more liquid. Or, skip the glaze entirely and just dust the cooled loaf with a bit of powdered sugar for a simpler look.
Storing and Reheating Tips
Once this delicious zucchini bread is baked and cooled (or glazed!), you’ll want to store it properly to keep it tasting its best. It’s really not as fussy as some baked goods, which is part of why I love it so much.
Room Temperature: If you plan on eating it within 2-3 days, you can absolutely keep it at room temperature. I usually store it in an airtight container or wrap it tightly in plastic wrap. I find that letting it sit out on the counter, maybe loosely covered, is best for a day or two. It stays wonderfully moist and tender that way. Just avoid direct sunlight or heat, which can make it spoil faster.
Refrigerator Storage: If it’s quite warm where you live, or you know you won’t get through it in 3 days, the refrigerator is your friend. Wrap it well in plastic wrap, then place it in an airtight container or a heavy-duty freezer bag. It should stay good in the fridge for up to a week. The texture might be slightly firmer when it’s cold, but it’s still delicious. Don’t worry, it won’t dry out if it’s sealed properly.
Freezer Instructions: This zucchini bread freezes like a dream! If you want to keep it for longer, say up to 3 months, freezing is the way to go. First, let the bread cool completely. If it’s glazed, make sure the glaze is fully set. Then, wrap the entire loaf tightly in a couple of layers of plastic wrap, followed by a layer of aluminum foil or a heavy-duty freezer bag. This double protection prevents freezer burn. When you’re ready to enjoy it, you can thaw it slowly in the refrigerator overnight, or at room temperature for a few hours. If it was glazed, it will be perfectly fine when thawed. If you didn’t glaze it, you might want to add a fresh glaze or a dusting of powdered sugar after thawing.
Glaze Timing Advice: If you plan on freezing your bread, I highly recommend glazing it *after* it has been thawed and is ready to serve. Glazing before freezing can sometimes make the glaze a bit sticky or less vibrant. If you’re just refrigerating it, glazing while it’s still slightly warm is fine, but it’s best to let it cool completely before wrapping to avoid condensation.
Frequently Asked Questions
Final Thoughts
There you have it – my grandma’s treasured zucchini bread recipe, which truly tastes more like cake than bread. It’s one of those recipes that brings such pure joy, both in the making and the eating. It’s comforting, it’s delicious, and it’s surprisingly simple, which is the perfect trifecta in my book. The way it stays moist and tender is truly a marvel, and the aroma that fills your kitchen as it bakes is just heavenly. If you’re looking for a go-to recipe that’s always a hit, whether it’s for a quick breakfast, a delightful snack, or even an easy dessert, you’ve found it. I really hope you give this a try. I can’t wait to hear how yours turns out and what you think of this little piece of my family’s culinary history. Happy baking, and may your kitchen be filled with the wonderful scent of this amazing zucchini bread!

twice-baked potatoes
Ingredients
Method
- Pierce the potatoes several times with a fork.
- Place in the microwave and use your baked potato setting until the potatoes are cooked through, turning halfway. (Or you can bake 1 hour in your oven at 425°F)
- Meanwhile, in a medium saucepan, combine cauliflower and broccoli with a little salted water and cook, covered for about 3 minutes.
- Remove the broccoli with a slotted spoon and set aside, continue cooking the cauliflower until soft, about 5 more minutes. Drain and set aside in a large bowl.
- Preheat the oven to 400°F.
- Cut the potatoes in half lengthwise.
- Scoop the flesh out into the large bowl with the cauliflower, leaving a 0.25 inch shell.
- Place the potato shells on a baking sheet.
- Mash the flesh with a potato masher or puree with a hand blender along with the cauliflower.
- Add the buttermilk and salt, mash until smooth.
- Fold in half of the shredded cheddar (and chives if desired).
- Spoon the potato/cauliflower mixture back into the shells.
- Top with the cooked broccoli (I just inserted them in) and remaining cheese on top.
- Bake for 5-10 minutes, or until heated through and the cheese is melted. (You can also microwave it for a few minutes if you prefer not to use the oven)