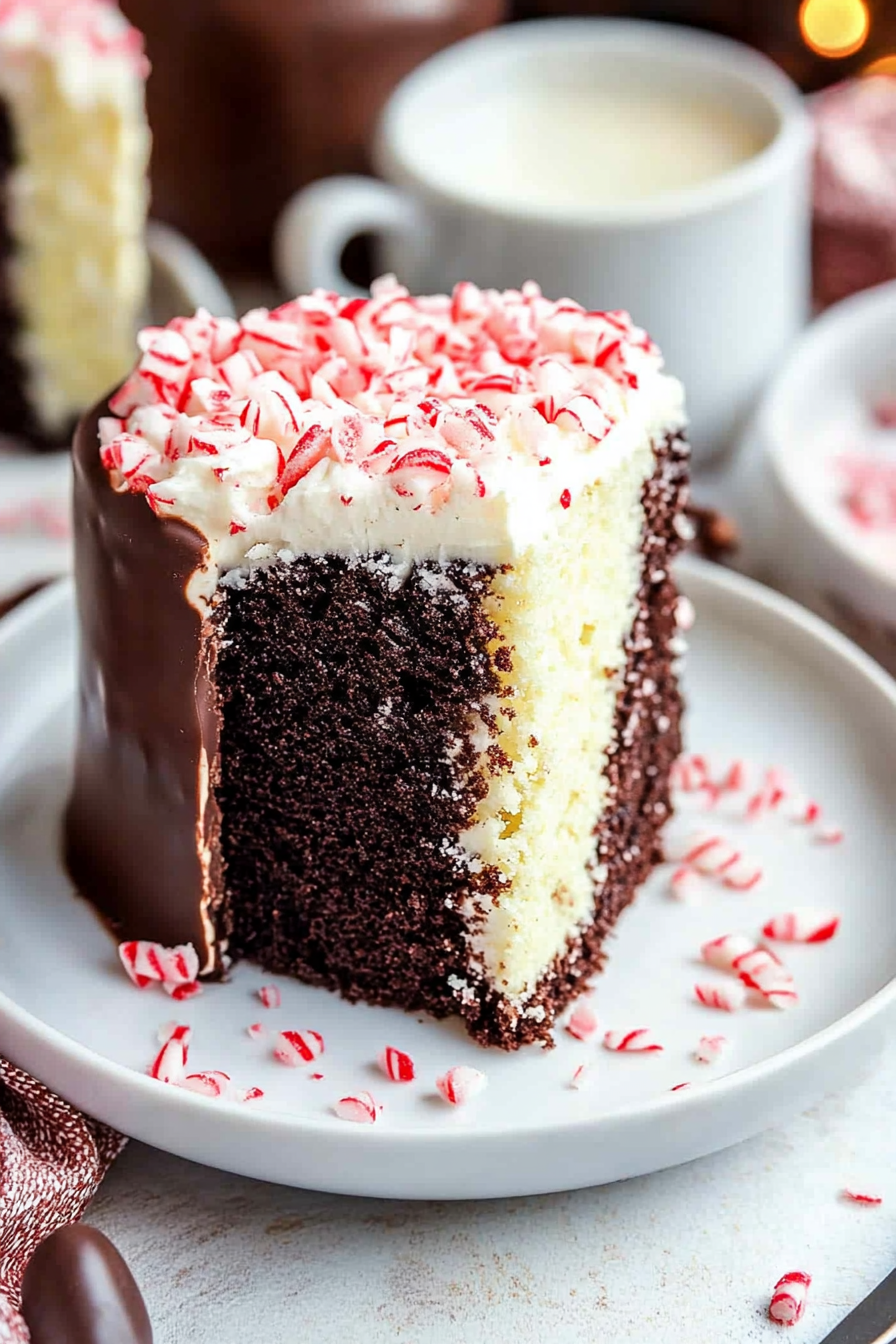
Festive Mint Chocolate Cheesecake Cake
There’s something about baking with zucchini that just feels like magic to me. Growing up, I always loved grabbing fresh zucchini from my grandma’s garden and turning it into something sweet—like her famous zucchini bread. But when I discovered that zucchini plus coffee cake was a match made in heaven, my world kind of changed. This zucchini coffee cake with cinnamon swirl isn’t just a quick snack; it’s comfort, nostalgia, and a little surprise all wrapped into one slice. It’s perfect for lazy Sunday mornings, impromptu coffee dates, or when your kids ask for seconds — no one ever suspects zucchini in this. It’s incredibly moist, flavorful, and filling, and the cinnamon swirl at the center feels like a warm hug. Trust me, you’ll want to keep a batch in the fridge for those mornings when you need a little extra sweetness and a lot of heart. Plus, I’ve tested this with almond milk and it actually made it even creamier—seriously, try it! I always do this when I want something cozy but don’t feel like baking a whole pie. This one’s a lifesaver on busy nights or when friends pop over unexpectedly. I promise, once you make this, it’ll become a staple in your kitchen too—your family will ask for it all the time, just like mine. Let’s dive into how to make this delicious, truly “human” coffee cake!
What is Zucchini Coffee Cake with Cinnamon Swirl?
Think of this zucchini coffee cake as the love child of classic coffee cake and a vegetable-packed treat. It’s essentially a moist, tender cake that sneaks in shredded zucchini—something I find gets rid of any guilt about indulging a little. The name might sound fancy, but don’t worry, it’s as simple as mixing a few ingredients, layered with a cinnamon-sugar swirl, and then baking it to perfection. The idea is that you get a buttery, flavorful cake with patches of cinnamon goodness running throughout, and the zucchini adds moisture and an extra layer of nutrition. It’s similar to banana bread in texture, but with a different spice kick and its own unique personality. I call it a “human” recipe because it’s honest, straightforward, and crafted from what I usually have lying around in the kitchen. No need for fancy ingredients—just good quality baking staples and a handful of grated zucchini from your garden or fridge crisper. And honestly, it’s a great way to sneak in some veggies while satisfying that sweet tooth. Think of it as cozy, homemade comfort in every bite, perfect for sharing with someone you care about.
Why you’ll love this recipe?
What I love most about this zucchini coffee cake with cinnamon swirl is that it’s endlessly versatile and downright addictive. The flavor is warm and comforting—the kind that makes your house smell like fall mornings with cinnamon and vanilla floating in the air. The moistness? Oh, it’s next level. Thanks to the zucchini, each bite melts in your mouth without feeling greasy or heavy. Plus, this recipe is super forgiving; even if you’re not a “baker,” I promise, you’ll get it right on the first try. It’s also budget-friendly because you probably already have all the ingredients—flour, sugar, cinnamon—and the zucchini is basically a free bonus from your garden or grocery store. I’ve made this for brunch, potlucks, and even dessert after dinner, and it always disappears fast. The cinnamon swirl adds such a nice surprise—my kids actually ask for this all the time because they love the little pockets of spicy sweetness. And if you’re trying to be a little healthier but don’t want to give up dessert, this is the perfect cheat—it feels indulgent but has that sneaky vegetable hiding inside. I highly recommend trying different toppings or swirling in a handful of nuts—trust me on this one, it takes it to a whole new level.
How do you make Zucchini Coffee Cake with Cinnamon Swirl?
Quick Overview
This recipe is all about layering simple ingredients into a tender cake, swirling in cinnamon sugar, and baking it just right. The prep couldn’t be easier: grate the zucchini, mix the batter, prepare your cinnamon swirl, and then layer everything in your pan. The trick is not overmixing—just fold everything gently to keep it light and airy. The baking time is straightforward, and the smell alone will make everyone in your house wander into the kitchen! Once baked, let it cool slightly before glazing—optional but oh-so-good. This cake is perfect when you want something homemade but don’t want to spend hours in the kitchen. I love how it’s almost foolproof, especially if you follow the tips I’ll share soon.
Ingredients
For the Main Batter:
- 2 cups all-purpose flour (I prefer unbleached for flavor)
- 1 cup granulated sugar (or coconut sugar for a healthier twist)
- 1 teaspoon baking powder
- 1/2 teaspoon baking soda
- 1/2 teaspoon salt
- 1 teaspoon ground cinnamon (because cinnamon makes everything better)
- 1/2 cup unsalted butter, melted (or use coconut oil for vegan)
- 1 cup grated zucchini (squeeze out excess moisture—trust me, it makes a difference!)
- 1/2 cup milk (dairy or almond milk works perfectly)
- 1 teaspoon vanilla extract (or almond for a different flavor)
- 2 large eggs (or flax eggs for vegan)
For the Filling:
- 1/3 cup granulated sugar
- 1 tablespoon ground cinnamon
For the Glaze:
- 1 cup powdered sugar
- 1-2 tablespoons milk (adjust for your desired consistency)
- Optional: a splash of vanilla or almond extract
Step-by-Step Instructions
Step 1: Preheat & Prep Pan
Set your oven to 350°F (175°C). Grease a 9-inch round or square baking pan with butter or lining parchment paper—this helps with the clean slices later. I always do this early so I don’t forget, and it’s super quick. Also, grate your zucchini and squeeze out all that extra moisture using a clean kitchen towel or paper towels—this keeps the cake from getting soggy, especially if your zucchini’s a little watery.
Step 2: Mix Dry Ingredients
In a large bowl, whisk together the flour, sugar, baking powder, baking soda, salt, and cinnamon. I find that sifting or whisking really well here ensures the batter is smooth and fluffier. It also prevents clumps, which can sometimes happen if your baking powder isn’t evenly distributed.
Step 3: Mix Wet Ingredients
In a separate bowl, combine your melted butter (or oil), milk, vanilla, and eggs. Whisk until everything’s well blended. If your eggs are fridge-cold, let them sit out for a few minutes to bring to room temp — it helps everything incorporate better. I tested this with almond milk and it actually made the batter super creamy, which I loved.
Step 4: Combine
Pour the wet ingredients into the dry and fold gently until just combined—don’t overmix or the cake will get dense. A few lumps are okay; overmixing activates gluten and ruins that tender crumb we want. Fold in the grated zucchini last, and make sure it’s evenly distributed.
Step 5: Prepare Filling
Mix your sugar and cinnamon in a small bowl. This will be sprinkled over the batter before adding the swirl. You can also add chopped nuts or mini chocolate chips if you’re feeling fancy—or skip it all for a classic look.
Step 6: Layer & Swirl
Pour about half the batter into your prepared pan. Sprinkle half the cinnamon sugar mixture on top, then add the remaining batter. Smooth it out a bit, then sprinkle the rest of the cinnamon mixture on top. Use a knife or skewer to gently swirl the layers, making a pretty marbled pattern. Don’t overdo it—just a few swirls to let the cinnamon pockets peek through as it bakes.
Step 7: Bake
Pop it into your preheated oven and bake for 40-45 minutes. Check doneness by inserting a toothpick into the center—if it comes out clean, your cake’s ready. Every oven is slightly different, so start checking at 40 minutes. The top should be golden, and it’ll smell insanely good.
Step 8: Cool & Glaze
Let the cake cool in the pan for about 15 minutes, then transfer to a wire rack. Once cooled slightly, mix up the glaze and drizzle over the top. This part is optional, but it adds a lovely sweetness and a shiny finish that makes it feel extra special.
Step 9: Slice & Serve
Cut into squares or slices—whatever your heart desires—and serve warm or at room temperature. I love it with a cup of coffee in the morning or a glass of milk in the afternoon. It’s even great chilled the next day—think of it as the perfect grab-and-go snack or breakfast.
What to Serve It With
This zucchini coffee cake pairs beautifully with a steaming mug of coffee or chai tea—especially if you add a touch of cream or foamed milk on top. For brunch, serve it alongside fresh berries or a dollop of whipped cream; the fruity tartness balances the cinnamon richness. I also love slicing it up and spreading a little butter or honey—my kids ask for this all the time, and it disappears in minutes. If I want to dress it up a bit, I’ll serve slices with vanilla yogurt or a drizzle of honey for a little extra decadence. It’s the kind of treat that feels indulgent, but secretly sneaky with healthy-ish veggies inside. Perfect on cozy weekend mornings or as a last-minute dessert when craving something sweet but homemade. Honestly, I’ve made this for family gatherings, and it’s always met with oohs and ahhs—so good!
Top Tips for Perfecting Your Zucchini Coffee Cake with Cinnamon Swirl
Over the years, I’ve picked up some tricks to make sure this cake turns out just right every time. First, always squeeze out the zucchini! Moisture is the enemy of fluffy cake, and excess water can turn your batter into soup. I tested using a cheesecloth and a paper towel—both work beautifully. Second, when mixing your wet ingredients, don’t rush—whisk until smooth, especially if using eggs straight from the fridge. The right temperature and good mixing help everything come together seamlessly. For the swirl, I recommend using a toothpick or skewer to create a gentle marbling—this not only looks pretty but ensures cinnamon flavor is sprinkled throughout. As for ingredient swaps, swapping half the sugar with honey or maple syrup works well, just reduce the liquid slightly. I’ve also added chopped nuts or mini chocolate chips into the batter for variation, and it’s fabulous. One thing I learned after a few attempts: don’t open the oven door too often during baking, or you risk collapsing the cake. If you prefer a more moist cake, try adding a splash of applesauce or Greek yogurt into the batter next time. And for the glaze, a splash of lemon juice can brighten the sweetness—trust me on this little trick! Experimentation is part of the fun—and a big part of what makes this recipe truly “human,” crafted from love and a few broken-in kitchen habits.
Storing and Reheating Tips
This cake holds up well in the fridge for up to 3 days, covered loosely with foil or stored in an airtight container. I find it’s best enjoyed within the first two days for maximum freshness—after that, the texture softens a bit, but it’s still delicious cold or slightly warmed in the microwave for a few seconds. To keep it longer, I usually freeze slices individually wrapped in plastic wrap and then in a zip-top bag—perfect for when those late-night sweet cravings hit. When reheating, microwave for about 10-15 seconds or warming slices in a low oven (around 300°F) for 10 minutes keeps the moisture intact. As for the glaze, I usually add it after reheating or serve it on the side—adding it fresh makes it shine. If you’re storing with the glaze, keep it in the fridge and reapply before serving for the best presentation. Overall, this cake is forgiving, keeps well, and tastes just as good on day three as it does fresh out of the oven. The key is to cover it well to prevent it from drying out, and if you want that shiny glaze to stay glossy, add it just before serving.
Frequently Asked Questions
Final Thoughts
This zucchini coffee cake with cinnamon swirl is one of those recipes I come back to whenever I want something warm, familiar, and surprisingly sneaky. It’s proof that baking doesn’t always have to be complicated or perfect—what matters is making it with love and a little bit of instinct. The moistness from the zucchini, the fragrant cinnamon, and that cozy crumb make every bite feel like a hug. I’ve served this for breakfast, afternoon snacks, and even as a little treat after dinner, and it’s always a hit. Honestly, once you try it, I think you’ll find yourself making it all the time, just like I do. It’s not just a recipe—it’s a reminder that “human” in baking is all about imperfectly perfect moments, shared flavors, and warm memories. So, go ahead, gather your ingredients, and let’s bake something wonderful today. I’d love to hear how yours turns out—drop a comment or share a photo! Happy baking!.
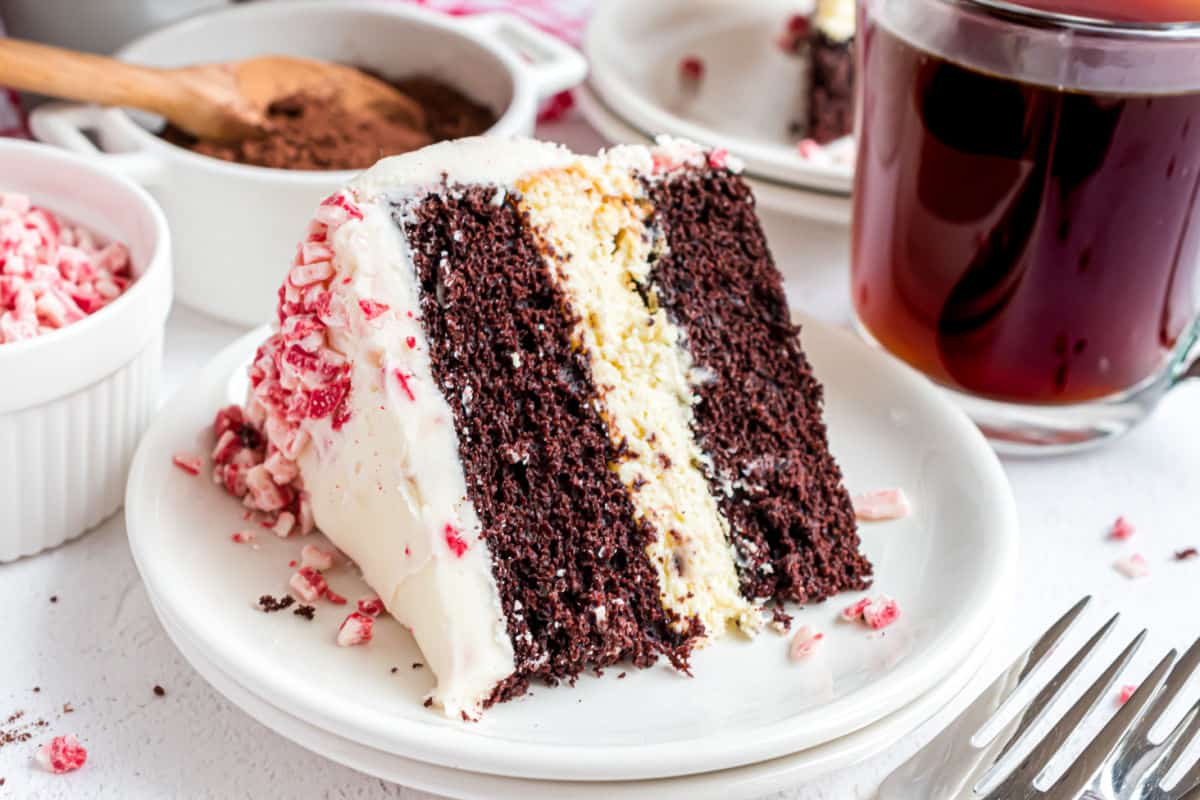
chocolate peppermint
Ingredients
Method
- Prepare the cake layers by mixing dry ingredients, then combining with wet ingredients. Bake at 350°F for 25 minutes, then cool completely.
- Make the cheesecake layer by beating cream cheese with sugar, then adding eggs, sour cream, and peppermint extract. Bake in a water bath at 325°F for 45 minutes, then chill overnight.
- Prepare the peppermint frosting by beating butter, then adding powdered sugar and heavy cream, and mixing until fluffy. Fold in peppermint chips.
- Assemble the cake by layering the frozen cake layers with the cheesecake, frosting, and peppermint chips. Chill before serving.
- Allow the assembled cake to sit at room temperature for 15 minutes before slicing. Enjoy!