Hazelnut Toast Rollups A Simple Sweet Treat
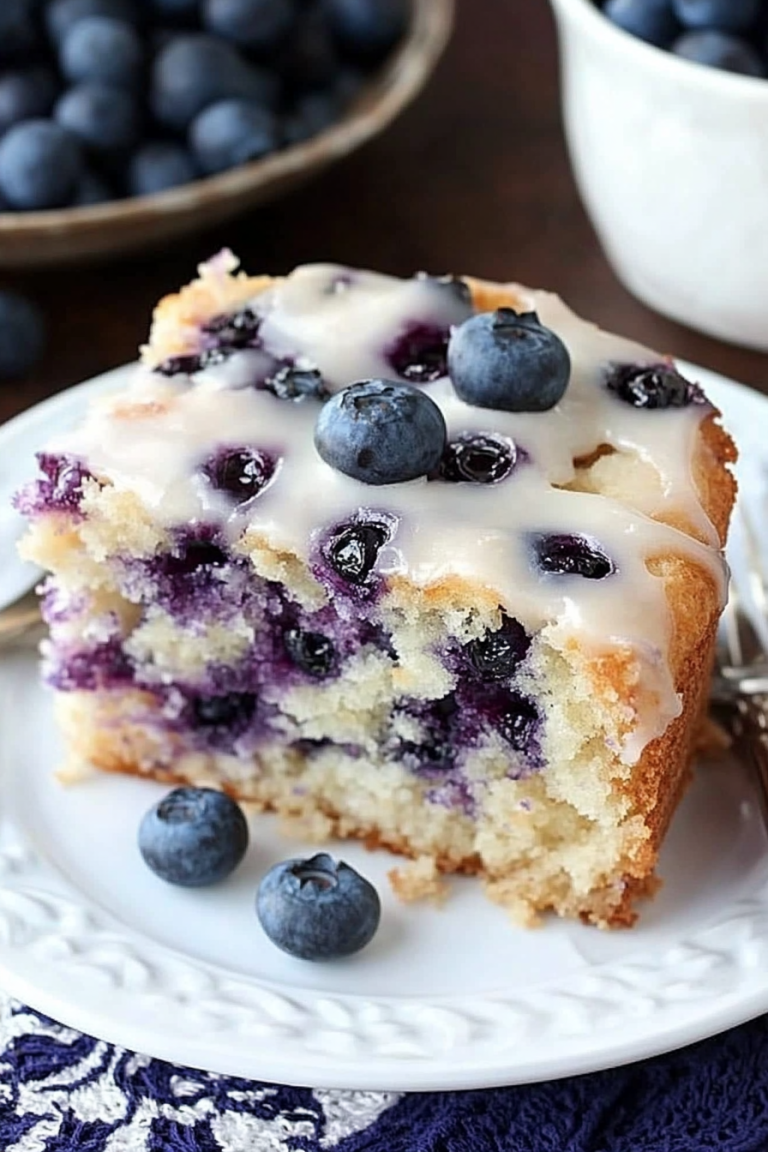
There’s nothing quite like the smell of fresh baked cake wafting through the kitchen on a lazy weekend morning, right? I remember and cherish those slow mornings when my grandma’s kitchen was filled with the comforting aroma of baked goodness. That’s the vibe I wanted to recreate with this zucchini blueberry swirl cake — a recipe I’ve made so many times that I could probably do it in my sleep, yet it always feels special. It’s essentially a humble zucchini bread, but with a surprise burst of blueberries that make it feel like a fancy dessert you could slice and serve for brunch or even a casual dinner. My kids ask for this all the time, and trust me, it disappears faster than I can grab a second slice. It’s simple, cozy, and so forgiving — perfect for when you want a treat but don’t want to fuss too much in the kitchen. Plus, it’s a sneaky way to get more veggies into your kids’ diets — they’ll never guess how healthy it really is! So, grab your apron, and let’s bake something that’s bound to become a family favorite.
What is Zucchini Blueberry Swirl Cake?
Think of this as a mash-up between your favorite zucchini bread and a vibrant blueberry swirl cake. It’s a moist, tender loaf with a hint of earthy sweetness from the zucchini, balanced by the bright, tangy burst of fresh blueberries spun throughout. The “swirl” part is what makes this special — a little dollop of blueberry jam or fresh berries gently marbled into the batter before baking, creating a gorgeous, marbled effect and flavor contrast. The name doesn’t sound fancy, but trust me, this cake feels like a treat with just the right amount of sweetness. It’s essentially a quick bread that’s versatile enough to serve for breakfast, brunch, or dessert. Think of it as a nourishing, all-in-one slice with a little bit of healthy hidden inside. I love how accessible it is — no fancy ingredients or complicated techniques, just a straightforward, cozy bake that brings people together around the table.
Why you’ll love this recipe?
What I love most about this zucchini blueberry swirl cake is how it combines the best of both worlds: health and indulgence. The zucchini keeps it super moist and soft, almost like a velvet crumb that melts in your mouth, while the blueberries add a delightful tartness and beautiful pops of color. It’s not overly sweet — just the right balance — which makes it perfect for breakfast, snack, or a light dessert. Plus, it’s incredibly easy to make. I’ve tested this with different variations, like swapping in frozen berries or using a bit of honey instead of sugar, and it’s always a crowd-pleaser. And budget-wise, you probably already have most of these ingredients in your pantry and fridge. The best part? You can make this ahead of time, and the flavors only get better after a day or two — perfect for meal prepping or last-minute get-togethers. The gentle swirl of blueberries running through each slice makes it feel special, even if it’s just a simple weekday treat. Honestly, I think what truly makes this recipe stand out is how cozy it makes me feel — like a warm hug in cake form. It’s one of those recipes that’s just as comforting as it is delicious, and I can’t wait for you to try it.
How do I make Zucchini Blueberry Swirl Cake?
Quick Overview
This cake is a breeze — you mix the dry ingredients separately from the wet, then bring them together gently. The zucchini gets grated and squeezed a little to remove excess moisture, which keeps the batter from becoming too soggy. I usually fold in fresh blueberries last, or swirl in some jam for a more dramatic look. After layering the batter in the pan, I swirl a spoon through to create a marbled effect. Baking at around 350°F (180°C) for about 45-50 minutes results in a beautifully moist, tender loaf with a lovely golden crust. The whole process from start to finish takes about an hour — perfect for when you want something homemade without spending the whole day in the kitchen. And trust me, it’s worth every minute.
Ingredients
For the Main Batter:
– 2 cups all-purpose flour (or a mix of whole wheat for extra fiber)
– 1 teaspoon baking powder
– ½ teaspoon baking soda
– ½ teaspoon salt
– 1 teaspoon cinnamon (optional but adds warm flavor)
– ½ cup granulated sugar (or honey/maple syrup for a natural touch)
– ⅓ cup vegetable oil or melted coconut oil
– 3 large eggs
– 1 teaspoon vanilla extract
– 1 cup finely grated zucchini (about 1 medium zucchini, excess moisture squeezed out)
– ½ cup buttermilk or almond milk (I tested both and loved how the almond milk made it even creamier)
For the Filling:
– ½ cup blueberry jam or 1 cup fresh blueberries (if using fresh, toss lightly in some flour to prevent sinking)
– Optional: lemon zest for extra brightness
– You can also sprinkle some chopped nuts or shredded coconut here if you like a bit of crunch.
For the Glaze:
– ½ cup powdered sugar
– 1-2 tablespoons milk or lemon juice
– A pinch of vanilla or a touch of lemon zest (for flavor variation)
– Mix until smooth — I like it slightly runny for better drizzle!
Step-by-Step Instructions
Step 1: Preheat & Prep Pan
Set your oven to 350°F (180°C). Grease a loaf pan with butter or non-stick spray and line it with parchment paper if you want an easy release. Sometimes I like to sprinkle a little flour or sugar at the bottom to help it come out perfectly. This step is simple but makes all the difference — nobody wants their cake stuck or cracked.
Step 2: Mix Dry Ingredients
In a large bowl, whisk together the flour, baking powder, baking soda, salt, and cinnamon. I always do this first because it ensures everything gets evenly distributed, especially the leavening agents. This step helps prevent lumps and ensures a fluffy, even crumb.
Step 3: Mix Wet Ingredients
In another bowl, beat the eggs lightly, then stir in the sugar, oil, vanilla, and buttermilk. I find it easiest to use a whisk or a fork here — really good for combining everything smoothly. When I tested with almond milk, it added a mild nutty flavor and made the batter even more tender. Just make sure the eggs are at room temp so everything mixes seamlessly.
Step 4: Combine
Pour the wet mixture into the dry ingredients. Gently fold everything together with a spatula or a wooden spoon. Don’t overmix — a few lumps are totally fine; it’ll still turn out moist and tender. Overmixing can lead to a dense loaf, which is the bane of every home baker’s existence. Be patient and gentle.
Step 5: Prepare Filling
If you’re using fresh blueberries, toss them lightly in a spoonful of flour to prevent sinking. For the jam, have it ready for swirling. I like to warm it a little so it drizzles easily — trust me, a little heat makes all the difference for that beautiful marble effect.
Step 6: Layer & Swirl
Pour about half of the batter into the prepared pan. Dollop spoonfuls of blueberry jam or scatter fresh berries on top. Add the remaining batter, then use a knife or a skewer to swirl through the batter. Create gentle figure-eights or zigzags — the more artistic, the better! This marbling creates a stunning visual when sliced and an exciting flavor contrast with every bite.
Step 7: Bake
Pop it in the oven for about 45-50 minutes. Start checking at 45 — if a toothpick inserted in the center comes out clean, it’s done. Sometimes mine takes a tad longer if my oven runs cool, so be patient. I’ve learned that the top should be golden and a little firm to the touch.
Step 8: Cool & Glaze
Let the cake cool in the pan for about 10 minutes, then transfer to a wire rack. Once fully cooled (or just slightly warm if you’re impatient), drizzle with the glaze. I like to wait until it’s almost room temperature because the glaze sets beautifully without dripping everywhere. The glaze adds just the right touch of sweetness and a glossy finish that makes it feel extra special.
Step 9: Slice & Serve
Using a serrated knife, cut slices carefully — this cake is moist and tender, so don’t rush it. Serve on a pretty plate, maybe with a dollop of whipped cream or a few extra blueberries on top for presentation. It’s delicious whether warm or at room temp. I love pairing it with a cup of strong coffee or tea — it’s such a cozy combo.
What to Serve It With
This zucchini blueberry swirl cake is so versatile, you can enjoy it just about anytime. For breakfast, I love pairing it with a steaming cup of coffee or a glass of almond milk — it’s nourishing and satisfying enough to start your day. My kids usually ask for it as a quick morning treat, especially if I’ve added a squeeze of lemon zest to the batter for extra brightness. During brunch, it’s a showstopper — warm slices with a dollop of mascarpone or Greek yogurt make it feel decadent without much effort. It’s also a lovely dessert after dinner — served with a scoop of vanilla ice cream or a drizzle of honey, it transforms into something really special. And on lazy afternoons, it makes the perfect cozy snack, paired with a book or a chat with friends. I’ve even made mini versions as muffins when I need something portable — baking time just decreases slightly, and they’re adorable! What I love most is how this cake brings people together — sharing slices and hearing “Wow, this is amazing!” makes all the work worth it.
Top Tips for Perfecting Your Zucchini Blueberry Swirl Cake
After making this countless times, I’ve picked up a few tricks that make a big difference. Here are my top tips:
- Zucchini Prep: Always grate and then gently squeeze out excess moisture. If it’s too wet, the batter gets gloopy, and the cake can turn denser than I like. I keep a clean dish towel handy for squeezing out the moisture — this step is key to that moist, tender crumb.
- Mixing Advice: Gently fold the ingredients together — overmixing is the enemy here. You want a light, airy texture, so be patient. Use a spatula or a wooden spoon, and stop when the ingredients are just combined.
- Swirl Tactics: To get a pretty marbled pattern, I drop spoonfuls of batter in layers, then swirl gently with a skewer. You don’t want to overmix or the swirl will disappear. Practice makes perfect — it took me a few tries to get those beautiful ribbons.
- Ingredient Swaps: Want to make it vegan? Swap eggs with applesauce or flaxseed meal. Prefer a gluten-free version? Use a blend of almond flour and gluten-free oats. Just remember, these substitutions might slightly change the texture, so adjust your baking time or moisture levels accordingly.
- Baking Tips: Always check early for doneness — ovens vary. If the top starts browning too fast, tent it with foil. A toothpick inserted should come out clean, but keep in mind that a few moist crumbs are okay in a moist batter like this.
- Glaze Variations: For an extra zing, add a splash of lemon juice or a pinch of cinnamon to your glaze. Or, sprinkle finely chopped nuts on top before glazing for crunch. The glaze is flexible — don’t be afraid to experiment!
I’ve tested quite a few tweaks over the years, and I’ve found that small adjustments can really elevate this cake without complicating things. The key is to keep things simple—trust your senses, and don’t overthink it. The result is a moist, flavorful cake that feels like a warm hug.
Storing and Reheating Tips
This cake keeps surprisingly well. Store it in an airtight container at room temperature for about 2 days — I usually cover it with a clean dish towel to keep it fresh. If you want it to last longer, pop it into the fridge, where it can stand for up to 4 days. Just make sure to bring it to room temp or warm it gently in the microwave before slicing, as it tends to firm up when chilled. For longer storage, freeze slices individually wrapped in plastic wrap and then foil — they thaw wonderfully for quick snacks. I’ve found that adding the glaze just before serving keeps it from becoming sticky or weeping after a couple of days. Whether you’re making this ahead for a brunch or saving some for later, it’s astonishing how well it holds up — you might just find yourself craving it all over again.
Frequently Asked Questions
Final Thoughts
If I had to pick a favorite way to enjoy a slice of homemade cake, this zucchini blueberry swirl version would be it. It’s simple, nourishing, and just a little bit indulgent — perfect for mornings when you want a quick breakfast but also crave something cozy and handmade. I love how the blueberries swirl through the tender crumb, making each bite a little surprise, and the aroma alone fills my house with happiness. Over the years, I’ve played around with different kinds of berries, milks, and toppings, and somehow, this recipe keeps winning every time. It’s adaptable, forgiving, and always impressive to guests or family. If you’re looking for something that feels special but is really just a humble loaf you toss together, give this a try. I promise, once you make it, it’ll become part of your go-to rotation. Happy baking, and I can’t wait to hear how yours turns out! Don’t forget to leave a comment or share your own tweaks—I love hearing from fellow home cooks.
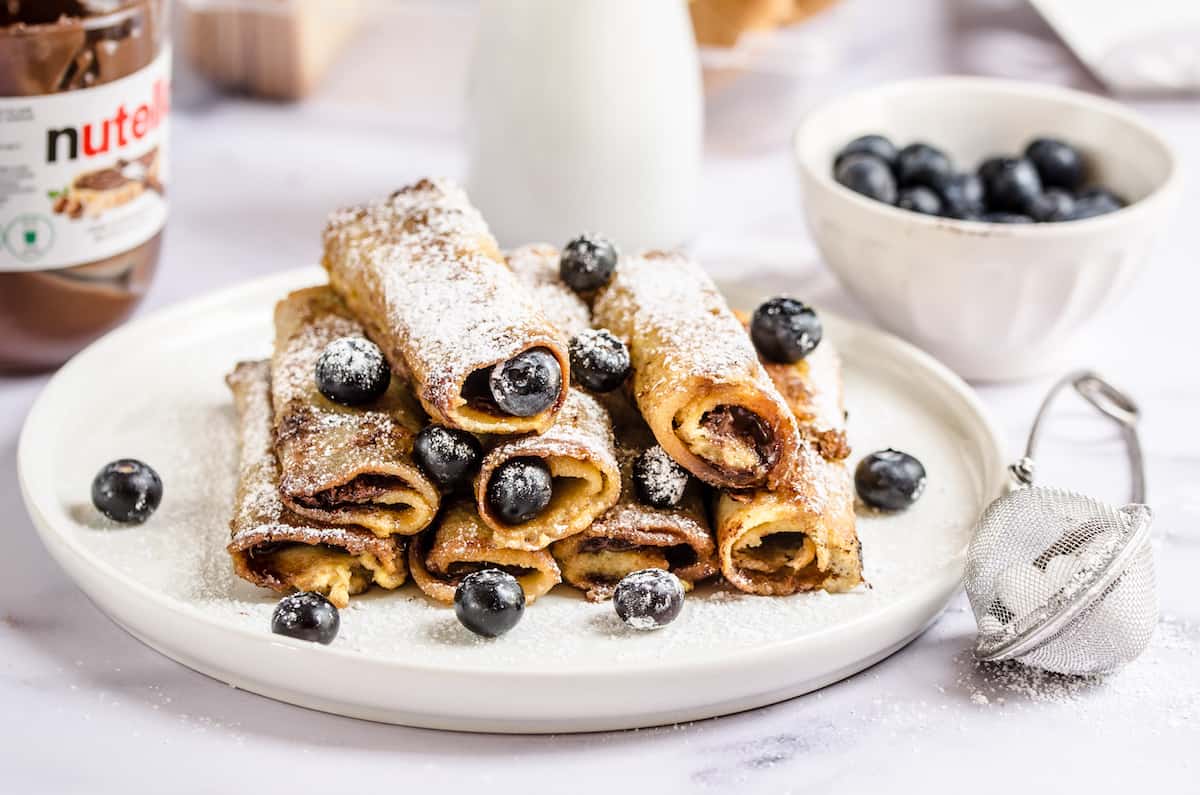
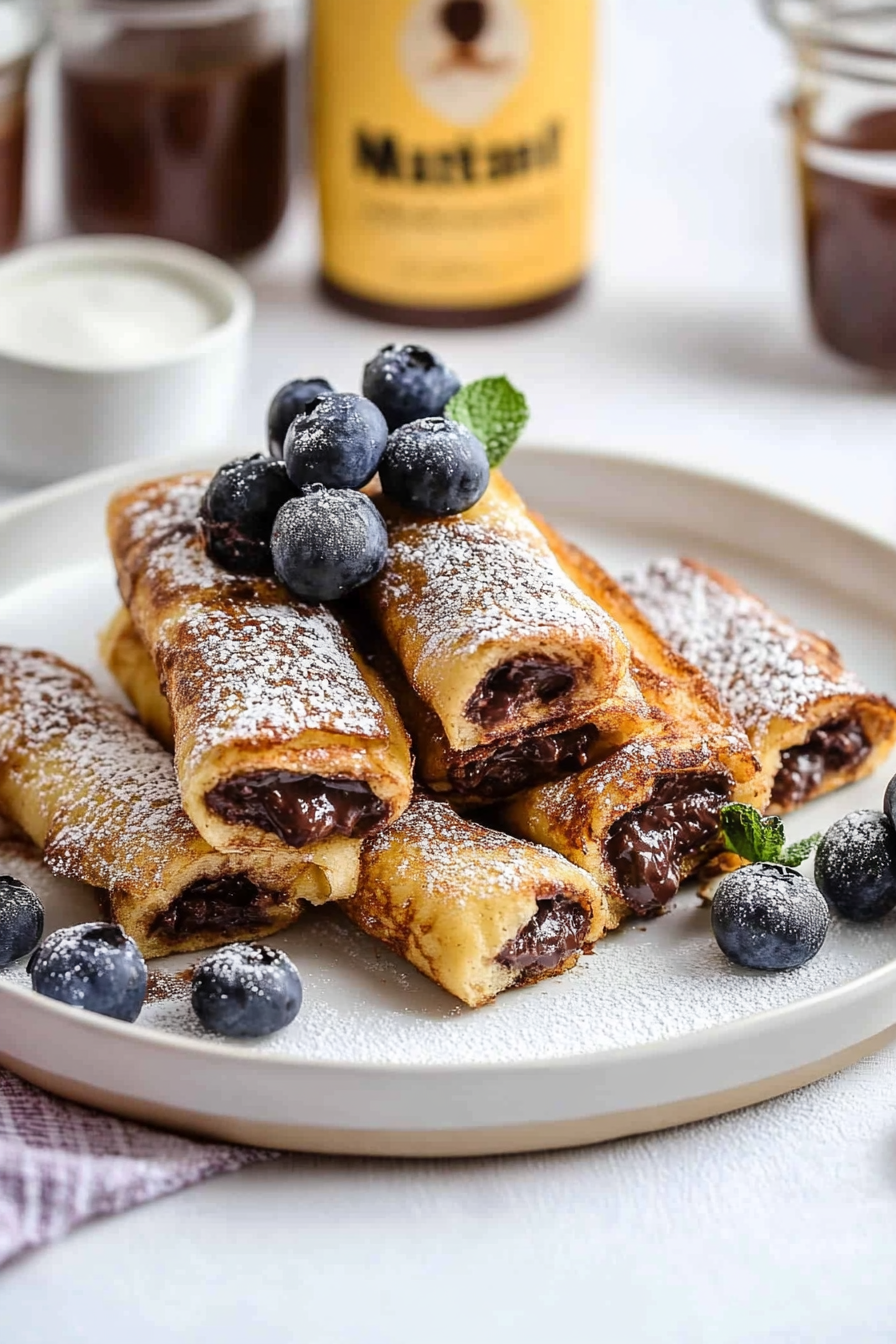
Nutella French Toast Rollups
Ingredients
Method
- Make the custard by whisking together milk, heavy cream, egg, and vanilla extract in a medium bowl. Set aside.
- Trim crusts from bread slices and flatten with a rolling pin as thin as possible.
- Spread Nutella evenly over each bread slice and roll them up, pinching the seam to secure.
- Heat 2 tablespoons of butter in a frying pan over medium heat. Dip rollups in the custard, then cook until golden brown, about two minutes per side. Do this in batches, adding remaining butter as needed.
- After cooking, roll the rollups in vanilla sugar or dust with powdered sugar if preferred. Serve immediately.