Light Tuna Noodle Casserole Recipe
Oh, friends, pull up a chair, grab a warm mug of something comforting, because I’m about to share a recipe that’s truly changed my life in the kitchen – my absolute favorite Swirled Cream Cheese Zucchini Bread. Seriously, this isn’t just a recipe; it’s a warm hug, a sweet memory, and a delightful secret weapon all rolled into one impossibly moist loaf. I remember the first time I whipped this up, thinking I was just making another batch of summer zucchini bread, trying to use up the endless bounty from my garden. But then, that cream cheese swirl happened, and honestly? It was pure magic. The way the tangy, sweet cream cheese marries with the warm spices and tender zucchini… it’s just something else entirely. If you’re a fan of my Gooey Cinnamon Swirl Bread, get ready, because this takes that comfort to a whole new, glorious level, wrapping it all up in the wholesome goodness of zucchini. It’s what I reach for when I want something utterly delicious, surprisingly easy, and destined to disappear in minutes.
What is your favorite swirled cream cheese Zucchini bread?
At its heart, this is a classic, super moist quick bread that cleverly incorporates grated zucchini, giving it an incredible tenderness and a subtle, earthy sweetness. But, here’s where we elevate it, friends: we introduce a luscious, slightly tangy cream cheese swirl right through the middle and on top! Think of it as the best zucchini bread you’ve ever had, decided it needed a little extra “oomph” and a touch of elegance. It’s essentially a spiced, sweet quick bread batter, studded with those green flecks (don’t worry, you can barely taste the zucchini, only appreciate its moisture!), beautifully complemented by pockets of creamy, dreamy cheesecake-like goodness. It’s approachable, comforting, and just fancy enough to impress, without any extra fuss. It’s the kind of recipe that makes you feel like a kitchen wizard without having to pull out any complicated spells or potions.
Why you’ll love this recipe?
There are so many reasons this particular zucchini bread has earned a permanent spot in my recipe box, and why I just know you’re going to fall head over heels for it too. What I love most about this is… well, where do I even begin?
- Flavor That Sings: What is the flavor that sings? The combination here is simply divine. You get that classic warmth from cinnamon and a whisper of nutmeg, the delicate sweetness of the zucchini, and then that glorious, slightly tart cream cheese swirl cuts through it all, creating a symphony of textures and tastes. It’s comforting yet sophisticated, and every bite is pure joy.
- Surprising Simplicity: What is the best way to describe Simplicity? Honestly, don’t let the “swirl” part intimidate you. It looks fancy, but it’s truly so simple to achieve! If you can mix a few ingredients, you can absolutely nail this. It’s the kind of project that feels rewarding without being overly complicated, making it a lifesaver on busy mornings when you want something special.
- Budget-Friendly Goodness: We’re talking about everyday pantry staples here. Flour, sugar, eggs, oil, cream cheese, and of course, those glorious zucchinis that seem to multiply overnight in the garden. It’s a fantastic way to use up garden bounty without breaking the bank, and it stretches far to feed a crowd or provide snacks for days.
- Versatility for Any Occasion: This isn’t just a breakfast bread. Oh no, my friends! It’s incredible for brunch, a delightful afternoon pick-me-up with your coffee, and it even makes a surprisingly elegant dessert with a scoop of vanilla ice cream. My kids ask for this all the time for their school lunches, and it disappears in minutes when I bring it to potlucks. If you enjoy the cozy vibes of a good Pumpkin Spice Loaf or a classic carrot cake, this zucchini bread offers a similar, irresistible appeal that makes everyone happy.
How to Make My Favorite Swirled Cream Cheese Zucchini Bread
Quick Overview
Making this incredible zucchini bread is much simpler than it looks, I promise! We’ll start by prepping our zucchini and mixing up a wonderfully spiced batter. Separately, we’ll whisk together a rich, tangy cream cheese filling. Then, it’s all about layering these two delicious components into our loaf pan and giving it a quick swirl before baking. The magic happens in the oven, transforming humble ingredients into a show-stopping loaf. Honestly, if you’ve ever made a simple quick bread, you’ve got this in the bag. The most “complicated” part is grating the zucchini, and even that’s just an arm workout!
Ingredients
For the Main Zucchini Bread Batter:
- 2 cups all-purpose flour: I always use unbleached flour; it just feels a bit lighter.
- 1 teaspoon baking soda: This gives our bread its lovely lift.
- 1/2 teaspoon baking powder: Works with the soda for perfect rise.
- 1 teaspoon ground cinnamon: The essential warming spice. Don’t skimp on quality here!
- 1/4 teaspoon ground nutmeg: A little whisper of nutmeg really rounds out the flavor. Freshly grated makes a huge difference!
- 1/2 teaspoon salt: Balances all the sweetness.
- 1 cup granulated sugar: For that perfect sweetness.
- 1/2 cup packed light brown sugar: Adds a lovely molasses note and extra moisture.
- 2 large eggs: Room temperature eggs mix in much more smoothly.
- 1/2 cup vegetable oil (or canola oil): Ensures a super moist crumb.
- 1 teaspoon vanilla extract: Go for pure vanilla; it’s worth it.
- 2 cups grated zucchini: About 2 medium zucchinis. No need to peel!
For the Cream Cheese Swirl:
- 8 ounces (1 block) cream cheese: Make sure it’s softened to room temperature! This is CRUCIAL for a smooth swirl.
- 1/4 cup granulated sugar: Sweetens our tangy swirl.
- 1 large egg yolk: Gives richness and helps the swirl set beautifully.
- 1/2 teaspoon vanilla extract: Enhances the creamy flavor.
For the Glaze (Optional, but highly recommended!):
- 1 cup powdered sugar: Sifted, if you want it extra smooth.
- 2-3 tablespoons milk (or heavy cream): Start with 2 and add more until you hit your desired consistency.
- 1/2 teaspoon vanilla extract: A final touch of warmth.
Step-by-Step Instructions
Step 1: Preheat & Prep Pan
First things first, let’s get that oven ready! Preheat your oven to 350°F (175°C). Then, grab a 9×5-inch loaf pan. I always grease mine really well with cooking spray, then dust it lightly with flour, shaking out any excess. For an extra easy removal (and trust me, you’ll want to preserve every crumb of this zucchini bread!), I like to line the bottom of the pan with a strip of parchment paper, leaving an overhang on the longer sides. This creates little “handles” for lifting the finished loaf out once it’s cooled a bit. It’s a little trick I picked up years ago, and it’s a lifesaver!
Step 2: Mix Dry Ingredients
In a large bowl, whisk together your flour, baking soda, baking powder, cinnamon, nutmeg, and salt. Make sure these are really well combined; you want those leavening agents and spices evenly distributed throughout the zucchini bread. A good whisk for 30 seconds or so will do the trick. This step might seem simple, but it’s important for ensuring a consistent texture and flavor in every slice.
Step 3: Mix Wet Ingredients
In a separate, medium-sized bowl, lightly beat your two large eggs. Then, pour in the granulated sugar, brown sugar, vegetable oil, and vanilla extract. Whisk these together until everything is fully incorporated and the mixture is smooth and slightly lighter in color. The brown sugar might leave a few small clumps, and that’s perfectly fine!
Step 4: Combine
Now, pour the wet ingredients into the bowl with the dry ingredients. With a rubber spatula or a wooden spoon, mix just until combined. This is a critical step for tender zucchini bread: whatever you do, DO NOT overmix! Overmixing develops the gluten in the flour too much, which can lead to a tough, dry loaf. A few lumps of flour are actually okay; they’ll disappear during baking. Finally, gently fold in your grated zucchini. The batter will be thick, but the zucchini will release moisture as it bakes.
Step 5: Prepare Filling
Time for that glorious cream cheese swirl! In a small bowl, combine the softened cream cheese, 1/4 cup granulated sugar, the egg yolk, and 1/2 teaspoon vanilla extract. Beat with a hand mixer or a whisk until the mixture is completely smooth and creamy, with no lumps of cream cheese remaining. If your cream cheese isn’t soft enough, it’ll be lumpy, so trust me, room temperature is your friend here!
Step 6: Layer & Swirl
Spoon about half of your zucchini bread batter into the prepared loaf pan and spread it evenly. Next, dollop spoonfuls of the cream cheese filling over the batter. You don’t need to be precise, just try to spread it out a bit. Then, carefully spoon the remaining zucchini bread batter over the cream cheese layer. Now for the fun part: take a butter knife or a skewer and gently swirl it through the batter, creating beautiful ribbons of cream cheese. Don’t overdo it, or you’ll lose the distinct layers; just a few swirls are perfect for that marbled effect. I usually do about 4-5 passes lengthwise and crosswise.
Step 7: Bake
Carefully place your loaf pan in the preheated oven. Bake for 50-60 minutes, or until a wooden skewer or toothpick inserted into the center of the zucchini bread (make sure it’s not poking into a cream cheese pocket!) comes out clean or with just a few moist crumbs attached. Every oven is a little different, so start checking around the 50-minute mark. If the top starts to brown too quickly, you can loosely tent it with aluminum foil for the last 10-15 minutes of baking. The smell alone will bring everyone to the kitchen!
Step 8: Cool & Glaze
Once baked, remove the zucchini bread from the oven and let it cool in the loaf pan for about 10-15 minutes. This allows it to set up and makes it easier to handle. Then, using those parchment paper handles (if you used them!), carefully lift the loaf out of the pan and transfer it to a wire rack to cool completely. This is key for the glaze! Don’t glaze a warm loaf, or it will just melt right off. While the loaf cools, whisk together your powdered sugar, milk, and vanilla for the glaze. Once the zucchini bread is completely cool, drizzle the glaze generously over the top. My family always fights over the glazed edges!
Step 9: Slice & Serve
Once the glaze has set (or if you’re like me, even if it hasn’t quite set!), slice your beautiful zucchini bread with a serrated knife. This helps to get clean cuts without squishing the soft crumb. Serve it at room temperature, or even slightly warmed in the microwave for a few seconds. The aroma alone is enough to make anyone happy, and trust me, it disappears in minutes at my house!
What to Serve It With
This Swirled Cream Cheese Zucchini Bread is incredibly versatile and shines in so many different settings. It’s truly a chameleon of baked goods!
- For Breakfast: My absolute favorite way to enjoy a thick slice is with a hot cup of coffee or a milky latte. The richness of the coffee perfectly complements the sweet and spicy notes of the zucchini bread. A side of fresh berries or a dollop of plain Greek yogurt wouldn’t hurt either, adding a touch of freshness to start your day. It’s a hearty enough start to keep you going, but feels like such a treat.
- For Brunch: If you’re hosting a brunch, this zucchini bread is an absolute showstopper. Slice it elegantly and arrange it on a platter with some fresh fruit, maybe a few sprigs of mint for color. It pairs beautifully with a light quiche, a simple green salad, and, of course, a mimosa or sparkling cider. It adds that homemade touch that guests always appreciate.
- As Dessert: While it’s technically a quick bread, don’t underestimate its dessert potential! Warm a slice ever so slightly, and serve it with a scoop of really good vanilla bean ice cream or a dollop of homemade whipped cream. The warm spices and the cool creaminess are a match made in heaven. It’s perfect when you’re craving something sweet at 10 pm but don’t want to bake a whole cake.
- For Cozy Snacks: This is my go-to afternoon pick-me-up. There’s nothing quite like curling up on the couch with a good book, a steaming mug of chai tea, and a slice of this zucchini bread. It’s pure comfort food, ideal for those moments when you just need a little sweet escape. We always have a slice of this zucchini bread with our Sunday afternoon tea, a tradition my family cherishes.
Top Tips for Perfecting Your Zucchini Bread
I’ve made this cream cheese zucchini bread countless times, and through all the batches, I’ve picked up a few invaluable tricks that I’m so excited to share. These little nuggets of wisdom will ensure your loaf comes out absolutely perfect every single time!
- Zucchini Prep: The Moisture Debate: Here’s a controversial tip! For this particular zucchini bread, I actually *don’t* squeeze out the moisture from the grated zucchini. The natural moisture is what keeps this loaf incredibly moist and tender. If you squeeze it out, you might end up with a drier bread. Just grate it (I prefer a box grater on the large holes for some texture), and toss it straight into the batter. The skin is fine to leave on; it softens beautifully and adds tiny specks of green, plus extra nutrients!
- Mixing Advice: Gentle is Key! I cannot stress this enough: do not overmix your batter once you combine the wet and dry ingredients. Overmixing develops the gluten, making your zucchini bread tough and chewy instead of tender and moist. Mix just until no streaks of dry flour remain, then stop. A few small lumps are perfectly acceptable and will bake out. This is where most people go wrong with quick breads!
- Swirl Customization: Make it Your Own: Want more cream cheese swirl? Go for it! You can increase the cream cheese filling by half if you’re a true fan. You can also add a sprinkle of mini chocolate chips to the cream cheese mixture for an extra decadent twist, or a pinch of cinnamon for more spice. For a more dramatic swirl, try putting half the batter, then all the cream cheese, then the rest of the batter, followed by a deeper swirl.
- Ingredient Swaps: Get Creative (Carefully!):
- Flour: You can swap up to half of the all-purpose flour for whole wheat pastry flour for a slightly nuttier, healthier twist, but stick with regular whole wheat flour can make it a bit dense.
- Oil: Melted unsalted butter can be used instead of vegetable oil for a richer, buttery flavor, though it might result in a slightly less moist crumb.
- Sugar: You can reduce the total sugar in the batter by about 1/4 cup if you prefer a less sweet zucchini bread, especially if you’re using the glaze.
- Add-ins: Feel free to fold in 1/2 cup of chopped walnuts, pecans, or chocolate chips (my personal favorite) to the batter along with the zucchini.
- Spices: If you love more spice, a pinch of allspice or ground ginger can be a wonderful addition to the batter.
- Baking Tips: Trust Your Oven: Ovens vary wildly! Start checking your zucchini bread around the 50-minute mark. If the top starts to brown too much before the inside is cooked, loosely tent it with aluminum foil. This prevents over-browning while allowing the center to finish baking. The toothpick test is your best friend here: it should come out clean or with moist crumbs, not wet batter.
- Glaze Variations: Beyond Vanilla: While the simple vanilla glaze is classic and delicious, don’t be afraid to experiment! A squeeze of lemon juice or orange zest in the glaze can add a bright, zesty note. For a coffee-flavored glaze, dissolve 1/2 teaspoon of instant espresso powder in the milk before mixing. Or, for a simpler finish, a light dusting of powdered sugar is always lovely.
Storing and Reheating Tips
Once you’ve gone to the trouble of baking this amazing Swirled Cream Cheese Zucchini Bread, you’ll want to make sure you enjoy every last crumb! Here’s how I store mine to keep it fresh and delicious.
- Room Temperature: If your kitchen isn’t too warm, you can keep the zucchini bread covered tightly with plastic wrap or in an airtight container on the counter for 2-3 days. Because of the cream cheese swirl, I generally err on the side of caution and prefer to refrigerate it after the first day, especially in warmer climates. Honestly, it never lasts that long in my house anyway!
- Refrigerator Storage: For longer freshness, I highly recommend storing this zucchini bread in the refrigerator. Wrap it tightly in plastic wrap or place it in an airtight container. It will stay wonderfully fresh and moist for up to a week. The chill actually helps firm up the cream cheese swirl a little, making for a lovely texture.
- Freezer Instructions: This zucchini bread freezes beautifully!
- To freeze a whole loaf: Let it cool completely, then wrap it tightly in plastic wrap, followed by a layer of aluminum foil.
- To freeze individual slices: Slice the cooled bread, then wrap each slice individually in plastic wrap before placing them in a freezer-safe bag or container. This way, you can grab a single serving whenever a craving strikes!
It will keep well in the freezer for up to 3 months. When you’re ready to enjoy, simply thaw at room temperature for a few hours (or overnight in the fridge for a whole loaf).
- Glaze Timing Advice: If you plan on freezing the zucchini bread, I usually recommend freezing it *un-glazed*. You can then whip up a fresh batch of glaze and drizzle it over the thawed loaf just before serving. This keeps the glaze from getting watery or sticky during the thawing process. However, if you’ve already glazed it, it will still freeze fine, though the glaze might not look quite as pristine upon thawing.
Frequently Asked Questions
Final Thoughts
There you have it, friends! My absolute favorite Swirled Cream Cheese Zucchini Bread recipe. It’s more than just a way to use up those garden zucchinis; it’s a recipe that brings joy, comfort, and incredible flavor to your kitchen. I truly believe this zucchini bread isn’t just a recipe; it’s a feeling – that warm, cozy, everything-is-right-with-the-world kind of feeling. It’s the perfect blend of wholesome and indulgent, simple to make, and utterly irresistible. Give it a try, and I promise you won’t regret it. If you enjoyed this, you might also love exploring some of my other quick bread recipes, like my Lemon Poppy Seed Loaf or the ever-popular Banana Nut Bread, for more delightful baking adventures. I’d absolutely love to hear about your experience! Leave a comment below, let me know how yours turns out, and if you made any fun customizations. Happy baking, friends!
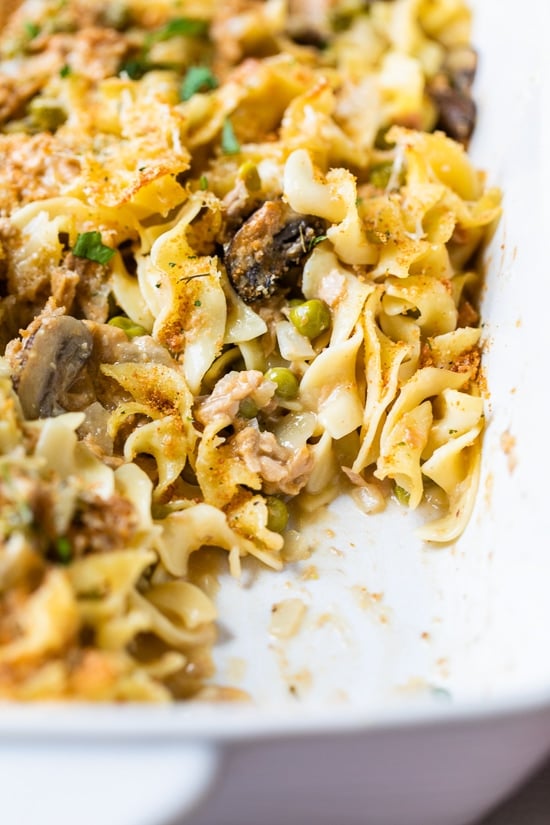
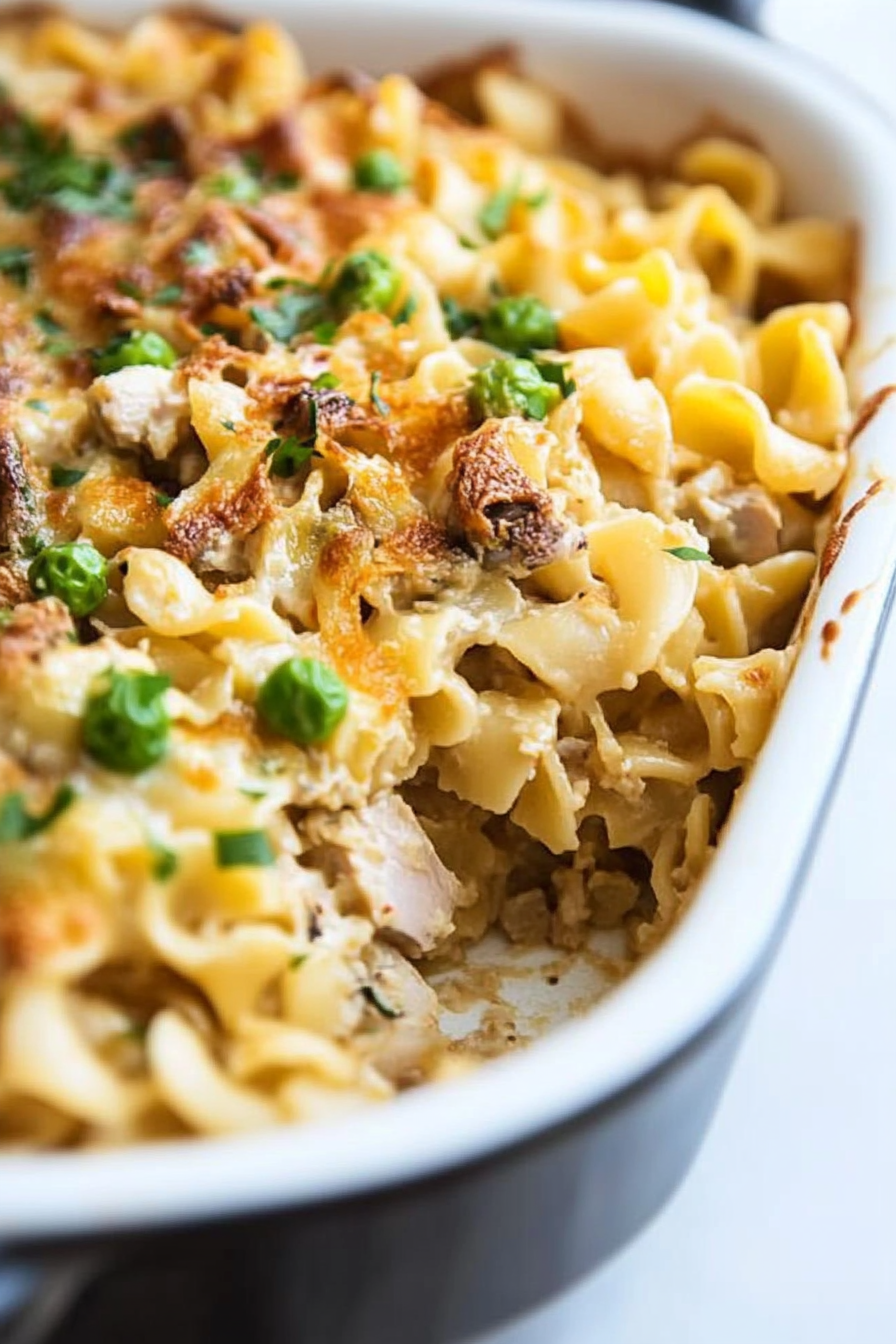
Tuna Noodle Casserole
Ingredients
Method
- Preheat oven to 375°F. Lightly spray a 9x12-inch casserole dish with cooking spray.
- Cook egg noodles in salted boiling water until al dente. Drain and set aside.
- In a large skillet, melt butter over medium heat. Add minced onion and cook until soft, about 5 minutes.
- Stir in flour and salt, cook for 2-3 minutes.
- Gradually whisk in broth, then add milk, stirring constantly until the mixture thickens, about 5-7 minutes.
- Add mushrooms and peas, simmer until tender, about 7 minutes. Stir in drained tuna.
- Remove from heat, stir in cheddar and Parmesan until melted. Combine with cooked noodles.
- Pour mixture into prepared casserole dish. Top with seasoned breadcrumbs and a drizzle of cooking spray.
- Bake for 25 minutes, until golden brown on top.
- Optional: Place under broiler for 2-3 minutes to crisp breadcrumbs. Garnish with chopped parsley.