Peanut Butter Balls How to Make Them Easy
There’s something truly nostalgic about pulling out a loaf of homemade cake, especially when it’s packed with sneaky veggies and topped with a glossy glaze. I remember my grandma’s kitchen, the sweet smell of baked goods drifting through the air, and her sneaking bits of zucchini into her famous afternoon treats. Honestly, this zucchini swirl cake is a tribute to those golden memories—simple, heartfelt, and absolutely delicious. It’s what I turn to when I want a quick baking fix that’s not just sweet but also secretly wholesome. Plus, it’s kinda like a happy surprise for folks who think veggies don’t belong in dessert. My kids ask for this all the time, and I always do this when I need something comforting but still a little special. Trust me, the smell alone brings everyone sprinting to the oven. It’s a dessert you don’t have to feel guilty about snacking on—I usually make it on Sunday afternoons and find myself grabbing a slice in the evening with a cup of coffee. It’s my little slice of happiness; I think you’re going to love it too!
What is Zucchini Swirl Cake?
This zucchini swirl cake is essentially a tender, moist cake layered with a cinnamon-spiced filling, all topped with a smooth, sweet glaze that just melts in your mouth. Think of it as a cozy, welcoming dessert—kind of like a cross between a quick bread and a layered cake, but without any fuss. The name “swirl” comes from how you blend the cinnamon filling into the batter before baking, creating beautiful marbled streaks that are visible when you cut into it. It’s inspired by those muffins with zucchini that are so good you keep asking for “more, please,” but baked as a loaf cake, it becomes perfect for sharing or slicing up for snacks later. The name might make it sound fancy or complicated, but honestly, it’s one of the easiest baked goods in my repertoire—you just need a bit of patience for the filling to swirl and a good eye for layering. Think of it as breakfast, dessert, or a treat—you choose!
Why you’ll love this recipe?
What I love most about this zucchini swirl cake is how it hits those sweet, spicy notes with so little fuss. It’s packed with flavor—think warm cinnamon and vanilla that make your home smell like a bakery the minute it’s in the oven. The best part? It’s effortless to make. I’ve tested this countless times, and trust me, it never fails. You toss everything together quickly, swirl in the filling, and pop it into the oven—no complicated steps or fancy tools needed. Plus, it’s budget-friendly; most of the ingredients are pantry staples or things I keep on hand. And the versatility? Oh, it’s flexible. Swap in honey instead of sugar, add walnuts for crunch, or use coconut milk for extra creaminess. I also love how it can be torn into a snack, sliced for brunch, or dressed up with extra glaze for special occasions. This is one of those recipes that feels cozy and homemade but always impresses—my secret weapon when friends pop by unexpectedly or when I need a quick, comforting treat. It’s a true family favorite—simple, satisfying, and honestly, kinda addictive.
How do I make Zucchini Swirl Cake?
Quick Overview
This cake is basically a one-bowl wonder with a simple batter that you swirl with a cinnamon-sugar mixture before baking. The trick? Don’t overmix the batter—leaving it a little lumpy makes it fluffier and more tender. The filling gets dolloped on, and then a knife does the magic of creating beautiful marble swirls. After baking, you pour a warm, glossy glaze right over the top while the cake is still slightly warm—trust me, it soaks in perfectly and makes every bite irresistible. It’s perfect for someone who loves a fuss-free, hearty slice of cake that’s more than just dessert—this one’s a true comfort food with a homemade touch.
Ingredients
For the Main Batter:
– 1 ½ cups all-purpose flour (unbleached is my favorite, but regular works just fine)
– 1 tsp baking powder
– ½ tsp baking soda
– ¼ tsp salt
– 1 cup granulated sugar
– ½ cup vegetable oil or melted butter
– 2 large eggs
– 1 tsp vanilla extract
– ¾ cup milk (I love almond or oat milk for a subtle nutty flavor)
For the Filling:
– ⅓ cup brown sugar
– 2 tsp cinnamon
– 1 cup finely grated zucchini (squeeze out excess moisture with a clean towel)
– 1 tbsp flour (to coat the zucchini and prevent sinking)
For the Glaze:
– 1 cup powdered sugar
– 2 tbsp milk or cream
– ½ tsp vanilla
– Optional: a dash of lemon juice or cinnamon for extra flavor
Step-by-Step Instructions
Step 1: Preheat & Prep Pan
Set your oven to 350°F (175°C) and grease a loaf pan or line it with parchment paper. I always do this first so I don’t rush later. Make sure the pan is well coated so the cake slides right out—trust me, messy cleanup is never fun. A light spray of cooking spray and a quick dusting with flour or a sheet of parchment does the trick. While the oven warms, you can get your ingredients ready—measure everything out to keep things moving smoothly.
Step 2: Mix Dry Ingredients
In a large bowl, whisk together the flour, baking powder, baking soda, salt, and cinnamon if you’re using the spice in your batter. Mixing the dry ingredients first ensures everything is evenly distributed and your cake will rise well. It’s a simple step but guarantees no weird clumps of baking soda or uneven spices in the final slice. Plus, it feels so satisfying to see all those powders blend into a uniform mixture.
Step 3: Mix Wet Ingredients
In another bowl, whisk together the sugar, eggs, oil (or melted butter), vanilla, and milk until you get a smooth, slightly frothy mixture. This part always feels like magic—how the ingredients come together to form a liquid silk. If you’re short on milk or want a dairy-free version, coconut milk or even applesauce can work here. I tested this with almond milk and it actually made it even creamier—winning! Be sure your eggs are at room temperature for better emulsification, but don’t sweat it if they aren’t.
Step 4: Combine
Pour the wet ingredients into the dry, and gently fold together with a spatula or wooden spoon until just combined. Try not to overmix—the batter will be a bit lumpy, but that’s completely fine. Overmixing can lead to dense, tough cakes, and I learned this trick after a few experimental fails. The batter should be thick but spreadable. If it’s too stiff, a splash more milk helps loosen it up just right.
Step 5: Prepare Filling
In a small bowl, stir together the brown sugar, cinnamon, and a pinch of salt. Fold in the grated zucchini and toss with a tablespoon of flour to help it stay suspended in the batter without sinking. This secret helps keep the filling evenly distributed and ensures you get pockets of cinnamon-sweet zucchini goodness in every slice.
Step 6: Layer & Swirl
Pour half of the batter into your prepared pan, spreading it out evenly. Dollop spoonfuls of the zucchini mixture over the batter, then gently spread the rest of the batter on top. Using a knife or skewer, swirl through the layers to create beautiful streaks—think of it as painting with batter. I like to make a few figure-eight movements for a marbled effect. Don’t overdo it, or you’ll lose the swirl magic. The key is to keep it gentle but thorough.
Step 7: Bake
Pop it into your preheated oven and bake for 45-55 minutes. You’ll know it’s done when a toothpick inserted in the center comes out clean, and the top is golden brown. Every oven is a bit different, so start checking at 45 minutes. My tip? If the top is browning too fast but the inside isn’t baked yet, tent it with foil and keep going. Remember, patience pays off—it’s worth waiting for that perfect crumb.
Step 8: Cool & Glaze
Let the cake cool in the pan for about 15 minutes, then transfer it to a wire rack. While still slightly warm, spoon your prepared glaze all over—it seeps right in and binds everything beautifully. I like to add a tiny splash of lemon juice to my glaze—it brightens the flavor so nicely. Wait until the cake is fully cooled before slicing to keep those beautiful swirls sharp and intact. Trust me, hot cake and glaze get a little messy!
Step 9: Slice & Serve
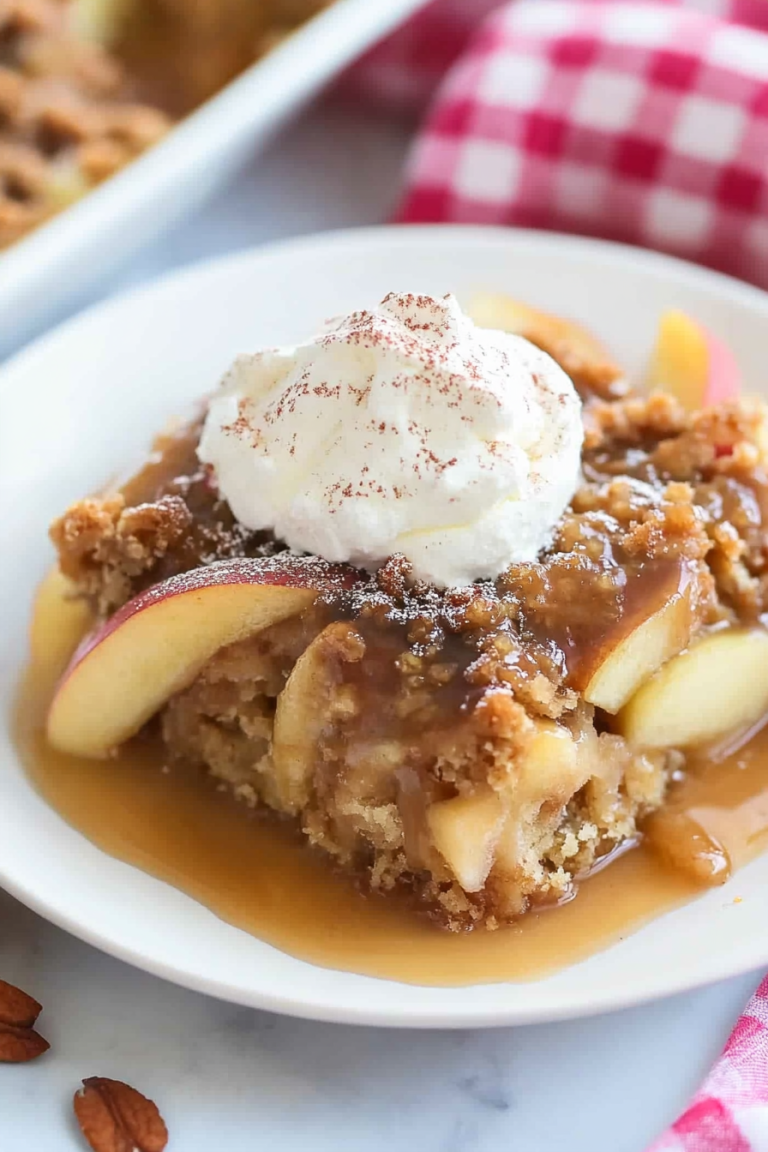
Use a sharp serrated knife to cut neat slices—clean cuts make it look bakery-fancy. Serve at room temperature or slightly warmed, with a cup of coffee or tea. I love this with a dollop of whipped cream or a sprinkle of toasted nuts on top for extra texture. It’s amazing how the blend of cinnamon, zucchini, and vanilla makes each bite taste like a warm hug. My family just devours this—each slice disappearing in minutes!
What to Serve It With
This cake is pretty much a chameleon—great for breakfast, brunch, or simply as a cozy snack. For breakfast, pair it with a steaming mug of coffee or a glass of cold milk—my kids actually ask for this as a morning treat. When I serve it for brunch, I love adding fresh berries and a side of yogurt, making it feel a little more special. As an after-dinner dessert, I drizzle a little extra glaze or even a dollop of whipped cream—something about the sweetness just rounds everything out. For casual afternoons, I slice it up and serve with a hot cup of tea, and trust me, it’s perfect with a book or a chat with friends. My family tradition is to have it alongside fresh fruit or even crumbled into oatmeal—so versatile, and it always makes a room smell divine.
Top Tips for Perfecting Your Zucchini Swirl Cake
Here’s what I’ve learned after making this countless times—that little extra effort makes a huge difference:
- Zucchini Prep: Always squeeze out excess moisture—the wetter the zucchini, the more the cake may turn soggy. Use a clean kitchen towel to get rid of that water. Fresh zucchini is key; avoided the mushy stuff!
- Mixing Advice: Gently fold your ingredients; overmixing leads to dense textures. Keep an eye on the batter—lumpy is good, smooth is not.
- Swirl Customization: Vary your swirl pattern—more playful strokes create a marbled look, while minimal ones keep it neat. Use a skewer for a finesse touch.
- Ingredient Swaps: Butter instead of oil gives it a richer flavor, and coconut sugar can replace regular sugar for a deeper sweetness. Play around, but start with small adjustments so you don’t affect the texture too much.
- Baking Tips: Always check early—ovens can be tricky. A toothpick in the center should come out with a few moist crumbs, not batter. Cover with foil if it browns too fast mid-bake.
- Glaze Variations: Add lemon zest or a splash of bourbon for a touch of sophistication. If your glaze feels too thick, whisk in a bit more milk, but don’t make it too runny—balance is everything.
Honestly, I’ve tried all kinds of tweaks—and these little experiments always make me fall more in love with this cake. Remember, baking is all about enjoying the process and making it your own. Don’t be afraid to adapt ingredients or techniques to suit your taste or pantry — that’s where the magic really happens!
Storing and Reheating Tips
This cake keeps well for up to three days at room temperature if covered with a clean towel or stored in an airtight container. I prefer refrigerating it if I want it to stay fresh longer—wrap slices tightly in plastic wrap or put them in a container to keep the moisture locked in. When reheating, a quick 10-15 second zap in the microwave does the trick, or you can gently warm slices in the oven at 350°F for about 10 minutes—nothing beats a warm piece with melted glaze. If you’ve frozen it, let it thaw at room temperature—preferably overnight—and then warm it up if you like, for that freshly-baked feeling. I don’t suggest adding glaze before freezing because it can get messy or sticky. Once re-heated, the cake is just as moist and flavorful as when it first came out of the oven—trust me on that!
Frequently Asked Questions
Final Thoughts
Honestly, this zucchini swirl cake has become a staple in my kitchen—not just because it’s easy, but because it’s full of cozy, nostalgic flavors that make everyone feel at home. It’s a reminder that baking doesn’t have to be complicated to be special. The swirl pattern is fun to create, and each bite combines that moist crumb with the warm cinnamon-spiced filling—so comforting, so satisfying. And the glaze? It’s that little touch of sweetness that ties everything together, making every slice feel like a treat. I love how adaptable it is, too—swap ingredients, play with flavors, or make it your own. Whether I’m baking with my kids or sneaking a slice after a long day, this recipe always hits the spot. I hope you try it and find your own little piece of happiness in every bite. Happy baking—and I’d love to hear how yours turns out! Feel free to leave a comment or share your twists on this classic comfort cake.
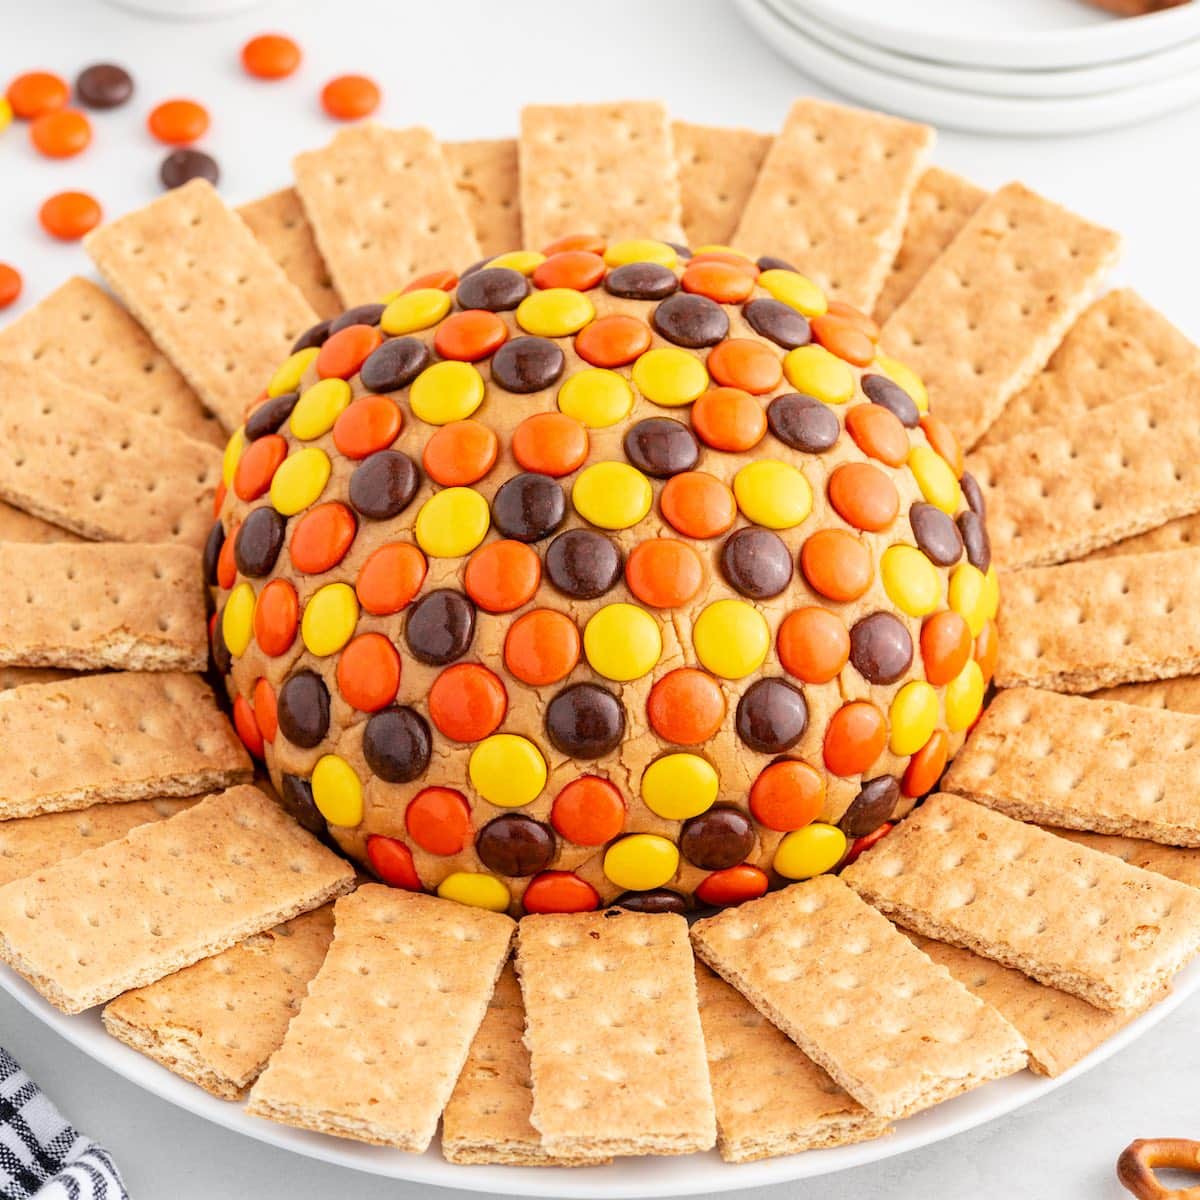
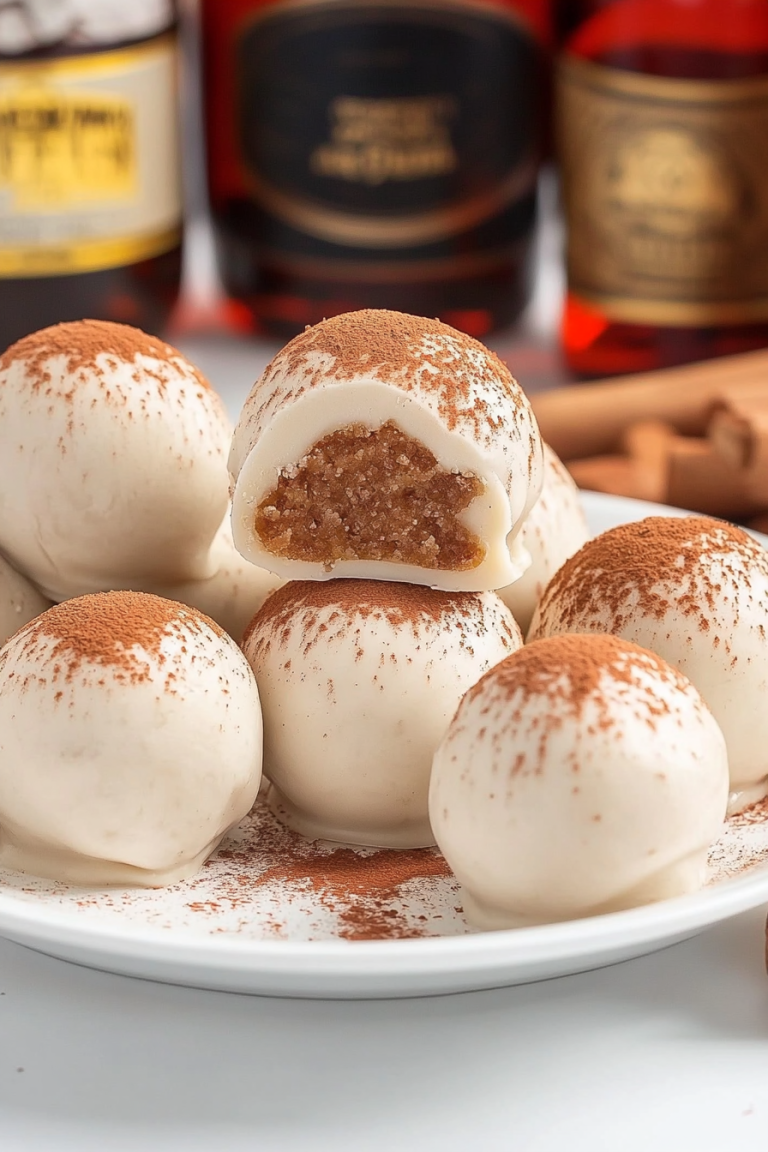
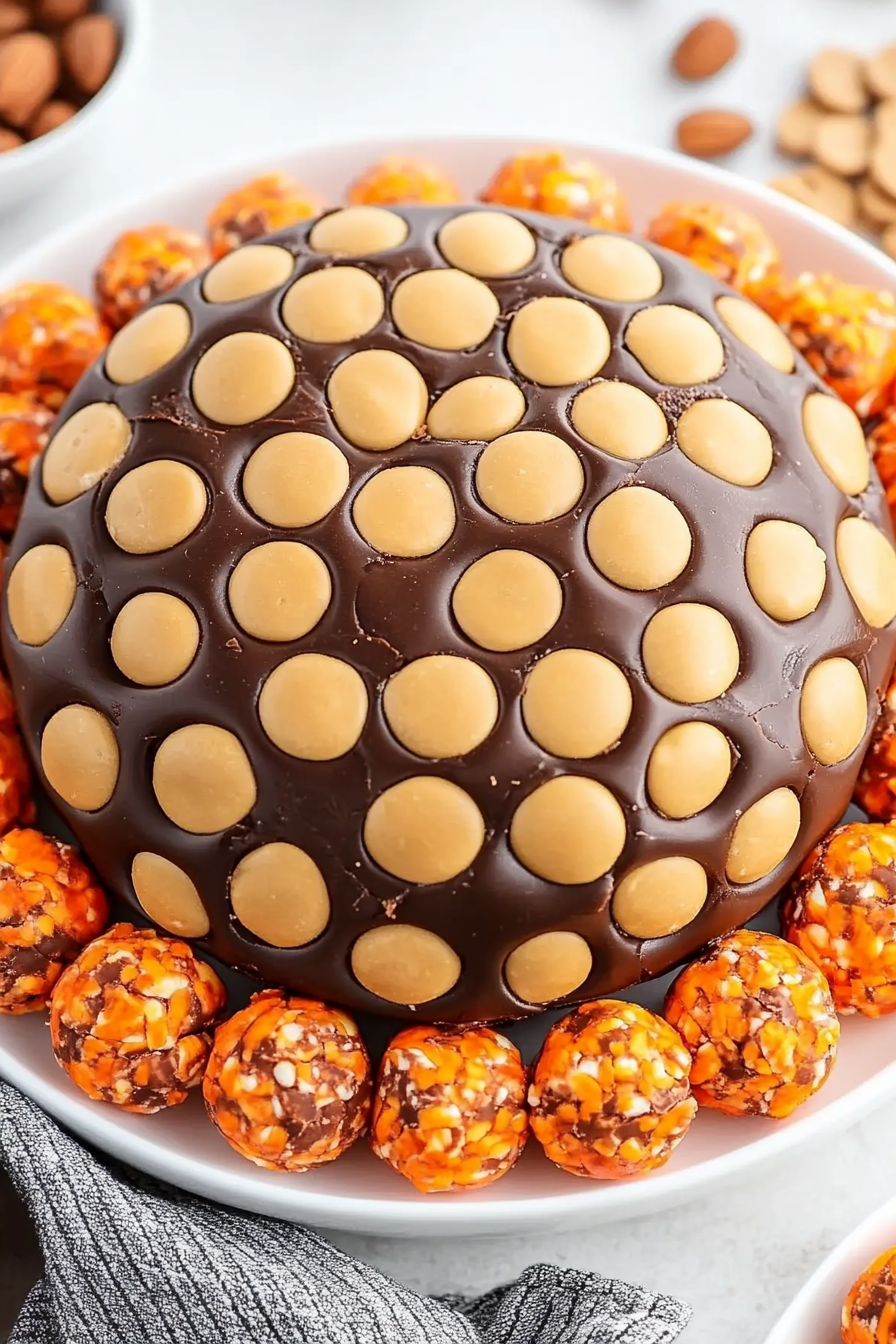
peanut butter balls
Ingredients
Method
- Using a stand mixer or a medium-sized mixing bowl with a handheld mixer on medium-high speed, beat together the softened cream cheese, creamy peanut butter, and vanilla extract for 1.5 to 2 minutes until smooth.
- Add the sifted powdered sugar and continue mixing for another 1 to 1.5 minutes.
- Measure out 2 pieces of plastic wrap in a crisscross pattern. Spoon the peanut butter mixture into the center of the plastic wrap and shape into a ball. Tightly wrap the peanut butter ball in the plastic wrap. Chill in the refrigerator for 2 hours.
- Just before serving, unwrap the peanut butter ball and place it in the center of a serving plate.
- Lightly press the Reese’s pieces onto the surface of the peanut butter ball. Arrange the graham cracker pieces around the decorated peanut butter ball.