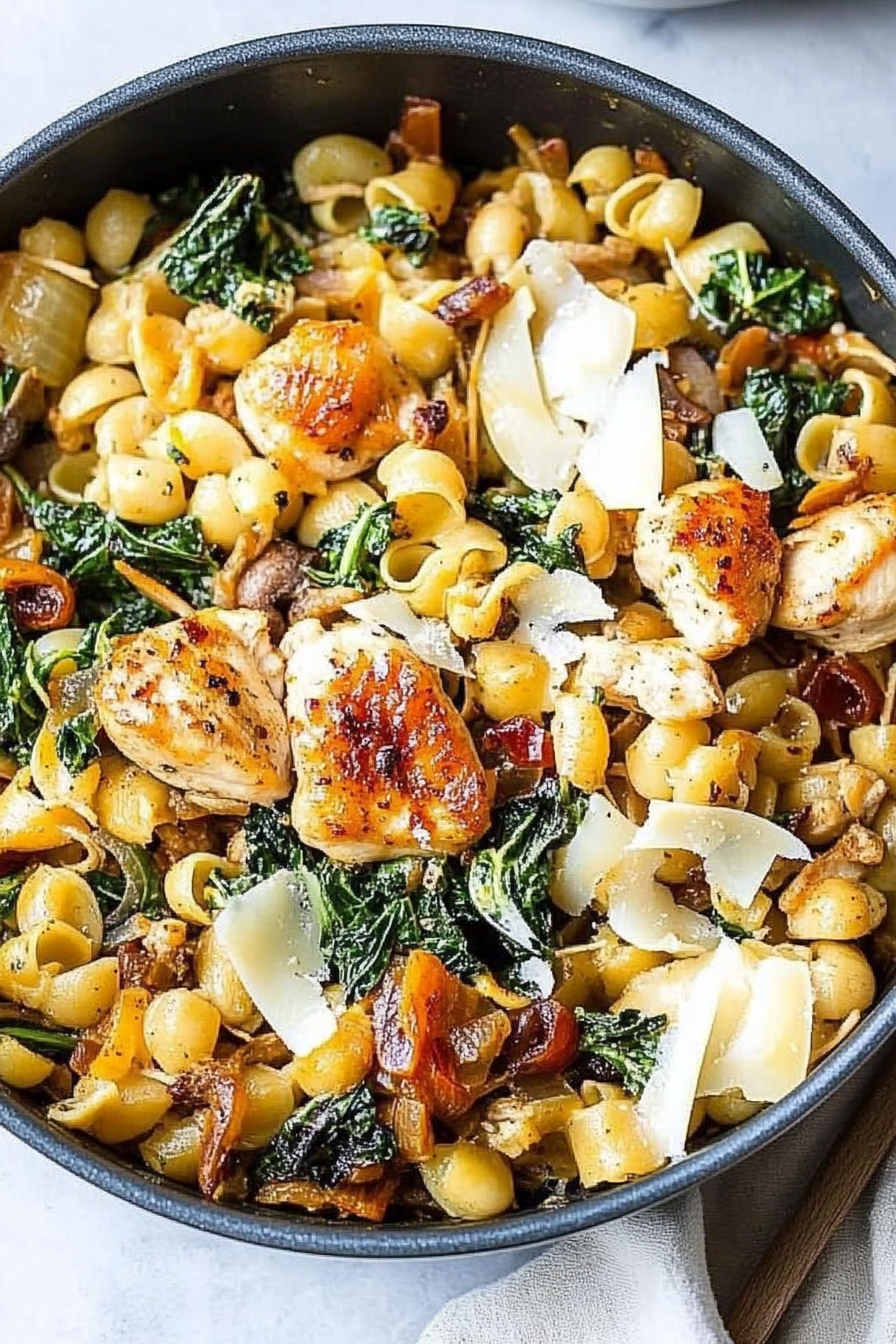
Simple One-Pot Chicken Artichoke Pasta
There’s something truly magical about coming home to the smell of freshly baked bread wafting through the house. I remember as a kid, my mom would always have some kind of banana bread cooling on the counter—golden, slightly crackly on top, with that warm, inviting scent that made everyone in the family gather in the kitchen. Over the years, I’ve tweaked her recipe a little, adding zucchini for moisture and a hint of sweetness, and I swear, it’s become one of my most cherished go-to treats. It’s perfect when you’ve got ripe bananas and a lonely zucchini sitting in the fridge—trust me, this one’s a lifesaver on busy nights or when you just need a little slice of comfort. My kids ask for this all the time, and I honestly don’t mind making it because it’s so straightforward and irresistibly good. Plus, I tested it with almond milk, and honestly, it made the bread even creamier and a little richer—bonus points for that!
What is Moist Zucchini Banana Bread?
This moist zucchini banana bread is basically a cozy hug in loaf form. Think of it as a mash-up of classic banana bread with a surprising twist—adding grated zucchini keeps it extra moist, almost like a tender crumb you don’t want to put down. It’s essentially a quick bread, which means no yeast or rising time—just toss everything together, bake, and enjoy. The combination of ripe bananas and zucchini creates a flavor that’s sweet, slightly cakey, and packed with nutrients. The name might sound fancy, but really, it’s just a smart way to use up those overripe bananas and a forgotten zucchini lurking in your fridge. It’s the kind of recipe that feels like a warm hug—simple, wholesome, and so satisfying to bite into, especially when topped with a drizzle of honey or a quick glaze.
Why you’ll love this recipe?
What I love most about this zucchini banana bread is how forgiving it is—truly, it’s almost impossible to mess up. The flavor? Oh, it’s divine. The bananas bring that sweet, comforting aroma and taste, while the zucchini adds a subtle, fresh note that keeps the loaf moist and tender for days. Plus, it’s a sneaky way to introduce some extra veggies into the kids’ diet—mine are always excited about the “banana bread” part and don’t even realize there’s zucchini hiding inside! This bread is also incredibly versatile. I usually keep it simple with a sprinkle of nuts or a light glaze, but it’s just as delicious plain. It’s budget-friendly, using ingredients I always have on hand, and it’s perfect for breakfast, snack time, or even a light dessert after dinner. What I especially love is how adaptable it is—I’ve experimented with almond milk, coconut sugar, and even added a handful of chocolate chips for special occasions. It’s the kind of recipe that’s always reliable, always cozy, and always a hit.
How do I make Moist Zucchini Banana Bread?
Quick Overview
This recipe is all about simplicity and flavor. You start by grating your zucchini and mashing the bananas, then mixing dry ingredients in one bowl and wet in another. Gently fold everything together—no overmixing here, or the bread might turn dense—and pour the batter into a loaf pan. After a quick bake, you’ll have a loaf that’s moist, fragrant, and just waiting for that sweet glaze. I love how fast it comes together, and I always do this when I want something warm and homemade without all the fuss. The smell alone is enough to make everyone rush to the kitchen. Plus, it keeps in the fridge for days, if it lasts that long!
Ingredients
For the Main Batter:
– 2 cups all-purpose flour (I like adding a little whole wheat for extra nutrition)
– 1 teaspoon baking soda
– 1/2 teaspoon salt
– 1 teaspoon ground cinnamon (trust me on this, it elevates the flavor)
– 1/2 cup packed brown sugar or coconut sugar (for a caramel note)
– 1/4 cup honey or maple syrup (optional but adds moisture)
– 1/4 cup olive oil or melted coconut oil
– 3 ripe bananas, mashed
– 1 cup grated zucchini (squeeze out excess moisture)
– 2 large eggs (or flax eggs for vegan tweak)
– 1 teaspoon vanilla extract
For the Filling:
– Optional: 1/2 cup chopped walnuts or chocolate chips
– To add variety, a handful of blueberries or cranberries work beautifully here.
For the Glaze:
– 1/2 cup powdered sugar
– 1-2 teaspoons milk or lemon juice
– A splash of vanilla
– Optional: a sprinkle of cinnamon or zest for extra flavor
Step-by-Step Instructions
Step 1: Preheat & Prep Pan
Preheat your oven to 350°F (175°C). Line a loaf pan with parchment paper or butter it lightly—I do a quick spray with non-stick spray and a dusting of flour for extra assurance. Having everything ready makes the process smooth and quick, especially when your kitchen smells amazing!
Step 2: Mix Dry Ingredients
In a large bowl, whisk together the flour, baking soda, salt, and cinnamon. This step ensures all those flavors and leaveners are evenly distributed—no pockets of baking soda or spice! I always do this first because it makes the next steps easier and prevents clumps.
Step 3: Mix Wet Ingredients
In a separate bowl, mash the bananas really well—my kids love helping with this part—it’s almost like play. Then whisk in the eggs, oil, honey, and vanilla until smooth. Mix in the grated zucchini last; squeezing out excess moisture beforehand prevents the batter from becoming too watery.
Step 4: Combine
Pour the wet mixture into the dry ingredients—gently fold with a spatula or wooden spoon until just combined. It’s crucial not to overmix; otherwise, the bread might turn out dense. You want a nice, fluffy crumb, not a rubbery one!
Step 5: Prepare Filling
If you’re adding nuts or chocolate chips, fold them into the batter now. I love a few chopped walnuts for added crunch, but chocolate chips are always a hit—especially if you’re sneaking some for the kids’ sake.
Step 6: Layer & Swirl
Pour the batter into your prepared pan. For an extra pretty touch, sprinkle some more nuts on top or swirl in some caramel or nut butter for a marbled look. If you want a swirl effect, dollop some of the filling on top and use a toothpick to create a gentle swirl.
Step 7: Bake
Bake for about 50-60 minutes, or until a toothpick inserted in the center comes out clean. Every oven is different, so start checking around the 50-minute mark. My trick is to listen for that slight crackle on top—it’s the sign it’s almost done!
Step 8: Cool & Glaze
Let the bread cool in the pan for at least 15 minutes, then transfer to a wire rack. If you’re making a glaze, mix powdered sugar with milk and vanilla until smooth. Drizzle it over the slightly warm loaf—the glaze will seep into all those nooks and crannies, making every bite just a little more special.
Step 9: Slice & Serve
This bread slices beautifully when cooled somewhat—fingertip gentle! Serve it plain, with butter, or with a dollop of Greek yogurt. It’s best enjoyed the day it’s made but still holds up well for a couple of days, wrapped tightly. My family loves it toasted the next morning, and the smell is always enough to stir excitement in everyone!
What to Serve It With
This zucchini banana bread is super versatile. For breakfast, I love pairing it with a strong cup of coffee or a frothy matcha latte. The sweetness balances perfectly with a splash of cream or even a smear of almond butter. When I serve it for brunch, I stack slices with fresh fruit and a drizzle of honey, maybe a side of crispy bacon or some scrambled eggs. It’s also a fantastic after-dinner dessert—warm slices with a scoop of vanilla ice cream or a dusting of powdered sugar turn it into something truly indulgent. For a quick snack, I keep it wrapped in foil—perfect for little hands to grab when hunger strikes. I’ve even made mini muffins out of the batter; they bake faster and are adorable for kid parties or on-the-go snacks. Honestly, this bread has become my secret weapon for happy mornings and cozy afternoons alike.
Top Tips for Perfecting Your Moist Zucchini Banana Bread
After making this recipe dozens of times, I’ve learned a few tricks to make it even better. First, always squeeze out as much moisture as you can from the zucchini—wet zucchini can make the bread too dense or soggy. I use a clean dish towel or paper towels for that. When mixing, I gently fold the ingredients rather than stirring vigorously, which keeps the bread fluffy rather than dense. If you want a prettier marbled effect, dollop some cinnamon-sugar or nut butter into the batter and swirl—trust me, it’s worth the little extra effort. Substituting almond or coconut flour works, but you might need to adjust the liquids a bit; I tested almond flour with good results, just keep an eye on moisture levels. When baking, I always place the loaf on the middle rack and rotate it halfway through—this helps it bake evenly. For the glaze, I prefer a slightly thicker mixture so it stays put, but you can make it runnier if you want a more delicate drizzle. I’ve also experimented with adding citrus zest or a splash of bourbon for grown-up flavors, which makes it even more tempting. Honestly, the key is patience—don’t take the loaf out too early, and let it cool completely before slicing. That way, it holds together beautifully and looks as cozy as it tastes.
Storing and Reheating Tips
This bread stays tender and moist if you store it properly. For short-term storage, keep it wrapped in plastic wrap or in an airtight container at room temperature for up to two days—any longer, and it’s best in the fridge. I like to reheat slices in the microwave for about 10-15 seconds, just enough to warm the insides without making it dry. If you want to keep it for longer, pop it in the freezer wrapped tightly in foil and then in a zip-top bag—this way, it can last up to three months. To enjoy, thaw it at room temperature or reheat with a quick blast in the microwave. One tip I swear by is adding a fresh drizzle of glaze or a light dusting of powdered sugar if the bread has been refrigerated overnight—they bring back that just-baked softness and sweetness. And if you’re really in the mood, a quick toast with a smear of butter or jam makes leftovers taste almost like fresh. Trust me on this—part of the joy of baking this bread is how forgiving it is, and it keeps well enough that you can enjoy slices all week long.
Frequently Asked Questions
Final Thoughts
If you’re like me, you’ll find that this moist zucchini banana bread kind of becomes a part of your life—something you turn to when you want something cozy but still nutritious. It’s a wonderful way to use up ripe bananas and zucchini, especially when those extras start to pile up. My kids devour it sliced straight from the fridge, and I love that I can adapt it to whatever I have in the pantry—whole wheat flour, coconut sugar, walnuts, or even vegan options. It’s sturdy enough for breakfast or afternoon tea, yet sweet enough to feel indulgent. Plus, I always get compliments when I bring it to family gatherings or friend brunches. I hope you try it and make it your own—trust me, this one will disappear in minutes at your house too! Feel free to leave a comment below with your tweaks or favorite add-ins—I’d love to hear how it turns out. Happy baking, and enjoy every moist, fragrant bite!
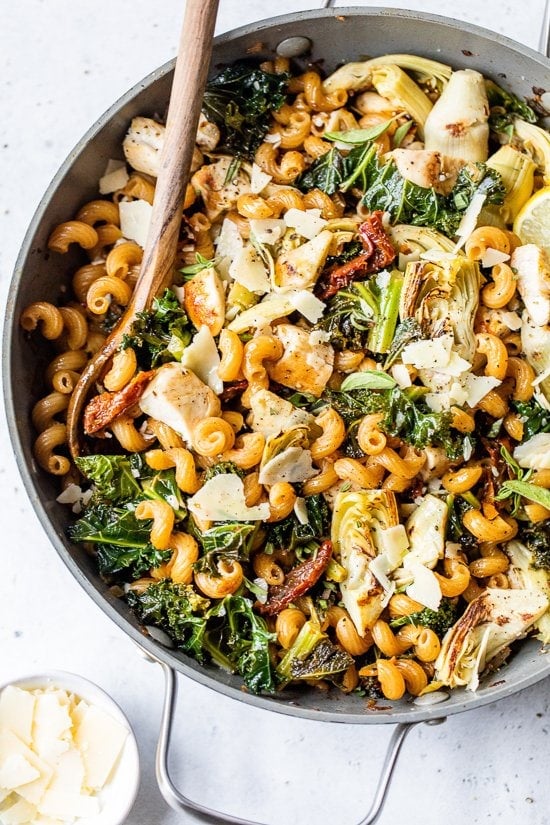
One-Pot Chicken
Ingredients
Method
- Heat a large non-stick skillet with high sides over medium heat. Lightly mist with olive oil spray.
- In two batches, add artichokes and cook until dark golden, about 3-4 minutes. Remove to a plate.
- Season chicken with 0.75 teaspoons salt and 0.125 teaspoons black pepper.
- Add chicken to the pan and cook for 5 minutes, turning halfway. Transfer to a plate.
- Add onions, garlic, and 1 teaspoon oregano. Cook until onions are softened, about 4 minutes.
- Stir in sun-dried tomatoes and kale, sprinkle with 0.75 teaspoons salt and 0.25 teaspoons black pepper.
- Add lemon juice and 2.25 cups water, stir in cavatappi, cover, and cook for 10 minutes.
- Cut chicken into 1-inch pieces.
- Add chicken and artichokes back to the pan. Reduce heat and cook covered for 5 minutes or until pasta is al dente and chicken is heated through.
- Remove cover, stir, and cook off excess liquid if needed.
- Serve topped with parmesan, remaining oregano, and season to taste.