Spiced Whiskey Bites How to Make Them
There’s something about the smell of freshly baked muffins that instantly makes me feel like I’m wrapped in a cozy blanket. Maybe it’s those warm notes of melted chocolate mingling with ripe bananas, or maybe it’s just the nostalgia of weekend mornings spent with my family, everyone gathered around the kitchen table. These chocolate banana muffins are my little secret to creating that happy, comforting atmosphere any day of the week. I’ve made this recipe so many times that I swear I could do it in my sleep—yet each batch still feels like a small miracle when the aroma hits the house. They’re sweet but not overly so, moist without being dense, and chocolatey enough to satisfy that craving that hits around 10pm—trust me on this one, it’s my go-to when I want a treat but don’t want to turn on the oven for a full cake. They disappear in minutes at my house, and I always do a little happy dance when I see my kids happily nibbling away. Enough said—let’s get baking!
What is chocolate banana muffin?
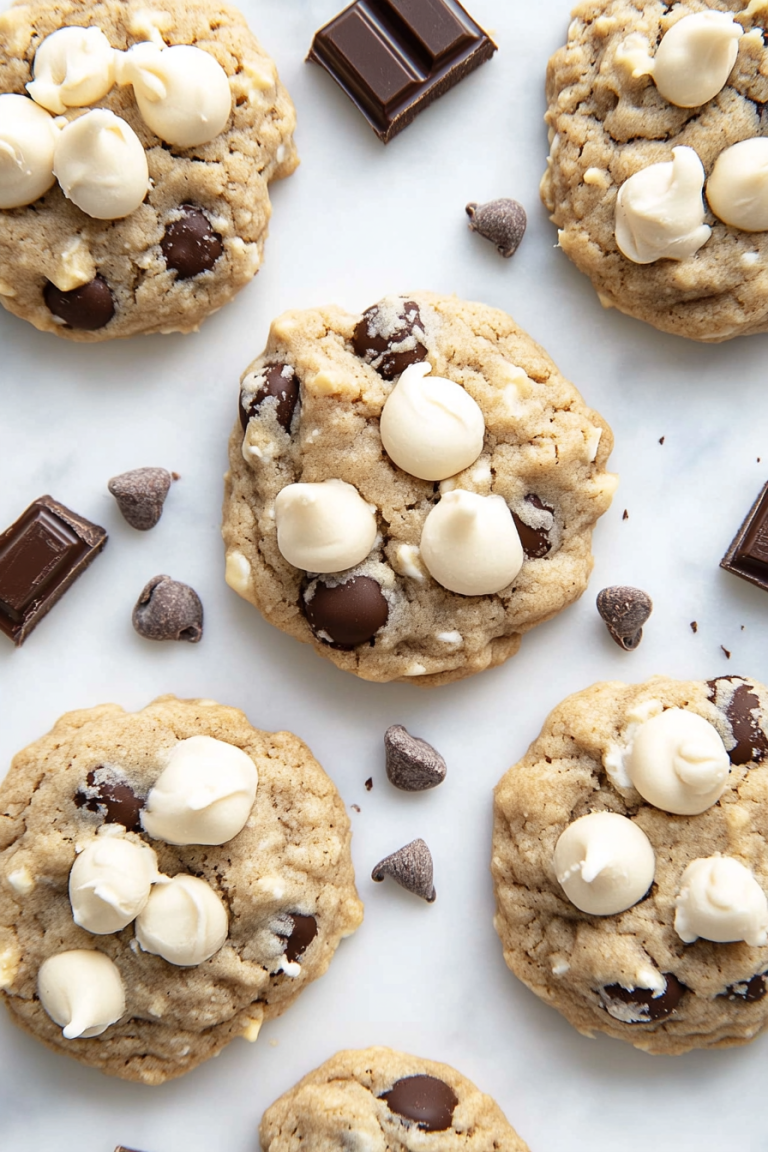
Think of these as a delightful twist on a classic banana bread—only in portable, snackable muffin form. They’re essentially soft, moist muffins packed with mashed bananas and chocolate chunks — the kind of combo that makes your taste buds dance. The name? Well, it’s simple, descriptive, and a little irresistible. These muffins are a perfect example of how humble ingredients like ripe bananas and chocolate can come together into something totally addictive. They’re great for breakfast, a quick snack, or even a sweet finish after dinner. What I love most about this is how forgiving the recipe is—you can swap in different nuts, throw in some berries, or even use vegan chocolate if you’re feeling that vibe. It’s almost like a blank canvas that I keep coming back to because it’s just so satisfying, easy, and honestly, better than most store-bought treats.
Why you’ll love this recipe?
What are some of the best things about these chocolate banana muffins?
- Flavor:This isn’t just sweet—it’s rich, chocolaty, and full of comforting banana warmth. The combination of ripe banana
- Simplicity: No fancy ingredients or equipment needed. Most of what you need is probably already in your pantry and fruit bowl. Plus, they come together fast, making them perfect for busy mornings or when sudden sweet cravings strike.
- Cost-efficient: Ripe bananas and a handful of chocolate chips don’t cost much, but the happiness they bring is priceless. I always think, why buy a fancy snack when I can make something so much better at home?
- Versatility: Love nuts? Add a handful of chopped walnuts or pecans. Want them more decadent? Extra chocolate chips on top! Or, for a healthier spin, switch out white sugar for coconut sugar—either way, they turn out fantastic.
What I love most about this recipe is how forgiving it is. I’ve tested it with different types of flour, milk substitutes, and even added some shredded coconut—each version turns out delicious. Plus, it’s a hit with everyone I’ve shared it with. My kids ask for these all the time, and they’re gone before I know it. Really, they’re my secret weapon during busy mornings or when I need to sneak in a bit of sweetness without overdoing it.
How to Make Chocolate Banana Muffins
Quick Overview
This recipe is as simple as mashing bananas, mixing together the wet ingredients, and folding in the dry stuff—all in one bowl. Then, you add chocolate chunks, fill your muffin tins, and bake. It’s quick, forgiving, and the batter comes together in about 10 minutes. The best part? No fancy prep or weird ingredients—just straightforward, good honest baking that feels like a warm hug. You’ll love how fast it makes your kitchen smell incredible, and I promise, once you try these, they’ll become a staple in your home too.
Ingredients
For the Main Batter:
- 3 ripe bananas (the softer, the better for sweetness and moisture)
- 1/2 cup granulated sugar or coconut sugar (adjust for sweetness)
- 1/4 cup vegetable or melted coconut oil
- 2 large eggs (or flax eggs for vegan version)
- 1 teaspoon vanilla extract
- 1 1/2 cups all-purpose flour (or whole wheat for a healthier twist)
- 1 teaspoon baking soda
- 1/2 teaspoon salt
For the Filling:
- 1 cup chocolate chips (semi-sweet, dark, or milk — whatever floats your boat)
- Optional: 1/2 cup chopped nuts or shredded coconut
For the Glaze (if you want a little extra charm):
- 1/4 cup powdered sugar mixed with a squeeze of lemon or a splash of milk
- or a drizzle of melted chocolate — totally optional but so pretty and tasty
Step-by-Step Instructions
Step 1: Preheat & Prep Pan
Set your oven to 350°F (180°C). Line a muffin tin with paper liners or grease it well—trust me, these will stick if you’re not careful! I always do this first so I’m not scrambling later. You want your oven to be nice and hot when it’s time to go in, and having everything ready makes the process seamless.
Step 2: Mix Dry Ingredients
In a small bowl, whisk together the flour, baking soda, and salt. This little step ensures everything is evenly distributed, which means muffins that rise nicely and don’t taste like flour pockets. I’ve learned that overmixing after adding liquids ruins the tender crumb, so I keep it light here.
Step 3: Mix Wet Ingredients
In a big mixing bowl, mash the bananas until smooth—my favorite trick is to use a fork and then give it a quick whisk. Add the sugar, oil, eggs, and vanilla, and whisk until it’s all combined and luscious. It should look a little glossy, almost like a caramel-colored pudding. If you’re feeling fancy, I’ve tested this with almond milk for even creamier texture, and honestly, it’s so good I keep doing it.
Step 4: Combine
Pour the dry ingredients into the wet and fold gently with a spatula just until combined—don’t overmix! It’s okay if there are a few streaks. Overworking the batter makes muffins dense and tough, and nobody wants that. Just enough to get everything moistened.
Step 5: Prepare Filling
Stir in the chocolate chips (and nuts if you’re using them). This little pocket of melting chocolate? It’s what makes each bite feel like a little celebration. For extra flavor, I sometimes add a handful of shredded coconut here—it adds a fun texture.
Step 6: Layer & Swirl
Fill each muffin cup about 3/4 full. Pro tip: Use an ice cream scoop or a big spoon for even portions. For that pretty marbled look, I sprinkle a few extra chocolate chips on top and use a toothpick or skewer to swirl the batter slightly—nothing fancy, just enough to create a marbled effect.
Step 7: Bake
Pop them into the oven and bake for 18-22 minutes. Check doneness by inserting a toothpick in the center—if it comes out clean, they’re ready! Every oven is different, so I usually start checking around 18 minutes, especially if my muffin tops are rising beautifully. You’ll smell the chocolate and bananas nearly immediately—it’s magic.
Step 8: Cool & Glaze
Let the muffins cool in the pan for about 5 minutes before transferring to a wire rack. This ensures they set properly and won’t fall apart. If you’re feeling fancy, drizzle with a little powdered sugar glaze or melted chocolate once they’re completely cooled—it’s the perfect finishing touch!
Step 9: Slice & Serve
Enjoy warm with a cup of coffee or a glass of cold milk. These are great slightly warm, but honestly, they taste just as good at room temperature. My kids love stacking them on a plate, and I love sneaking a mini muffin or two after they go to bed. Trust me, you’ll want to hide a few for yourself!
What to Serve It With
I usually keep these muffins handy for a quick breakfast on busy mornings. They pair beautifully with a steaming cup of coffee or a glass of cold milk (my kids still love dipping them!). Sometimes I make a little brunch spread with fresh fruit, yogurt, and a few extra chocolate chips on the side—you know, for presentation. When family comes over or it’s a weekend treat, I like to add a dollop of whipped cream or a drizzle of caramel for that wow factor. These muffins are also fantastic as an after-school snack—they satisfy that sweet tooth without feeling heavy. My favorite tradition is to serve them with a big glass of cold milk and watch my kids dive in, cheeks all puffed out—heart full, stomach happy. Honestly, they’re perfect for any occasion that calls for a little extra love in the form of baked goods.
Top Tips for Perfecting Your Chocolate Banana Muffins
After making these countless times, I’ve picked up a few tricks that make all the difference. Here’s what I’d share:
- Zucchini prep: Not in this recipe, but if you ever want to sneak in some shredded zucchini, just squeeze out excess moisture with a paper towel—banana muffins stay moist even without it.
- Mixing advice: Mix dry and wet ingredients just until combined. Overmixing leads to dense muffins. Think of it as a gentle folding—no stirring frenzy!
- Swirl customization: Use a skewer to swirl the batter when filling the muffin cups. It creates a pretty marbled effect and makes each muffin look special. Just drag it gently through the batter for that perfect visual.
- Ingredient swaps: Want dairy-free? Use coconut oil and almond milk! For extra flavor, toss in a handful of chopped dark chocolate instead of chips—trust me, it melts beautifully.
- Baking tips: Oven temperatures can vary, so start checking around 18 minutes. Don’t overbake or they’ll dry out—nobody wants a crumbly muffin!
- Glaze variations: Switch it up with cream cheese frosting or simple dusting of powdered sugar. I love a squeeze of lemon in the glaze—it adds a zing that cuts through the sweetness beautifully.
One thing I discovered after multiple trials: using brown sugar instead of white adds a caramel note that takes these muffins to a whole new level. Sometimes I toss in a handful of oats for texture, and they still turn out perfect. The key is to keep tasting and adjusting until you find what suits your family’s taste buds best.
Storing and Reheating Tips
These muffins are so good they never last long in my house! To keep them fresh, I usually store them in an airtight container at room temperature for up to two days. If I want to keep them for longer, I pop them in the refrigerator—just make sure to cover tightly so they don’t dry out. They reheat really well in the microwave for about 15 seconds, or you can warm them in a low oven for 10 minutes. Freeze individual muffins wrapped tightly in plastic wrap, then place them in a resealable bag. They’ll stay good for up to a month, perfect for stockpiling. Just thaw at room temperature or warm briefly before enjoying. If you’re serving them for a special breakfast or brunch, I recommend adding a little extra chocolate chips or a drizzle of glaze after reheating—makes them feel freshly baked all over again!
Frequently Asked Questions
Final Thoughts
If you’re looking for a muffin that’s cozy, chocolatey, and packed with flavor, these chocolate banana muffins are it. They’re the kind of treat that makes your home smell like happiness, and every bite feels like a warm hug from someone you love. I’ve made these so many times that I can do it blindfolded—and honestly, they’ve never disappointed. Whether you’re whipping them up for a quick breakfast, a last-minute snack, or a special occasion, I promise they’ll bring smiles around your table. They’re endlessly adaptable—swap ingredients, add extras, or keep it simple. The core is always delicious. So go ahead, indulge a little. I can’t wait to hear how yours turn out—happy baking, friend!
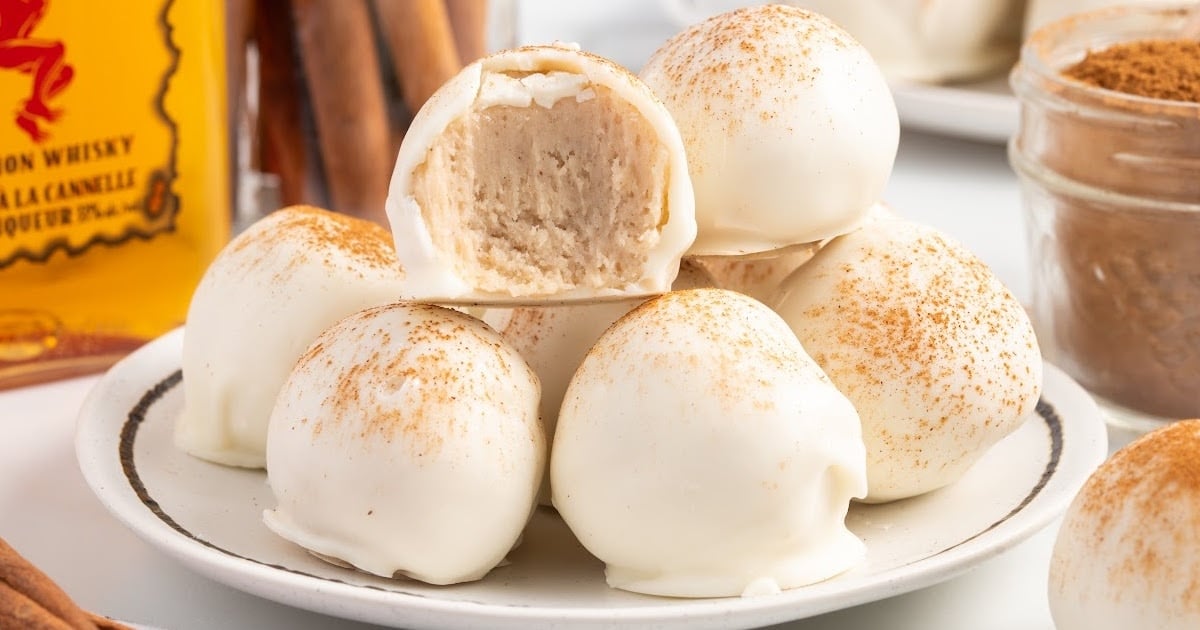
fireball whiskey balls
Ingredients
Method
- Heat treat the dry cake mix by microwaving in 30-second intervals until it reaches 165°F. Let cool completely.
- Line baking sheets with parchment paper or silicone mats.
- Beat the cream cheese with ground cinnamon until fluffy.
- Mix in the cake mix and one ounce of Fireball whiskey until thoroughly combined.
- Refrigerate the mixture for 2 hours.
- Scoop mixture with a 1-inch cookie scoop and roll into balls.
- Melt the vanilla almond bark according to package instructions until smooth.
- Dip each ball into the melted almond bark using a fork, then tap off excess.
- Place the coated balls on prepared sheets and sprinkle with ground cinnamon.
- Refrigerate for at least 30 minutes before serving.