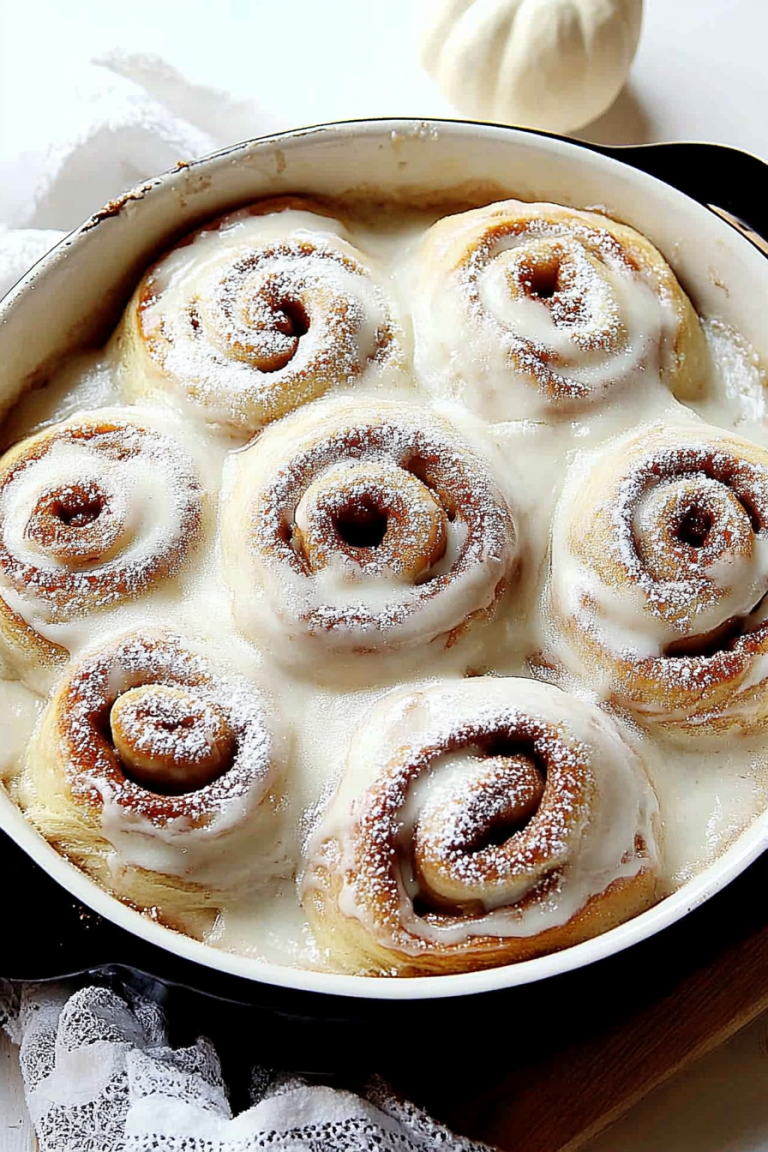
Sweet Strawberry Tart Pie Recipe
There’s something about the smell of freshly baked cake that immediately takes me back to childhood — that warm, cozy feeling of walking into my grandma’s kitchen, where she’d have a treat waiting just for us. This zucchini banana cake is like that, wrapped in a slightly nostalgic hug. It’s got this incredible moistness from the zucchini, coupled with the sweet, rich flavor of bananas, making each bite feel comforting and just a little indulgent. And the best part? It’s the type of dessert I can whip up on a busy weekday or serve at a weekend get-together without any fuss. Honestly, I’ve made this countless times, and it never fails to disappear in minutes at my house. My kids ask for this all the time — it’s become a bit of a family favorite, perfect when I want something sweet but don’t want to haul out the big cake pan. Trust me, once you try this, it’ll become your go-to too. Plus, the vanilla glaze on top? Pure magic — it’s the kind of finishing touch that makes it feel special even if you’re just sneaking a slice after dinner.
What is Moist Zucchini Banana Cake with Creamy Vanilla Glaze?
This isn’t your typical banana bread or zucchini muffin; it’s a soft, tender cake that’s got a delightful moisture packed from grated zucchini and ripe bananas. Think of it as a cross between a bread and a classic sponge cake, but with a little more personality. The zucchini keeps the cake ultra moist and tender, almost like carrot cake but a bit lighter, while the bananas lend natural sweetness and moisture. It’s essentially a quick bread turned cake, with a vanilla glaze that melts on your tongue and adds just the right amount of sweetness without overpowering the subtle flavors. The name might sound fancy, but I promise it’s a simple, forgiving recipe anyone can make — perfect for lazy Sundays, afternoon teas, or even when you’ve got a sneaky bunch of zucchini in the fridge that needs using up.
Why you’ll love this recipe?
Honestly, what I love most about this zucchini banana cake is how incredibly versatile and forgiving it is. It’s one of those recipes that makes you feel like a pro in the kitchen even if you’re not; I’ve tested this with overripe bananas, a dash of cinnamon, or even a splash of almond milk, and it turns out beautifully every time. The flavor is just unbeatable — moist, sweet, with a lovely hint of vanilla that’s pleasantly subtle. The aroma alone when it’s baking is enough to bring everyone running into the kitchen — that warm, comforting smell of bananas and vanilla combined with the earthy scent of zucchini. Plus, it’s budget-friendly, using pantry staples you probably already have on hand, like flour, sugar, and some zucchini! What I also love is how adaptable this cake is — you can easily dress it up for a special brunch or keep it simple for a quick snack. And let’s not forget that creamy vanilla glaze on top — it’s the kind of finish that elevates this humble loaf into something truly irresistible.
How do I make a Moist Zucchini Banana Cake with Creamy Vanilla Glaze?
Quick Overview
This cake comes together in just a handful of steps: start by grating fresh zucchini, mash ripe bananas, mix all your wet ingredients, then fold in your dry ingredients. Pour the batter into a prepared pan, add the filling swirl if you like, bake until golden, and finish with a smooth vanilla glaze. It’s genuinely super straightforward, and the best part? It’s pretty hard to mess up. I love how flexible the process is — you can double the batch for a crowd or swap ingredients based on what you’ve got. The scent of it baking never fails to make my kitchen feel like a little slice of heaven.
Ingredients
For the Main Batter:
– 2 medium zucchinis, grated (about 1 ½ cups)
– 3 ripe bananas, mashed
– 2 cups all-purpose flour (or a gluten-free blend if needed)
– 1 cup granulated sugar
– 1 teaspoon baking powder
– ½ teaspoon baking soda
– ½ teaspoon salt
– 1 teaspoon vanilla extract
– ½ cup vegetable or melted coconut oil
– 3 eggs (or flax eggs for vegan options)
For the Filling (optional but highly recommended):
– ½ cup cream cheese, softened
– ¼ cup powdered sugar
– 1 teaspoon vanilla
– ¼ cup chopped walnuts or chocolate chips (for extra flavor and texture)
For the Glaze:
– 1 cup powdered sugar
– 2-3 tablespoons milk (or almond milk)
– ½ teaspoon vanilla
– A pinch of salt
– Food coloring or extracts for fun variations (optional)
Step-by-Step Instructions
Step 1: Preheat & Prep Pan
Start by preheating your oven to 350°F (175°C). Grease your favorite loaf pan or round cake pan — I like lining mine with parchment for easy removal. If you’re using a metal pan, a little butter and flour or non-stick spray works perfectly. This little prep trick ensures nothing sticks, and you get neat slices every time.
Step 2: Mix Dry Ingredients
In a large bowl, whisk together the flour, sugar, baking powder, baking soda, and salt. This step may seem small, but good mixing prevents clumps and ensures the leavening agents distribute evenly, giving you that nice rise and fluffy texture.
Step 3: Mix Wet Ingredients
In another bowl, mash the bananas until smooth — I always do this with a fork or a potato masher. Grate the zucchini and squeeze out some excess moisture. I’ve learned the hard way that too much moisture can make the cake a bit dense, so I blot the grated zucchini with a paper towel before adding. Whisk in the eggs, oil, vanilla, and a splash of milk until well combined. The mixture should be fragrant and slightly frothy.
Step 4: Combine
Add the wet mixture to the dry ingredients, gently folding to combine — don’t overmix! Overmixing can lead to a dense, rubbery cake. Stir just until you see no dry spots. The batter will be thick and moist—just perfect for spooning into your pan.
Step 5: Prepare Filling
If you’re adding the cream cheese filling, mix the softened cream cheese with powdered sugar and vanilla until creamy. You can also fold in chopped nuts or chocolate chips. This layer adds a wonderful tang and richness. Set aside until ready to layer.
Step 6: Layer & Swirl
Pour half of the batter into the prepared pan. Drop dollops of the cream cheese mixture on top, then cover with the remaining batter. Using a toothpick or skewer, gently swirl the layers together to form a marbled effect — this is my favorite part! It looks pretty, and the flavor combo is delightful.
Step 7: Bake
Pop it into the oven and bake for about 50-60 minutes. Start checking at 50 minutes by inserting a toothpick into the center — if it comes out clean, you’re good to go. Ovens vary, so mine sometimes takes a little longer. Once baked, let it sit in the pan for about 10 minutes before transferring to a wire rack to cool completely. The smell alone will have your family hanging around the kitchen.
Step 8: Cool & Glaze
While your cake cools, make the glaze by whisking powdered sugar, vanilla, and enough milk to reach a slightly thick but pourable consistency. Once the cake is cooled, pour or drizzle the glaze over the top, letting it cascade down the sides. The glaze sets quickly — trust me, this step makes all the difference in elevating the look and flavor.
Step 9: Slice & Serve
Use a sharp serrated knife to slice into your cake. I like waiting until it’s only slightly warm for the perfect moist texture — it’s soft, fragrant, and just sweet enough. Serve with a cup of coffee or tea, maybe a drizzle of extra glaze if you’re feeling fancy. Honestly, this cake is just as good on its own, but a dollop of whipped cream or a few fresh berries never hurts.
What to Serve It With
For breakfast, I adore pairing this with a steaming mug of coffee, perhaps a dollop of whipped cream or a sprinkle of extra nuts for crunch. It’s my go-to when I have overnight guests, as the smell alone makes everyone feel at home. During brunch, serve it sliced with a side of fresh fruit and maybe some yogurt or mascarpone. It’s fancy enough to impress but simple enough to whip up on a weekday. As a dessert, I love warming a slice and topping it with vanilla ice cream or a dusting of cinnamon. It’s also fantastic for a cozy snack — my kids love tearing off a piece after school. This cake is my secret weapon — it’s quick, forgiving, and completely satisfying. And if you want to make it kid-friendly, jazz up the glaze with a little chocolate or swap walnuts for colorful sprinkles. Truly, it’s one of those recipes that you can customize endlessly and still get rave reviews!
Top Tips for Perfecting Your Moist Zucchini Banana Cake with Creamy Vanilla Glaze
Over the years, I’ve picked up a few tricks to make this cake even better. First, always squeeze out excess moisture from the zucchini — that’s the trick to a fluffy, tender crumb. I’ve tested this with different zucchinis, and the drier, the better — otherwise, you risk a dense cake. When mixing your wet ingredients, don’t overdo it; a gentle fold preserves the cake’s airy texture. If you want a more pronounced vanilla flavor, add a splash of vanilla bean paste or vanilla extract to the glaze. For the swirl pattern, I’ve found that gently zigzagging the toothpick or skewer gives the most artistic look — plus, it adds visual interest that always amazes guests. As for ingredient swaps, I’ve tested whole wheat flour — it works fine, but the cake is slightly denser, so I usually stick with all-purpose for that perfect lightness. If you’re vegan, substitute mashed flax eggs and dairy-free milk, and it still turns out beautifully — just keep an eye on the baking time, as some pans cook faster or slower.
One thing I learned the hard way: don’t open the oven door too early or too often — it can cause your cake to sink. Also, set the timer a little extra time and check with a toothpick — ovens vary, and you don’t want to overbake or underbake. When glazing, I prefer slowly pouring the glaze over the cooled cake, starting from the center and letting it drip down the sides. If the glaze is too runny, just add a little more powdered sugar; if it’s too thick, thin it with a tiny splash of milk. Trust me, a little patience during the glazing process makes all the difference in achieving that beautiful, shiny finish.
Storing and Reheating Tips
If you have leftovers (which I find hard to believe, because this usually disappears fast!), store the cake in an airtight container at room temperature for up to two days. Cover loosely to prevent the glaze from smudging. For longer storage, pop it into the fridge — just give it a quick 15-second zap in the microwave to bring back some of its initial moistness. You can also freeze slices individually wrapped in plastic wrap, then thaw at room temperature or in the fridge when needed. The flavor actually improves after a day or two in the fridge, letting the vanilla glaze deeply infuse into the moist cake. Just a heads-up: if you’re storing it with the glaze, keep it in the fridge, or the glaze might get a little sticky. When reheating, microwave for about 20 seconds, just enough to warm it without drying out the cake. Honestly, this cake is a keeper — simple to store, easy to reheat, and always makes my kitchen smell amazing.
Frequently Asked Questions
Final Thoughts
This moist zucchini banana cake has become one of my favorite ways to use up ripe bananas and zucchinis that are just begging to be transformed into something delicious. It’s the kind of treat that’s humble yet special, simple but memorable. Every time I bake it, I’m reminded of the magic of combining everyday ingredients and turning them into comfort food that feels like a big warm hug. The smell alone makes everyone in the house slow down and gather around — almost like a little family tradition in the making. Plus, with that luscious vanilla glaze and optional fillings, it feels fancy enough to serve at a brunch or family gathering but easy enough for a spontaneous weeknight dessert. Honestly, it’s one of those recipes that I keep coming back to because it’s forgiving, fuss-free, and always leaves everyone asking for more. I’d love to hear how yours turns out, so don’t forget to leave a comment or share your tweaks. Happy baking — and enjoy every bite!
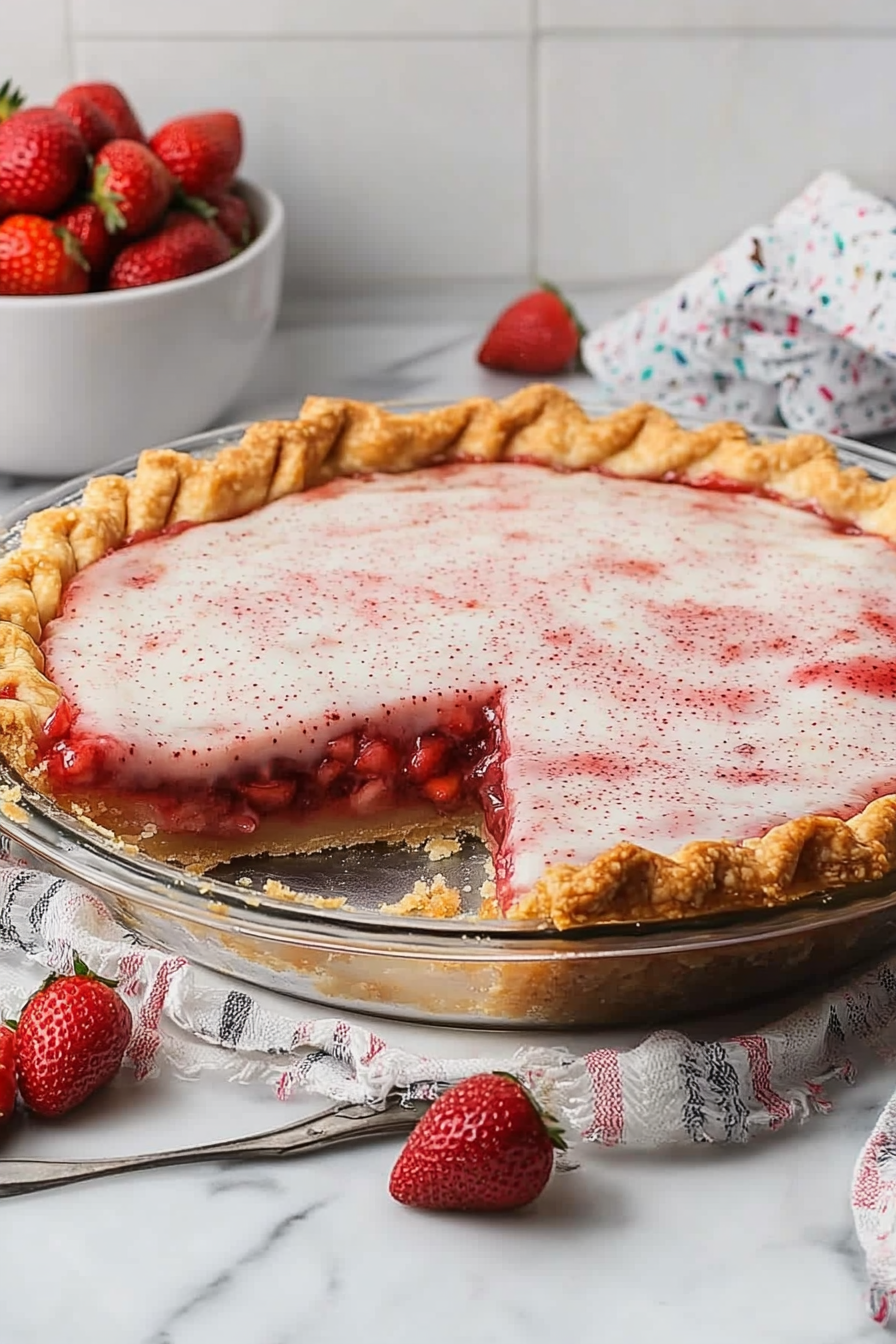
Strawberry Pie
Ingredients
Method
- To a large sauce pot (4 quart), over medium heat, add the fresh diced strawberries and granulated sugar. Cook the strawberries for 10-12 minutes or until most of their juices have been released and the liquids start to rapidly boil. Be sure to stir often to avoid the liquids from burning or bubbling over.
- To a small bowl, whisk together the fresh lemon juice and cornstarch until smooth and all the cornstarch has dissolved completely. This will create a slurry to thicken the strawberry filling even more.
- While whisking constantly, slowly pour in the cornstarch slurry to the boiling strawberries and cook for another 1-2 minutes or until the strawberry filling is thick and glossy. Do not stop whisking to ensure that no lumps form from the added cornstarch slurry.
- Remove the cooked strawberry filling from the heat, stir in the vanilla extract, then transfer the strawberry filling to a large shallow bowl to allow the filling to cool for approximately 30 minutes before adding to the prepared pie crust. It should be warm to the touch (not too hot) when added to the pie crust.
- Adjust the racks in your oven to allow the pie to be baked in the lower two-thirds of the oven and preheat the oven to 375°F.
- Place a 9 inch pie dish onto a large rimmed baking sheet. The baking sheet will catch any strawberry syrup that may bubble over and will make transporting the pie to, and from, the oven easier.
- Remove the refrigerated pie crusts from their packaging and unroll the pie crusts according to the package instructions. Place one pie crust into the bottom of the 9 inch pie dish pressing the bottom and sides up against the pie dish. The second crust will be used for the top of the pie.
- Whisk the egg in a small bowl to create an egg wash for the pie crust.
- Using a pastry brush, lightly brush the bottom and sides of the pie crust inside the pie dish. Be sure to cover the entire surface of the pie crust as this will help to ensure the strawberry pie filling does not make the crust soggy when baked and will also make sure the top and bottom crust seal well when crimped together. Set aside the remaining egg wash for brushing the top crust.
- Pour the slightly warm strawberry filling into the prepared pie crust.
- Top the pie with the second pie crust. Using a sharp paring knife, trim the excess crust from the outer edges of the pie dish. Using the tines of a fork, crimp the edges of the pie crust to seal the top and bottom crusts together.
- Lightly brush the entire top surface of the strawberry pop tart pie with the egg wash. You can discard any excess egg wash you may have when done.
- Using a sharp paring knife again, cut 4 - 1 inch slits into the top crust to allow steam to escape as the pie bakes. This will help prevent the liquids from bursting out the edges of the crust and bubbling over.
- Bake the strawberry pop tart pie in the lower two-thirds of your oven for 40-45 minutes or until the crust is golden brown. Remove the pie, and the rimmed baking sheet, from the oven and allow the strawberry pop tart pie to cool completely (for a minimum of 5-6 hours), or until it feels fully cool to the touch, at room temperature before adding the glaze.
- Once the pie has cooled completely, make the glaze by adding the sifted powdered sugar, 2 tablespoons whole milk, and vanilla extract to a medium bowl and whisk until smooth. The consistency of the glaze should be thick yet still easily spreadable. If needed, you can add more whole milk, 1 teaspoon at a time, until it reaches a thick yet spreadable consistency, similar to melted white chocolate.
- Using a large spoon, slowly add the glaze over the surface of the cooled pie, spreading to an even coating, being careful not to go as far as the outer crimped edges. This is reminiscent of the classic pop tart pastries. Evenly sprinkle the rainbow sanding sugar over the glaze.
- Allow the glaze to harden and set (minimum of 30 minutes) before slicing and serving this strawberry pop tart pie.