Crispy Frozen Cream Delight How To Make It
There’s just something about biting into a warm, tender slice of zucchini cake that takes me right back to lazy Sunday mornings at my grandma’s house. The smell of cinnamon, the gentle sweetness, and that quiet comfort it brings — it’s pure nostalgia. This recipe is one I’ve made countless times, especially when I’ve got a few zucchinis sitting in the garden or on the counter that need using up. It’s easily become a family favorite and a secret little treat we look forward to. I love how versatile it is—breakfast, brunch, or a cozy snack with tea — and honestly, it’s one of those dishes that tastes even better the next day. Plus, it’s a sneaky way to get kids to eat their veggies without any fuss. I always do this when I need something quick, satisfying, and honestly, just a little bit special. Trust me — once you try it, you’ll see why it’s become a staple in my kitchen.
What is a Moist Zucchini Breakfast Cake?
This moist zucchini breakfast cake is essentially a fuss-free, tender cake packed with grated zucchini, warm spices, and just enough sweetness to satisfy those morning cravings. Think of it as a cross between bread and muffin — moist, hearty, and packed with flavor. The name might make you think it’s only for breakfast, but honestly, I’ve served it as dessert, brunch, or even a late-night treat when I want something sweet but don’t want to turn my oven into a cookie factory. It’s like a nicer, more refined version of zucchini bread, but with a cake-like texture that melts in your mouth. The best part? It’s pretty forgiving and adaptable — I’ve test-driven it with almond milk, honey instead of sugar, and even added a handful of walnuts for crunch. It’s all about shining a spotlight on those fresh zucchinis, which are at their peak right now, making this a super seasonal, wholesome choice.
Why you’ll love this recipe?
There are a few things I always tell people about this zucchini cake — and I mean it from my heart. First off, the flavor is just *so* good. The cinnamon and a hint of vanilla really elevate the zucchini’s mild flavor, making every bite taste warm, cozy, and downright addictive. What I love most about this is how simple it is to whip up; you only need one bowl for the batter, and it comes together quickly. No fancy gadgets or long ingredient lists. Plus, it’s budget-friendly, relying on common pantry staples like flour, sugar, and eggs — no specialty ingredients needed. And the best part? It’s incredibly versatile. Serve it warm with a drizzle of that sweet glaze or enjoy it plain; either way, it’s delicious. My kids actually ask for seconds (and thirds), which is a small miracle in our busy household. I also love that this recipe is flexible: you can add different nuts, swap out ingredients, or make it gluten-free with a little tweak. Honestly, it’s comfort in cake form, and I always keep a batch in the fridge — it’s my go-to when I need an instant hug in food.
How do I make a Moist Zucchini Breakfast Cake?
Quick Overview
This cake comes together in just a few simple steps. First, grate and salt your zucchini to remove excess moisture — a trick I learned after countless experiments to keep the cake super moist but not soggy. Then, whisk together your dry ingredients and wet ingredients separately before folding everything together gently. Layer in the batter with a spoonful of cinnamon-sugar swirled through the middle for a delightful surprise when you slice it. Bake until golden, then cool slightly before drizzling with that luscious vanilla glaze. It’s honestly one of the easiest recipes I’ve ever made, and the smell alone will draw everyone into the kitchen. What makes this special is the texture: moist, tender, with just enough crumb, and the aroma—oh, the aroma—is out of this world. It’s perfect for busy mornings or a relaxed weekend brunch when you want something homemade but fuss-free.
Ingredients
For the Main Batter:
- 2 cups grated zucchini (roughly 2 medium zucchinis; I always swear by fresh, in-season zucchinis, but frozen works if you thaw and squeeze out the moisture)
- 1 1/2 cups all-purpose flour (or gluten-free blend if you prefer)
- 1/2 teaspoon baking soda
- 1 teaspoon baking powder
- 1 teaspoon ground cinnamon
- 1/4 teaspoon salt
- 1/2 cup granulated sugar (or coconut sugar for a healthier twist)
- 1/4 cup light brown sugar (adds a caramel note)
- 1/3 cup vegetable or melted coconut oil
- 2 large eggs
- 1 teaspoon vanilla extract
For the Filling:
- Optional: 2 tablespoons brown sugar mixed with 1 teaspoon cinnamon for swirling
- Feel free to sprinkle chopped nuts or blueberries inside for extra texture and flavor
For the Glaze:
- 1/2 cup powdered sugar
- 1-2 tablespoons milk or almond milk (add gradually to reach your preferred consistency)
- 1/2 teaspoon vanilla extract
Step-by-Step Instructions
Step 1: Preheat & Prep Pan
Heat your oven to 350°F (175°C). Grease your loaf pan or line it with parchment paper — I like using a simple metal loaf pan for that rustic look. This step ensures nothing sticks and makes clean-up so much easier. Set aside.
Step 2: Mix Dry Ingredients
In a large bowl, whisk together the flour, baking soda, baking powder, cinnamon, and salt. These dry ingredients give structure and flavor — don’t skip this step, trust me on this, it evenly distributes the leaveners and spices into every bite.
Step 3: Mix Wet Ingredients
In a separate bowl, beat the eggs, then whisk in the sugars, oil, and vanilla. The mixture should be smooth and slightly frothy. If your eggs are cold, I recommend warming the oil just a bit — it’ll help everything combine better. I’ve tested this with almond milk, and it’s actually made the cake even creamier, so don’t be afraid to experiment.
Step 4: Combine
Pour the wet mixture into the dry and fold gently with a spatula. Don’t overmix — just until combined. Lumps are okay; this keeps the batter tender. If you notice any pockets of dry flour, gently fold those in too. Overmixing makes the cake dense, and nobody wants that.
Step 5: Prepare Filling
If you’re using the cinnamon-sugar swirl, sprinkle it over the batter now. If you want extra texture, fold in chopped nuts or a handful of blueberries at this stage too. Just fold lightly so the swirls stay pretty when baked.
Step 6: Layer & Swirl
Pour about half of the batter into your loaf pan. Then, add a spoonful of cinnamon-sugar or nuts on top, followed by the remaining batter. Use a skewer or a butter knife to gently swirl through the batter to create lovely marbled patterns. It’s the little touches like this that make the cake feel special.
Step 7: Bake
Pop it into the oven and bake for 45–50 minutes. The top should be golden brown, and a toothpick inserted in the center should come out clean. The smell alone will make everyone stop what they’re doing and head straight to the kitchen. If it’s browning too fast, tent it loosely with foil and continue baking.
Step 8: Cool & Glaze
Let the cake cool in the pan for about 10 minutes, then transfer to a wire rack. Once slightly cooled, drizzle generously with your vanilla glaze. The warmth will help it seep into every crevice — totally addictive! I usually wait until the cake is just barely warm to keep the glaze from running off too much.
Step 9: Slice & Serve
Use a sharp serrated knife to slice this cake — it’s super moist, so gentle is key. Serve it warm with extra glaze on top, or store it for later. I love to enjoy a slice on lazy mornings with a hot cup of coffee or a tall glass of milk. It’s just so cozy, like a hug in baked form.
What to Serve It With
This zucchini cake is so versatile, I often serve it differently depending on the occasion. For breakfast, I love pairing it with a hot latte or a strong black coffee — a burst of caffeine and carbs to start the day right. Plus, it’s nice to serve it with fresh fruit on the side, like sliced strawberries or blueberries, to give it a little extra freshness. When I have guests over for brunch, I’ll cut it into thicker slices and present it alongside yogurt and a drizzle of honey; it’s fancy enough to impress yet still feels homey.
As a dessert, I like adding a splash of whipped cream or a dash of vanilla ice cream. The sweetness and the moist crumb are already indulgent, so it doesn’t need much fuss. Sometimes, I sprinkle a little extra cinnamon or toasted nuts on top; it’s the perfect finishing touch. My kids ask for this all the time after school — especially on chilly days when they want something warm and sweet. Honestly, it’s become a little family tradition.
Top Tips for Perfecting Your Moist Zucchini Breakfast Cake
After making this dozens of times, I’ve picked up a few tricks worth sharing. First, always salt your grated zucchini and let it sit for about 10 minutes before squeezing out the excess moisture. This little step makes a huge difference in keeping your cake moist but not soggy—you want that tender crumb, not a puddle.
Second, don’t overmix the batter. A few lumps here and there are totally fine — it keeps the cake from becoming dense and rubbery. When it comes to swirling in the cinnamon-sugar, use a light hand — you want pretty marbling, not a mess! Also, I tested this with different flours and found that a gluten-free blend works just as well, though the texture might be slightly grainier; just add an extra splash of milk or a few more eggs if it feels too dry.
Regarding baking, oven temperatures can vary. I always check around the 45-minute mark by inserting a toothpick — if it comes out clean, you’re good. If not, give it another 5 minutes. I learned this the hard way — my first attempt was a bit underbaked. Also, if you want to make this ahead, keep it wrapped in plastic in the fridge, and warm slices briefly in the microwave before serving to revive that just-baked softness.
For the glaze, I like to keep it simple, but adding a dash of lemon zest or a pinch of nutmeg can change its flavor entirely. The glaze should be thick enough to hold on the top without slipping off — if it’s too runny, just add a little more powdered sugar. If it’s too stiff, a splash of milk will loosen it right up. Trust your senses on this — it’s all about that perfect drizzle.
All these little tips have helped me troubleshoot and refine this recipe into something I really love. Don’t be discouraged if your first batch isn’t perfect — with a little practice, you’ll get the hang of it and start experimenting with your own tweaks. That’s what makes baking fun, right?
Storing and Reheating Tips
This cake keeps surprisingly well, actually. If you’re planning to eat it within a day or two, store it at room temperature wrapped tightly in plastic or in an airtight container; it’ll stay moist and fresh for about 2 days. Just make sure it’s completely cooled before wrapping — warm cakes can get soggy or develop condensation, which is never fun.
For longer storage, I recommend refrigerating it — wrapped tightly, it can last up to a week. To reheat, just warm a slice in the microwave for about 20 seconds; it refreshes the moisture and heat beautifully. If you prefer it cold, it’s still delicious — just a tad denser, but the flavors still shine through.
If you want to freeze slices, wrap them individually in plastic wrap, then place them in a freezer bag. They’ll keep for about 3 months. Thaw in the fridge overnight or reheat gently in the microwave. A quick reheat will bring back that fresh-baked texture and aroma.
As for the glaze, it’s best added fresh — either before serving or right before eating. If you’re storing the cake with the glaze on, keep it in the fridge, but note that the glaze might soften or slightly dissolve over time. Either way, it’s a small detail that’s worth it for that shiny, sweet topping.
Frequently Asked Questions
Final Thoughts
Honestly, this moist zucchini breakfast cake has become one of my culinary happy places. It combines everything I love — that homey, comforting vibe, the ability to customize, and the fact that it’s a one-bowl wonder that comes together so effortlessly. I love how the smell of cinnamon and vanilla fills the house as it bakes, and the first warm slice instantly brightens any day. Whether you’re on a busy weekday morning or lounging on a lazy weekend, it’s the kind of treat that makes everyone smile. Plus, it’s a sneaky veggie addition that doesn’t scream “healthy,” but secretly is. I hope you’ve enjoyed hearing about it as much as I love making it. Give it a try, tweak it to your liking, and let me know how yours turns out. Happy baking, friends! And don’t forget to share a slice with someone you love.
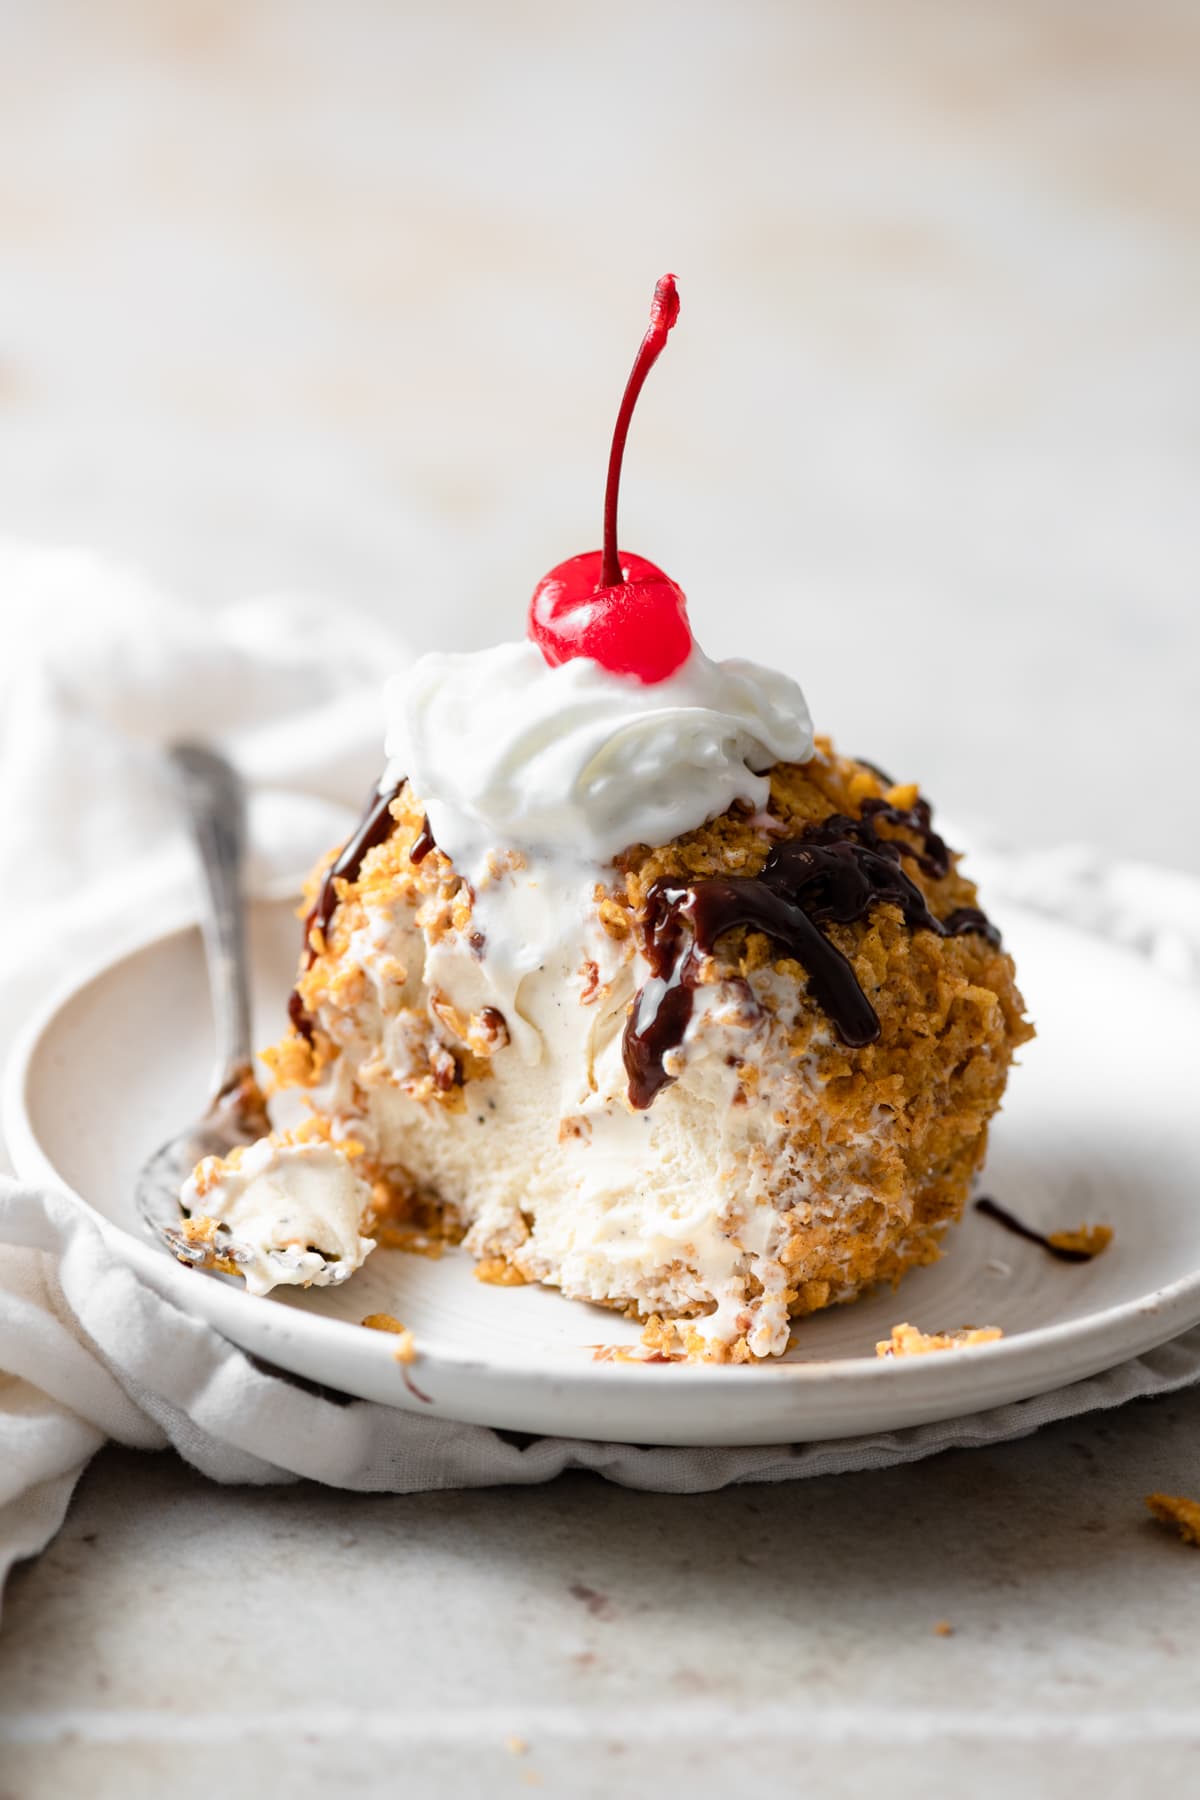
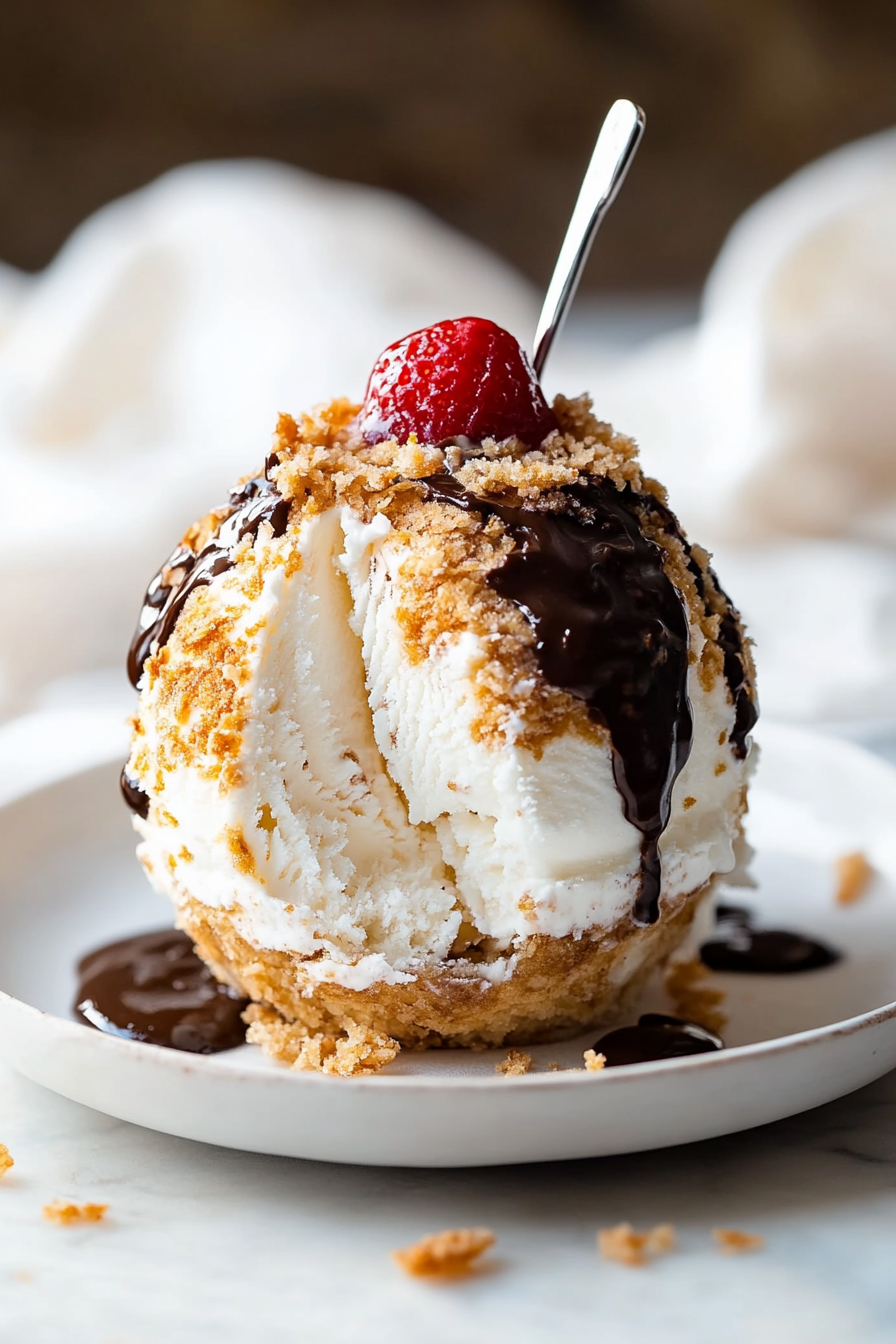
fried ice cream
Ingredients
Method
- Crush cornflakes: Pour cornflakes into a resealable bag, seal and crush into small bits.
- Melt butter in a skillet over medium heat. Stir in crushed cornflakes and cinnamon, cook until golden and fragrant, about 2 minutes.
- Remove mixture from heat and cool in a shallow dish.
- Shape the ice cream into balls and place on a tray.
- Roll each ice cream ball in the cooled cornflake mixture, pressing to coat thoroughly.
- Freeze the coated ice cream balls for 10-15 minutes to re-solidify.
- Serve with toppings like honey, chocolate sauce, whipped cream, and cherries.