Delicious Oreo Heath Cake Recipe
There’s something about the smell of baking that instantly turns a regular afternoon into a cozy, soul-warming moment. I remember my grandma’s kitchen overflowing with the sweet aroma of cinnamon and fresh-baked goodies, and this zucchini coffee cake takes me right back there. It’s one of those recipes I keep coming back to — not just because it’s ridiculously delicious, but because it’s also surprising. Who would’ve thought that zucchini, yes zucchini, could make a cake so tender, moist, and packed with flavor? I always do this when I want something sweet but don’t want to fuss over a complicated dessert. It’s the perfect treat for a lazy weekend brunch, a quick snack, or even a little pick-me-up after a long day. Plus, it disappears in minutes at my house — my kids ask for this all the time. Trust me on this one: if you’re wondering whether zucchini belongs in a cake, give this a try. You’ll be hooked from the first bite!
What is Zucchini Coffee Cake?
Think of zucchini coffee cake as the best of both worlds: a tender, crumbly cake that’s subtly healthy with zucchini, combined with that classic cinnamon-sugar swirl you know and love. It’s essentially a breakfast or brunch treat that’s so good, it’s hard to call it just a “morning snack.” It got its name because it pairs beautifully with a steaming cup of coffee or tea — and honestly, it’s so flavorful that it could easily be a comfy dessert too. The magic lies in how zucchini adds moisture and a bit of nutritional benefit without compromising the cake’s airy texture. The recipe’s origin is kind of funny; I think it started as a way to sneak in some veggies for my kids, but now it’s a family favorite that I constantly tweak. Think of it as a cozy, little slice of home — familiar, comforting, and with a hint of something special. Once you make it, I promise it’ll become one of your go-to baked treats, especially for those times when you want a little bit of sweet, a lot of flavor, and all the warmth that baking brings.
Why you’ll love this recipe?
What I love most about this zucchini coffee cake is how it balances indulgence and simplicity — it’s honestly one of those recipes that looks fancy but is sooo easy to make. The flavor punch from the cinnamon-sugar swirl is just perfect; it’s sweet without being overly so, and the zucchini keeps everything moist and tender. The best part? It’s remarkably budget-friendly. I usually keep a few zucchinis in the fridge for these moments, and I always have the basic ingredients in my pantry: flour, sugar, baking powder. My kids go nuts over it, and I can whip up a batch in no time when friends drop by unexpectedly. Plus, it’s versatile: serve it warm with a smear of cream cheese, or cold with a cup of coffee — either way, it hits the spot. I’ve tested this with different variations, like swapping out some of the oil for applesauce or adding a dash of nutmeg, and honestly, it’s always a winner. That’s what I love most: it’s forgiving, adaptable, and just downright cozy.
How do I make Zucchini Coffee Cake?
Quick Overview
This recipe is all about layering moist zucchini batter with a cinnamon-sugar swirl, then baking until golden and fragrant. I love that the process is straightforward: mix dry ingredients, whisk wet ingredients, fold them together gently, layer the filling, and bake. The real trick is not overmixing — that keeps the cake fluffy — and how you swirl the cinnamon sugar for that beautiful marbled effect. It’s truly a foolproof process that gives you that bakery-quality look and taste right in your own kitchen. Once it’s in the oven, you get that wonderful smell that makes everyone gather around — a sign that it’s nearly ready to experience. Trust me, once you make this a couple of times, you’ll never want to go back to any store-bought “healthy” muffins or coffee cakes again.
Ingredients
For the Main Batter:
– 2 cups grated zucchini (about 2 small zucchinis, cooked and squeezed of excess moisture)
– 2 cups all-purpose flour (I use unbleached for a richer flavor)
– 1 cup granulated sugar (adjust for sweetness preference)
– 1/2 cup vegetable oil or melted butter (olive oil works too, but I prefer neutral for baking)
– 3 large eggs (room temperature if possible)
– 1 teaspoon vanilla extract
– 1 teaspoon baking powder
– 1/2 teaspoon baking soda
– 1/2 teaspoon salt
– 1 teaspoon ground cinnamon (because everything’s better with cinnamon!)
For the Filling:
– 1/4 cup brown sugar
– 1 teaspoon ground cinnamon
– 2 tablespoons melted butter
*Optional: chopped nuts or a handful of chocolate chips for extra indulgence.*
For the Glaze:
– 1 cup powdered sugar
– 2-3 teaspoons milk (or almond milk for dairy-free version)
– 1/2 teaspoon vanilla (or citrus zest for zing)
*More of a drizzle than a glaze, this adds that finishing touch.*
Step-by-Step Instructions
Step 1: Preheat & Prep Pan
Set your oven to 350°F (175°C). Grease a 9-inch round or square baking pan, or line it with parchment paper — trust me, parchment makes cleanup so much easier. I always do this first because once the batter is ready, I don’t want to scramble for the pan. Make sure your zucchini is grated finely and squeezed dry — excess moisture can make the cake dense instead of fluffy.
Step 2: Mix Dry Ingredients
In a large bowl, whisk together the flour, sugar, baking powder, baking soda, salt, and cinnamon. I do this step first to evenly distribute all those adorable spices and leavening agents. It helps prevent clumps and ensures a nice rise.
Step 3: Mix Wet Ingredients
In a separate bowl, beat the eggs with oil and vanilla until smooth. I like to do this with a whisk rather than a spoon — it makes everything come together faster and gives me that light, airy texture. Fold in the grated zucchini last because it’s already soft and moist.
Step 4: Combine
Gently fold the wet ingredients into the dry mixture. No need to overmix — just until the flour streaks disappear. Overmixing can make the cake tough, and nobody wants a dense coffee cake! The batter should be thick but pourable.
Step 5: Prepare Filling
Mix the brown sugar, cinnamon, and melted butter in a small bowl. If you’re feeling fancy, sprinkle in nuts or chocolate chips here. This filling will give that lovely cinnamon swirl that looks as good as it tastes.
Step 6: Layer & Swirl
Pour half of the batter into your prepared pan, spreading it out smoothly. Sprinkle half of the cinnamon-sugar mixture evenly over the batter. Top with the remaining batter, then scatter the rest of the cinnamon sugar on top. Use a knife or a skewer to swirl it gently — don’t overdo it, or you’ll lose the beautiful marbled effect. You want those gorgeous cinnamon ribbons running through the cake.
Step 7: Bake
Pop it into the oven and bake for 40-45 minutes. Check doneness with a toothpick inserted in the center — it should come out clean. The top should be golden brown, and your kitchen will be filled with that irresistible cinnamon smell. Ovens vary, so keep an eye on it after 40 minutes.
Step 8: Cool & Glaze
Let the cake cool in the pan for about 15 minutes before transferring it to a wire rack. This helps prevent it from breaking apart. Mix your glaze ingredients and drizzle over it while still warm — that slight warmth helps the glaze seep in just a little. Once cool, the glaze will set, giving it that gorgeous shiny finish.
Step 9: Slice & Serve
Use a sharp serrated knife to cut neat slices. This cake is best enjoyed warm or at room temperature, with a dollop of whipped cream or a splash of milk. Honestly, I love it just as it is — simple, sweet, and a reminder that the best baking often comes from humble ingredients and a little love.
What to Serve It With
This coffee cake is versatile enough to be paired with morning coffee for a lazy weekend brunch or served as a dessert after a family dinner. I always serve it with a steaming mug of coffee or a cup of cold milk — it’s such a comforting combo. Sometimes I sprinkle a few extra cinnamon-sugar flakes on top just before serving for that homemade bakery look. When I serve it for brunch, I like adding fresh berries or a side of Greek yogurt for a little extra freshness. It also pairs beautifully with a scoop of vanilla ice cream if you’re feeling extra indulgent. My family normally requests it for birthdays or Sunday mornings, and I always try to hide a piece for myself before anyone gobbles it up. If you ask me, this cake just screams cozy, kid-friendly, and so satisfying — a true keeper in my recipe box.
Top Tips for Perfecting Your Zucchini Coffee Cake
After making this dozens of times, I’ve picked up a few tricks that guarantee a perfect result every time. First, don’t skip squeezing out the zucchini — too much moisture can make the batter too runny, and nobody wants a soggy cake. I learned this the hard way after one too many gooey results. Using a fine grater helps get an even texture, and I always double-check that the zucchini isn’t wetter than a sponge. When mixing, I fold gently — overmixing ruins the fluffiness, and I want it light as a feather.
Swirling the cinnamon-sugar isn’t complicated, but a steady hand makes a difference. I’ve tried zig-zag patterns and clockwise spirals, but I find that a gentle swirl with a skewer creates that lovely marbled look. For ingredient swaps, I’ve tested apple sauce replacing some oil, and it still turns out moist, but I’d reduce the sugar slightly if you do that. Want to make it gluten-free? Substitute with a 1:1 gluten-free flour blend — it works, but the texture may be a tad denser. I’ve also experimented with reducing sugar if you’re watching your intake; even then, the flavor remains wonderful because of the cinnamon and zucchini’s natural sweetness. As for baking, I always rotate the pan halfway through to prevent uneven browning and test with a toothpick beforehand. The glaze can be customized too — adding a splash of lemon juice brightens it up, or try maple syrup instead of vanilla for a richer flavor.
All in all, this recipe is forgiving, reliable, and foolproof once you get the hang of it. A few little tweaks here and there, and you can make it even more personalized. The best advice I can give is to trust your nose and eyes — when it smells heavenly and the top is golden, you’re good to go. Oh, and don’t forget: a little bit of patience while cooling makes slicing so much easier and prettier.
Storing and Reheating Tips
This cake stays fresh and delicious for days if stored properly. I usually keep leftovers in an airtight container at room temperature for up to two days; after that, I pop it into the fridge. That keeps it moist and prevents it from going stale. If you want to keep it longer, wrap it tightly in plastic wrap and stash it in the fridge for up to five days. The texture stays pretty good, and the cinnamon flavor actually mellows into the cake, making every slice even better the next day.
For freezing, I slice it first — that way, I can grab a piece whenever a craving hits. Wrap individual slices tightly in plastic wrap, then put them in a freezer bag. They’ll keep for up to three months. To reheat, just warm a slice in the microwave for about 20-30 seconds or in a low-temperature oven until warmed through. The aroma alone is worth it, and I love re-experiencing that fresh-baked goodness even days later.
As for the glaze, I usually wait to drizzle it over after reheating — that way it stays shiny and appealing. If you’ve already added the glaze earlier, no worries — just warm the cake gently to revive some moisture. Either way, this cake ages gracefully, and I’ve never had it lose its flavor or softness with proper storage.
Frequently Asked Questions
Final Thoughts
Honestly, this zucchini coffee cake has become a staple in my home. It’s one of those recipes that’s forgiving enough for a beginner but flavorful enough to impress anyone. It’s cozy, comforting, and packed with the kind of love that turns a simple ingredient like zucchini into something special. Each time I make it, I think about how food connects us — those warm Sundays baking with my kids, the smell filling the house and pulling everyone into the kitchen. It’s perfect for sharing, for snuggling up with a cup of coffee on a lazy afternoon, or even for surprising friends with something homemade. When you make this, I’d love to hear how it turns out — maybe you’ll add your own twist or serve it with a special cup of tea. Either way, happy baking! And don’t forget to leave a comment or share your photos — I love seeing your creations!
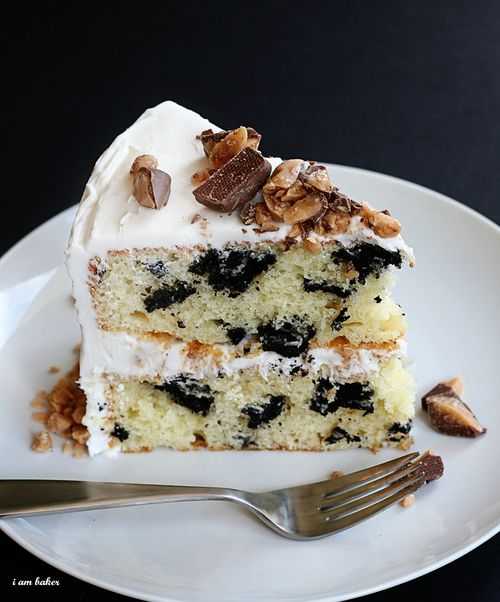
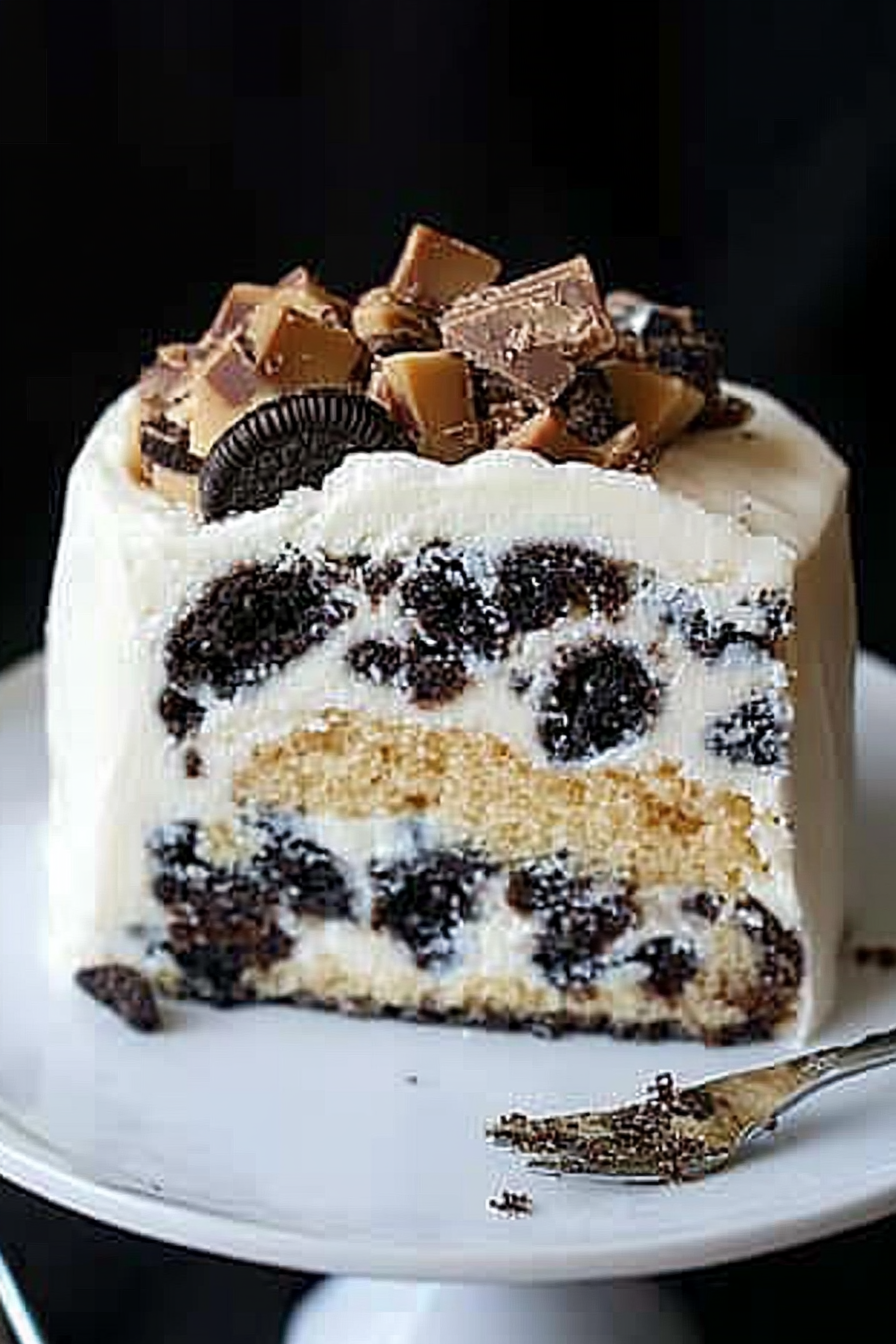
Oreo Heath Cake
Ingredients
Method
- Crush the Oreos into fine crumbs and set aside.
- In a mixing bowl, whip the heavy cream until stiff peaks form.
- Fold the crushed Oreos and toffee bits into the whipped cream.
- Transfer the mixture into a prepared cake pan and smooth the top.
- Sprinkle chocolate chips on top and refrigerate for at least 4 hours before serving.