
Easy Chicken Zucchini Bake for Low Carb Nights
There’s something about the smell of a freshly baked cake that instantly takes me back to childhood summers at grandma’s house, where the air was always filled with cinnamon and warm whispers of love. I remember sneaking into her kitchen, eyes wide with excitement, as she pulled out a pan of the most fragrant zucchini cake — it was moist, sweet, and had this beautiful swirl of cinnamon and sugar marbled through the batter. That cake was magic. Fast-forward to today, and I’ve probably made dozens of versions myself, but this zucchini cake swirl? It’s my secret weapon — my go-to when I want something cozy, homey, and just a little special. My kids ask for this all the time, and honestly, it’s one of the few desserts I don’t mind making on a busy weeknight. It’s so forgiving, so easy to tweak, and the smell alone guarantees everyone will come running. Trust me, once you try this, it’ll become a staple in your kitchen too.
What is Zucchini cake swirl?
Think of zucchini cake swirl as a cozy, moist cake that’s packed with grated zucchini — kind of like a carrot cake, but with a cooler, more versatile twist. It’s essentially a simple, tender vanilla cake infused with the subtle sweetness of zucchini, layered with a cinnamon sugar swirl that adds a cozy touch. The name “swirl” comes from the beautiful marbled effect you get when you gently swirl the cinnamon sugar mixture into the batter before baking. It’s a fun technique that makes each slice look like a little piece of art, and the flavor combo? Pure comfort. My favorite part? This cake is friendly on the wallet because it uses ingredients I always have lying around — eggs, flour, zucchini from the garden, and a sprinkle of cinnamon. It’s a humble, honest cake, but with an impact far beyond what the ingredients suggest. And let’s be honest, who doesn’t love a sneaky vegetable in their dessert?
Why you’ll love this recipe?
What I love most about this zucchini cake swirl is how it hits all the right notes — sweet, moist, with just enough spice to make it feel like a treat. The flavor profile is warm and inviting, with the cinnamon sugar swirl adding a gooey, caramelized touch in every bite. It’s a perfect balance of wholesome and indulgent. Plus, it’s so easy to make — no fancy equipment or hard-to-find ingredients. I’ve tested this with almond milk to make it even creamier, and honestly, it was a game-changer, adding a richness that everyone loved. And if you’re watching your budget or are short on time, this dish is your best friend. It’s economical, doesn’t require complicated steps, and tastes like you spent ages fussing over it. The versatility is another win — serve it for breakfast with a dollop of whipped cream, as a cozy afternoon snack, or as a charming dessert after dinner. My kids actually ask for seconds — that’s saying a lot in our house, where desserts are a rare treat!
How do I make Zucchini cake swirls?
Quick Overview
This cake is all about keeping things simple and cozy. You mix a basic vanilla batter, grate some fresh zucchini (squeeze out excess moisture so it doesn’t make the cake gummy), prepare a cinnamon sugar swirl, and then layer and swirl everything together before baking. The result is a beautifully marbled cake that’s moist, flavorful, and perfect for any occasion. It’s forgiving — I’ve made this with different types of zucchinis, gluten-free flours, and even added nuts — every time it turns out delicious. What makes this method special is how effortlessly the swirl works its way into the batter, giving each slice a lovely visual and flavor surprise.
Ingredients
For the Main Batter:
– 2 cups all-purpose flour (or your favorite gluten-free blend)
– 1 cup granulated sugar
– 1/2 teaspoon baking powder
– 1/2 teaspoon baking soda
– 1 teaspoon vanilla extract
– 1/2 cup vegetable oil or melted unsalted butter
– 1 cup grated zucchini (squeezed dry)
– 3 large eggs
– 1/2 cup buttermilk or milk (almond milk works beautifully here)
For the Filling:
– 1/4 cup brown sugar
– 1 tablespoon cinnamon
– 2 tablespoons softened butter or coconut oil
For the Glaze:
– 1 cup powdered sugar
– 2-3 teaspoons milk (or lemon juice for a citrus twist)
– A pinch of extra cinnamon (optional)
Step-by-Step Instructions
Step 1: Preheat & Prep Pan
Preheat your oven to 350°F (175°C). Grease a 9-inch round or square cake pan, or line it with parchment paper for easy removal. Make sure it’s ready to go because once you start mixing, you’ll want to bake ASAP so the batter doesn’t sit and lose its freshness.
Step 2: Mix Dry Ingredients
In a large bowl, whisk together the flour, baking powder, baking soda, and a pinch of salt. This step ensures everything is evenly distributed, which is key to a fluffy, even cake. I always do this first because it saves me from overmixing later, and trust me — lumps are not your friends here.
Step 3: Mix Wet Ingredients
In another bowl, beat the eggs, sugar, vanilla, and oil until smooth. I find using a whisk or an electric mixer makes this quick and fluffy. If your eggs aren’t room temp, don’t worry — just whisk a little longer until frothy. Mix in the grated zucchini and buttermilk until well combined. The batter will be slightly runny but that’s perfect.
Step 4: Combine
Add the wet ingredients into the dry and fold gently until just combined. Avoid overmixing — this is where a light hand makes all the difference. Overmixing can make the cake dense, and I learned that the hard way from a batch that turned out quite rubbery. So, fold gently, stop as soon as there are no streaks of flour.
Step 5: Prepare Filling
Mix the cinnamon with brown sugar and soften the butter until the mixture resembles a crumbly paste. This makes spreading easier and ensures the cinnamon flavor gets distributed evenly through the swirl.
Step 6: Layer & Swirl
Pour half of the batter into your prepared pan. Spread evenly. Dollop the cinnamon sugar mixture over the batter, then pour the remaining batter on top. Using a butter knife, gently swirl through the batter from the center outwards to create a marbled effect. Be gentle — you want a nice swirl but not a muddled mess.
Step 7: Bake
Pop it into the oven at 350°F (175°C) for about 35-40 minutes. Check with a toothpick — it should come out clean when inserted in the center. My oven runs a little hot, so I usually start checking around 32 minutes, just to be safe. Every oven is different, but this cake is pretty forgiving — it’s moist and doesn’t dry out easily.
Step 8: Cool & Glaze
Let the cake cool in the pan for about 15 minutes, then transfer to a wire rack. Once completely cooled, drizzle with the glaze. I love adding a splash of lemon juice instead of milk for a zesty kick — totally optional but worth trying!
Step 9: Slice & Serve
Use a sharp knife and a gentle sawing motion to cut even slices. I like serving this warm with a scoop of vanilla ice cream in summer, or just plain with a cup of tea in the afternoon. It’s surprisingly good cold, too, and keeps beautifully in an airtight container for days.
What to Serve It With
This zucchini cake swirl is so versatile; it fits right into whatever mood you’re in. For breakfast, I love to serve it with a steaming cup of coffee or a dollop of Greek yogurt on the side. It’s amazing when slightly warm, topped with some fresh berries — a real treat to start your day. For brunch, add some whipped cream or a drizzle of honey, and maybe a side of honey-glazed bacon or scrambled eggs. It also makes a lovely after-dinner dessert, especially garnished with a sprinkle of powdered sugar or extra cinnamon. The flavor combinations are endless. My mother-in-law even sneaks a piece with her afternoon tea — she says it’s like getting a hug in every bite!
Top Tips for Perfecting Your Zucchini Cake Swirl
I’ve tested this recipe many times, and a few tricks have really helped me get it just right. First, squeezing out excess moisture from the zucchini is a game-changer — too much water and the cake can turn gummy or crack. Use a clean towel or cheesecloth for this step; it’s worth the extra minute. When mixing the batter, fold gently to keep it light — overmixing is the enemy of airiness. For the swirl, I always use a skewer or a butter knife in a zig-zag motion for a pretty marbled effect; try to avoid going straight down so the swirl looks natural and inviting. A tip I learned the hard way: if you want a richer flavor, swap half the oil for softened cream cheese or even mascarpone — it adds a subtle tang that balances the sweetness. About baking, I rotate my pan halfway through to promote even browning and check frequently near the end, so I don’t overbake. For the glaze, if you want a glossy finish and no drips, add a little more milk and whisk until smooth. I’ve also experimented with adding chopped nuts or mini chocolate chips to the batter — they’re delightful surprises in every slice. Adjusting the cinnamon amount changes the flavor profile so feel free to experiment, but don’t forget — simple is sometimes the best.
Storing and Reheating Tips
This cake keeps well at room temperature for up to two days if covered tightly with foil or plastic wrap. I recommend storing it in an airtight container, especially if you plan on keeping it longer, and it’s just as delicious chilled or at room temp. If you want to make it ahead, you can keep it in the fridge for up to five days. Just pop it out and let it come to room temperature before slicing — it’ll be even moister. For freezing, wrap leftover slices tightly with plastic wrap, then pop them inside a resealable bag or airtight container. They’re good for up to three months. Thaw at room temperature or in the fridge overnight. As for the glaze, I usually wait until serving; if you want it to last longer, add the glaze just before slicing so it stays fresh and glossy. Honestly, this cake is pretty hardy — I even like it cold from the fridge on busy mornings. The moisture stays locked in, and the flavors deepen overnight.
Frequently Asked Questions
Final Thoughts
This zucchini cake swirl has become more than just a dessert in my house — it’s a symbol of comfort, a reminder that sometimes the simplest recipes are the most memorable. It’s humble, forgiving, and endlessly versatile. I honestly think anyone can master it, even if you’re new to baking. The smell, the texture, that swirl of cinnamon — it’s like a warm hug wrapped in cake. Once you’ve made this, you’ll understand why I keep coming back to it, testing little tweaks here and there because it just gets better every time. I hope you try it and fall in love with it as much as I have. Feel free to leave a comment, share your own twist, or just tell me how it turns out — I love hearing everyone’s stories. Happy baking, and may your kitchen be filled with the sweet aroma of love and zucchini!
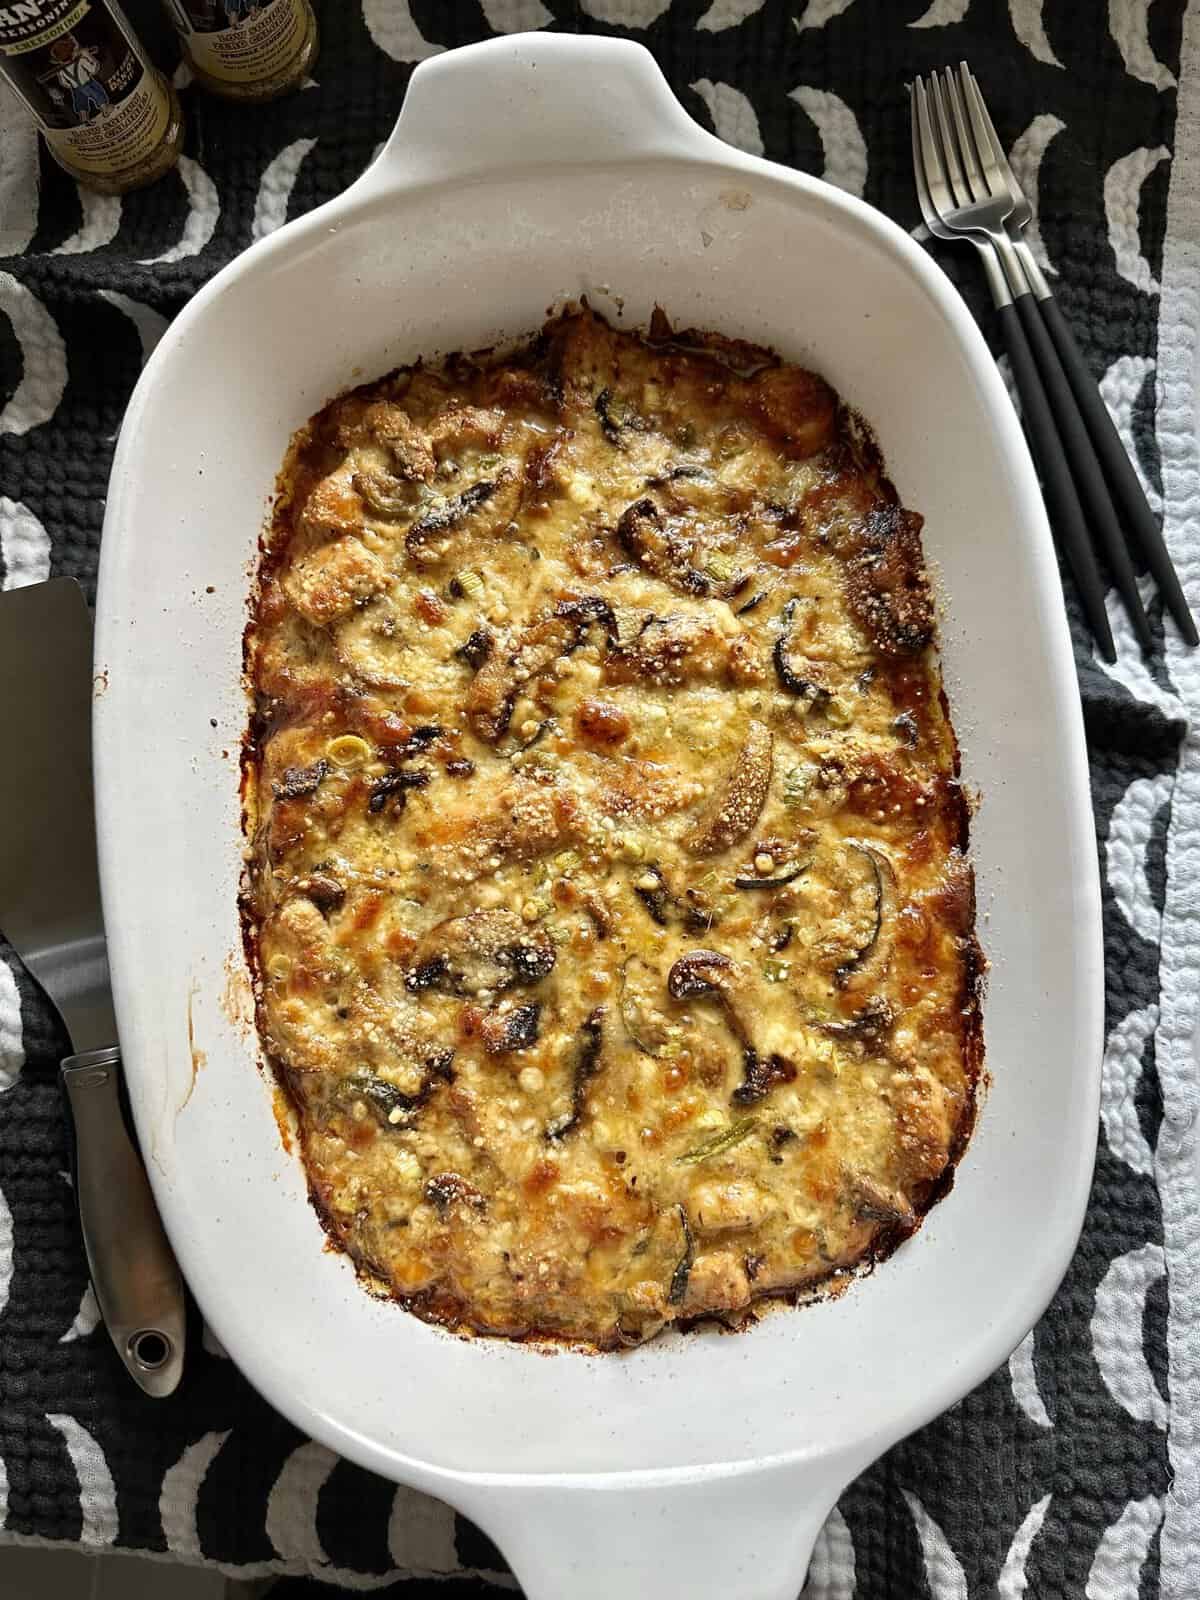
Chicken Zucchini Bake
Ingredients
Method
- Preheat oven to 375°F (190°C).
- In a large bowl, combine sour cream, mayonnaise, garlic, oregano, salt, and pepper. Mix well.
- Add chicken pieces and zucchini slices into the mixture. Toss until well coated.
- Transfer the mixture to a greased 9x13 inch baking dish.
- Sprinkle shredded mozzarella and Parmesan cheese evenly on top.
- Bake uncovered for 35-40 minutes until the chicken is cooked through and the cheese is bubbly and golden.
- Let cool for 5 minutes before serving.