Stacked Cabbage Rolls How to Make Them
If you’ve ever found yourself lingering in the kitchen, aching for something sweet but wanting it to feel cozy and nourishing at the same time, then this banana zucchini bread is your new best friend. I remember my grandma baking similar loaves when I was a kid, the smell filling the whole house with warmth, like a quiet hug from someone who loves you. Now, I make this at least once a month — it’s that good. The best part? It’s insanely easy, so I always do this when I need a little comfort or a quick treat that the whole family will devour. My kids ask for this all the time—especially when the bananas are starting to turn black on the counter. Trust me, it’s just as good as it sounds, and it disappears in minutes at my house!
What is banana zucchini bread?
Think of banana zucchini bread as a muffin-top-crusted, moist loaf of happiness. It’s essentially a hybrid between banana bread and veggie-packed zucchini bread—think of it as sneaking a vegetable into something undeniably luscious and sweet. The name is pretty straightforward: ripe bananas give it that natural sweetness and richness, while shredded zucchini keeps it moist and adds a subtle earthiness without overpowering the flavor. Originally, zucchini bread was born out of a need to use up summer squash, but over time, this delicious loaf has become a cozy treat that’s perfect for breakfast, brunch, or an afternoon snack. It’s the kind of dish that tastes like home—warm, slightly nostalgic, and honestly, just so satisfying.
Why you’ll love this recipe?
What I love most about this banana zucchini bread is how it combines simplicity and flavor in the best way possible. First, the smell alone is worth making it — think ripe bananas mingling with cinnamon, baked to a golden perfection. The texture is just dreamy—moist, fluffy, with a slight crumb that nothing can beat. Plus, it’s super forgiving; I’ve tried swapping ingredients, skipping the nuts, even using different sweeteners, and it still turns out beautifully every time. Budget-wise, it’s a win, using pantry staples like bananas, flour, and sugar, with optional mix-ins like walnuts or chocolate chips if you’re feeling fancy. What makes it stand out for me is that it’s versatile: I can serve it for breakfast, cut thick for a snack, or warm slices with a dollop of butter for dessert. Honestly, it’s one of those recipes that just feels like a warm hug after a long day.
How do I make banana bread?
Quick Overview
This banana zucchini bread comes together as smoothly as spreading butter on toast. You start by preheating your oven, then mixing the dry ingredients while you mash the ripe bananas and shred the zucchini. Then, you gently combine everything, swirl in your favorite fillings if you want, and bake until golden. The best part? It’s really forgiving — overmixing is a no-no, but once you get the hang of the fold-and-stir method, it’s as simple as it gets. I love that you can customize it with whatever mix-ins you like, making each loaf special. Plus, it’s a one-bowl wonder, so clean-up is a breeze. Whether you’re a baking novice or a seasoned cook, this recipe is a guaranteed crowd-pleaser.
Ingredients
For the Main Batter:
- 3 ripe bananas, mashed — I always do this with a fork right in the peel for easy cleanup. Ripe bananas are key for sweetness and flavor.
- 1 cup shredded zucchini — I use a box grater, and I always make sure to squeeze out some excess moisture so the bread isn’t soggy.
- 1/2 cup melted butter or olive oil — use what you prefer; I tested with almond milk and it actually made it even creamier!
- 3/4 cup brown sugar — or coconut sugar for a more caramelized flavor.
- 2 large eggs — for richness and structure.
- 1 teaspoon vanilla extract — because a splash of vanilla makes everything better.
- 1 1/2 cups all-purpose flour — I like to use unbleached for a more wholesome touch.
- 1 teaspoon baking soda
- 1 teaspoon cinnamon — I always do a little extra, because who doesn’t love cinnamon?
- Pinch of salt
For the Filling (optional but recommended):
- 1/2 cup chopped walnuts or pecans — toast them beforehand for extra flavor.
- 1/2 cup mini chocolate chips — because who doesn’t love a little surprise inside?
For the Glaze:
- 1/2 cup powdered sugar
- 2 teaspoons milk or cream
- 1/4 teaspoon vanilla
Step-by-Step Instructions
Step 1: Preheat & Prep Pan
Set your oven to 350°F (175°C). Grab your loaf pan—I like lining mine with parchment paper or giving it a quick spray of non-stick spray. A 9×5-inch pan is perfect. This step is crucial because the quicker you get it in the oven, the more the bread will rise beautifully without drying out.
Step 2: Mix Dry Ingredients
In a small bowl, whisk together the flour, baking soda, cinnamon, and salt. Mixing these first helps evenly distribute the leavening agents and spices, giving your bread that perfect rise and flavor boost. Set aside for now.
Step 3: Mix Wet Ingredients
In a big bowl, mash your bananas until smooth. I do this with a fork, and then I stir in the melted butter, sugar, eggs, and vanilla. The key here is to make sure your eggs are at room temperature for that smooth, homogenous mixture. I’ve learned that adding a splash of almond milk can make this batter super creamy—try it!
Step 4: Combine
Gently fold the dry ingredients into the wet, just until combined. Don’t overmix — that’s a common mistake I used to make, and it made my bread dense instead of fluffy. A light touch keeps it tender.
Step 5: Prepare Filling
If you’re using nuts or chocolate, fold them into the batter now. I also love adding a handful of extra chopped walnuts on top before baking — it looks pretty and adds crunch.
Step 6: Layer & Swirl
Pour half the batter into your loaf pan, then sprinkle or dollop some of your filling, then top with the remaining batter. For a pretty swirl, use a toothpick or skewer to gently swirl through the batter—this creates a beautiful marbled effect that my kids think is super fancy.
Step 7: Bake
Pop it into the oven and bake for about 55-65 minutes. Check doneness with a toothpick—if it comes out clean, you’re all set. Every oven is a little different, so start checking at around 50 minutes. When it smells incredible and a toothpick poked in the center comes out clean, it’s ready.
Step 8: Cool & Glaze
Let the bread cool in the pan for about 15 minutes before transferring it to a wire rack. Once fully cooled, mix your glaze ingredients and drizzle over the top. I love adding a splash of lemon juice in the glaze for a bright contrast—it’s so good!
Step 9: Slice & Serve
Use a serrated knife for clean slices, and serve slightly warm or at room temperature. My favorite way is with a slather of butter or a smear of cream cheese. It’s perfect for breakfast or an afternoon pick-me-up.
What to Serve It With
This banana zucchini bread is truly versatile. For breakfast, I love enjoying a warm slice with a cup of black coffee or a mug of chai. It’s also divine as part of a brunch spread—paired with fresh fruit and a dollop of Greek yogurt. When served as a dessert, I like to give it a quick warm-up and add a drizzle of honey or a scoop of vanilla ice cream. For cozy snacks, this bread is a lifesaver on busy nights or when friends stop by unexpectedly—you can even toast slices and spread a little nut butter for a more indulgent treat. The kids love it sliced thick, with a glass of milk, and I swear, the smell alone makes the house feel like a warm hug.
Top Tips for Perfecting Your Banana Zucchini Bread
Over the years, I’ve learned a few tricks to make this bread even better. First, always try to use bananas that are super ripe—that’s where the flavor really shines. The more black spots, the sweeter and more pudding-like they are, which gives your bread that incredible moisture. When shredding zucchini, I always squeeze out excess moisture—otherwise, your loaf might turn a bit soggy. The trick is to fold ingredients gently; overmixing is the enemy of fluffiness. If you want a more decadent bread, toss in chocolate chips or chopped nuts—just remember to fold them in last so they stay evenly distributed. I’ve tested with different spices, like nutmeg and allspice, which add cozy warmth, especially in winter. Lastly, I learned that baking it on the middle rack gives even heat, ensuring a perfect crust and moist interior. Trust me, this is one recipe that’s as forgiving as it is delicious—you’ll want to make it again and again.
Storing and Reheating Tips
This banana zucchini bread is good for a couple of days at room temperature if wrapped tightly in plastic or foil. I often slice it and store in an airtight container—it stays moist and fresh for about 2-3 days. Want it to last longer? Pop individual slices into the refrigerator, where it keeps well for about a week. For longer storage, slice and freeze in a well-sealed bag—thaw at room temp or warm in the oven for a fresh-out-of-the-oven feel. If you’re planning to add the glaze later, wait until served, because the glaze can melt or become sticky if stored too long. Reheat slices in the microwave for about 15 seconds, or gently warm in the oven wrapped in foil—that way, you bring back that comforting warmth without drying it out.
Frequently Asked Questions
Final Thoughts
This banana zucchini bread isn’t just a recipe — it’s a little piece of my family’s comfort food vault. It’s forgiving, versatile, and just the thing to bring a little warmth to your day. Whether you’re using up ripe bananas or sneaking a veggie into your toddler’s snack, it hits all the right notes in flavor and heart. I love how one batch can turn into so many cozy moments — breakfast, snacks, or even a thoughtful gift. My hope is that you try it, tweak it, and make it your own. Happy baking! I’d love to hear your variations and stories — leave a comment below or share on social media. Let’s spread the love, one slice at a time!
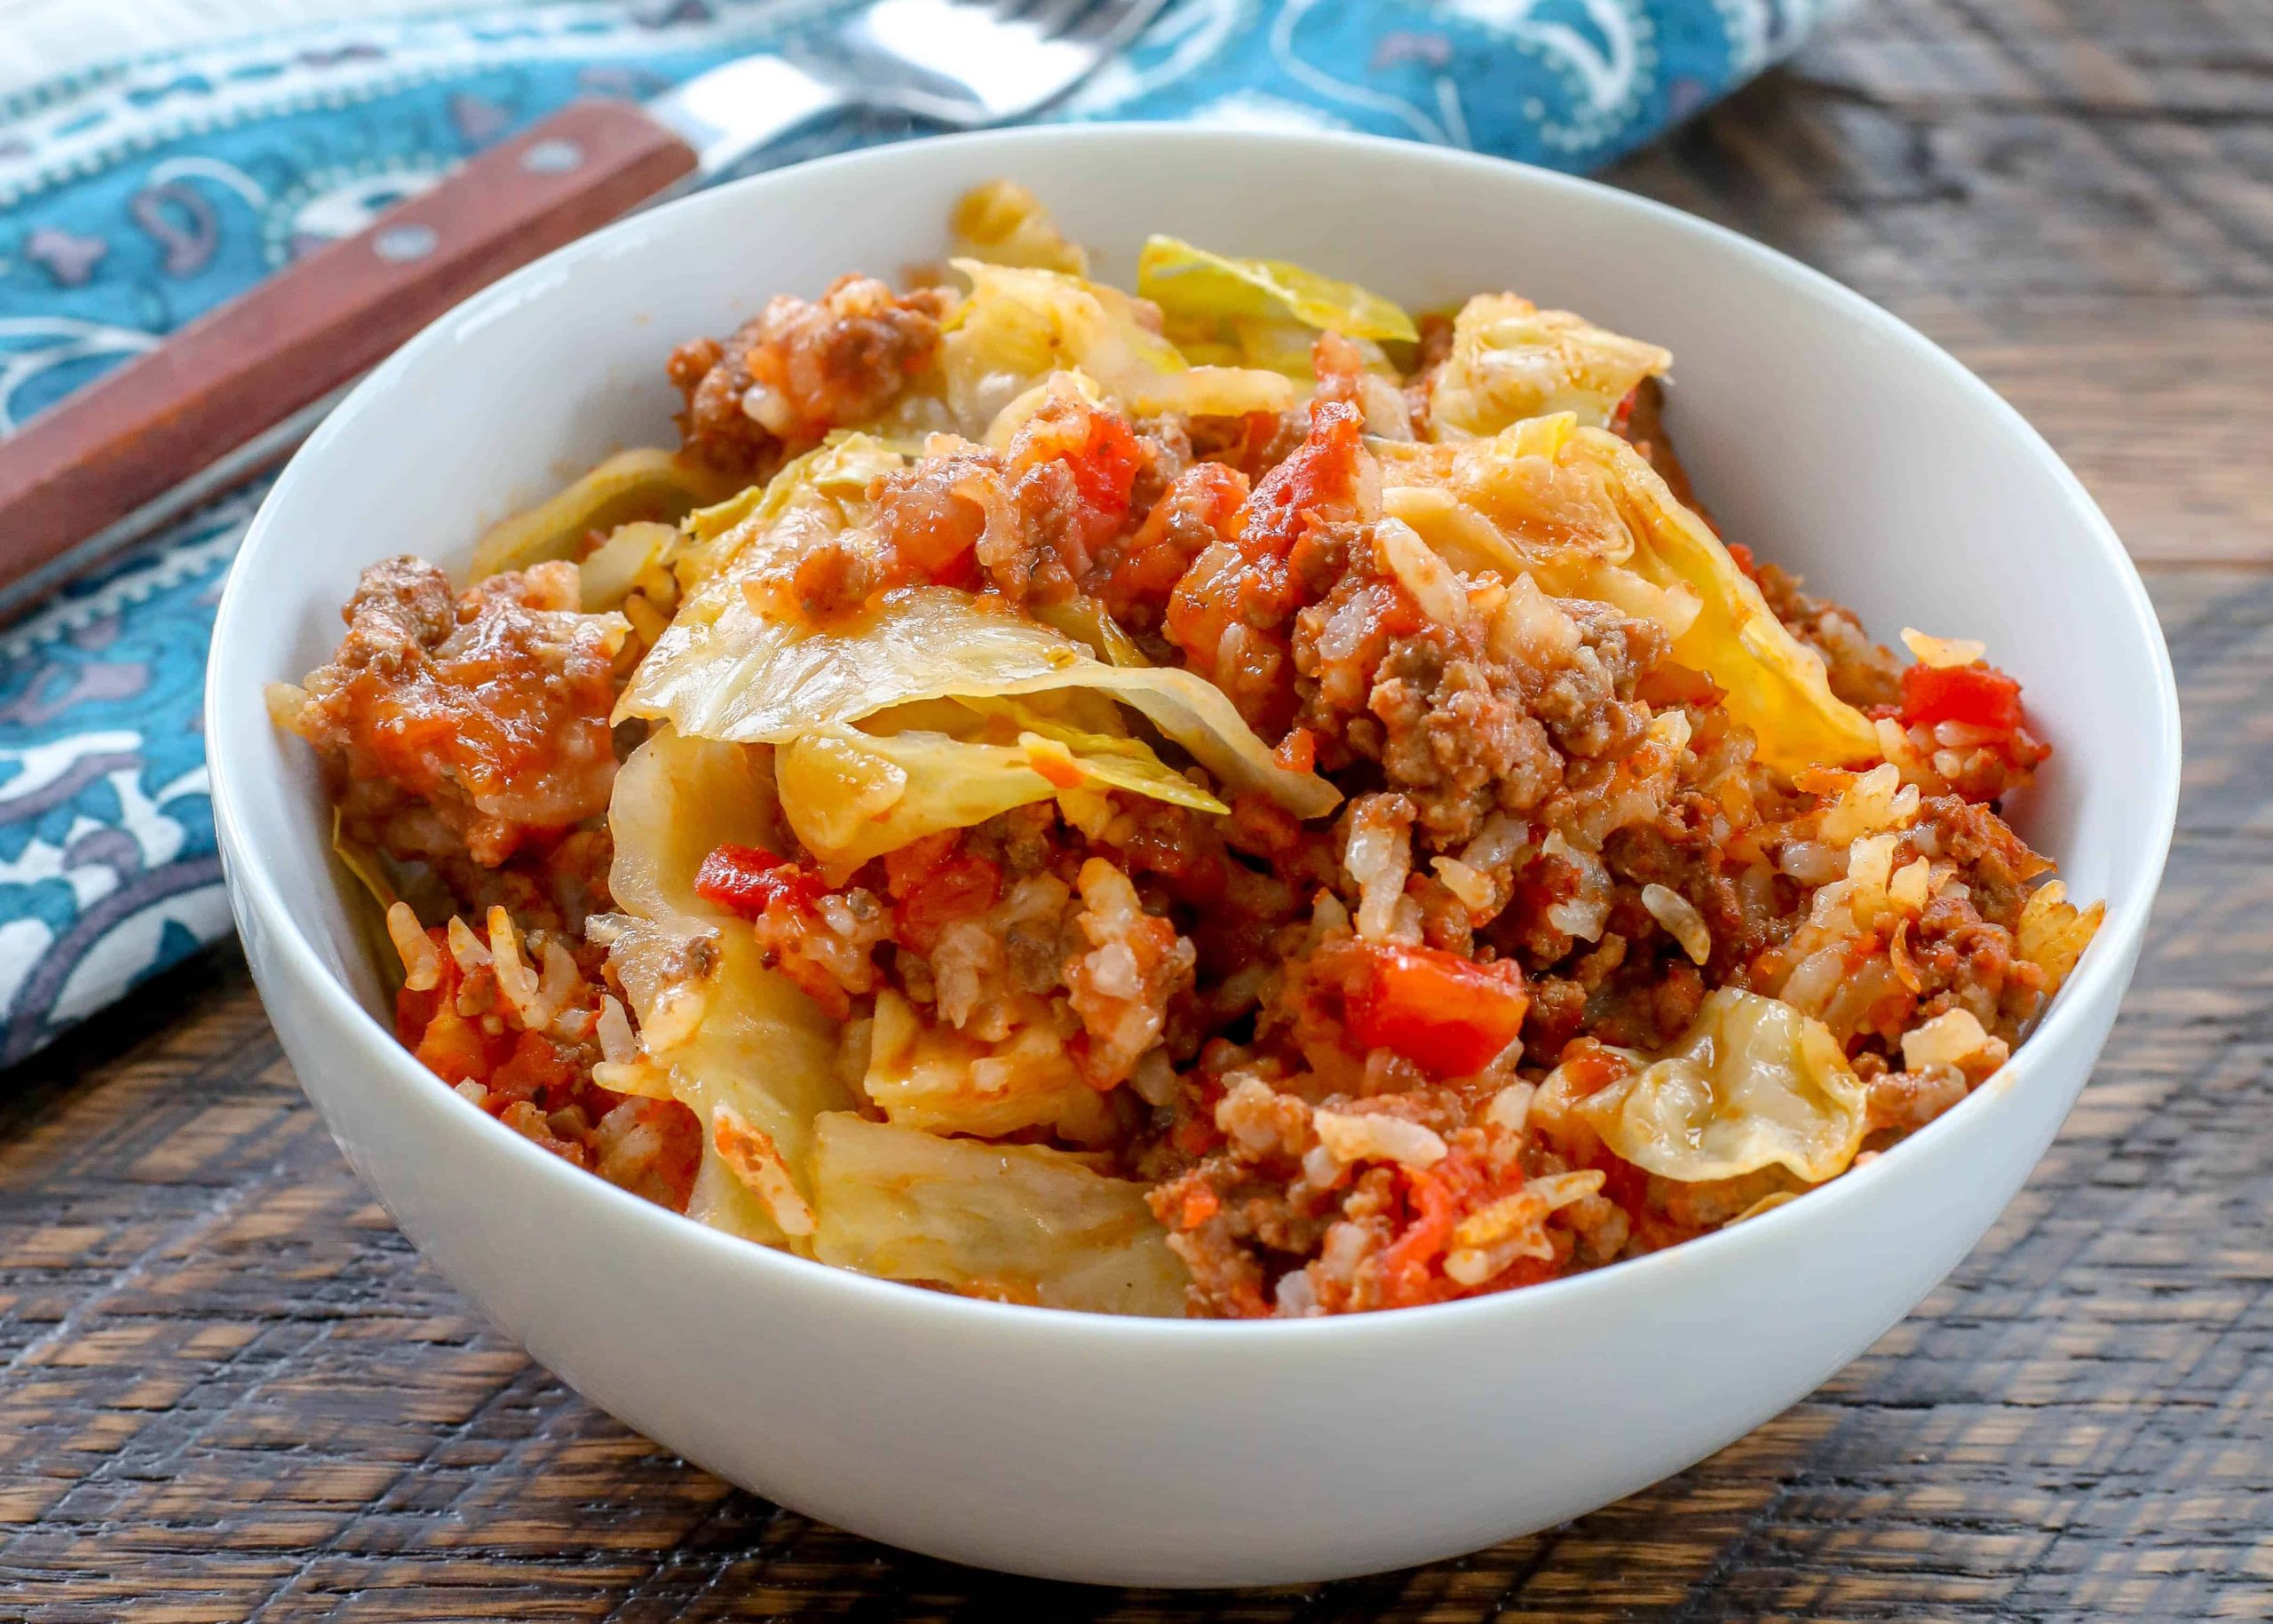
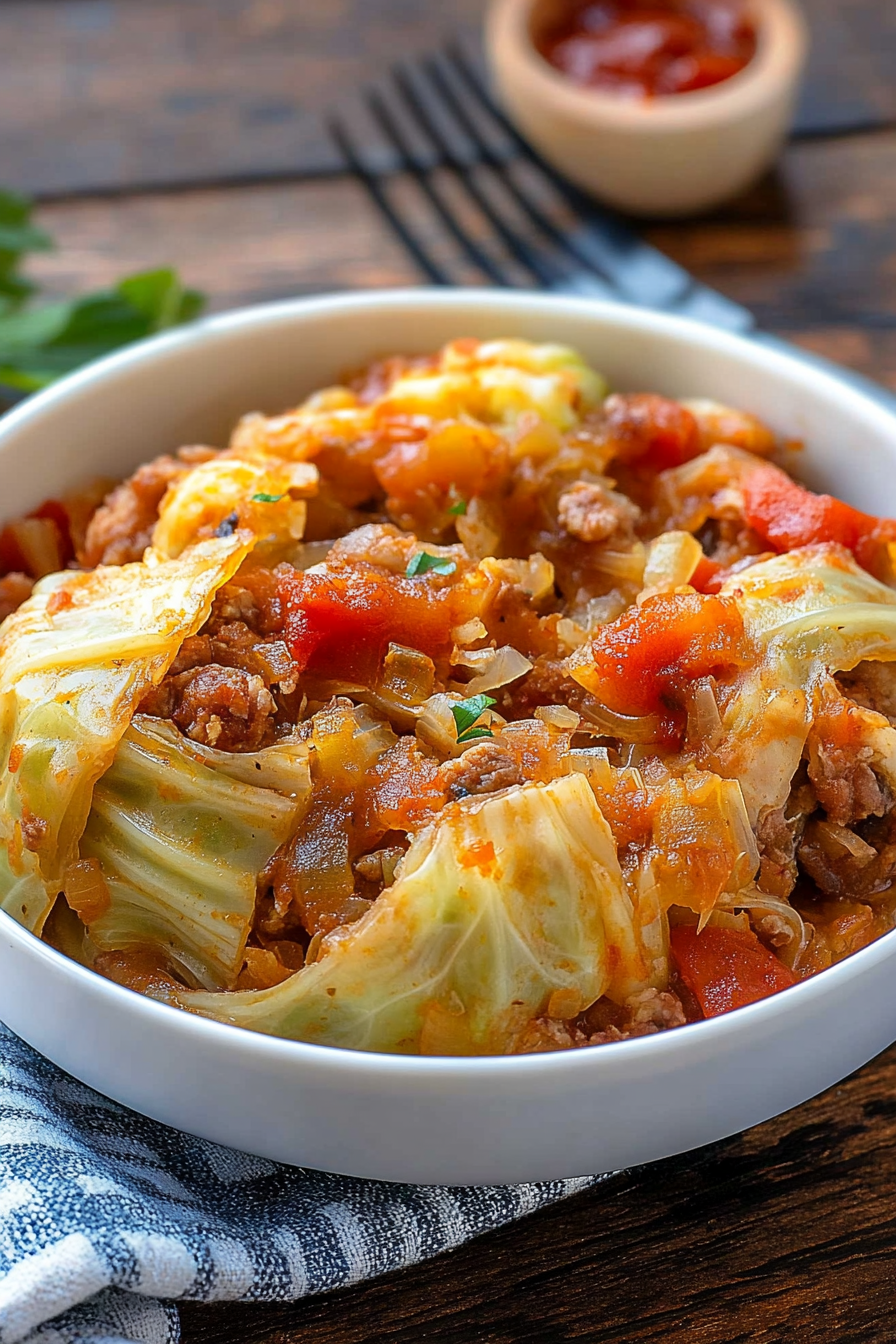
cabbage rolls
Ingredients
Method
- Preheat the oven to 350°F. Spread the cabbage across the bottom of a 9x13 inch dish. In a large skillet, cook the ground beef with chopped onion over medium heat until browned.
- Drain excess fat, then add rice, chili powder, garlic powder, salt, and pepper to the skillet. Stir in crushed tomatoes and cook until combined. Spread the mixture over the cabbage in the baking dish.
- Mix tomato sauce, sugar, and vinegar together and pour over the meat mixture. Cover with foil and bake for 90 minutes. Uncover and let rest for 5-10 minutes before serving.