Zesty Lemon Garlic Chicken Recipe
There’s something about baking a cake that feels like giving a little hug to everyone I love — and honestly, nothing beats a slice of this zucchini swirl cake on a busy weeknight when I need a sweet pick-me-up or during lazy Sunday mornings when the aroma fills the house and everyone drifts into the kitchen, noses in the air. I’ve made this recipe countless times, tweaking little things here and there, and I tell you, it never fails to impress. Plus, it’s secretly good for you—full of zucchini (yes, zucchini in cake!)—which keeps it moist and adds a subtle veggie boost. I always do this when I want something comforting, yet lighter than a typical frosting-heavy dessert. My kids ask for this all the time, especially because it’s so easy to whip together—I promise, it’s kind of addictive. If you’re craving that warm, home-baked smell and a dessert that’s just as friendly at the dinner table as it is at the snack corner, this zucchini swirl cake is your new best friend. Trust me on this one—it’ll become a family favorite in no time!
What is Zucchini Swirl Cake?
The zucchini swirl cake is kind of like a cross between a moist spice cake and a layered tart, but way easier to make. Think of it as a cozy dessert that’s got a surprise hidden inside—a luscious swirl of cinnamon-spiced batter that winds through each slice. The name might sound fancy, but it’s just a rustic, home-style cake, like something your grandma might’ve baked on a Sunday. It’s essentially a sponge cake with a surprise cinnamon filling that’s gently marbled in, making each piece look like a little work of art. The ingredients are simple staples—flour, sugar, eggs, oil—and it’s all about how you layer and swirl for that gorgeous marbled effect. I love how versatile it is, too—you can swap out the spices or add nuts or even blueberries if you’re feeling adventurous. This cake doesn’t require fancy equipment—you just need a good loaf pan, a whisk, and a little patience. Oh, and the smell! It’s the best part—warm cinnamon and sweet batter filling the house like a hug.
Why you’ll love this recipe?
What I love most about this zucchini swirl cake is that it’s so forgiving and downright charming. For starters, the flavor—and don’t laugh—just gets better the second day! The cinnamon-infused batter seeping into the cake creates this beautiful marbled effect that makes even the simplest presentation feel special. It’s incredibly easy to make, so no stress, even if you’re short on time or not much of a baker. I’ve tested this with different kinds of oil (olive oil, light coconut, even butter) and honestly, the subtle flavor variations add delightful twists. Plus, it’s budget-friendly—mostly pantry staples. My favorite part? It works so well for breakfast, brunch, or dessert—you really can’t go wrong! What I love most about this is how it’s a perfect “clean-out-the-fridge” kind of recipe. You can toss in different add-ins like chopped nuts or berries, or keep it simple—either way, it’s delightful. And easy enough to make with kids—my little ones love helping swirl the batter or sprinkle cinnamon on top. Honestly, this cake is a total lifesaver on busy nights when I want a cozy, homemade treat that everyone will enjoy.
How do I make Zucchini Swirl Cake?
Quick Overview
This cake is all about layering, swirling, and patience. You start by mixing a simple vanilla-type batter, then prepare a cinnamon-spiced filling that you gently swirl into the batter—creating beautiful marbled patterns. Baking it in a loaf pan gives it that rustic charm, and the smell alone makes everyone gather around. It’s straightforward, doesn’t require fancy ingredients, and honestly, the hardest part is resisting slicing into it too soon! I always tell myself to let it cool a bit, but I have been known to sneak a warm piece fresh out of the oven. This one’s a real crowd-pleaser and, once you get the hang of swirling, it’s almost meditative. The final result? A moist, tender cake with a hint of cinnamon and that irresistible marbled swirl. It’s so satisfying to see how the batter comes together, and trust me, it’s so worth the wait.
Ingredients
For the Main Batter:
- 2 cups all-purpose flour (I like unbleached for a richer flavor)
- 1 cup granulated sugar (feel free to reduce slightly if you want less sweetness)
- 1/2 cup vegetable or light olive oil (or melted butter if you prefer)
- 3 large eggs (fresh and room temperature if possible)
- 1 teaspoon vanilla extract
- 1/2 cup milk (dairy or almond milk work great)
- 1 teaspoon baking powder
- 1/2 teaspoon baking soda
- 1/4 teaspoon salt
For the Filling:
- 1 tablespoon cinnamon (or more if you really love that flavor)
- 2 tablespoons brown sugar or coconut sugar
- Optional: 1/4 cup chopped nuts or berries for extra flavor
For the Glaze (Optional):
- 1/2 cup powdered sugar
- 1-2 teaspoons milk (to thin it out)
- A dash of vanilla or lemon zest for extra flavor
Step-by-Step Instructions
Step 1: Preheat & Prep Pan
Set your oven to 350°F (175°C). Grease a standard loaf pan or line it with parchment paper. I like to give it a quick spray with cooking spray and dust a little flour—prevents sticking and makes for easy slicing later. While it’s warming up, grab your ingredients and get ready to mix!
Step 2: Mix Dry Ingredients
In a large bowl, whisk together the flour, baking powder, baking soda, salt, and a pinch of cinnamon if you like. Doing this first ensures your leavening is evenly distributed, which is super important for that perfect rise and even marbling. Sometimes I sift the dry ingredients just to make sure everything’s light and fluffy—I swear it makes a difference.
Step 3: Mix Wet Ingredients
In a separate bowl, whisk the eggs, sugar, vanilla, and milk until well combined. Then, slowly whisk in the oil or melted butter. When I do this, I love how the mixture becomes silky and fragrant—that’s a good sign! I always test the temperature of my eggs beforehand so they’re not cold—lukewarm is best for mixing smoothly.
Step 4: Combine
Pour the wet mixture into the dry ingredients and gently fold—it’s tempting to overmix, but I keep it just until everything’s combined. You want a smooth batter, but don’t overdo it, or your cake might turn out dense. A few lumps are totally fine; that’s the secret to a tender crumb.
Step 5: Prepare Filling
In a small bowl, mix together the cinnamon and sugar. If you’re adding nuts or berries, toss them in here. It adds a wonderful texture and flavor surprise. I like chopping nuts fine so they don’t sink or overpower the swirl—just enough crunch in every bite.
Step 6: Layer & Swirl
Pour about half the batter into your prepared pan. Sprinkle half the cinnamon-sugar mixture on top, then add the remaining batter. Use a butter knife or skewer to gently swirl the batter in a figure-eight or zigzag pattern—this creates that beautiful marbled effect. Trust me, take your time here; swirling evenly makes all the difference.
Step 7: Bake
Pop it into your preheated oven and bake for about 45-50 minutes. The top should turn golden, and a toothpick inserted in the center should come out clean. Every oven varies a bit, so keep an eye around the 45-minute mark—nothing beats that aroma filling the kitchen.
Step 8: Cool & Glaze
Allow the cake to cool in the pan for about 10 minutes, then transfer it to a wire rack. If you’re glazing, mix powdered sugar with milk and vanilla, then drizzle over the cooled cake when it’s just warm enough to absorb the glaze. It adds that glossy, sweet finishing touch—trust me, it makes the whole thing look like a bakery masterpiece.
Step 9: Slice & Serve
Once fully cooled, slice with a serrated knife for clean cuts. I like to serve it slightly warm with a dollop of whipped cream or a scoop of vanilla ice cream—so cozy! For breakfast, it’s equally perfect on its own with a mug of coffee or tea. This cake tastes even better on the second day, once the flavors meld closer together.
What to Serve It With
Honestly, this cake is a chameleon—it pairs beautifully with many things, depending on your mood. For breakfast, a splash of cream and some fresh berries turn it into a special start to the day. My family loves it with a cup of strong coffee or even spiced chai—those warm spices are so inviting. During brunch, I like to serve slices alongside scrambled eggs or a fruit salad, making it more of a sweet-yet-savory affair. As a dessert, a drizzle of caramel or a dusting of powdered sugar puts it over the top, especially when served with a scoop of vanilla ice cream or a dollop of whipped cream. When I want a cozy snack, I’ll cut thick slices, butter them, and toast until golden—perfect for afternoons with a book and a cup of tea. Growing up, my mom made something similar, and honestly, each bite brings back childhood memories—no matter how old I get, it still feels like coming home.
Top Tips for Perfecting Your Zucchini Swirl Cake
Getting that swirl just right takes a little practice, but over the years I’ve picked up some tips that’ll help you achieve bakery-quality swirls right at home. First, grate your zucchini well—squeeze out excess moisture with a clean kitchen towel, or your batter might turn out too wet or dense. I tested this with different grating textures (finely versus coarse), and I prefer fine because it melts into the batter seamlessly. When mixing the wet and dry ingredients, I always fold gently—overmixing can toughen the crumb, and nobody wants a dense slice. For the swirl, start with a generous dollop of batter, sprinkle your cinnamon mixture on top, then repeat with the remaining batter. Use a skewer or butter knife in slow, gentle zigzags to create the marbled look—don’t overdo it, or the swirl will disappear! Variations? You can swap out the cinnamon for pumpkin pie spice, add chopped walnuts or toasted coconut, or even swirl in some fruit preserves for extra flavor. I’ve also tried making mini muffins with this batter—just adjust the baking time to around 20-25 minutes. Keep an eye on them—they’re tempting to pull out early, but patience makes all the difference. The biggest lesson? Use good-quality ingredients and trust your instincts. If the batter feels too thick, add a splash more milk. If it’s too runny, sprinkle in a bit more flour. Practice makes perfect, and each batch teaches you something new.
Storing and Reheating Tips
This cake is best enjoyed within a few days but will stay lovely in the fridge for up to 4 days. Wrap it tightly with plastic wrap or store in an airtight container—this keeps it moist and fresh. If you’re not devouring it all at once, I recommend slicing it first, then keeping individual pieces covered in the fridge for quick snacks. On warm days or if you need to keep it longer, it’s safe in the freezer—wrap slices tightly in plastic wrap and foil. To reheat, just pop a slice in the microwave for about 15-20 seconds until warm, or warm it in a low oven—trust me, warm brings out that cinnamon aroma and makes every bite feel comforting. As for the glaze, if you’ve added it, it’s best to wait until you’re ready to serve. If you want to freshen it up after a day or two, just re-glaze or add a sprinkle of cinnamon sugar on top. I’ve found that keeping it properly wrapped preserves the flavor and texture, and honestly, it’s one of those baked goods that tastes almost homemade even days later—nothing beats that feeling.
Frequently Asked Questions
Final Thoughts
This zucchini swirl cake is one of those recipes that feels like a warm hug from the oven. It’s endlessly adaptable, forgiving, and downright delicious. Whether you’re baking it for a weekday treat, a cozy weekend breakfast, or a casual dinner party, it always makes the house smell incredible. I love how it’s packed with simple ingredients but looks so charming and homemade—nothing fancy, just good, honest baking. I’ve experimented with a few variations over the years, and I get excited every time I pull it out of the oven, knowing how much my family will enjoy it. If you’re new to baking or just looking for a fail-proof recipe that delivers comfort and a touch of elegance, this one’s a keeper. I can’t wait to hear how yours turns out! Share your tweaks, photos, or stories in the comments—I always love hearing how a recipe comes alive in different kitchens. Happy baking, friends!

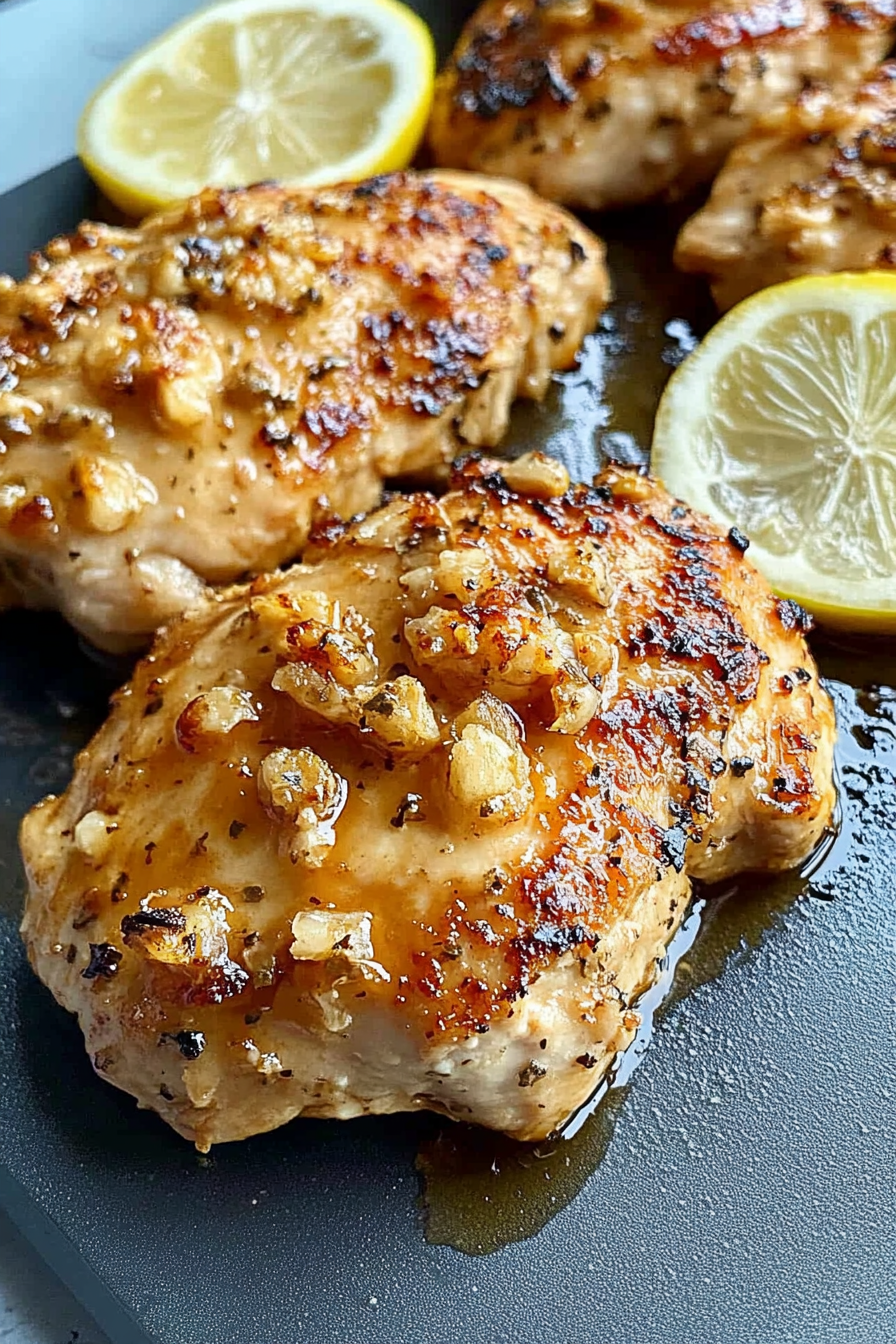
lemon garlic chicken
Ingredients
Method
- Preheat your oven to 400°F or your air fryer to 375°F.
- Rinse and pat dry your chicken pieces. Transfer to a ziploc bag.
- In a small bowl, combine the olive oil, lemon juice, honey, garlic, spices, salt, and pepper, and grated parmesan. Whisk together. Transfer 3/4 of this mixture to the ziploc bag and close the bag. Swoosh to coat. Refrigerate for at least 30 minutes or overnight. Reserve the remaining marinade for serving.
- Place the chicken on a baking sheet and bake for 17-20 minutes. Alternatively, air fry for 12 minutes.
- Top the cooked chicken with the remaining marinade before serving.