Easy Baked Spaghetti Dinner Recipe
There’s something about baking with zucchini that takes me straight back to my grandmother’s kitchen. Maybe it’s the way the smell of warm cocoa and fresh veggies mingles and fills the entire house, or how everyone gathers around, curious about that sneaky green stuff hiding in the batter. Honestly, I wasn’t always a huge fan of zucchini—at least not until I discovered how incredible it can be in baked goods. This zucchini chocolate swirl cake? It’s my go-to when I want a dessert that’s moist, indulgent, but secretly sneaky in the best way. Plus, unlike traditional cakes that can feel heavy or overly sweet, this one’s somehow light and vibrant—almost like eating a little slice of vegetable-powered happiness. It’s perfect when you want something decadent but still have that tiny voice in your head saying, “But it’s almost dinner time…” Trust me, I’ve made this countless times, and it never fails to disappear in minutes at my house. The kids ask for seconds; my coffee friends ask for the recipe, and honestly, it’s become a bit of a comfort food for us all.
What is Zucchini Chocolate Swirl Cake?
This zesty little number is essentially a chocolate cake infused with shredded zucchini—think of it as a smarter, more sneaky way to get some greens in your dessert. The idea actually comes from traditional zucchini bread, but I took it up a notch by swirling in rich chocolate batter to create a marbled effect that’s as beautiful as it is delicious. The name might sound fancy, but this cake is dead simple to make, even on those busy weeknights when you’re craving something sweet yet need to keep things quick. It’s the kind of dessert that surprises everyone because, let’s be honest, no one can tell there’s vegetables hiding inside. My goal with this recipe was to create a moist, chocolatey treat that my kids could never resist—yet I can feel good about serving it because it’s got that added boost of zucchini’s hydration and fiber. Think of it as a win-win: you get a gorgeous, impressive-looking cake with almost no extra effort, and it’s a dessert that feels a little healthier than your average chocolate cake.
Why you’ll love this recipe?
What I love most about this zucchini chocolate swirl cake is just how versatile and forgiving it is. The flavor? Oh, it’s pure chocolatey heaven—rich, deep, with just enough sweetness to hit that perfect spot. The zucchini keeps it insanely moist; every bite practically melts in your mouth. And let me tell you, this one’s a lifesaver on busy nights. When I’ve got early mornings or just don’t feel like fussing over complicated desserts, I toss everything together in one bowl, swirl it up, and pop it in the oven. No fuss, no stress—yet everyone thinks I’ve been slaving away! Plus, it’s budget-friendly—most of the ingredients are pantry staples: cocoa powder, flour, sugar, and of course, zucchini. Another favorite thing? It’s endlessly adaptable. Want to add a handful of walnuts, or swap out some of the sugar for honey? You can. You’ll find this cake infinitely customizable to suit your taste and ingredients on hand. And honestly, what I love most about this cake is how it brings people together—family, friends, even that neighbor who drops by for a quick cup of coffee. It’s cozy, familiar, and secretly good for you.
How do I make Zucchini Chocolate Swirl Cake?
Quick Overview
This cake comes together in just minutes once you get your ingredients organized. Mix the wet ingredients, then combine with dry ingredients in a single bowl—no need to beat… just fold until it’s smooth. Pour half of the batter into your prepared pan, layer with the chocolate batter, then swirl together to get that marbled look. Bake until a toothpick comes out clean, and voilà—you’ve got a show-stopping dessert that looks fancy but is really just simple magic. The best part? I tested this with different types of cocoa (Dutch-process and natural), and honestly, both worked beautifully. It’s a forgiving recipe that rewards a light touch. Trust me on this one—you’ll be surprised how easy it is to get perfect, moist slices every time.
Ingredients
For the Main Batter:
– 2 cups all-purpose flour (I always use unbleached for extra flavor)
– 1 cup granulated sugar (or coconut sugar for a bit of a caramel twist)
– ¾ cup unsweetened cocoa powder (Dutch-process for a richer chocolate flavor)
– 1 teaspoon baking powder
– ½ teaspoon baking soda
– ½ teaspoon salt
– 1 cup shredded zucchini (squeeze out excess moisture after grating)
– ½ cup vegetable oil (or apple sauce if you want to keep it lighter)
– 3 large eggs
– 1 teaspoon vanilla extract
For the Filling:
– ½ cup semi-sweet chocolate chips or chopped chocolate (optional but totally recommended for richness)
– ¼ cup milk or cream for smoother swirl (I’ve also tested almond milk—works like a charm)
For the Glaze:
– ½ cup powdered sugar
– 1-2 teaspoons milk or lemon juice (to create a glaze consistency)
– A sprinkle of cocoa powder or chocolate shavings for decoration
Step-by-Step Instructions
Step 1: Preheat & Prep Pan
I always start by preheating my oven to 350°F (175°C). Grease your cake pan—either a 9-inch round or a loaf pan, whatever you prefer—and line it with parchment paper if you want an extra clean slice. This keeps things easy for those delicate cuts later. Getting the pan ready first just means less stress once your batter is ready to go in.
Step 2: Mix Dry Ingredients
In a large mixing bowl, whisk together the flour, cocoa powder, baking powder, baking soda, salt, and sugar. The key here is to make sure everything’s thoroughly combined so no pockets of flour or cocoa sneak through. I usually do this with a gentle whisk, and I make sure to sift the cocoa if it’s clumpy—nobody likes biting into a lump of cocoa!
Step 3: Mix Wet Ingredients
In another bowl, whisk the eggs, oil, vanilla, and shredded zucchini. I like to grate the zucchini, then squeeze out the extra moisture with a clean dish towel—trust me, too much moisture can make for a dense cake. A little zest or a squeeze of lemon in the zucchini mixture gives a fresh note that balances the richness of the cocoa.
Step 4: Combine
Pour the wet ingredients into the dry and gently fold until just combined—don’t overmix! Overmixing can make the cake tough, and nobody wants that. It’s okay if a few streaks of flour are still visible; they’ll disappear during baking.
Step 5: Prepare Filling
If you’re using chocolate chips, stir them into about half of the batter, or melt your chopped chocolate with a splash of milk for the swirling layer. I love adding a drizzle of coffee or cinnamon at this stage for a flavor twist—I say, play around and make it your own.
Step 6: Layer & Swirl
Pour half of the plain batter into your prepared pan. Dollop spoonfuls of the chocolate batter on top, then add the rest of the plain batter. Using a toothpick or skewer, gently swirl through the layers—don’t overdo it; a few swirling motions create that marbled look without turning it into a mess.
Step 7: Bake
Bake in your preheated oven for about 30-35 minutes, or until a toothpick inserted in the center comes out with just a few moist crumbs. Ovens vary, so keep an eye on the first batch—you want it moist but not wet. If you notice cracks forming on top, don’t worry; that’s just a sign of a perfectly baked cake.
Step 8: Cool & Glaze
Let the cake cool in the pan for about 10 minutes, then transfer to a wire rack. Once completely cooled, drizzle with your glaze—mix the powdered sugar with milk until it’s thick but pourable. I love adding a splash of vanilla or lemon zest to the glaze for extra flavor. The smell alone when the glaze hits the warm cake is just irresistible!
Step 9: Slice & Serve
Use a sharp serrated knife for clean slices. I like to wait until it’s just barely warm—then the chocolate swirl looks even more stunning. Serve with a dollop of whipped cream or a dusting of cocoa powder, and watch everyone’s eyes light up.
What to Serve It With
This cake is a chameleon—sweet enough to be dessert, but so good with a cup of coffee in the morning, too. For breakfast, I love a slice with a bland coffee or a dollop of Greek yogurt—it’s rich but not overly heavy. On weekends, I might serve it with fresh berries and a splash of cream for a fancy brunch vibe. As a dessert, serve warm with vanilla ice cream or a drizzle of caramel—my kids actually ask for this all the time. Trust me, it’s the kind of treat that’s perfect for sharing at family dinners or last-minute get-togethers. Sometimes I even crumble leftovers over oatmeal for an extra hit of chocolate and greens. It’s surprisingly versatile, and I can say honestly that it’s become a family favorite for all the right reasons—moist, flavorful, easy, and a little healthier than your average cake.
Top Tips for Perfecting Your Zucchini Chocolate Swirl Cake
Here are some tricks I’ve picked up over the years to make sure yours turns out just right:
- Zucchini Prep: Always squeeze out the excess moisture—if you don’t, your cake might turn out dense and greasy. Grate zucchini on a fine box grater, then gather it in a clean kitchen towel and give it a good squeeze. Freshness! I’ve tested with frozen shredded zucchini; it works okay, but I prefer fresh for that bright flavor and better moisture control.
- Mixing Advice: Overmixing is the enemy of moist cake—fold just until you barely see streaks of flour. That’s when it’s perfect. The batter should be shiny and smooth but not runny.
- Swirl Customization: Try layering different flavors—blueberry jam, peanut butter, or even a hint of peppermint! Use a skewer to create a beautiful marbled effect. The secret is gentle swirling—you want pretty ribbons, not a muddled mess.
- Ingredient Swaps: Substitute coconut oil or applesauce to make it dairy-free. Natural sweeteners like honey or maple syrup work, but reduce the other liquid accordingly—trust me, the texture needs balancing. For a deeper chocolate flavor, add a teaspoon of espresso powder to the cocoa—it amplifies the richness.
- Baking Tips: Rotate your cake halfway through if it’s browning unevenly, and start checking doneness a few minutes early—you don’t want it overbaked. Every oven is different, so trusting your toothpick test is key.
- Glaze Variations: Use melted dark chocolate for a richer topping, or dust with powdered sugar for a lighter finish. I love adding a pinch of chili powder or cinnamon to the glaze for a spicy kick—try it someday!
Honestly, I’ve made so many tweaks over the years that I feel like this recipe keeps evolving. But the one thing that stays constant is how happy it makes people—whether it’s a family birthday or a quick afternoon snack. It’s foolproof, cozy, and secretly nutritious.
Storing and Reheating Tips
Keep this cake stored properly, and it remains just as delightful for days. If you’re planning to enjoy it over several days, I recommend wrapping it tightly in plastic wrap or storing it in an airtight container at room temperature for up to 2 days. I find that refrigerating keeps it fresh for about a week, especially if you’ve added a lot of fresh toppings or glaze. Just bring slices to room temperature before serving to revive that moist, melt-in-your-mouth texture. For freezing, wrap slices individually in plastic wrap, then place them in a zip-top bag—great for grabbing for an afternoon treat. When thawing, leave at room temperature for about 30 minutes—no microwave, or you risk melting the glaze or drying out the cake. I personally love making a fresh glaze after reheating, which I find adds an extra layer of richness. And if you made the swirl with chocolate, I suggest keeping the glaze light or skipping it on leftovers—nothing beats that fresh, gooey chocolate experience from the first day.
Frequently Asked Questions
Final Thoughts
This zucchini chocolate swirl cake has truly become a family staple—so much so that my kids ask for it on birthdays and cozy weekend mornings. It’s the kind of dessert that feels fancy enough to serve to guests but simple enough to whip up on a weeknight after a busy day. The magic ingredient is, of course, that secret vegetable—zucchini—which keeps it incredibly moist and subtly adds a boost of nutrition. I always say, the best recipes are the ones that make you smile, comfort you, and somehow sneak in a little bit of health—this one does just that. If you’re looking to impress without stress or just want a slice of something delicious and slightly healthier, give this a try. And hey, I’d love to hear how yours turns out! Drop a comment or share your variations—baking is all about personal touch. Happy baking!
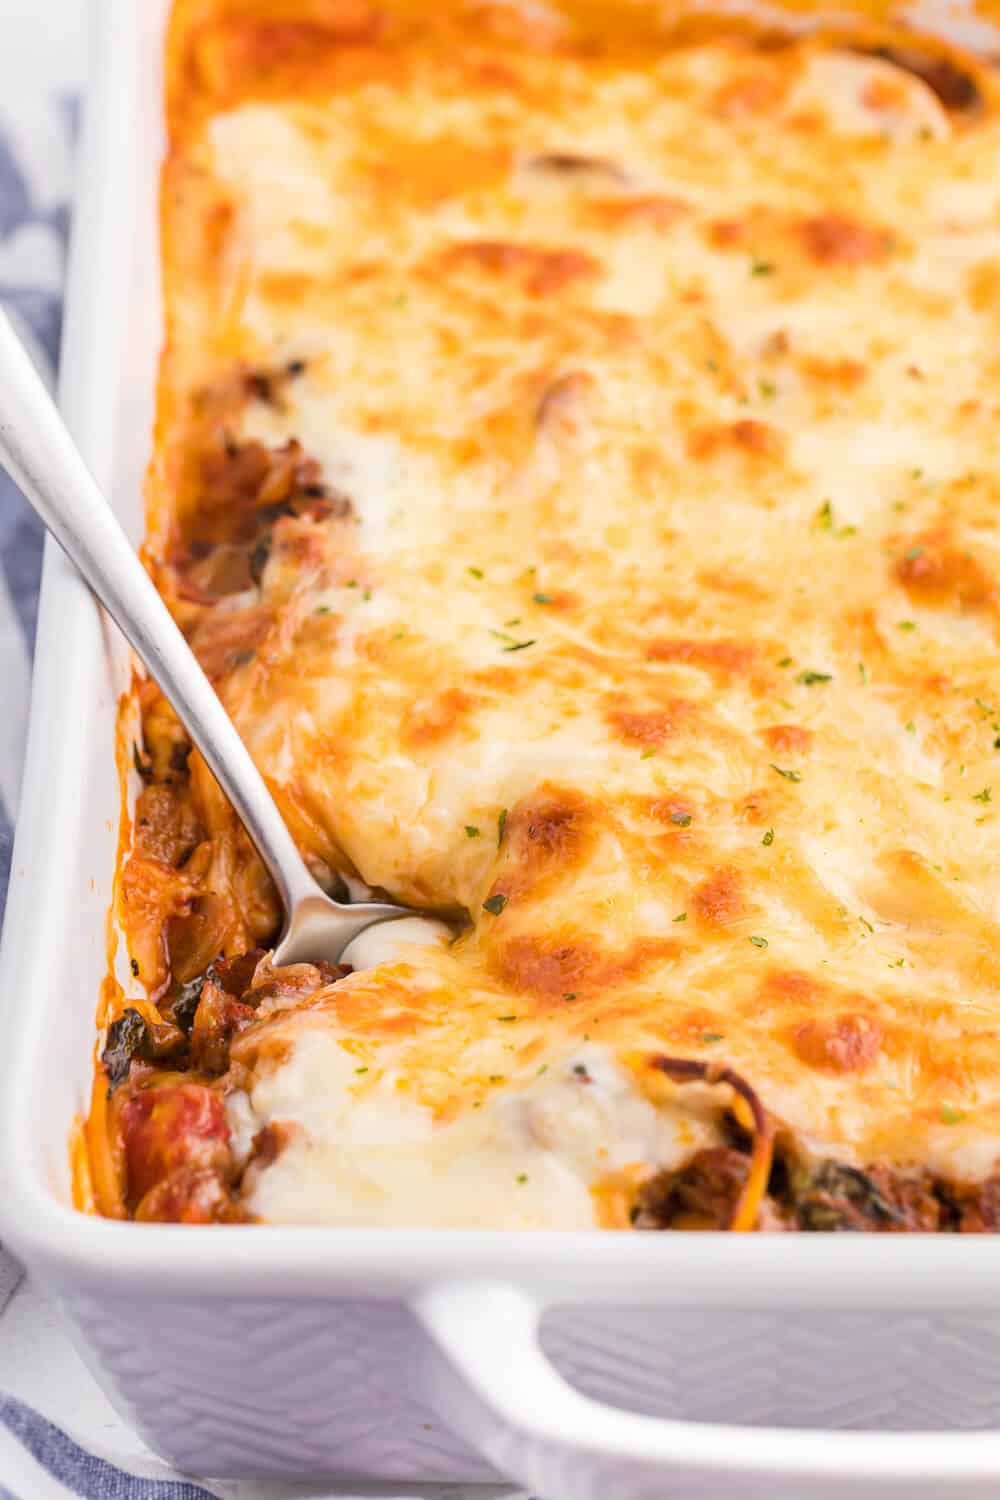
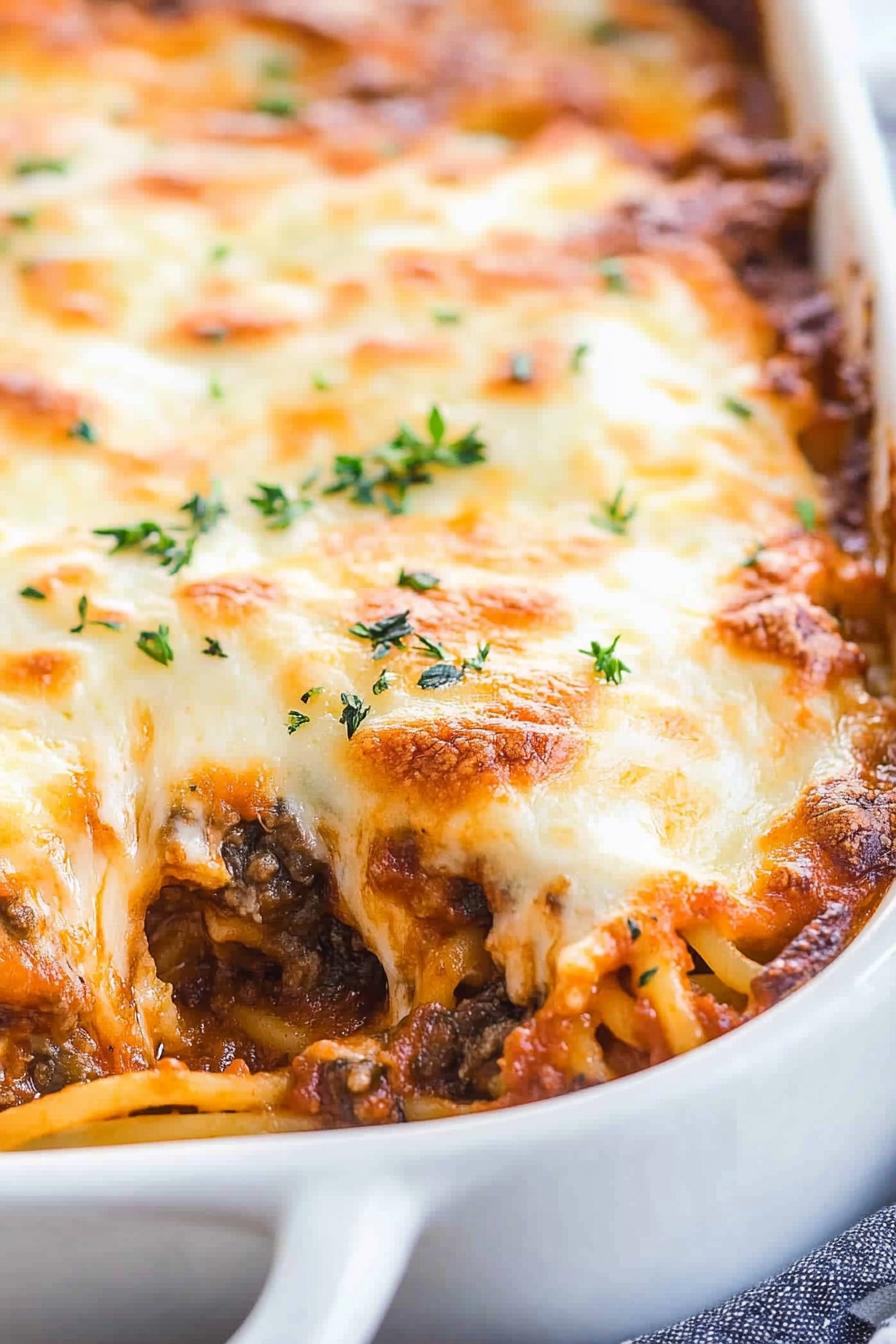
spaghetti bake
Ingredients
Method
- Preheat the oven to 375°F.
- Cook sausage in a large pan over medium-high heat until no longer pink. Stir often to crumble the sausage.
- Add chopped onion, garlic, and dried basil and stir to combine. Cook for 5 minutes.
- Add sliced mushrooms and cook for another 5 minutes.
- Stir in diced tomatoes, tomato paste, and pepper. Bring to a boil, then reduce heat and simmer for 15 minutes.
- Add spinach, stir, and remove from heat.
- In a small saucepan, melt butter over medium heat. Whisk in flour and cook for 1 minute.
- Gradually whisk in milk and cook until thickened. Stir in 1 cup mozzarella and a pinch of salt.
- Cook spaghetti until al dente, then drain and combine with meat sauce.
- Spread the mixture in a 9x13 inch casserole dish. Pour cheese sauce on top, then sprinkle remaining mozzarella and Parmesan cheese.
- Bake for 30 minutes or until the top is golden brown. Serve hot.