Easy Creamy Chicken Pasta in a Slow Cooker
You know those recipes that just feel like a warm hug? The ones that smell like childhood and make your kitchen feel instantly cozier? This zucchini bread is absolutely one of those for me. It’s not just any zucchini bread, though. This one is unbelievably moist, packed with cinnamon-spiced goodness, and has this incredible tender crumb that’s just pure magic. I’ve tried a million zucchini bread recipes over the years, and some are okay, some are dry, and some just don’t have that ‘wow’ factor. But this one? This one is a keeper. It’s what I bake when I need a pick-me-up, when unexpected guests pop over, or when I just have a few sad-looking zucchini lurking in the fridge that need a delicious purpose. It’s like a simpler, more comforting cousin to a spiced apple cake, but with that special zucchini secret that makes it extra special and surprisingly healthy-ish!
What is Zucchini bread?
So, what exactly *is* zucchini bread? Well, at its heart, it’s a quick bread, meaning it doesn’t require yeast or any complicated rising techniques. It’s baked in a loaf pan, much like its banana bread sibling, but with grated zucchini taking center stage. The name itself is pretty straightforward, right? But what’s fascinating is how that humble zucchini completely transforms in the oven. It lends an unbelievable moisture and tenderness to the crumb without imparting any strong vegetable flavor. Think of it as nature’s little secret for the most perfect, moist cake-like texture. It’s essentially a delightful way to sneak in some extra veggies, disguised as an irresistible sweet treat. It’s not quite cake, not quite bread, but something wonderfully in-between that’s perfect for any time of day.
Why you’ll love this recipe?
Okay, let’s talk about why this specific zucchini bread recipe has become my absolute go-to, and why I just know you’re going to adore it too. First off, the flavor is just out of this world. It’s got this perfect balance of warm spices – cinnamon is the star, but a touch of nutmeg whispers in the background – and just the right amount of sweetness. It’s not cloying at all; it’s just perfectly balanced. And the texture! Oh my goodness, the texture. It’s unbelievably moist and tender. I’ve tested this with a splash of almond milk instead of regular milk, and guess what? It made it even creamier! It’s like a little slice of heaven in every bite. Then there’s the sheer simplicity of it. Seriously, if you can whisk a few things together, you can make this. It’s one of those lifesavers on a busy weeknight when you want something homemade and delicious without a whole production. Plus, it’s wonderfully budget-friendly. Zucchini is often so affordable, and the other ingredients are pantry staples. It’s a win-win-win! What I love most is its versatility. It’s fantastic on its own, but it’s also a great base for adding nuts, chocolate chips, or even a streusel topping if you’re feeling fancy. Compared to other quick breads, it has this unique moisture that just keeps it from ever being dry, which is a common downfall for so many recipes out there. It’s genuinely the best zucchini bread I’ve ever made, and I’m so excited for you to try it!
How do you make Zucchini bread?
Quick Overview
This recipe is wonderfully straightforward. You’ll mix your dry ingredients, whisk together your wet ingredients, then combine them gently. The star, grated zucchini, gets folded in, and then you pour it into your prepared pan and bake until golden and fragrant. The whole process, from start to finish, can be done in under an hour and a half, with most of that being hands-off baking time. It’s incredibly forgiving, and the results are consistently fantastic, ensuring a perfectly moist and flavorful loaf every single time. You’ll be amazed at how easy it is to achieve such delicious results!
Ingredients
For the Main Batter:
2 cups all-purpose flour (spooned and leveled – I always use King Arthur’s, it’s reliable!)
1 teaspoon baking soda
1/2 teaspoon baking powder
1/2 teaspoon salt
1 ½ teaspoons ground cinnamon
1/4 teaspoon ground nutmeg (optional, but it adds a lovely warmth!)
1 ½ cups granulated sugar (you can reduce this slightly if you prefer, but I find it perfect)
2 large eggs, at room temperature
3/4 cup vegetable oil (or melted coconut oil for a subtle flavor)
1/2 cup milk (whole milk or almond milk works beautifully for extra creaminess)
1 teaspoon vanilla extract
2 cups finely grated zucchini (about 2 medium zucchinis – squeeze out excess moisture!)
For the Filling:
1/2 cup packed light brown sugar
1 tablespoon ground cinnamon
1/4 cup chopped walnuts or pecans (optional, but adds a lovely crunch!)
For the Glaze:
1 cup powdered sugar
2-3 tablespoons milk (or lemon juice for a tangy kick)
1/2 teaspoon vanilla extract (optional)
Step-by-Step Instructions
Step 1: Preheat & Prep Pan
First things first, get your oven preheating to 350 degrees Fahrenheit (175 degrees Celsius). It’s so important to have your oven at the right temperature *before* your batter goes in. While the oven heats up, grease and flour a standard 9×5 inch loaf pan really well. I like to use a bit of baking spray with flour in it, or you can use butter and flour. This step is crucial to prevent any sticking and ensure your beautiful loaf slides out perfectly. You can also line it with parchment paper if you’re feeling extra cautious, leaving an overhang on the sides for easy lifting later.
Step 2: Mix Dry Ingredients
In a large bowl, whisk together the all-purpose flour, baking soda, baking powder, salt, cinnamon, and nutmeg (if you’re using it). Give it a good whisk to make sure everything is evenly distributed. This is a simple step, but it ensures your leavening agents and spices are spread throughout the batter, preventing any pockets of salt or baking soda and making sure every bite is perfectly flavored. I like to do this even before I start measuring my wet ingredients; it just makes the flow so much smoother.
Step 3: Mix Wet Ingredients
In a separate, medium-sized bowl, whisk together the granulated sugar, room temperature eggs, vegetable oil, milk, and vanilla extract until everything is well combined and smooth. Make sure your eggs are at room temperature; they incorporate better into the batter, leading to a more even texture. If you forget to take them out, no worries! Just pop them in a bowl of warm water for about 5-10 minutes.
Step 4: Combine
Now for the magic! Pour the wet ingredients into the bowl with the dry ingredients. Using a spatula or a wooden spoon, gently fold everything together until *just* combined. It’s really important not to overmix here. A few streaks of flour are okay; they’ll disappear as you fold in the zucchini. Overmixing can develop the gluten too much, leading to a tough loaf, and we definitely don’t want that! You want a tender, delicate crumb, so be gentle.
Step 5: Prepare Filling
While the batter is coming together, let’s get that delicious spiced filling ready. In a small bowl, mix together the light brown sugar and the 1 tablespoon of cinnamon. If you’re using nuts, stir them in now. This simple mixture is what gives our zucchini bread those wonderful pockets of sweet, spiced goodness that make it so special. It adds an extra layer of flavor and texture that takes it from good to absolutely divine.
Step 6: Layer & Swirl
Now, gently fold in your finely grated zucchini into the batter. Again, be careful not to overmix. You want to distribute it evenly. Next, spoon about half of the batter into your prepared loaf pan. Sprinkle about half of the brown sugar-cinnamon filling mixture evenly over the batter. Then, spoon the remaining batter on top, and finish by sprinkling the rest of the filling over the very top. For a really pretty swirl, you can use a knife or a skewer to gently swirl the filling into the top layer of batter. Just a few gentle passes will do the trick! This helps distribute the flavor and creates a beautiful marbled effect.
Step 7: Bake
Pop that beautiful loaf into your preheated oven. Bake for 50-65 minutes, or until a wooden skewer or toothpick inserted into the center comes out clean. The baking time can vary depending on your oven, so start checking around the 50-minute mark. If the top starts to get too brown before the inside is cooked, you can loosely tent it with aluminum foil. The aroma that fills your kitchen as it bakes is absolutely intoxicating – just pure comfort!
Step 8: Cool & Glaze
Once baked, let the zucchini bread cool in the loaf pan for about 10-15 minutes. This allows it to set up properly. Then, carefully invert it onto a wire rack to cool completely. This is important: don’t try to glaze it while it’s hot, or the glaze will just melt and drip off. Once it’s completely cool, whisk together the powdered sugar, 2 tablespoons of milk, and vanilla extract for the glaze. Add more milk, a teaspoon at a time, until you reach your desired drizzling consistency. Generously drizzle it over the cooled loaf. It adds that extra touch of sweetness and visual appeal that makes it look as good as it tastes.
Step 9: Slice & Serve
Once the glaze has set a bit (or if you skipped the glaze, once it’s fully cooled), it’s time to slice and enjoy! Use a serrated knife for the cleanest cuts. This zucchini bread is delicious at room temperature, but I find it’s absolutely divine when it’s still slightly warm. Serve it on its own for a perfect snack, or with a dollop of cream cheese or a pat of butter. The layers of spice and the incredibly moist crumb are just heavenly.
What to Serve It With
This amazing zucchini bread is so versatile, it honestly fits into so many moments! For a cozy breakfast, I love a thick slice toasted and served with a smear of butter and a strong cup of coffee. It’s hearty enough to keep you going but feels like a special treat. At brunch, it’s a star! I’ll often serve it alongside a fresh fruit salad and maybe some scrambled eggs or a quiche. It looks so pretty on a brunch spread. As a dessert, it’s fantastic, especially with that lovely glaze. Sometimes, I’ll even serve a warm slice with a scoop of vanilla bean ice cream or a drizzle of caramel sauce – pure indulgence! And for those cozy evening snacks? This is the ticket. It’s perfect when you’re craving something sweet at 10pm but don’t want to bake a whole cake. My kids absolutely adore having a piece after school with a glass of milk, and honestly, so do I. I’ve also found it pairs wonderfully with a light berry compote or even a dollop of Greek yogurt for a slightly healthier twist. The warm spices in the bread complement so many flavors.
Top Tips for Perfecting Your Zucchini Bread
I’ve definitely learned a few things over the years of making this zucchini bread, and I’m happy to share them to help you achieve perfection right from your first try! First, about the zucchini prep: it’s essential to grate your zucchini finely and then *squeeze out as much moisture as possible*. I usually use my hands or wrap it in a clean kitchen towel or cheesecloth and wring it out. This step is non-negotiable if you want a bread that bakes up properly and isn’t gummy. If you skip this, you’ll end up with a too-wet batter, and it can affect the baking time and texture. For mixing advice, remember my golden rule: *do not overmix*. Mix the wet and dry ingredients until *just* combined, and then fold in the zucchini gently. A few little flour streaks are fine; they’ll disappear. Overmixing is the enemy of tender quick breads! When it comes to the swirl, there’s no right or wrong way. You can just sprinkle the filling over the batter and then add the rest of the batter on top, or you can do a more deliberate swirl with a knife. Don’t overthink it; the flavor will be there regardless! For ingredient swaps, I’ve tested this with different flours – using a gluten-free blend works well, though you might need a little extra liquid. I also love adding chocolate chips! About 1/2 cup of mini chocolate chips folded into the batter is divine. Baking tips are super important too. Make sure your oven is truly preheated. Always use the middle rack for even heat distribution. And remember that skewer test for doneness; it’s the most reliable way. Finally, for the glaze variations, if you want a thicker glaze, use less liquid. If you want it thinner, add more. You can also add a tiny bit of lemon zest to the glaze for a bright, zesty counterpoint to the sweet bread. I once forgot to squeeze the zucchini and it came out a bit dense, so trust me on that squeezing step!
Storing and Reheating Tips
Keeping your delicious zucchini bread fresh and tasty is pretty easy, thankfully! At room temperature, once it’s completely cooled and the glaze has set, I store it in an airtight container. It stays wonderfully moist for about 3-4 days. Just make sure it’s not too humid where you store it. If you live in a warmer climate or just want it to last a bit longer, refrigerator storage is your best bet. Wrap it tightly in plastic wrap or place it in an airtight container. It should keep well for up to a week, though the texture might change ever so slightly. When you’re ready to enjoy a slice from the fridge, you can eat it cold, or pop it in the toaster for just a few seconds to bring back that lovely warmth and softness. For longer storage, this bread freezes beautifully! I like to wrap the entire cooled loaf (or individual slices) tightly in a layer of plastic wrap, then a layer of aluminum foil, and finally pop it into a freezer-safe bag. It can last for up to 2-3 months this way. To thaw, just unwrap it and let it come to room temperature. If you want that fresh-baked feel, you can warm slices gently in a low oven (around 250°F or 120°C) for about 10-15 minutes. And for the glaze, I always wait until the bread is completely cooled before drizzling it on. If you’re freezing, it’s best to store the bread *without* the glaze and add it after thawing and warming. If you do glaze it before freezing, the glaze might get a little sticky or change texture, but it’s still edible!
Frequently Asked Questions
Final Thoughts
Honestly, this zucchini bread is more than just a recipe to me; it’s a little piece of comfort that I’m so thrilled to share with you. It’s the kind of baking that makes you feel good, both while you’re making it and especially when you’re enjoying that first warm, tender bite. Its incredible moistness, the fragrant spices, and the sheer ease of preparation make it a winner every single time. It’s the perfect solution for using up those garden zucchinis and a guaranteed crowd-pleaser for any occasion. If you love this recipe, you might also enjoy my classic banana bread or my incredibly moist blueberry muffins. They share that same spirit of simple, delicious home baking. I really hope you give this zucchini bread a try; I can’t wait to hear what you think! Let me know in the comments how yours turns out, and if you have any special additions or variations you love. Happy baking!
Slow Cooker Creamy Chicken Pasta
Ingredients
Method
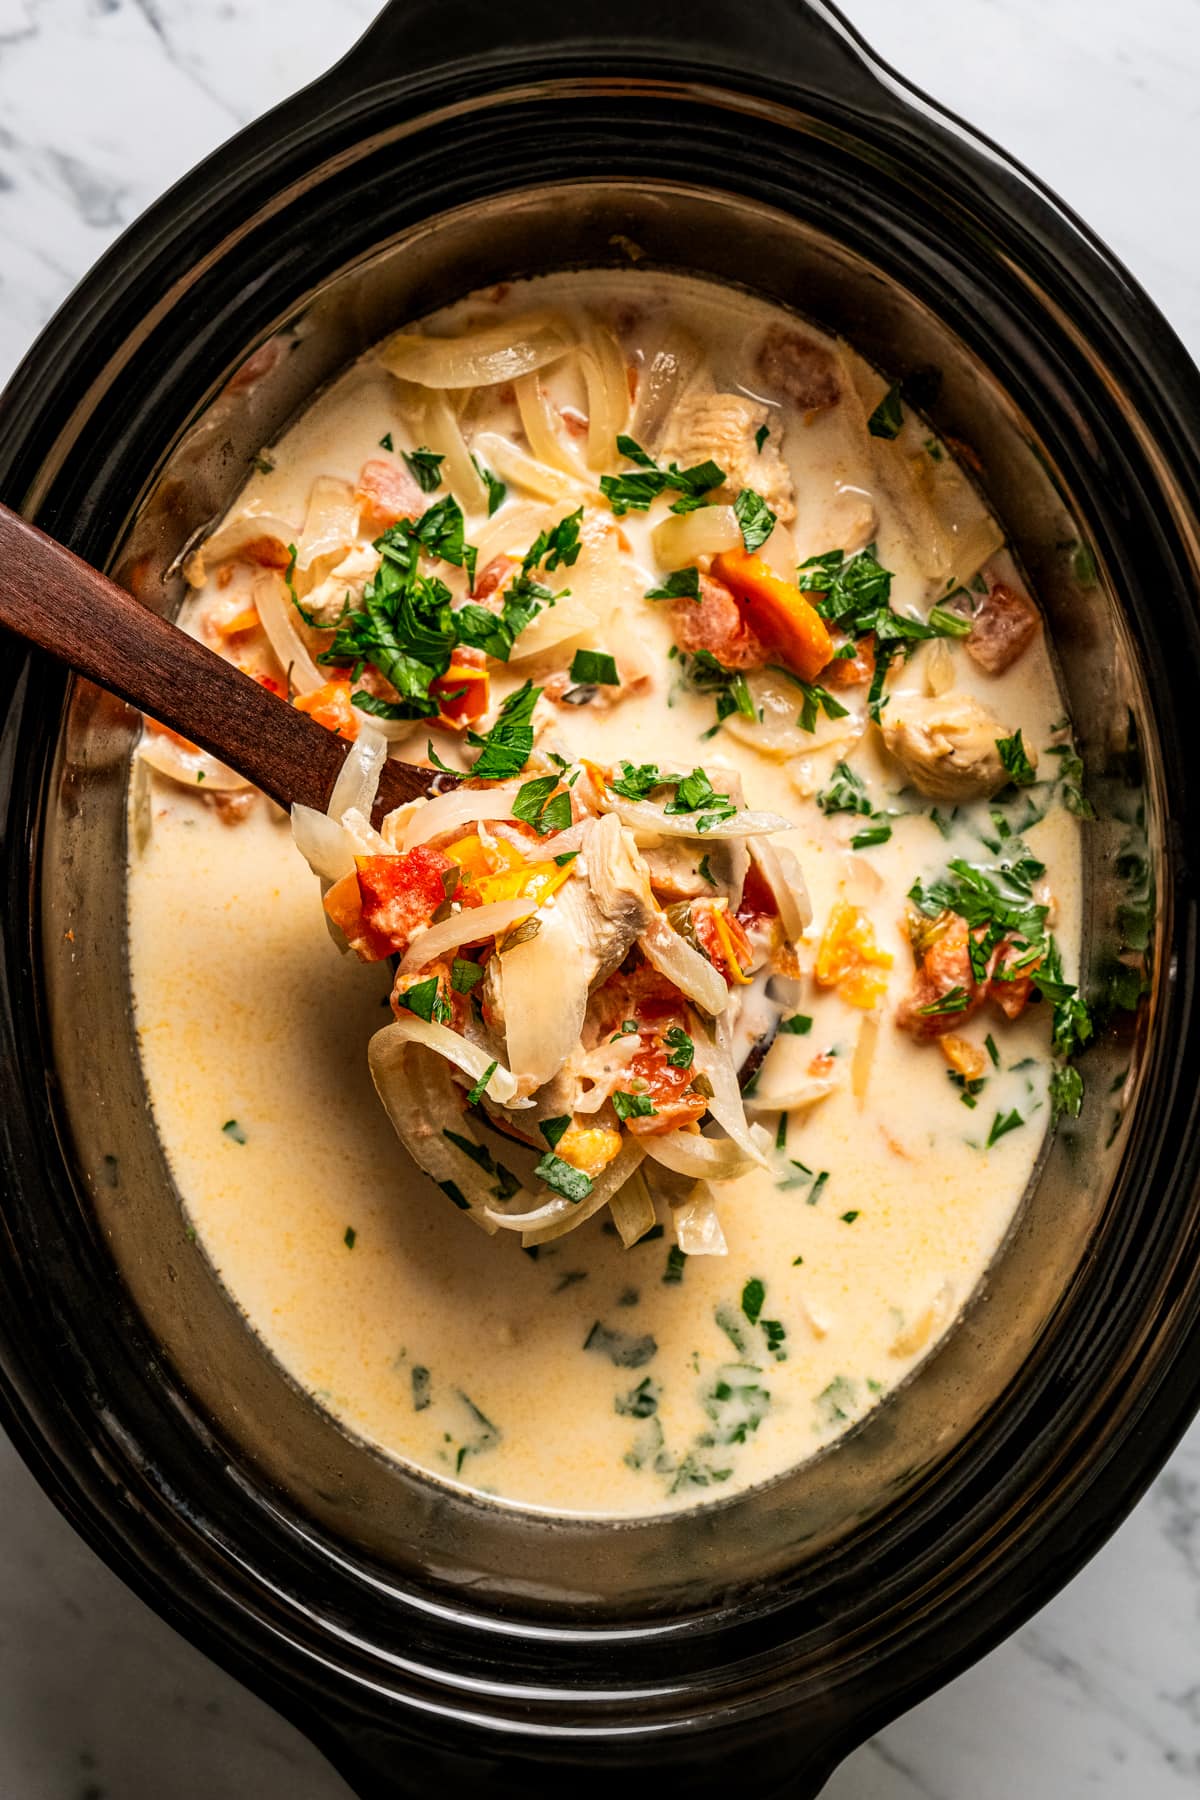
- To the slow cooker, add the chicken, chicken broth, heavy cream, butter, onions, carrots, tomatoes, Italian seasoning, garlic powder, dried thyme, salt, and pepper. Stir and cover.
- Cook on HIGH for 2 to 2.5 hours or on LOW for 4 hours.
- Stir in the noodles and parmesan and cook for 20 to 25 minutes or until the pasta is tender.
- Stir, taste for salt and pepper, and adjust.
- Serve in bowls garnished with fresh parsley.