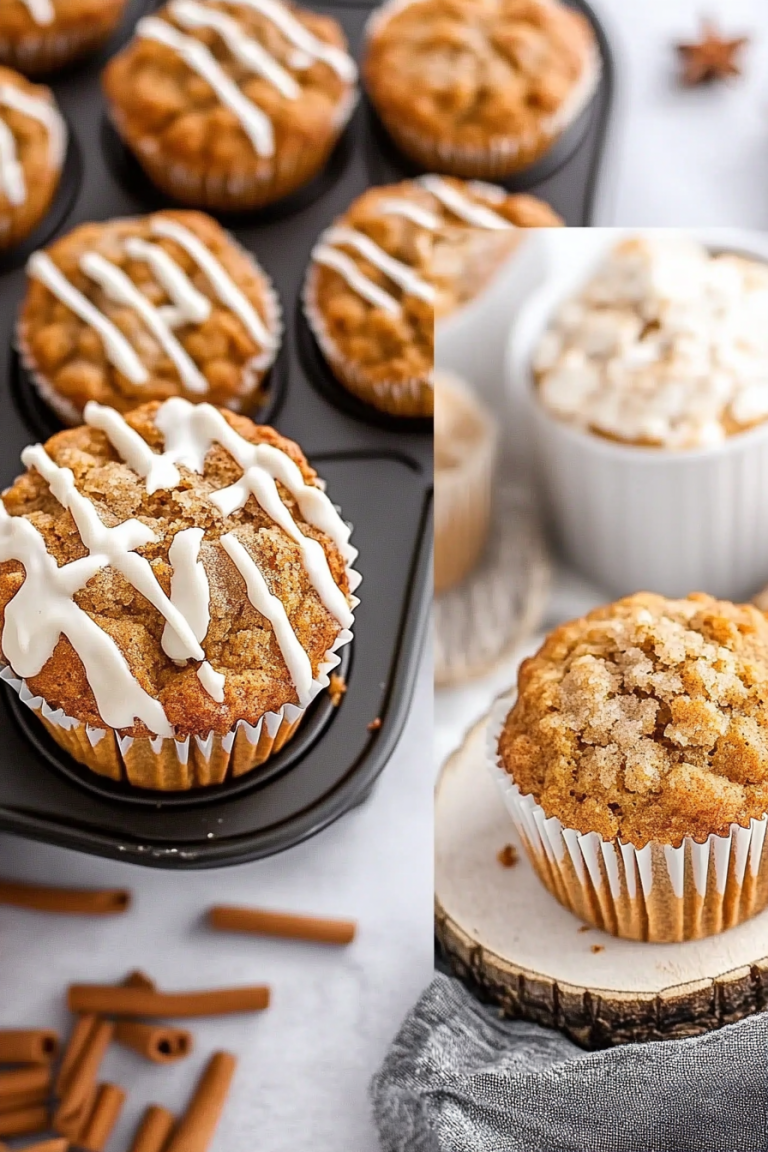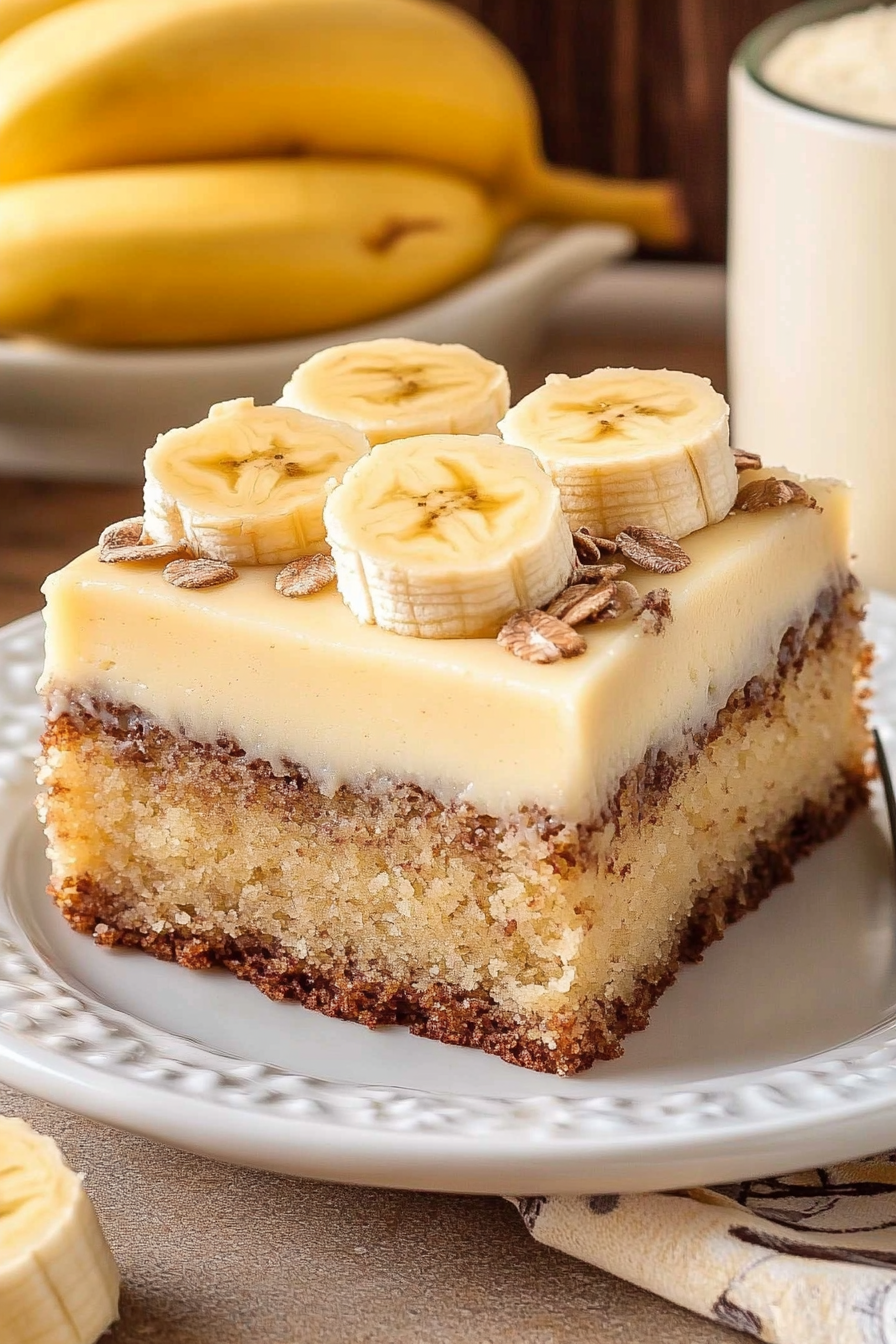
Golden Banana Cake How to Bake It Easy
Okay, you *have* to try this zucchini bread. I know, I know, zucchini bread can sometimes be…well, a little bit sad. Like a health food in disguise that doesn’t quite fool anyone. But this? This is different. This is the zucchini bread that makes my kids ask for seconds (and thirds!), the one that disappears in minutes when I bring it to a potluck, and the one I reach for when I’m craving something wonderfully sweet and comforting without the fuss of a full cake. It’s incredibly moist, packed with warm spice, and has this delightful hint of sweetness that’s just *chef’s kiss*. Honestly, it’s become my benchmark for what a truly fantastic quick bread should be. Forget those dry, crumbly imposters; this is the real deal, and it’s going to become your new favorite, too. I’m so excited to share this with you!
What is Zucchini bread?
So, what makes this zucchini bread so special, you ask? Think of it as the ultimate comfort food, disguised as a wholesome baked good. At its heart, it’s a classic quick bread, meaning you don’t need any fancy techniques or proofing like you would for yeast breads. It’s literally a mix-and-bake situation. The “zucchini” part isn’t just for show, though! It’s the secret weapon for that incredible, almost unbelievable moisture. It melts into the batter as it bakes, leaving behind a tender crumb that’s out of this world. It’s essentially a hug in loaf form, elevated with warm spices and a touch of sweetness that makes it feel like a decadent treat, even though it’s packed with good-for-you zucchini. It’s the kind of thing you can feel good about serving for breakfast, but it’s equally perfect for an afternoon pick-me-up or even a simple dessert.
Why you’ll love this recipe?
Honestly, there are so many reasons this zucchini bread has earned a permanent spot in my baking rotation. First off, the flavor is just *phenomenal*. It’s not overly sweet, but there’s a comforting warmth from the cinnamon and nutmeg that just sings. The zucchini adds this subtle earthy note that balances everything perfectly. And the texture? Oh my goodness. It’s impossibly moist and tender. I’ve tested this recipe with almond milk, and it actually made it even creamier, which I never thought was possible!
But beyond the taste, the simplicity is a major win for me. On busy weeknights when I need to whip up a dessert or a breakfast treat without a lot of fuss, this is my lifesaver. You literally just whisk some things together and bake. No creaming butter and sugar for ages, no worrying about overmixing. It’s foolproof. And talk about budget-friendly! Zucchini is usually pretty inexpensive, and the other ingredients are pantry staples for most of us. Plus, it’s so versatile. I’ll often add a handful of chocolate chips or chopped nuts, and it’s always a hit. It’s a far cry from those dry, crumbly zucchini breads you might have had in the past. This one is rich, moist, and utterly delicious, making it a winner for everyone from picky eaters to seasoned foodies.
How do I make Zucchini bread?
Quick Overview
The magic of this zucchini bread is in its straightforward approach. You’ll simply combine your dry ingredients in one bowl, your wet ingredients in another, then bring them together. The grated zucchini is stirred in last, adding that essential moisture. It’s then poured into a prepared loaf pan and baked until golden brown and a tester comes out clean. The whole process, from gathering ingredients to getting it in the oven, takes about 15-20 minutes. It’s designed for busy lives, proving that incredible flavor doesn’t have to be complicated.
Ingredients
For the Main Batter:
This is where all the goodness comes together. I always try to use medium-sized zucchini for the best moisture content – not too watery, not too dry. If you can get your hands on fresh, home-grown zucchini, even better! I usually grate mine on the larger holes of a box grater. It’s important to squeeze out *most* of the excess moisture, but don’t go crazy and get it bone dry; a little bit of liquid is good for that tender crumb. You’ll need about 2 cups of grated zucchini, packed. For the flour, I typically use all-purpose flour, but I’ve had success with a good quality 1:1 gluten-free blend if you need it. Make sure your baking soda and baking powder are fresh, as they are crucial for that lovely lift. I also love to use a mix of cinnamon and nutmeg for that cozy, warm flavor profile.
For the Filling:
This is where you can really customize this bread! My personal favorite is a simple swirl of brown sugar and cinnamon. It creates these lovely pockets of caramel-y goodness throughout the loaf. For this, you’ll just mix about 1/2 cup of packed brown sugar with 1-2 teaspoons of cinnamon. Some people like to add chopped walnuts or pecans here for extra crunch, which is also divine. You could even do a swirl of chocolate chips or a berry compote if you’re feeling adventurous! Just make sure whatever you add isn’t too wet, or it could affect the baking time.
For the Glaze:
This is optional, but I highly recommend it for that extra touch of sweetness and a beautiful finish. It’s a simple powdered sugar glaze. You’ll need about 1 cup of powdered sugar and a few tablespoons of milk (or even lemon juice for a little tang!). I like to start with 2 tablespoons of milk and add more, a teaspoon at a time, until it reaches a pourable but not too thin consistency. You want it to drizzle nicely without running right off the loaf.
Step-by-Step Instructions
Step 1: Preheat & Prep Pan
First things first, preheat your oven to 350 degrees Fahrenheit (175 degrees Celsius). This is the standard temperature for most quick breads, and it allows for even baking without drying out the edges before the center is cooked. While the oven is heating up, grab a standard 9×5 inch loaf pan. You want to grease it really well, and then flour it. I usually use butter or cooking spray for the greasing, then a tablespoon or two of flour, tilting the pan to coat all the sides. For extra insurance against sticking, especially if you’re using a darker pan, I sometimes line the bottom with a strip of parchment paper. This makes getting the loaf out a breeze!
Step 2: Mix Dry Ingredients
In a large mixing bowl, whisk together your all-purpose flour, baking soda, baking powder, salt, cinnamon, and nutmeg. Whisking is key here to ensure that your leavening agents and spices are evenly distributed. You don’t want any surprise pockets of baking soda or clumps of cinnamon. Give it a good whisk for about 30 seconds until everything looks uniformly combined. This step seems simple, but it really does make a difference in the final texture and flavor.
Step 3: Mix Wet Ingredients
In a separate medium bowl, whisk together your melted butter (or oil, if you prefer that), granulated sugar, eggs, and vanilla extract. Whisk until everything is well combined and slightly creamy. If you’re using oil, it will just be a smooth liquid. If you’re using melted butter, make sure it’s cooled slightly so it doesn’t scramble the eggs. I usually opt for melted butter because it adds a lovely richness, but a neutral oil like canola or vegetable oil works beautifully too and often results in an even moister bread.
Step 4: Combine
Now, pour the wet ingredients into the bowl with the dry ingredients. Using a spatula or a wooden spoon, gently fold the ingredients together until they are *just* combined. It’s really important not to overmix here! You’ll still see some streaks of flour, and that’s perfectly okay. Overmixing develops the gluten in the flour, which can lead to a tough, rubbery bread. We want tender and light, so stop as soon as you don’t see huge pockets of dry flour. Then, gently fold in your grated and squeezed zucchini until it’s evenly distributed. The batter will be thick.
Step 5: Prepare Filling
If you’re adding that glorious brown sugar and cinnamon swirl, now’s the time to mix it up! In a small bowl, combine your packed brown sugar and cinnamon. Give it a quick stir with a fork until it’s well combined. If you’re adding nuts or chocolate chips, have them ready to go.
Step 6: Layer & Swirl
Pour about half of the batter into your prepared loaf pan, spreading it out evenly. Now, sprinkle about half of your brown sugar-cinnamon mixture (or chocolate chips/nuts) over the top. Dollop spoonfuls of the remaining batter over the filling. Finally, sprinkle the rest of your filling over the top. For that beautiful swirl effect, you can gently run a knife or a skewer through the batter in a zigzag motion. Don’t overdo it, you want distinct layers and swirls, not a uniform color. Just a few passes are enough to create those lovely patterns.
Step 7: Bake
Pop the loaf pan into your preheated oven. Bake for about 50-65 minutes. The exact time will depend on your oven, so start checking around the 50-minute mark. The bread is done when it’s golden brown on top and a wooden skewer or toothpick inserted into the center comes out clean, with no wet batter clinging to it. If you notice the top is browning too quickly before the center is cooked, you can loosely tent it with aluminum foil for the last 15-20 minutes of baking.
Step 8: Cool & Glaze
Once it’s baked, let the loaf cool in the pan on a wire rack for about 10-15 minutes. This allows it to set up a bit. Then, carefully invert the loaf onto the wire rack to cool completely. If you used parchment paper, you can lift it right out. Letting it cool completely is important, especially before glazing. If you try to glaze a warm loaf, the glaze will just melt and drip off. Once it’s completely cool, whisk together your powdered sugar and milk (or lemon juice) for the glaze. Start with a little liquid and add more slowly until you get a nice, drizzly consistency. Drizzle it generously over the top of the cooled loaf.
Step 9: Slice & Serve
Once the glaze has set slightly (about 15-20 minutes), your incredible zucchini bread is ready to be sliced and enjoyed! I like to use a serrated knife for clean slices. Serve it at room temperature for the best texture and flavor. It’s delicious on its own, or with a smear of butter. The aroma alone is enough to make you happy!
What to Serve It With
This zucchini bread is so versatile, it works for almost any occasion! For a lovely breakfast, I love to serve it with a strong cup of coffee or a steaming mug of tea. It’s simple, satisfying, and wakes you up with its warm spices. For brunch gatherings, it’s a fantastic addition to a buffet spread. I’ll often cut it into smaller squares and arrange them artfully on a platter, maybe with some fresh berries on the side for a pop of color and freshness.
As a dessert, it’s surprisingly elegant. A drizzle of the glaze makes it feel special, and a small scoop of vanilla bean ice cream alongside it is pure heaven, especially if the bread is still slightly warm. For those cozy snack moments, when you just need something comforting, this bread is perfect. I’ll often just grab a slice (or two!) with a glass of cold milk while I’m curled up with a book. My family also loves it toasted lightly the next day; it brings out a slightly different, delightful texture. It’s one of those recipes that truly fits every moment.
Top Tips for Perfecting Your Zucchini Bread
Over the years, I’ve picked up a few tricks that make this zucchini bread consistently amazing. Let’s dive into some of those little secrets!
Zucchini Prep: This is probably the most crucial step for moisture control. You absolutely want to grate your zucchini using the larger holes of a box grater. Smaller gratings can turn mushy. After grating, place the zucchini in a fine-mesh sieve or a clean kitchen towel. Gently press down to release as much liquid as you can. You don’t need to wring it out bone-dry, but you want to remove the excess water. This prevents a soggy bread and ensures it bakes up beautifully. I learned this the hard way after a few batches that were a little too wet!
Mixing Advice: Remember that “just combined” rule? It’s gold! When you combine the wet and dry ingredients, stop mixing the moment you no longer see dry flour streaks. Those little lumps are fine. Overmixing develops gluten, which is the enemy of tender baked goods. A few stirs too many can turn a moist quick bread into something more chewy or dense. Use a spatula for this stage; it’s gentler than a whisk.
Swirl Customization: The cinnamon-sugar swirl is my go-to, but feel free to experiment! For a truly stunning visual, you can add a few drops of food coloring to your cinnamon-sugar mixture before swirling. Just a little goes a long way. You can also swirl in chocolate chips, chopped nuts, or even a dollop of fruit jam. If you add something wet like jam, be sure to keep the amount minimal to avoid making the bread too wet.
Ingredient Swaps: While this recipe is fantastic as is, I’ve played around with a few swaps! For a richer flavor, you can substitute half of the all-purpose flour with whole wheat flour. If you’re out of eggs, a flax egg (1 tablespoon flaxseed meal + 3 tablespoons water, let sit for 5 minutes) can work in a pinch, though the texture might be slightly denser. I’ve also tested this with various plant-based milks for the glaze, like oat or soy, and they work wonderfully. For the sweetener, you can reduce the granulated sugar slightly if you prefer, but remember that sugar contributes to moisture and tenderness.
Baking Tips: Every oven is different, so get to know yours! If you find your oven tends to bake hot, you might want to reduce the temperature by 10-15 degrees Fahrenheit. Always check for doneness with a skewer or toothpick inserted into the thickest part of the loaf. If it comes out clean, it’s done. If it has wet batter, bake for another 5-10 minutes and check again. Placing the loaf on the center rack ensures even heat circulation.
Glaze Variations: The simple powdered sugar glaze is classic, but you can jazz it up! For a citrusy kick, use fresh lemon juice or orange juice instead of milk. A touch of almond extract can also add a lovely subtle flavor. If you prefer a less sweet topping, you can simply dust the cooled loaf with a bit of powdered sugar or cinnamon sugar.
Storing and Reheating Tips
Keeping this delicious zucchini bread fresh is a breeze, and thankfully, it stays wonderfully moist. For best results, I always let it cool *completely* before storing it. Trying to store a warm loaf can lead to condensation and a soggy bottom, which we definitely want to avoid.
Room Temperature: If you plan on enjoying the entire loaf within 2-3 days, storing it at room temperature is perfectly fine. Wrap it tightly in plastic wrap or place it in an airtight container. This will keep it fresh and moist. I’ve found it tastes best within the first couple of days.
Refrigerator Storage: If you need it to last longer, up to a week, the refrigerator is your best bet. Wrap the cooled loaf tightly in plastic wrap, then place it in an airtight container or a resealable bag. The fridge can sometimes dry out baked goods, but because this zucchini bread is so moist to begin with, it holds up remarkably well.
Freezer Instructions: This bread freezes beautifully, which is a lifesaver when you’ve baked a double batch (and trust me, you’ll want to!). Once the loaf is completely cooled, wrap it very tightly in plastic wrap, then in a layer of aluminum foil. For extra protection, you can place the wrapped loaf in a freezer-safe bag. It will keep well in the freezer for up to 3 months. To thaw, unwrap it and let it sit at room temperature for a few hours, or thaw it overnight in the refrigerator.
Glaze Timing Advice: If you’re storing the loaf at room temperature or freezing it, it’s best to glaze it *after* it’s thawed or when you’re ready to serve it. If you glaze it before freezing, the glaze can become sticky or crack. If you plan on refrigerating it and want to glaze it beforehand, that’s usually fine, but be aware that condensation can affect the appearance of the glaze over time.
Frequently Asked Questions
Final Thoughts
So there you have it – my absolute favorite zucchini bread recipe. It’s the one that proves to everyone that zucchini bread can be moist, flavorful, and downright decadent. It’s more than just a recipe; it’s a little piece of comfort that I love to share. The way the warm spices mingle with the subtle sweetness, and that incredibly tender crumb… it’s pure magic, and I’m so happy you’re going to get to experience it too. I really hope you give this a try; it’s so rewarding to make something that brings so much joy to your family and friends.
If you love this recipe, you might also enjoy my “Lemon Poppy Seed Loaf” for a brighter citrus flavor, or my “Banana Bread Bliss” for another fantastic quick bread option. They all share that same emphasis on flavor and ease that I adore. Let me know in the comments below how yours turns out! I love seeing your creations and hearing about any fun twists you add. Happy baking, and may your kitchen always smell this amazing!
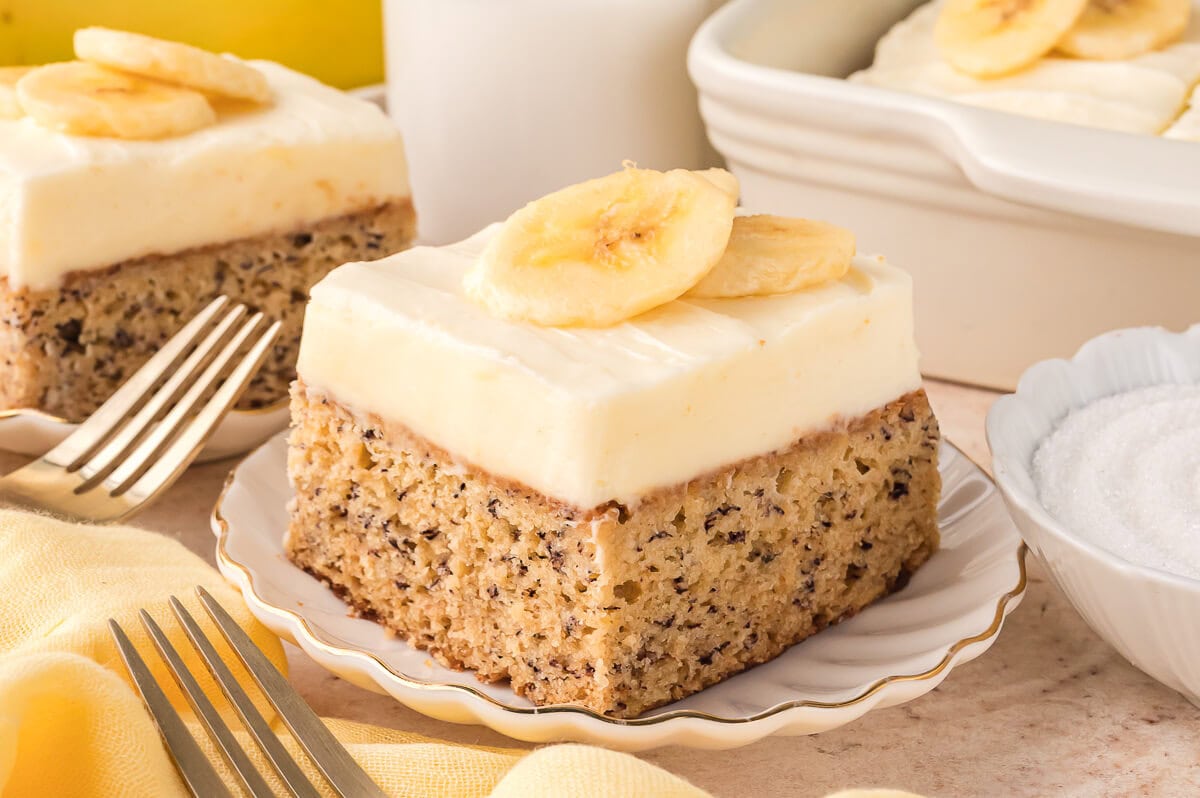
banana cake
Ingredients
Method
- Preheat oven to 350°F. Grease a 9x13 inch baking pan and set aside.
- In a large bowl, beat butter and sugar until combined. Add eggs, mashed bananas, and vanilla extract and beat until combined.
- In another bowl, stir together flour, baking soda, and salt. Add to wet mixture and stir to combine.
- Pour into prepared baking pan. Bake for 45 minutes or until a toothpick comes out cleanly from the center. Cool completely.
- Beat softened butter and cream cheese together until smooth. Gradually add in powdered sugar and vanilla extract. Beat until smooth. Spread over cooled cake.