Easy Frozen Banana Treats for Summer
There’s something about that sweet, inviting aroma filling my kitchen when I bake this zucchini bread — it’s like a warm hug on a hectic day. Growing up, my mom always kept a loaf of it in the bread box, and I’d sneak a slice after school while the scent of cinnamon and sugar drifted through the house. It’s surprisingly easy to make, and honestly, it’s one of those recipes that feels special enough for guests but simple enough for a Monday night. My kids actually ask for this all the time, especially when I tell them there’s a sneaky veggie in every bite. Plus, it’s a great way to use up those big zucchinis from summer’s bounty without letting them go to waste. The best part? This zucchini bread disappears in minutes at my house, and I love knowing I’ve made something that’s both delicious and sneaky healthy. Trust me, once you try it, it’ll become a forever favorite!
What is Zucchini bread with a sweet swirl?
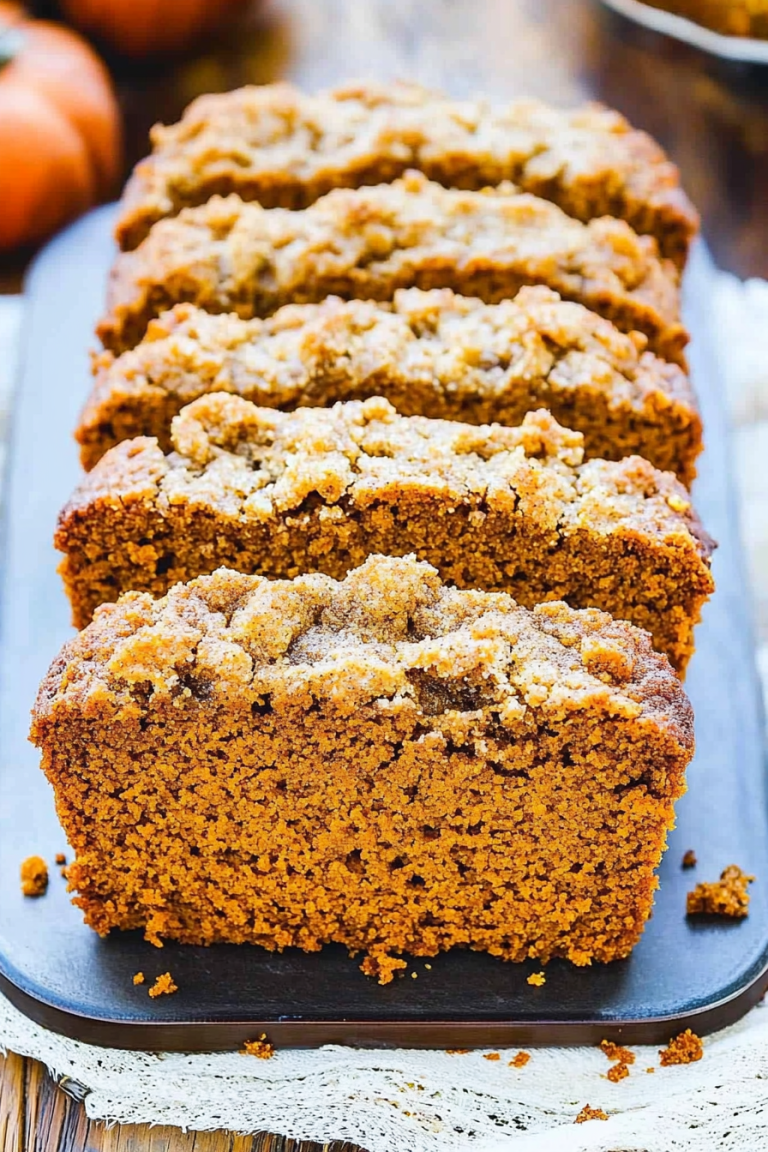
Think of zucchini bread as a cozy, slightly decadent loaf that sneaks in a veggie without anyone noticing. It’s essentially a quick bread—no yeast needed, just a simple mix of flour, sugar, and eggs—that gets a moisture boost from shredded zucchini. The “sweet swirl” part? It’s a luscious ribbon of cinnamon sugar or cream cheese running through the middle, turning an ordinary loaf into something that feels fancy but is really just a quick fix. The name might sound fancy, but really, it’s just a clever way to dress up a humble zucchini bread. I always do this when I want something comforting but don’t have hours to fuss around in the kitchen. It’s perfect for breakfast, a snack, or dessert—and honestly, it’s kind of like enjoying dessert for breakfast, and who’s gonna complain about that?
Why you’ll love this recipe?
What I love most about this zucchini bread with a sweet swirl is how versatile it is. It’s honestly a crowd-pleaser every single time. The flavor? Oh, it’s a perfect balance of moist, tender crumb and cozy cinnamon-spiced sweetness. The zucchini keeps it super moist—like, crumb-soaking, melt-in-your-mouth moist—and it’s a little bit nutritious, especially if you sneak in some nuts or add a handful of shredded carrots. This one’s a lifesaver on busy nights because I always keep shredded zucchini in the freezer, so I can whip up a loaf in no time. Plus, it’s budget-friendly — just pantry staples and a couple of zucchinis. I’ve tested this with different toppings, like cream cheese or just a simple glaze, and honestly, each variation has its charm. It’s a forgiving recipe, too. If I’m feeling a little creative, I add chopped walnuts or even a handful of chocolate chips. And the best part? The smell that fills the house while baking — I swear, it’s better than any candle!
How do you make Zucchini bread with a sweet swirl?
Quick Overview
This zucchini bread with a sweet swirl couldn’t be easier. You start by shredding zucchinis and mixing the dry ingredients. Then, the wet ingredients get a quick whisk—think eggs, oil, vanilla—and combined gently with the dry, folding in the zucchini. For the swirl, I love mixing cinnamon sugar with a bit of butter until it’s crumbly — that creates this gorgeous ribbon through the batter. You layer half the batter in your loaf pan, dollop on the cinnamon-sugar mixture, then top with the remaining batter. A gentle swirl with a toothpick or knife creates that beautiful marbling effect. Bake at 350°F until a toothpick comes out clean — about an hour or so — and cool just enough before slicing. It’s honestly foolproof once you get the hang of layering and swirling! The kitchen will smell divine, and you’ll be tempted to cut it too early — don’t, let it cool fully for clean slices.
Ingredients
For the Main Batter:
– 2 cups grated zucchini (about 2 zucchinis, shredded and excess moisture squeezed out)
– 1 1/2 cups all-purpose flour
– 1 teaspoon baking powder
– 1/2 teaspoon baking soda
– 1/2 teaspoon salt
– 1 teaspoon ground cinnamon
– 1/2 teaspoon ground nutmeg (optional, but adds warmth)
– 1/2 cup sugar
– 1/2 cup brown sugar
– 1/2 cup vegetable oil or melted butter
– 3 large eggs
– 1 teaspoon vanilla extract
For the Filling:
– 1/4 cup unsalted butter, softened
– 1/4 cup brown sugar
– 1 teaspoon cinnamon
– Optional: 2 tablespoons all-purpose flour or cornstarch for a thicker swirl
For the Glaze (optional):
– 1 cup powdered sugar
– 1-2 tablespoons milk or cream
– 1/2 teaspoon vanilla
– A pinch of cinnamon or zest of lemon for flavor variations
Step-by-Step Instructions
Step 1: Preheat & Prep Pan
Set your oven to 350°F (175°C). Grease and flour a standard loaf pan or line it with parchment paper. Now, shred your zucchinis — I use the coarse side of a box grater — then squeeze out as much water as possible with a clean kitchen towel or paper towels. A dry zucchini is key to preventing a soggy loaf. I always do this because excess moisture can make your bread dense, and nobody wants that! Once dry, set it aside. This prep step might seem small, but it’s the difference between a fluffy loaf and a soggy mess.
Step 2: Mix Dry Ingredients
In a large bowl, whisk together the flour, baking powder, baking soda, salt, cinnamon, and nutmeg. Mixing these first evenly distributes the spices and leavening so your bread bakes up perfectly fluffy. Trust me, this step keeps everything uniform and helps avoid pockets of baking soda or uneven flavor.
Step 3: Mix Wet Ingredients
In a separate bowl, whisk the eggs, sugar, brown sugar, oil, and vanilla until well combined. I love doing this with a fork or whisk — it’s quick and gets everything nice and smooth. Make sure your eggs aren’t cold; room temperature eggs incorporate better and make the batter uniform.
Step 4: Combine
Pour the wet mixture into the dry ingredients and gently fold them together. Don’t overmix — just until you see no streaks of flour. Overmixing can cause the bread to be tough, and nobody wants that. Fold in the shredded zucchini last, making sure it’s evenly distributed without deflating the batter.
Step 5: Prepare Filling
In a small bowl, mix the softened butter, brown sugar, and cinnamon until crumbly. This is your sweet cinnamon swirl, and it’s what makes this bread extra special. If you want a thicker, more defined swirl, add a splash of flour or cornstarch here. I’ve learned that a good swirl pattern looks best when the batter is a little thick, so it doesn’t sink down too much.
Step 6: Layer & Swirl
Pour half of the batter into your prepared loaf pan. Spread evenly, then spoon on dollops of the cinnamon sugar mixture in a zigzag pattern across the surface. Add the rest of the batter on top, then gently swirl a knife or toothpick through the layers to create pretty marbling. Take your time here — I find swirling in different directions adds a lovely textured look.
Step 7: Bake
Pop it into the oven and bake for about 55-60 minutes. Check for doneness by inserting a toothpick into the center; if it comes out clean, you’re good. Sometimes, the edges turn golden before the center is fully baked, so if yours browns too quickly, tent it with foil. Every oven is different, so keep an eye on it around the hour mark.
Step 8: Cool & Glaze
Once baked, let the bread cool in the pan for about 10 minutes, then transfer it to a wire rack. Patience is key — slicing too early means squished edges. If you want a shiny, sweet glaze, mix powdered sugar with vanilla and milk until smooth, then drizzle generously over the cooled loaf. It’s the perfect touch that makes the bread feel like a special treat.
Step 9: Slice & Serve
Use a serrated knife for clean slices. I love serving mine slightly warm with a pat of butter or plain with a cup of coffee — it’s a treat I could have every weekend. The swirl pattern looks pretty on a plate, and the moist crumb keeps everyone coming back for more. Store leftovers wrapped tightly at room temperature or in the fridge for up to 3 days. Honestly, it’s just as delicious the next day — maybe even more so!
What to Serve It With
This zucchini bread with a sweet swirl is so adaptable, it pairs wonderfully with just about anything. For breakfast, a sliver alongside your morning coffee makes a cozy start — I love a dark roast or a caramel-flavored latte to go with it. It’s also lovely served as part of a brunch spread, maybe with fresh berries, whipped cream, or even a dollop of mascarpone. At dinner parties, I’ve sliced it into small squares, topped with a bit of cream cheese or Greek yogurt drizzled with honey for a more refined dessert. And if you’re craving something comforting as a snack? It’s perfect toasted with butter or peanut butter, especially on chilly days. My kids think it’s a crown jewel of our weekend baking, and I love how it feels like a little bit of homemade magic on a busy weeknight.
Top Tips for Perfecting Your Zucchini Bread with a Sweet Swirl
Over the years, I’ve learned a few tricks to make this zucchini bread absolutely foolproof. First, always squeeze out as much moisture from your shredded zucchini as possible. I keep a fresh batch in the freezer, which works beautifully for quick baking — just defrost and drain! If your batter seems a little sticky or runny, adding just a touch more flour helps keep everything balanced.
When adding the swirl, don’t be heavy-handed — gentle layering creates a prettier marbling. I also recommend using room temperature ingredients, especially eggs and butter, for a smoother batter and better rise. If you’re feeling adventurous, add chopped nuts or chocolate chips into the batter for even more flavor dimensions. Trust me on this one: a quick swirl with a skewer or knife creates a visual wow factor and keeps the different flavors beautifully layered.
From experience, oven differences can be tricky. If your loaf starts to brown too fast, tent it loosely with foil — better to underbake slightly than overbake. Keep an eye on it after about 50 minutes. Sometimes, I lower my oven temp by 25°F if I notice the top’s browning too early. For the glaze, I like to make it a little thicker for drizzle lines or thinner if I want a more subtle sweetness. From my kitchen to yours, these small tweaks can make your zucchini bread with a sweet swirl turn out picture-perfect every time.
Storing and Reheating Tips
This bread keeps beautifully, especially when stored properly. Wrap the cooled loaf tightly in plastic wrap or foil if you plan to eat it within a couple of days. You can also keep it in an airtight container at room temperature for up to 2 days — just don’t forget to keep it out of direct sunlight or heat. If you want to keep it longer, slicing and refrigerating is the way to go — it stays moist and fresh for up to 3 days. To freeze, double-wrap the loaf in plastic wrap and then foil, or freeze individual slices in freezer bags — perfect for quick snacks. Thaw at room temperature or pop a slice in the microwave for about 15-20 seconds. The glaze or topping tastes just as good when reheated, so I usually add fresh glaze just before serving for that fresh-baked feel. Overall, this zucchini bread tends to taste better the next day, like most good baked treats.
Frequently Asked Questions
Final Thoughts
This zucchini bread with a sweet swirl has become a staple in my kitchen — it’s comfort, sweetness, and a little bit of health all rolled into one. I love how it feels fancy but really comes together in just one bowl, no fancy equipment needed. Watching friends and family’s eyes light up when I cut that first slice — especially with the cinnamon ribbon running through — makes me feel like I’ve hit the jackpot in baking. It’s a perfect example of how something simple can turn into a little moment of joy. Plus, using up those zucchinis I’d otherwise just toss out? Win-win. I hope you try it and find as much happiness in it as I do. And hey, if you tweak the recipe—add chocolate chips or chopped nuts—I’d love to hear about it! Happy baking, and I can’t wait to see how yours turns out. Drop a comment below or share your photos — let’s keep this cozy baking spirit going!

Frozen banana popsicles
Ingredients
Method
- Peel the bananas and cut them in half lengthwise, then in half crosswise to create four quarters.
- Insert a popsicle stick into each banana quarter.
- Place the banana quarters on a parchment-lined tray and freeze until solid, about 2 hours.
- Melt the chocolate with canola oil in a microwave-safe bowl, heating in 30-second intervals and stirring until smooth.
- Dip each frozen banana quarter into the melted chocolate, allowing excess to drip off.
- Quickly sprinkle with optional sprinkles before the chocolate hardens.
- Place the dipped bananas back on the parchment-lined tray and freeze until chocolate is set, about 30 minutes.
- Serve and enjoy the frozen banana popsicles!