Easy Nutty Chicken Quinoa Bake
I still remember the first time I made this zucchini chocolate swirl cake — it was a rainy Sunday afternoon, and I had a mountain of fresh zucchinis from my garden that I didn’t want to waste. I hadn’t baked in a while, and honestly, I was craving something sweet but also wanted to sneak in a vegetable or two. This cake is the perfect balance. It looks fancy enough to serve at a dinner party, but trust me, it’s so easy to throw together on a weeknight. Plus, my kids actually ask for seconds—which is almost unheard of when it comes to vegetables in desserts! It’s almost like a buttery, moist chocolate cake with a sneaky veggie boost. I always do this when I want to impress friends or just treat myself after a long day. The smell alone—rich cocoa and sweet zucchini—fills my kitchen with comfort. Honestly, it’s one of those recipes that never fails to bring a smile to everyone’s face. You’re going to love the way the swirl looks, too—like a little art project in the oven. Ready to get baking? Let’s do this—your taste buds are in for a real treat.
What is Zucchini Chocolate Swirl Cake?
This zucchini chocolate swirl cake is a simple, cozy dessert that combines the healthiness of zucchini with the indulgence of rich chocolate. Think of it as a cross between your favorite quick bread and a decadent chocolate cake—moist, slightly dense, and filled with chocolatey goodness. The magic happens when you fold a luscious, velvety chocolate batter into the zucchini batter, then swirl it all together before baking. The name might sound fancy, but it’s basically a cake you can whip up in under an hour, with minimal fuss. It’s beloved in my house not just for taste but also because it’s a sneaky way to get the kids to eat their veggies without a tantrum. The zucchini keeps the cake super moist and tender, while the chocolate adds that irresistible richness every dessert needs. Plus, it’s perfect for using up those zucchinis sneaking out of your garden—and who doesn’t want to turn something healthy into a dessert? It’s honestly become my go-to sweet treat for busy weeknights or when I want something satisfying with minimal effort.
Why you’ll love this recipe?
What I love most about this zucchini chocolate swirl cake is how it hits all the right notes—flavor, texture, and ease. First, the flavor. The zucchini doesn’t overpower; instead, it acts like a secret weapon, making the cake super moist and subtly sweet. The rich cocoa flavor is the star, and I swear, no one can guess there’s a veggie in there until I tell them! The swirl pattern? Oh, it’s a visual showstopper. Every slice reveals gorgeous marbled chocolate ribbons—pretty enough for a special occasion, but honestly, I make it just for myself when I need a little comfort. It’s also incredibly simple to make. No complicated techniques or obscure ingredients—just basic pantry staples. It’s budget-friendly, too. You probably have everything you need already! And the best part? It’s versatile. Serve it warm with a dollop of whipped cream, or let it cool completely for a more traditional slice. My favorite thing? My kids can’t get enough of it, and I’ve tested this with different types of cocoa and even almond milk—I swear, it’s a showstopper every time.
How do I make Zucchini Chocolate Swirl Cake?
Quick Overview
This cake comes together quickly: mix the batter, prepare the chocolate swirl, layer them in your pan, and bake. The secret is in how you swirl the chocolate through the batter—just a gentle figure-eight motion, and you’ve got a beautiful marbled effect that makes everyone think you’re a baking pro. The batter itself is moist, thanks to the shredded zucchini, and it’s so forgiving—trust me, overmixing is the enemy here. Just fold and go! Once baked, let it cool a bit before glazing or serving straight from the pan. It’s one of those recipes that’s idiot-proof and always makes me look like a hero, even on the busiest days.
Ingredients
For the Main Batter:
– 2 cups grated zucchini (about 2 small zucchinis, shredded and excess moisture squeezed out)
– 1 1/2 cups all-purpose flour (or a gluten-free blend if you prefer)
– 1/2 cup unsweetened cocoa powder (preferably Dutch-processed for depth)
– 1 cup granulated sugar (or coconut sugar for a healthier twist)
– 1/2 teaspoon baking soda
– 1 teaspoon baking powder
– 1/4 teaspoon salt
– 1/2 cup vegetable oil or melted butter
– 3 large eggs
– 1 teaspoon vanilla extract
For the Filling:
– 1/2 cup semi-sweet chocolate chips or chopped dark chocolate
– 1/4 cup milk (dairy or plant-based like almond milk) to help melt the chocolate smoothly
– A pinch of sea salt (optional, for flavor enhancement)
For the Glaze (optional but recommended):
– 1/2 cup powdered sugar
– 1-2 teaspoons milk
– A drizzle of melted chocolate or chocolate curls for garnish
Step-by-Step Instructions
Step 1: Preheat & Prep Pan
Set your oven to 350°F (175°C). Grease a 9-inch round cake pan or line it with parchment paper—you want the cake to come out easily and look pretty. I always do a light spray of non-stick spray, then dust it with a bit of flour or cocoa powder for extra non-stick goodness. Preparing your zucchini beforehand makes a difference—shred it, then squeeze out as much moisture as you can with a clean towel or cheesecloth. This keeps your batter from getting too watery, which could cause the cake to sink or be dense.
Step 2: Mix Dry Ingredients
In a big bowl, whisk together the flour, cocoa powder, sugar, baking soda, baking powder, and salt. Sifting the cocoa helps prevent lumps and results in a smoother batter. This step is quick but crucial—you’re building the foundation for that perfect crumb. I’ve learned the hard way that skipping this can lead to uneven pockets of flour or cocoa, which isn’t pretty or tasty.
Step 3: Mix Wet Ingredients
In a separate bowl, whisk the eggs, oil, and vanilla until smooth. I like to do this one at a slightly warm room temperature—cold eggs can cause the oil to seize up, and you want the batter to blend effortlessly. Add the shredded zucchini and mix again. The batter will look quite thick and chunky—don’t worry, that’s exactly what you want.
Step 4: Combine
Pour the wet mixture into the dry ingredients and fold gently with a spatula until just combined. Overmixing here is a common mistake—stop when you no longer see streaks of flour. The batter should be thick but spreadable. Resist the urge to keep mixing—it’s tempting, I know, but this is where the magic of a tender crumb happens.
Step 5: Prepare Filling
In a microwave-safe bowl, melt the chocolate chips with the milk in 20-second bursts, stirring between each until smooth. If you prefer, use a double boiler—whatever’s easiest. Then, let it cool slightly—if it’s too hot, it’ll melt into the batter when you swirl, which is fine, but it can also make the layers less distinct. Keep it slightly thickened but pourable.
Step 6: Layer & Swirl
Spread about half of the zucchini batter into the prepared pan. Drizzle the melted chocolate over the batter—try to do it in a zig-zag or spiral pattern for fun. Top with the remaining batter, then pour the remaining chocolate over the top. Using a skewer or a toothpick, gently swirl from the center outward in many directions—this creates lovely marbled effects and combines the flavors without blending them completely.
Step 7: Bake
Pop it into your preheated oven and bake for about 40-45 minutes. Test doneness with a toothpick—it should come out clean or with a few moist crumbs. The smell alone will remind you of rich chocolate, and the batter will feel slightly springy when you tap the center. Every oven is different, so keep an eye on it. If it’s browning too fast, tent it with foil for the last 10 minutes.
Step 8: Cool & Glaze
Let the cake cool in the pan for at least 20 minutes—patience is key here, or it’ll fall apart when you slice. Then transfer it to a wire rack and cool completely. If you’re using a glaze, mix the powdered sugar with milk until smooth—adjust the thickness by adding more sugar or milk. Drizzle it over the cooled cake, or pour gently for a shiny finish. I like to add a few chocolate curls on top for extra flair.
Step 9: Slice & Serve
Use a sharp, clean knife to cut through the marbling for tidy slices. I recommend letting the cake sit at room temperature for 10-15 minutes before slicing—the flavors are more pronounced, and the texture is perfect when not chilled. Serve warm, with a dollop of whipped cream, or keep it simple with a cup of coffee. Honestly, this cake disappears in minutes at my house—I’ve made it dozens of times, and it’s always a hit.
What to Serve It With
This zucchini chocolate swirl cake is incredibly versatile. For breakfast, I love a slice with a strong coffee or a glass of cold milk—yes, breakfast cake, and I’m not ashamed. It also makes a stunning brunch offering, especially if you add a few fresh berries on the side and maybe some whipped cream. As a dessert, it’s perfect played down with a dusting of powdered sugar or topped with a scoop of vanilla ice cream. My family especially enjoys it warm with a drizzle of caramel or a handful of chopped nuts sprinkled on top. It’s also fantastic on its own—moist, rich, and just the right amount of sweetness—making it a cozy snack on a chilly day. This cake has become a staple in my home, often reheated the next morning for breakfast, and always gets rave reviews. I love that it’s simple enough for weeknights but special enough for weekends. Plus, it’s one of those recipes where everyone asks, “Is there zucchini in here?” and I just smile and say, “Secret ingredient.”
Top Tips for Perfecting Your Zucchini Chocolate Swirl Cake
Over the years, I’ve learned a few tricks to elevate this already delicious cake. First, make sure to squeeze out as much moisture as possible from your zucchini—wet zucchini is the enemy of a fluffy, tender crumb. I do this by shredding, then pressing it in a clean towel, which makes a huge difference. When mixing the dry and wet ingredients, fold gently—overmixing is my biggest mistake. A light touch ensures the cake stays soft and airy. For the swirl, don’t overdo it—just a few gentle zig-zags with your skewer or fork will do. I used to swirl too aggressively and ended up with muddy-looking batter. My tip: pour a thick chocolate mixture over the batter and let it sit for a minute or two; it will sink a little, making the swirl more dramatic. You can play with flavor additives like cinnamon or espresso powder to deepen the cocoa taste. I’ve tested this with almond milk, and honestly, it made the cake even more tender and subtly nutty. In terms of baking, every oven is different, so check on it around the 40-minute mark and use a toothpick test. I prefer baking in the middle rack—not too close to the heating element—and turning the pan halfway through if your oven heats unevenly. For the glaze, I like it simple, but a splash of vanilla or a pinch of sea salt in the glaze can really make it pop. Trust me, this simple little tweak can take your cake from good to wow! Also, storing leftovers in an airtight container keeps it fresh for 2-3 days, but honestly, it’s so tasty, it’s usually gone sooner. Reheat slices briefly in the microwave for that warm-fresh feeling. The best part? This recipe is adaptable—you can swap out the chocolate for peanut butter or add some chopped nuts to the batter for extra crunch. I’ve made this countless times, and I still find little ways to make it even better!
Storing and Reheating Tips
This cake is pretty hardy, but a few tricks keep it at its best. If you’re planning to enjoy it in a day or two, store it in an airtight container at room temperature—cover loosely with foil or plastic wrap. It’s best consumed within 2 days for that perfect moistness. If you want it to last longer, pop it in the fridge—it stays fresh for 3-4 days. Just allow it to come to room temperature before slicing for maximum softness. For longer storage, freeze individual slices wrapped tightly in plastic wrap and foil. They’ll keep well for up to 3 months. When reheating, microwave for about 15-20 seconds, just until warmed through—don’t overdo it, or the texture can become rubbery. If you love the glaze, wait to add it until just before serving—refrigerated leftovers may cause the glaze to set differently, and you want that shiny, gooey finish. If you’ve added nuts or fruit, know that they’re best consumed sooner rather than later—they can get soggy or lose their crunch over time. Trust me, this cake still tastes amazing even after being stored, but I think the key to keeping that soft crumb and chocolate swirl looking its best is gentle reheating and proper wrapping. And if you’re feeling fancy, a drizzle of melted chocolate or caramel right before serving can add that extra touch of decadence. This one’s a lifesaver on busy nights when I want something sweet but don’t want to slave away in the kitchen for hours.
Frequently Asked Questions
Final Thoughts
This zucchini chocolate swirl cake is hands down one of my favorite comfort desserts. It’s deceptively healthy because of the zucchini, but I swear, you won’t miss the extra sugar or butter once you taste that velvety, chocolatey crumb. Over the years, I’ve made it for birthday parties, casual Tuesdays, and even last-minute dinner guests, and it always wins rave reviews. The marbled swirl makes it look like a masterpiece, but I promise, it’s foolproof—you’ll be surprised how simple it is to master. Plus, it’s a fantastic way to sneak some greens into a treat that everyone actually asks for. I love how adaptable it is—swap in different chocolates, add nuts, or sprinkle with cinnamon for a warm twist. Honestly, once you make this, I bet it’ll become a staple in your home too. So go ahead—grab those zucchinis, roll up your sleeves, and let’s bring a little chocolatey joy into your kitchen. Can’t wait to hear how yours turns out! Happy baking!

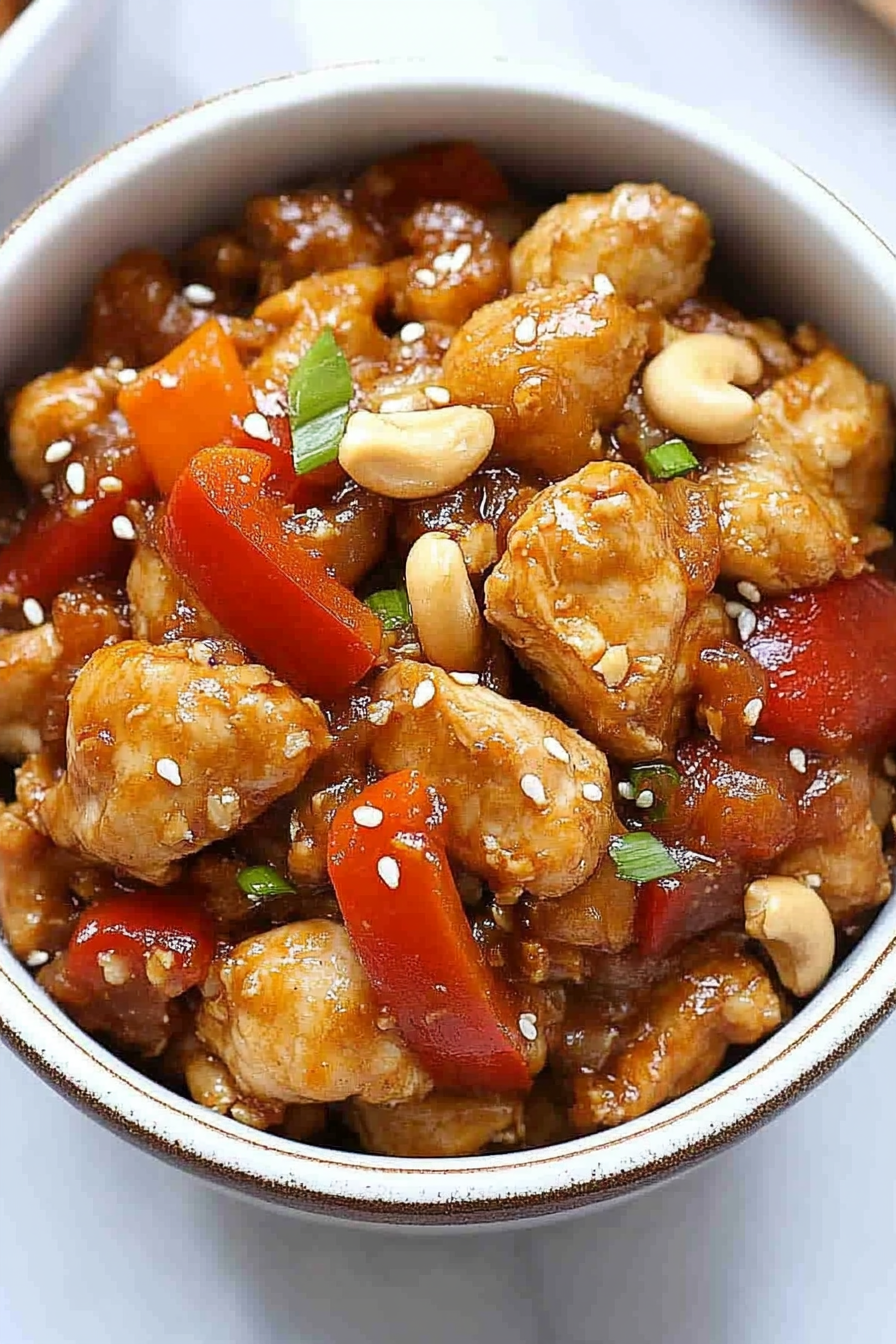
Cashew Chicken
Ingredients
Method
- Cook the rice according to package instructions.
- Dice the chicken breasts into bite-sized pieces.
- Heat olive oil in a large skillet over medium-high heat. Add chicken and cook until browned and cooked through, about 5-7 minutes.
- Add minced garlic and cook for another minute.
- In a small bowl, mix soy sauce, honey, sesame oil, and black pepper.
- Pour the sauce over the cooked chicken and stir to combine.
- Add cashews and stir for another 2 minutes.
- Serve the cashew chicken over cooked rice.