Ham And Cheese Sliders
Ham and Cheese Sliders
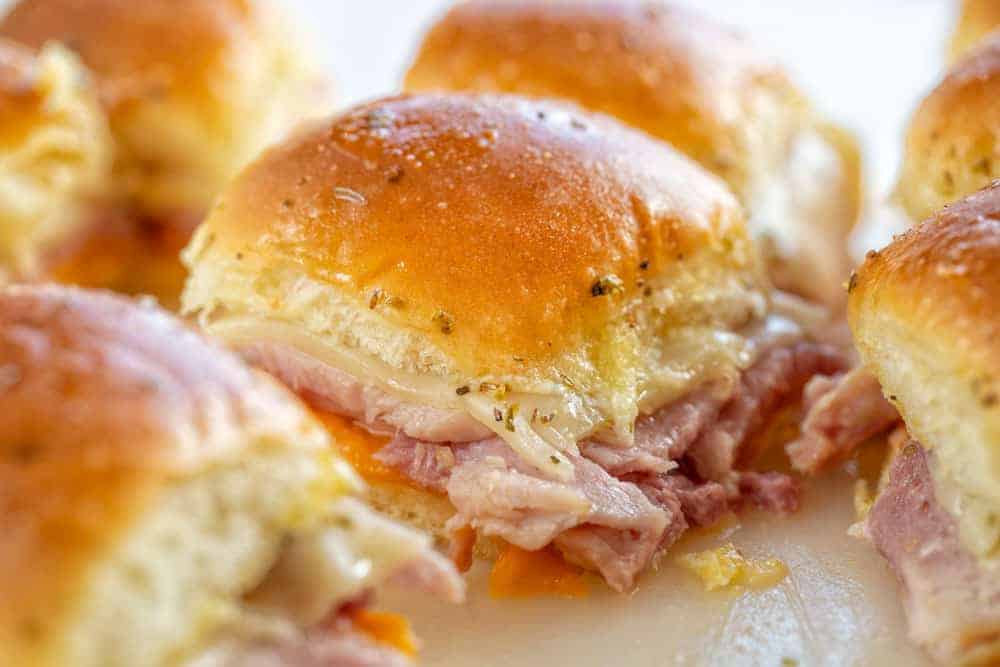
There’s something so comforting about a warm, gooey slider that just melts in your mouth. These Ham and Cheese Sliders are hands down one of my all-time favorite appetizers—simple to make, packed with flavor, and always disappear faster than you can say “more!” The secret? It’s not just the layers of sharp cheddar, provolone, and perfectly seasoned ham—it’s that magical butter sauce brushed right over everything. That little mix of garlic salt and Italian seasoning? Total game-changer. I first made these for a casual get-together with friends, and let me tell you, they stole the show. Everyone asked for the recipe, and honestly? I’m not surprised. There’s just something about that golden-brown top and the way the cheese bubbles up around the edges that makes every bite feel like pure joy.
What Is Ham and Cheese Sliders?
Ham and Cheese Sliders are bite-sized sandwiches layered with savory deli or cooked ham, melted cheese, and baked until warm and melty inside. They’re typically served on soft dinner rolls or Hawaiian buns, then topped with a fragrant butter sauce infused with garlic salt and Italian seasoning. What sets this version apart is how simple yet rich the flavors are—no fancy techniques needed, just good ingredients and a little love. Whether you’re serving them at a party, a holiday gathering, or even as a cozy snack, these sliders bring people together. I usually make them with King’s Hawaiian rolls because they stay soft but hold their shape, but if you have homemade rolls on hand, those work beautifully too.
Why You’ll Love This Recipe
If you think ham and cheese sandwiches are boring, wait until you try these. Seriously. Every single layer builds on the last—first the bottom half of the rolls, then a generous slice of sharp cheddar, followed by ham, another round of provolone, and finally the top buns. Then comes the magic: brushing the entire stack with that garlicky, herby butter sauce. When they come out of the oven, the smell alone will have everyone asking what you’re cooking. The cheese gets gloriously bubbly, the bread stays tender without getting soggy, and every bite tastes like a warm hug. Plus, they’re super customizable. Want pepper jack instead of provolone? Go for it. Craving a breakfast twist? Add scrambled eggs between the cheeses. And the best part? You can prep them ahead and freeze them (without the butter sauce), making them perfect for busy days or last-minute entertaining. Trust me, once you taste these, you’ll want them at every gathering.
How to Make Ham and Cheese Sliders
Quick Overview
Making these sliders is shockingly easy. You start by preheating your oven, then layering the ingredients in a baking dish—bottom buns, cheese, ham, more cheese, and top buns. Brush everything with seasoned butter, cover, bake for 15 minutes, uncover, and give the tops a quick bake until golden. In under 30 minutes, you’ve got a crowd-pleasing dish that feels like you spent hours in the kitchen. No complicated steps, no special equipment—just a little patience and maybe a pastry brush to spread that delicious butter sauce evenly.
Ingredients
- 12 count King’s Hawaiian rolls (or homemade Hawaiian rolls)
- ¼ cup (½ stick / 57 g) butter, melted
- ½ teaspoon garlic salt
- ½ teaspoon Italian seasoning
- 6 slices sharp cheddar cheese
- 12 slices cooked ham* (deli ham works great)
- 6 slices provolone cheese**
Step-by-Step Instructions
- Preheat your oven to 350°F. Lightly spray a 9×13-inch baking dish with nonstick cooking spray.
- In a small bowl, whisk together the melted butter, garlic salt, and Italian seasoning. Set aside.
- Split each roll in half horizontally. Place the bottom halves into the prepared baking dish.
- Layer on the sharp cheddar cheese slices, then add the ham slices generously.
- Top with the provolone cheese, then place the top halves of the rolls over everything.
- Brush the entire surface—including the sides and crevices—with the seasoned butter mixture. Use a pastry brush or pour it evenly so the seasonings don’t clump.
- Cover the dish tightly with aluminum foil and bake for 15 minutes, or until the cheese is hot and bubbly.
- Remove the foil and bake for another 5 minutes, or until the tops are lightly golden brown.
- Let cool slightly, then slice and serve immediately while still warm and gooey.
What to Serve It With
These sliders shine when paired with simple sides that complement their rich, savory flavor. A crisp green salad with a light vinaigrette helps cut through the richness, while pickles or marinated vegetables add a bright, tangy contrast. For drinks, I love serving sparkling water with a twist of lemon or a glass of chilled white wine. If you’re making this for brunch or a party, consider adding a bowl of homemade ranch dressing nearby—some folks can’t resist dunking these beauties in it. And honestly? They’re fantastic on their own. But hey, variety is the spice of life, so feel free to get creative!
Top Tips for Perfecting Your Ham and Cheese Sliders
Want to make sure your sliders turn out amazing every time? Here are a few tried-and-true tips. First, don’t skimp on the cheese—use both sharp cheddar and provolone for that perfect balance of tang and meltability. Second, be generous with the ham; extra means extra flavor, and nobody minds a little more protein. Third, when brushing the butter sauce, really get into every nook and cranny. That’s where the magic lives. Fourth, if you’re using leftover honey-baked ham, go wild—it adds incredible depth. Finally, don’t skip the final uncovered bake. That golden crust is what makes them irresistible. Oh, and always use accurate measurements for the butter sauce. We’ve tested this dozens of times, and getting the seasoning right is key.
Storing and Reheating Tips
Got leftovers? Lucky you. These sliders actually taste even better the next day because the flavors have had time to meld. Store them in an airtight container at room temperature for up to two days, or refrigerate for longer storage. To reheat, pop them back into a 350°F oven for about 10 minutes (covered with foil), then uncover for a minute to refresh the tops. Now, here’s a pro tip: if you plan to freeze them, don’t add the butter sauce before freezing. Instead, wrap the assembled (but unbaked) sliders tightly in plastic wrap, then place them in a freezer-safe bag or container. They’ll keep for up to three months—though I’ve had success with them after a year if wrapped well. To bake frozen sliders, remove from packaging, place in a greased dish, brush with fresh seasoned butter, cover, and bake for 20 minutes at 350°F. Uncover and bake a few extra minutes until golden. Boom—perfect sliders, anytime.
Frequently Asked Questions
Final Thoughts
These Ham and Cheese Sliders aren’t just food—they’re memories in the making. Whether it’s a family dinner, a game-day spread, or a holiday buffet, they always seem to bring people closer. There’s something deeply satisfying about pulling a golden pan of sliders from the oven, hearing the cheese sigh as it melts, and knowing that happiness is just moments away. I’ve made them for birthdays, barbecues, and even quiet evenings at home. And each time, it’s the same feeling—warmth, comfort, and a whole lot of flavor. So go ahead, gather your ingredients, invite someone you love, and share this recipe like it’s your most treasured secret. Because really, it kind of is.
Ham and Cheese Sliders
Ingredients
Method
- Preheat oven to 350°F. Spray a 9x13-inch baking dish with nonstick cooking spray.
- In a small bowl, mix together the melted butter, garlic salt, and Italian seasoning. Set aside.
- Split your rolls in half, and place the bottom half in the baking dish.
- Top the buns with the cheddar cheese slices, follow with a layer of ham slices, and then the final layer of provolone cheese slices.
- Place the top half of the buns on top and brush the top of the rolls with the melted butter mixture.
- Cover the dish with aluminum foil and bake for 15 minutes, or until the cheese is hot and bubbly.
- Remove foil, and bake for an additional 5 minutes (or until the tops of the sliders turn a golden brown.
- Remove from oven, slice and serve!