How to Make Delicious Apple Pie Filling
You know those recipes that just feel like a warm hug? The ones you pull out when you need a little comfort, or when you’ve got unexpected guests and need something delicious *fast*? This zucchini bread is absolutely one of those for me. It’s more than just a sweet treat; it’s a little piece of my kitchen history, a recipe I’ve tweaked and perfected over years, and honestly, it’s the best darn zucchini bread you’ll ever taste. Forget those dry, bland versions you might have tried; this one is incredibly moist, bursting with warm spices, and has this subtle sweetness that just makes you happy. It’s like a hug in loaf form, and I’m so excited to share it with you!
What is Zucchini bread?
So, what exactly *is* zucchini bread, you ask? At its heart, it’s a quick bread, meaning it doesn’t require any yeast or complicated rising. Think of it like a cake that you bake in a loaf pan. The “zucchini” part comes from the grated vegetable that gets mixed right into the batter. Now, before you wrinkle your nose, let me tell you – you *cannot* taste the zucchini! What it does is pure magic: it adds an incredible amount of moisture, making the bread unbelievably tender and soft. It’s kind of like a culinary secret weapon. The name itself, “zucchini bread,” is pretty straightforward, but the result is anything but ordinary. It’s a beautiful marriage of simple ingredients and pure deliciousness, perfect for using up those garden zucchini that seem to multiply overnight!
Why you’ll love this recipe?
There are so many reasons why this zucchini bread has become a staple in my kitchen, and I just know you’re going to fall in love with it too. First off, the flavor is just out of this world. It’s perfectly sweet, but not overly so, with a wonderful warmth from the cinnamon and nutmeg that just sings. It has this fantastic tender crumb that melts in your mouth, and the little bits of zucchini (which you can’t taste, remember!) make it incredibly moist. Seriously, this is the opposite of dry cake! The simplicity is another huge win. On a busy weeknight, when the sweet craving hits or I need a last-minute bake sale contribution, this is my lifesaver. It comes together so quickly; you can have it in the oven in about 15 minutes flat. And let’s talk about budget-friendliness – zucchini is usually super affordable, and the other ingredients are pantry staples. You probably have everything you need right now! What I love most, though, is its versatility. It’s perfect for breakfast, a satisfying snack, or even a simple dessert with a dollop of cream cheese frosting (more on that later!). It truly stands out because of that incredible, consistent moisture and flavor. It’s the kind of recipe that makes you feel like a baking pro, even if you’re a beginner.
How do I make Zucchini bread?
Quick Overview
Alright, let’s get down to the good stuff! The process for this zucchini bread is wonderfully straightforward. You’ll basically whisk together your dry ingredients, then your wet ingredients separately, and then combine them gently. The magic happens when you fold in the grated zucchini and any add-ins you love, like chocolate chips or nuts. Pour it into your prepared pan, bake it until golden and fragrant, and then let it cool before you indulge. The whole thing, from start to finish, takes less time than you’d think, and the result is a truly show-stopping loaf that tastes like pure comfort.
Ingredients
For the Main Batter:
You’ll need:
- 2 cups all-purpose flour. I always use unbleached, I find it makes a difference in texture.
- 1 teaspoon baking soda. This is crucial for that lovely rise!
- 1/4 teaspoon baking powder. Just a little extra boost.
- 1/2 teaspoon salt. Don’t skip this; it enhances all the other flavors.
- 1 teaspoon ground cinnamon. Or even a touch more if you’re a big cinnamon fan like me!
- 1/4 teaspoon ground nutmeg. This adds such a cozy, warm note.
- 1 1/2 cups granulated sugar. Yes, it sounds like a lot, but remember this is a sweet bread!
- 2 large eggs, at room temperature. Room temp eggs incorporate so much better.
- 1 cup vegetable oil. Or any neutral-flavored oil like canola or even light olive oil.
- 1/4 cup milk. Whole milk is my preference for richness, but almond milk works wonders too, making it surprisingly creamy!
- 1 teaspoon vanilla extract. For that lovely aromatic sweetness.
- 2 cups grated zucchini, about 2-3 medium zucchini. Make sure to squeeze out as much liquid as you can – this is key!
For the Filling (Optional, but highly recommended!):
This is where you can get creative:
- 1 cup chocolate chips. Semi-sweet or dark chocolate are my go-to.
- 1/2 cup chopped walnuts or pecans. Toasted ones have an extra lovely flavor.
- A swirl of cinnamon-sugar mixture. About 2 tablespoons sugar mixed with 1 teaspoon cinnamon.
For the Glaze (Optional, but makes it extra special!):
This is super simple and takes it to the next level:
- 1 cup powdered sugar. Sifted, if you want it extra smooth.
- 2-3 tablespoons milk or lemon juice. Lemon juice gives it a nice tangy kick!
- 1/2 teaspoon vanilla extract.
Step-by-Step Instructions
Step 1: Preheat & Prep Pan
First things first, let’s get that oven preheated to 350°F (175°C). While it’s heating up, grab a standard 9×5 inch loaf pan. Grease it really well with butter or cooking spray, and then I like to dust it with a little flour. You can also line it with parchment paper, leaving an overhang on the sides, which makes lifting the loaf out super easy. This little bit of prep work ensures your beautiful bread doesn’t stick!
Step 2: Mix Dry Ingredients
In a large bowl, whisk together your flour, baking soda, baking powder, salt, cinnamon, and nutmeg. Whisking them together at this stage is important because it evenly distributes all the leavening agents and spices. You want to make sure there are no clumps of baking soda or powder. Just give it a good whisk until everything looks uniformly blended. This sets the foundation for a perfectly risen and flavorful bread.
Step 3: Mix Wet Ingredients
In a separate medium bowl, combine the granulated sugar, eggs, vegetable oil, milk, and vanilla extract. Beat these together with a whisk or a spatula until they’re well combined and the mixture looks smooth and slightly emulsified. It shouldn’t look separated. Make sure the eggs are fully incorporated. This is where the moisture and richness begin to build.
Step 4: Combine
Now, pour the wet ingredients into the bowl with the dry ingredients. Here’s the trick: mix *just* until everything is combined. Don’t overmix! Overmixing develops the gluten in the flour too much, which can lead to a tough, dense bread. A few streaks of flour are totally okay; they’ll disappear when you add the zucchini. Gently fold them together with a spatula. Honestly, I sometimes use my hands for the final little fold, just to be sure I’m not overdoing it.
Step 5: Prepare Filling
If you’re using add-ins, this is the time to prepare them. If you’re going for the cinnamon-sugar swirl, mix those two tablespoons of sugar with a teaspoon of cinnamon in a small bowl. If you’re adding chocolate chips or nuts, just have them ready to go. Remember to squeeze your grated zucchini *very* well! I like to put it in a clean kitchen towel or cheesecloth and wring out as much moisture as humanly possible. This step is SO important for avoiding a gummy bread. Then, gently fold the squeezed, grated zucchini into the batter, along with any chocolate chips or nuts you’re using.
Step 6: Layer & Swirl
Pour about half of the batter into your prepared loaf pan. If you’re doing the cinnamon-sugar swirl, sprinkle about half of that mixture over the batter. Then, add the remaining batter, smoothing the top as best you can. Sprinkle the rest of the cinnamon-sugar mixture (or chocolate chips/nuts, if you didn’t mix them in) over the top. For the swirl, you can gently run a knife or skewer through the batter in a zigzag pattern to create those beautiful marbled lines. Don’t overdo it, just a few gentle strokes will do!
Step 7: Bake
Pop that pan into your preheated oven. Bake for about 50-65 minutes. The baking time can vary depending on your oven, so keep an eye on it. You’ll know it’s done when a toothpick inserted into the center comes out clean or with just a few moist crumbs attached. The top should be a beautiful golden brown and it should smell absolutely heavenly. If the top is browning too quickly, you can loosely tent it with foil for the last 15-20 minutes.
Step 8: Cool & Glaze
Once it’s baked, let the loaf cool in the pan for about 10-15 minutes. This allows it to firm up a bit. Then, carefully turn it out onto a wire rack to cool completely. It’s really important to let it cool completely before glazing, otherwise, the glaze will just melt and slide off. For the glaze, whisk together the powdered sugar, vanilla, and 2 tablespoons of milk or lemon juice. Add more liquid, a tiny bit at a time, until you reach your desired drizzling consistency. Once the bread is cool, drizzle the glaze over the top. It’s so pretty!
Step 9: Slice & Serve
Once the glaze has set a bit (or if you skipped the glaze), it’s time to slice! I love using a serrated knife for a clean cut. Serve it at room temperature. It’s perfect on its own, or with a smear of butter. Get ready for everyone to ask for seconds!
What to Serve It With
This zucchini bread is so versatile, it’s practically its own food group! Here are some of my favorite ways to enjoy it:
For Breakfast: It’s a dream with a steaming mug of coffee or a glass of cold milk. I often toast a slice lightly, just to warm it through, and it’s the perfect thing to grab on a busy morning when I need something a little more substantial than cereal. The subtle sweetness is just enough to get your day started right.
For Brunch: Presentation matters here! Arrange slices on a pretty platter, perhaps with some fresh berries on the side. It looks gorgeous next to a fruit salad or a quiche. For beverages, a mimosa or a sparkling cider complements its sweetness beautifully.
As Dessert: This is where it gets decadent. A warm slice with a scoop of vanilla bean ice cream is pure bliss. Or, try a dollop of lightly sweetened cream cheese frosting on top – it’s incredible! It’s a lighter option than a traditional cake, but feels just as indulgent.
For Cozy Snacks: My kids absolutely love this as an afternoon snack. It’s the perfect comfort food for a chilly day, paired with a warm cup of herbal tea. It’s satisfying without being too heavy, making it ideal for that 3 pm slump.
Honestly, it’s so good, it doesn’t really need anything else, but these pairings just elevate the experience. We often have a slice after dinner when we’re craving something sweet but don’t want to commit to a whole pie. It’s that perfect in-between treat.
Top Tips for Perfecting Your Zucchini Bread
Over the years of making this, I’ve picked up a few tricks that I think make all the difference. Here are my top tips to ensure your zucchini bread is always a winner:
Zucchini Prep: This is the golden rule! You *must* squeeze out as much moisture from the grated zucchini as possible. Use a clean kitchen towel, cheesecloth, or even a fine-mesh sieve. The more water you remove, the less dense and gummy your bread will be, and the better it will bake. Fresh zucchini is best; avoid zucchini that’s been sitting around for too long and might be a bit soft.
Mixing Advice: Resist the urge to overmix the batter once you combine the wet and dry ingredients. Mix until just combined, meaning you don’t see any big pockets of dry flour. A few small streaks are fine! Overmixing leads to tough bread, and we want tender, moist goodness. Gentle folding is key.
Swirl Customization: If you’re doing the cinnamon-sugar swirl, don’t go overboard. A light sprinkle is all you need. For a more dramatic swirl, you can add a little melted butter to your cinnamon-sugar mixture before sprinkling it on, and then use a skewer to create more defined patterns. Play around with it – that’s part of the fun!
Ingredient Swaps: I’ve tested this recipe with all sorts of variations! For a dairy-free option, almond milk or oat milk work wonderfully in the batter, and you can use melted coconut oil instead of vegetable oil. For the add-ins, dried cranberries or even a handful of white chocolate chips are delicious. If you’re feeling adventurous, a bit of orange zest in the batter adds a lovely brightness.
Baking Tips: Every oven is a little different, so start checking for doneness around the 50-minute mark. A toothpick inserted into the center is your best friend. If the top is browning too quickly, loosely tent the pan with aluminum foil. Try to bake on the center rack of your oven for the most even heat distribution.
Glaze Variations: The simple powdered sugar glaze is classic, but you can play with it! For a tangier glaze, use lemon juice instead of milk. A bit of orange juice can give it a citrusy twist. For a richer, creamier glaze, you can add a tablespoon or two of cream cheese to the powdered sugar and milk mixture. Drizzle it while the bread is still slightly warm for a glaze that melts and coats beautifully, or wait until it’s completely cool for a firmer coating.
Storing and Reheating Tips
This zucchini bread is wonderfully forgiving when it comes to storage. I’ve found it actually tastes even better the next day!
Room Temperature: Once completely cooled, I store it in an airtight container or wrapped tightly in plastic wrap at room temperature. It will stay fresh and delicious for about 3-4 days. This is my usual method because it’s so convenient!
Refrigerator Storage: If your kitchen is particularly warm, or you just want to extend its freshness, you can store it in the refrigerator. Again, use an airtight container. It should keep well for up to a week. I find that the texture is still lovely, though slightly firmer.
Freezer Instructions: For longer storage, freezing is your best bet. Once the bread is completely cooled (and if you’ve glazed it, ensure the glaze is fully set and dry), wrap it tightly in a layer of plastic wrap, followed by a layer of aluminum foil. You can also freeze individual slices. It will keep its quality for up to 3 months. To thaw, unwrap it and let it come to room temperature on the counter, or thaw in the refrigerator overnight. For a warm treat, pop slices in a toaster oven or a regular oven at a low temperature (around 300°F/150°C) for a few minutes.
Glaze Timing Advice: If you plan to store the bread for more than a day or two, I highly recommend glazing it *after* it has cooled completely and just before serving. If you glaze it and then store it, the glaze can sometimes become sticky or melty, especially in humid conditions. If you’re freezing it, it’s usually best to glaze it *after* thawing.
Frequently Asked Questions
Final Thoughts
So there you have it – my absolute favorite, foolproof zucchini bread recipe. It’s the kind of baking that feels both comforting and rewarding. The process is simple enough for a beginner, yet the results are so impressive, you’ll feel like a total baking rockstar. I hope this recipe brings as much joy and deliciousness to your kitchen as it has to mine. It’s proof that sometimes, the simplest ingredients can create something truly magical. If you try this, please let me know how it turns out! I’d love to hear your variations and see your creations in the comments below. Happy baking, and enjoy every moist, flavorful bite!

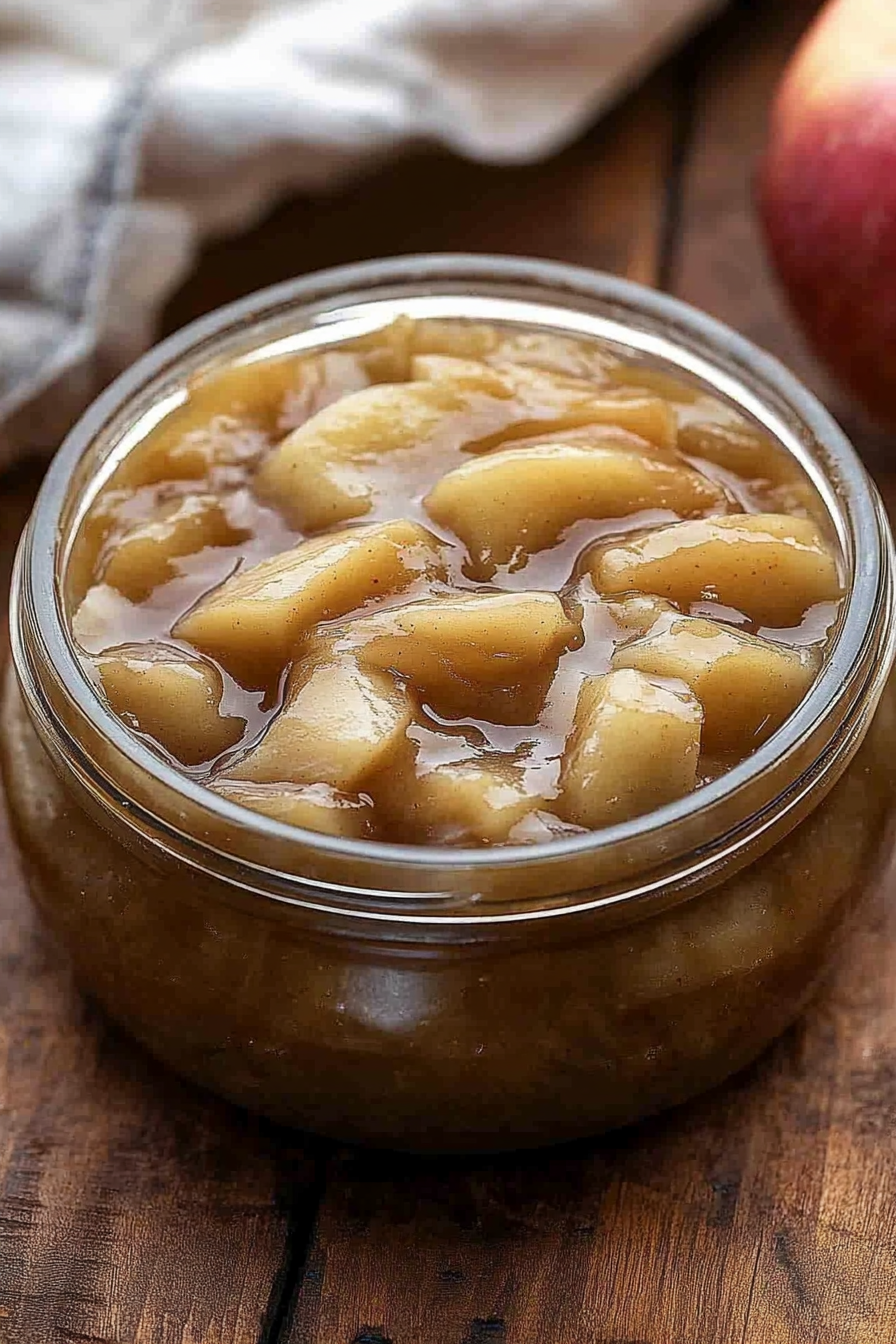
apple pie filling
Ingredients
Method
- In a medium saucepan over medium-high heat, combine the sliced apples and water. Cook for 6 minutes, stirring occasionally. Add the butter and allow to melt.
- In a separate bowl, whisk together the granulated sugar, ground cinnamon, cornstarch, and nutmeg until well combined.
- Add the sugar mixture to the saucepan with the apples. Stir constantly for 2 minutes, or until the sauce thickens to your desired consistency.
- Remove the saucepan from the heat and allow the apple pie filling to cool completely before using or storing.
- Store the cooled filling in an airtight container in the refrigerator for up to a week, or freeze for longer storage.