How to Make Delicious Santa Fe Peppers
There’s something about sneaking vegetables into dessert that just feels like a little victory, doesn’t it? I remember the first time I tried making this zucchini swirl cake — I was looking for a cozy afternoon baking project, and honestly, I wasn’t sure if it would turn out worth the effort. But let me tell you, this one’s a lifesaver on busy nights when I want something sweet but don’t want to spend hours in the kitchen. Plus, my kids ask for this all the time — they actually prefer it over cupcakes or cookies now. The smell alone as it bakes is enough to draw everyone into the kitchen — warm, cinnamon-spiced, with a hint of the zucchini’s natural sweetness peeking through. Trust me, this cake has become a family favorite, and I love how simple it is to whip up even when I’m short on time. Once you try it, you’ll see — it’s like a little slice of nostalgia wrapped in a swirl of flavor and comfort. Brighten up your day with a piece, and I promise, you’ll be hooked!
What is Zucchini Swirl Cake?
This zucchini swirl cake is basically a cozy, butter-rich dessert that combines the moistness of a classic cake with the surprising delight of shredded zucchini folded into the batter. Think of it as the lovechild of your favorite carrot cake and a cinnamon roll — soft, tender, and cozy, but with a visual twist thanks to the swirling cinnamon-vanilla filling. It’s called a “swirl” because before baking, you layer the batter and the cinnamon filling together, then drag a knife through to create beautiful marbled patterns. The name might sound fancy, but trust me, it’s super approachable — just a few simple steps to turn everyday ingredients into something special. The zucchini not only makes the cake incredibly moist but also adds a gentle vegetal sweetness that’s offset by cinnamon, vanilla, and a dusting of powdered sugar. It’s essentially a way to indulge without feeling too guilty — vegetables in your dessert? Yes, please.
Why you’ll love this recipe?
What I love most about this zucchini swirl cake is how it manages to sneak nutrients into a treat that everyone actually wants to eat — yes, even those picky little eaters! The moistness is just next level; it’s like biting into a cloud with a hint of cinnamon. The smell alone during baking is enough to make everyone in the house come running — that warm, spicy aroma that evokes cozy mornings and lazy weekends. Honestly, it’s so easy to make that I’ve lost count of how many times I’ve thrown it together on busy weeknights when I need a quick comfort fix. Plus, it’s budget-friendly because most of the ingredients are staples I usually have in my pantry — sugar, flour, spices, and of course, zucchini. The versatility is another bonus: you can top it with cream cheese frosting, dust it with powdered sugar, or even serve it plain with a dollop of whipped cream. And let’s not forget the beauty of this cake: it’s cute enough to serve at brunch but simple enough for everyday snacking. It’s a winner for practically any occasion.
How do I make Zucchini Swirl Cake?
Quick Overview
This cake comes together in just a few simple steps. First, grate the zucchini — I always do this with a box grater and give it a good squeeze to remove excess moisture, because nobody likes a soggy cake. Then, you whisk together the dry ingredients, beat the butter with sugar until fluffy, and add eggs and vanilla. Mixing the batter is straightforward and quick — just don’t overmix or the cake might turn dense. The cinnamon-sugar filling gets layered in last, creating that beautiful swirl once you drag a knife through the batter. Pop it into a preheated oven, bake until the top is golden and a toothpick comes out clean, then let it cool before glazing or dusting with powdered sugar. The whole process is pretty forgiving, and I’ve tested this with almond milk once (because I ran out of regular milk), and honestly, it made it even creamier. It’s a perfect bake to bond over — fragrant, warm, and just the right amount of indulgence.
Ingredients
For the Main Batter:
– 2 cups all-purpose flour (I like using unbleached for a richer flavor)
– 1 ½ teaspoons baking powder
– ½ teaspoon baking soda
– 1 teaspoon ground cinnamon
– ½ teaspoon salt
– 1 cup granulated sugar
– ½ cup unsalted butter, softened (or coconut oil for a dairy-free twist)
– 2 large eggs
– 1 teaspoon vanilla extract
– 1 cup grated zucchini (squeezed of excess moisture)
For the Filling:
– ¼ cup brown sugar
– 1 tablespoon cinnamon
– 2 tablespoons softened butter (or coconut oil)
– Optional: a handful of chopped pecans or walnuts for crunch
For the Glaze:
– ½ cup powdered sugar
– 1-2 teaspoons milk (or dairy-free alternative)
– A splash of vanilla or lemon juice for flavor
Step-by-Step Instructions
Step 1: Preheat & Prep Pan
Set your oven to 350°F (175°C) and grease your favorite loaf or bundt pan — I like the glass ones because I can see the swirl pattern forming. Line it with parchment paper for easy removal. I always do this because nothing’s worse than a broken slice!
Step 2: Mix Dry Ingredients
In a medium bowl, whisk together the flour, baking powder, baking soda, cinnamon, and salt. Mixing dry ingredients well is key to avoiding lumps and ensuring even rise. It’s a small step but makes a big difference — trust me, I’ve learned this after a few clumpy batches!
Step 3: Mix Wet Ingredients
In a large bowl, beat the softened butter and sugar until fluffy and light — about 2-3 minutes. Then, add the eggs one at a time, mixing well after each. Stir in vanilla. If your butter is too warm or if you rush, the batter might split, so I always let my butter sit out just a bit to soften evenly.
Step 4: Combine
Gradually add the dry ingredients into the wet, folding gently with a spatula just until everything looks combined. Overmixing will make the cake dense — I’ve definitely tested that! Fold in the grated zucchini last, making sure it’s evenly distributed without overworking the batter.
Step 5: Prepare Filling
Mix the brown sugar, cinnamon, and softened butter until crumbly but cohesive. If you want a crunch factor, toss in chopped nuts — I’ve done pecans, and it’s divine. Set aside while you layer the batter.
Step 6: Layer & Swirl
Pour half the batter into your prepared pan. Sprinkle or dollop half the cinnamon filling over the top. Then add the remaining batter, smoothing it out gently. Finish by dropping dollops of the remaining cinnamon mixture on top. Using a small knife or skewer, drag through the layers in swirling motions to create beautiful marbled patterns. This part is so satisfying — I love watching the swirl develop!
Step 7: Bake
Bake for about 50-60 minutes, or until a toothpick inserted in the center comes out clean. If your oven runs hot, start checking around 45 minutes. The top should be golden, and the house will smell incredible. When the toothpick tests clean, remove the cake and let it cool in the pan for 10 minutes before transferring to a wire rack.
Step 8: Cool & Glaze
Once cooled, mix your powdered sugar with a splash of milk and vanilla. Drizzle over the top or spread it for a smooth finish. Don’t skip this step — it adds just the right finishing touch, balancing the cinnamon-spiced flavor with a mild sweetness. I often wait until the cake’s just warm, not hot, to glaze — this helps it set nicely without running off.
Step 9: Slice & Serve
Use a sharp serrated knife, and cut gently to preserve the swirls. Serve warm or at room temperature, maybe with a dollop of whipped cream or a hot cup of coffee. Honestly, I like it plain — the flavors shine through perfectly, and it keeps well for the next day, staying moist and delicious.
What to Serve It With
Oh, so many options! For breakfast, a cup of strong black coffee or a chai latte pairs beautifully. My family loves to slice this up for brunch with a side of fresh berries and a dollop of yogurt — it feels fancy but is super casual. As a dessert, a scoop of vanilla ice cream or a drizzle of caramel adds a lovely richness. On cozy nights, I’ve served it with a hot mug of apple cider and a chat by the fire. Sometimes, I sprinkle a little more cinnamon or add chopped nuts on top for extra crunch. When I make this for friends, I sometimes dress it up with a cream cheese frosting or dust it with powdered sugar, depending on how fancy I feel. Honestly, this cake is versatile enough that it fits any occasion — casual family dinners or weekend get-togethers — and everyone leaves with a big smile. It’s become one of those recipes that I keep in rotation, knowing it’ll bring joy every single time.
Top Tips for Perfecting Your Zucchini Swirl Cake
After making this countless times, I’ve learned a few tricks to ensure your cake turns out just right. First, always squeeze the grated zucchini very well — excess moisture can make your batter too runny and cause greasiness or sinking in the oven. I use a clean kitchen towel or cheesecloth to wring out as much water as possible. Second, don’t overmix once you add the dry ingredients; a few gentle folds are all that’s needed. Overmixing creates a dense texture that no one wants in a cake. When layering, be gentle — patience pays off. Swirling the batter is a bit of an art; I like to drag the knife in slow circular motions for a marbled look that’s evenly distributed. As for ingredient swaps, I’ve tested using coconut oil instead of butter, and it gave the cake a subtle tropical note — delicious! If you want to make it gluten-free, swap out the all-purpose flour for a blend of almond and rice flours (though the texture might be a tiny bit different). For the filling, I’ve experimented with maple sugar instead of brown, and it adds a lovely caramel flavor. Baking tips: oven placement matters — always bake in the middle rack to promote even cooking. And always check doneness with a toothpick; every oven is a little different. For the glaze, if you like a tangy kick, add a touch of lemon juice or zest. Honestly, it’s all about your taste — these little tweaks make the recipe uniquely yours.
Storing and Reheating Tips
This cake stays fresh and moist for a couple of days at room temperature if covered loosely with a cloth or foil. I often make it in the evening and enjoy slices throughout the next day. Just keep it away from direct sunlight or humid spots. For longer storage, wrap it tightly in plastic wrap or store in an airtight container and refrigerate for up to 3 days. The fridge helps maintain freshness, especially in warmer weather, and it’s surprisingly good cold or gently reheated. I’ve also frozen slices wrapped in foil and placed in a zip-top bag for up to a month; just thaw in the fridge overnight and enjoy. When reheating, microwave for about 15-20 seconds or warm in a low oven. I like to add a fresh drizzle of glaze or a sprinkle of powdered sugar to brighten it up again. If you’re planning to frost it, do so once completely cooled — this prevents the frosting from melting or sliding off. An important tip: if you’re refrigerating it, let it come to room temperature before slicing so it’s easier to cut clean slices without squishing the swirl pattern. The key is to keep it moist and flavorful, so quality storage really makes a difference.
Frequently Asked Questions
Final Thoughts
Honestly, this zucchini swirl cake has become one of those recipes I keep coming back to. It’s like a warm hug wrapped up in a swirl of cinnamon and gentle zucchini goodness. Every time I bake it, I’m reminded how simple ingredients can come together to create something so cozy and satisfying. Plus, it’s a sneaky way to get the kids to eat their vegetables without a fuss — they ask for seconds, which is the real proof that this recipe is a keeper. The versatile flavor and texture, the forgiving process, and the beautiful marbled swirl make it a baker’s best friend. I hope you give it a try and find as much joy in making and sharing it as I do. Happy baking! And if you do try it, I’d love to hear how yours turns out — leave a comment or share your own twists. Maybe next time I’ll toss in some chopped apples or a splash of orange zest. The possibilities are endless, and that’s the best part. Enjoy every bite!
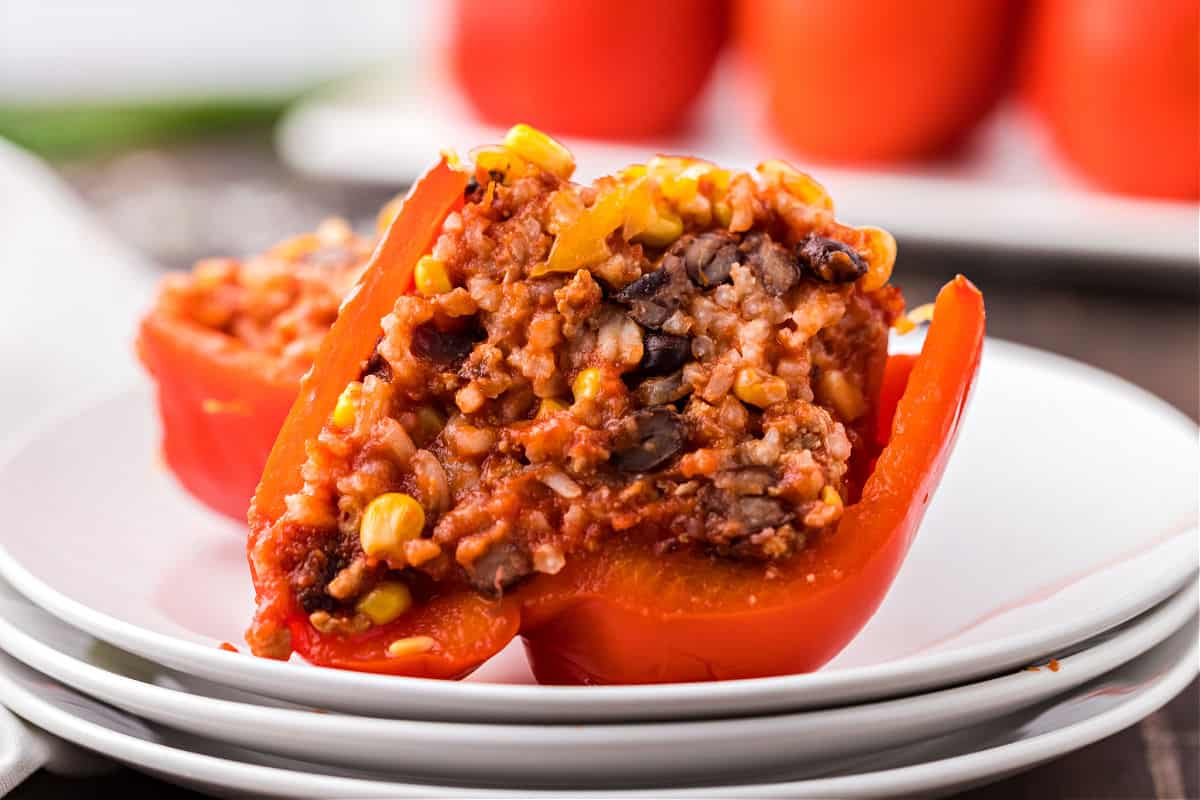
stuffed peppers
Ingredients
Method
- Preheat oven to 375°F (190°C). Slice tops off the bell peppers and remove seeds.
- In a large skillet, heat olive oil over medium heat. Add ground beef and cook until browned, about 8 minutes.
- Add diced tomatoes, cumin, paprika, and black pepper to the skillet. Stir and cook for another 5 minutes.
- Mix in cooked rice and half of the shredded cheese into the beef mixture. Stir well.
- Stuff the mixture into the hollowed bell peppers and place in a baking dish.
- Top each stuffed pepper with the remaining cheese.
- Bake in the preheated oven for 35-45 minutes until peppers are tender and cheese is melted and bubbly.
- Serve hot, garnished with chopped green onions if desired.