Tropical Frozen Treat How to Make Pineapple Sorbet
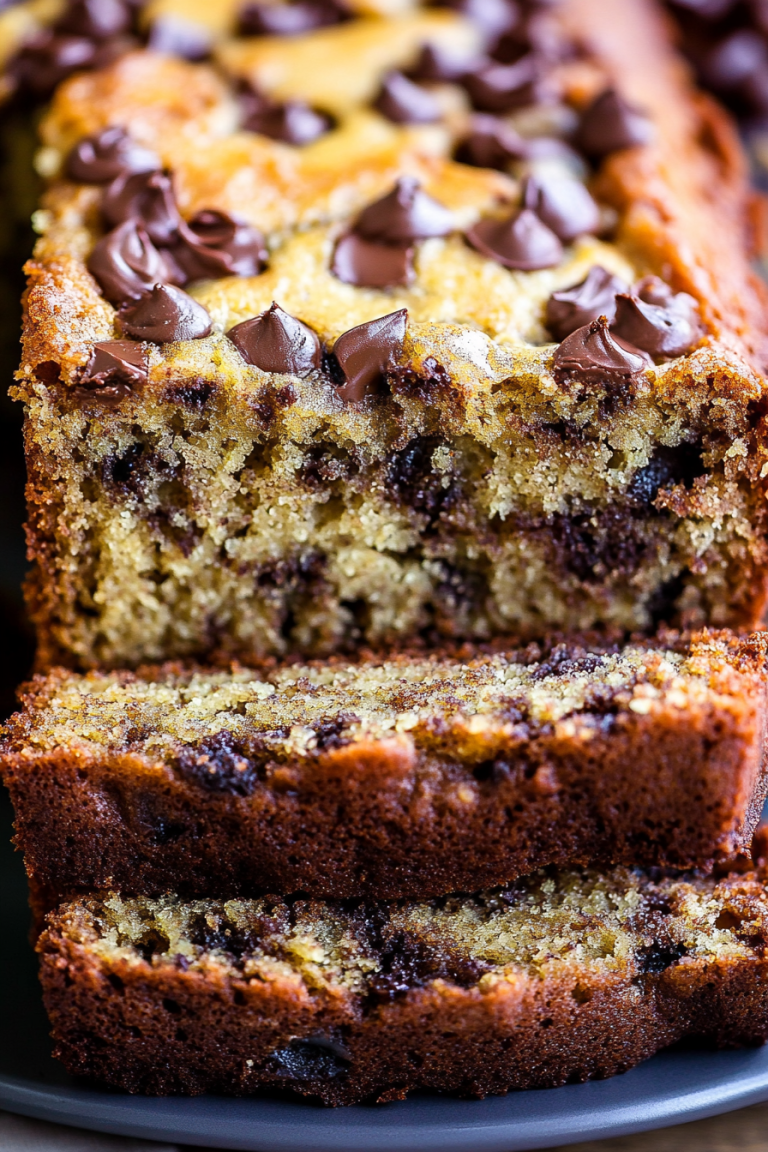
You know those recipes that just feel like a warm hug? The ones you can whip up without even really looking at the instructions because you’ve made them so many times? This zucchini bread is one of those for me. It’s the kind of thing I’ve been making for years, and it never, ever disappoints. It’s not just a basic loaf; it’s moist, perfectly spiced, and has this incredible texture that’s somewhere between cake and a dense, satisfying bread. Honestly, when I need a treat that feels a little bit wholesome but is also seriously indulgent, this is my absolute go-to. It’s miles better than those store-bought muffins, and so much easier than a fussy cake, especially when you’re craving something sweet but the baking bug hasn’t quite bitten enough to tackle something big. My family devours it, and I always feel a little smug knowing I made it myself.
What is Zucchini bread?
So, what exactly is this magical creation? At its heart, zucchini bread is a quick bread, which means it uses chemical leaveners like baking soda and baking powder instead of yeast. That’s why it’s so fast to make! The star ingredient, of course, is zucchini. Now, don’t let that scare you. You don’t taste the zucchini itself, not really. What it does is amazing: it adds incredible moisture and a wonderfully tender crumb. Think of it as the secret ingredient that makes this bread so unbelievably soft and never dry. The name comes from that humble vegetable, but the flavor is all about warm spices like cinnamon and nutmeg, a hint of sweetness, and that satisfying, comforting aroma that fills your kitchen. It’s the kind of thing that feels homemade and special without being complicated at all.
Why you’ll love this recipe?
Oh, where do I even start with why this zucchini bread is a winner? First off, the flavor is just divine. It’s that perfect balance of sweet and spice. The cinnamon and nutmeg aren’t overpowering; they just give it this cozy, autumnal warmth, even if you’re making it in the middle of summer. And the texture? Unbeatable. It’s so incredibly moist thanks to that secret weapon, the zucchini. It’s never dry or crumbly, which is a huge win in my book for any quick bread. Beyond the taste and texture, it’s ridiculously easy. Seriously, you can have this mixed up and in the oven in about 15 minutes. It’s a lifesaver on busy weeknights when the kids are asking for a treat or when unexpected guests pop over. Plus, it’s really budget-friendly! Zucchini is usually pretty affordable, and the other ingredients are pantry staples. What I love most, though, is its versatility. It’s fantastic on its own, of course, but it’s also great with a smear of cream cheese or a dollop of yogurt. I’ve even seen people add chocolate chips or walnuts, and while I’m a purist with this recipe, those are great ideas if you’re feeling adventurous! It’s my absolute favorite way to use up those extra zucchinis from the garden, too. It’s a win-win-win situation.
How do you make Zucchini bread?
Quick Overview
This is really a straightforward process. You’ll grate your zucchini, whisk together your dry ingredients, mix your wet ingredients, then combine them. The trick is not to overmix! After that, you’ll pour it into your prepared pan, bake until a toothpick comes out clean, and then let it cool before a simple glaze goes on top. It’s designed for minimal fuss and maximum deliciousness, making it perfect for novice bakers and seasoned pros alike.
Ingredients
For the Main Batter:
You’ll need about 2 cups of grated zucchini. I always use medium-sized zucchini; they have the best moisture content without being too watery. Don’t bother peeling them; the skin adds a little extra fiber and color and you won’t notice it when it’s baked. Make sure to squeeze out as much excess liquid as you can after grating – this is super important for the texture! Use a fine grater for the zucchini. You’ll also need all-purpose flour (about 2 cups), granulated sugar (1 cup is standard, but you can adjust slightly), baking soda (1 teaspoon), baking powder (1 teaspoon), salt (1/2 teaspoon), ground cinnamon (1 teaspoon), and a pinch of ground nutmeg (about 1/4 teaspoon). I find that using good quality cinnamon makes a real difference.
For the Filling:
This recipe as written doesn’t have a separate filling; it’s more of a swirled loaf. However, if you wanted to add something, you could prepare a simple cinnamon-sugar mixture or even a quick chocolate ganache to swirl in. For the classic cinnamon swirl, you’d mix about 2 tablespoons of brown sugar with 1 teaspoon of cinnamon and a tablespoon of melted butter.
For the Glaze:
This is the simple, sweet finish that takes it over the top. You’ll need powdered sugar (about 1 cup), milk or cream (1-2 tablespoons, depending on how thick you like it), and a tiny splash of vanilla extract. I sometimes use a bit of almond milk in place of regular milk, and it’s surprisingly creamy!
Step-by-Step Instructions
Step 1: Preheat & Prep Pan
First things first, get your oven preheating to 350 degrees Fahrenheit (175 degrees Celsius). This is a pretty standard temperature for quick breads and bakes them evenly. Next, grab a loaf pan – a standard 9×5 inch one is perfect. You want to grease it really well, then flour it, or even better, line it with parchment paper. I like to leave a little overhang on the parchment so it’s easy to lift the bread out later. This step is crucial to prevent any sticking, and nobody wants a loaf stuck in the pan!
Step 2: Mix Dry Ingredients
In a large bowl, whisk together your all-purpose flour, granulated sugar, baking soda, baking powder, salt, cinnamon, and nutmeg. Whisking them together ensures that the leavening agents and spices are evenly distributed. This means you won’t get weird pockets of salt or baking soda in your finished loaf. I always do this step first so everything is ready to go when I add the wet ingredients.
Step 3: Mix Wet Ingredients
In a separate, medium-sized bowl, whisk together your eggs (usually 2 large ones), your melted and slightly cooled butter or oil (1/2 cup), and your vanilla extract (1 teaspoon). If you’re adding any liquid like milk or yogurt, now’s the time to add it. Make sure your melted butter isn’t too hot, or it might scramble the eggs. You’re just looking for everything to be well combined into a smooth, cohesive liquid.
Step 4: Combine
Now for the magic! Pour the wet ingredients into the bowl with the dry ingredients. Add your squeezed, grated zucchini to this bowl as well. Using a spatula or wooden spoon, gently fold everything together until just combined. It’s SO important not to overmix here. A few streaks of flour are perfectly fine. Overmixing develops the gluten in the flour, which can make your bread tough and dense, and we want it tender and moist!
Step 5: Prepare Filling (Optional Swirl)
If you’re doing a swirl, now’s the time. In a small bowl, mix together your brown sugar, cinnamon, and melted butter until it forms a paste. You can also just use plain cinnamon sugar if you prefer.
Step 6: Layer & Swirl
Pour about half of the batter into your prepared loaf pan. If you’re swirling, dollop about half of your cinnamon-sugar mixture over the batter. Then, pour the remaining batter on top, followed by the rest of the cinnamon-sugar mixture. Now, take a knife or a skewer and gently swirl it through the batter to create those beautiful marble patterns. Don’t go crazy with the swirling; you just want to create some visual appeal.
Step 7: Bake
Pop that pan into your preheated oven. Bake for about 50-65 minutes. The exact time will depend on your oven, of course. You’ll know it’s done when a toothpick inserted into the center comes out clean. If the top starts to brown too quickly before the inside is cooked, you can loosely tent it with aluminum foil. I always check mine around the 50-minute mark.
Step 8: Cool & Glaze
Once it’s baked, let the bread cool in the pan for about 10-15 minutes. This allows it to set up a bit. Then, carefully invert it onto a wire rack to cool completely. It’s really important that it’s completely cool before you glaze it, otherwise, the glaze will just melt off. While it’s cooling, whisk together your powdered sugar, milk/cream, and vanilla for the glaze. Start with 1 tablespoon of liquid and add more as needed until you get a nice drizzling consistency.
Step 9: Slice & Serve
Once the bread is fully cooled, drizzle that gorgeous glaze over the top. Let it set for a few minutes, then slice it up. The best way to slice it is with a serrated knife for clean cuts. Serve at room temperature for the best flavor and texture. It’s honestly delicious all on its own!
What to Serve It With
This zucchini bread is so versatile, it’s fantastic for any occasion! For a simple Breakfast, I love it toasted and served with a smear of good quality butter or cream cheese. A hot cup of coffee or a glass of cold milk is the perfect companion. For Brunch, I like to elevate it a bit. I’ll slice it neatly and arrange it on a nice platter, maybe with a side of fresh berries or a small fruit salad. It pairs wonderfully with a mimosa or a fancy iced coffee. As a simple Dessert, it’s a dream. You can serve it warm with a scoop of vanilla bean ice cream or a drizzle of chocolate sauce. It’s also lovely with a slightly sweeter glaze, maybe one made with a hint of lemon zest. And for those Cozy Snacks, which is honestly how I eat it most of the time, just grab a slice (or two!) and enjoy it as is. It’s perfect with a cup of tea when you’re curled up with a book. My kids also love it with a glass of chocolate milk. It’s the ultimate comfort food!
Top Tips for Perfecting Your Zucchini Bread
I’ve made this countless times, and through trial and error, I’ve picked up a few tricks that make it even better. Here are my go-to tips:
Zucchini Prep: The absolute key is squeezing out the moisture! Use a fine grater, and once it’s grated, wrap it in a clean kitchen towel or cheesecloth and wring out as much liquid as humanly possible. Seriously, get in there and squeeze hard. This prevents a soggy loaf and ensures a lovely tender crumb. Don’t use pre-shredded zucchini; it’s usually too dry. Freshly grated is best.
Mixing Advice: I can’t stress this enough: do NOT overmix! Once the wet and dry ingredients meet, mix until just combined. A few lumps or streaks of flour are totally fine. Overmixing leads to a tough, dense bread, and we want it light and moist. Fold gently, and stop as soon as you don’t see large pockets of dry flour.
Swirl Customization: If you’re swirling, don’t overdo it. You want visible swirls, not a muddy mess. I like to make just a couple of passes with a knife or skewer. For extra flavor, you can add a handful of chopped nuts (like walnuts or pecans) or mini chocolate chips to the batter after you’ve combined the wet and dry ingredients. Just fold them in gently.
Ingredient Swaps: If you don’t have butter, you can use a neutral-flavored oil like canola or vegetable oil, or even a light olive oil. You might need to adjust the amount slightly. I’ve also had success using a dairy-free milk alternative in the glaze; it works just as well. For a bit of tang, a tablespoon of plain yogurt or sour cream in the batter can add extra moisture and tenderness.
Baking Tips: Ovens can be finicky! If you find your bread is browning too quickly on top, tent it loosely with aluminum foil for the last 15-20 minutes of baking. Always use the toothpick test to check for doneness; it’s the most reliable way. Make sure your baking powder and soda are fresh; old leavening agents won’t give you that perfect lift.
Glaze Variations: If you’re not a fan of powdered sugar glaze, you can dust the cooled loaf with a little powdered sugar, or skip the glaze altogether. A cream cheese frosting is also a delightful option, though it makes it a bit more decadent. For a citrusy kick, add a little lemon or orange zest to the glaze!
Storing and Reheating Tips
This zucchini bread is pretty forgiving when it comes to storage, and it stays delicious for several days. If you’re going to eat it within a day or two, storing it at Room Temperature is perfectly fine. Just wrap it tightly in plastic wrap or store it in an airtight container. It should stay fresh for about 2-3 days this way. For longer storage, definitely opt for Refrigerator Storage. Wrap the cooled loaf (or slices) tightly in plastic wrap, then place it in an airtight container. It can last for up to a week in the fridge, though the texture is best within the first 4-5 days. It makes for a great make-ahead breakfast or snack!
If you want to make a big batch and have some on hand for later, the freezer is your friend. For Freezer Instructions, make sure the bread is completely cooled. Wrap it very tightly in plastic wrap, then in a layer of aluminum foil, or place it in a heavy-duty freezer bag. It will keep well in the freezer for up to 3 months. To thaw, simply remove it from the freezer and let it come to room temperature on the counter. It will be just as delicious as when you first baked it!
Regarding Glaze Timing Advice, it’s best to add the glaze after the bread has completely cooled. If you’re refrigerating or freezing the bread *with* glaze on it, be aware that the glaze might become a little sticky or soft due to moisture. It’s usually better to glaze it right before serving if you plan on storing it for more than a day or two, or if it’s going into the freezer.
Frequently Asked Questions
Final Thoughts
So there you have it – my absolute favorite zucchini bread! It’s truly a recipe that brings me so much joy every time I make it, and seeing my family’s happy faces when they bite into a slice is the best reward. It’s the perfect example of how simple ingredients can come together to create something truly special and comforting. It’s easy enough for a beginner, yet satisfying enough for any baker. If you love this recipe, you might also enjoy my other quick bread recipes, like my classic banana bread or my lemon poppy seed loaf! They share that same easy, comforting vibe. I really hope you give this zucchini bread a try; I have a feeling it’s going to become a favorite in your kitchen too. I can’t wait to hear how yours turns out, so please leave a comment below and share your thoughts or any fun variations you tried! Happy baking, everyone!
Piña Colada Sorbet
Ingredients
Method
- Cut the pineapple into chunks.
- Puree in a blender with sugar, coconut milk, and rum if using until smooth.
- Chill thoroughly then freeze in your ice cream maker according to manufacturers directions.